
How to Grow Spinach in a Greenhouse
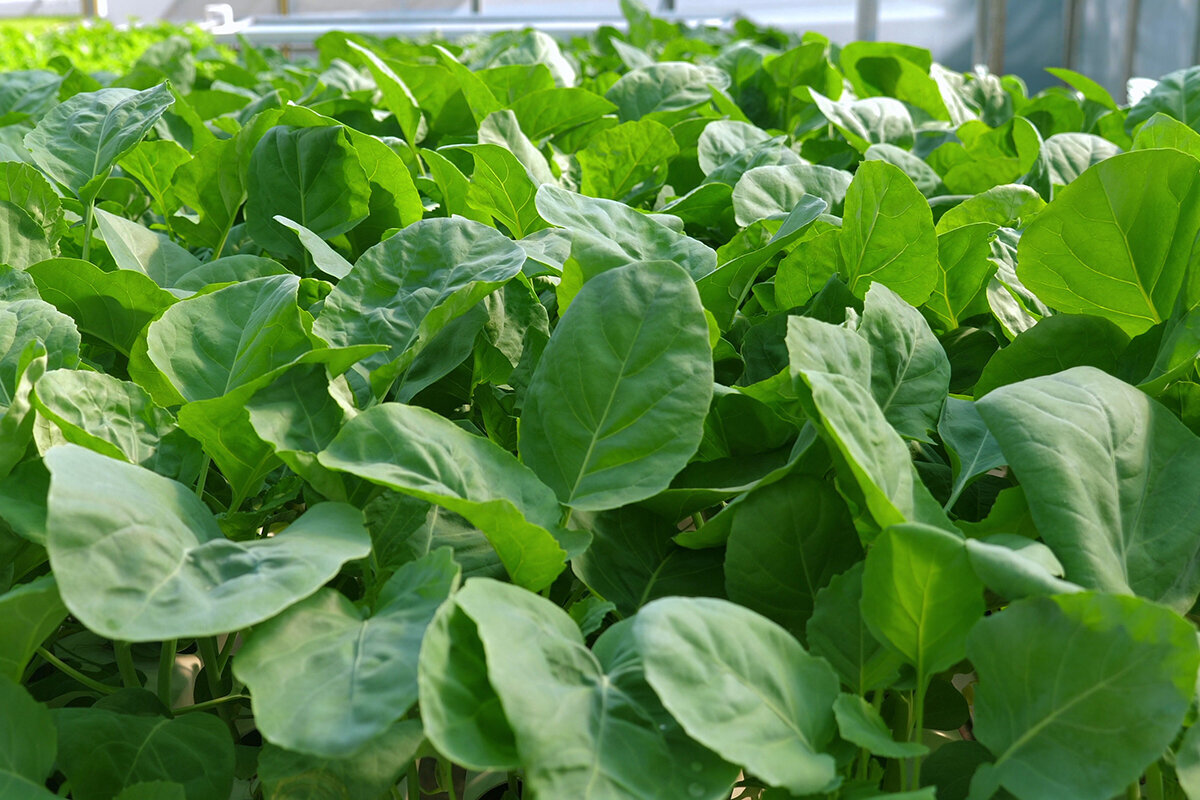
Bloomcabin field folio / cool-season issue 05
How to Grow Spinach in a Greenhouse
A crisp, quick crop for quiet winter light, early spring harvests and the productive greenhouse season that begins after summer has finished.
Crop character Cool-season annual
Best air range Cool and ventilated
Seed depth About 2cm
Harvest rhythm Baby leaves to repeated picking
The greenhouse shoulder season
Spinach does not need the sustained warmth associated with tomatoes, peppers and cucumbers. It needs a measured pocket of cool light: protected from driving rain and sharp temperature changes, open enough to release humidity, and never allowed to become a bright oven at midday.
That makes it an excellent crop for British greenhouse gardeners. In late winter, it turns a workable border or container into tender leaves while outdoor soil may remain cold or sodden. In autumn, it follows summer crops with useful speed. Hardy plants can remain compact through winter and resume growth as light returns. The important shift is to use the greenhouse as a season-extending cool house, rather than simply a warm house.
Begin with a clean border or deep container, direct-sow modest quantities and repeat every two to three weeks while conditions remain favourable. A well-ventilated Classic Aluminium Greenhouse gives this compact crop a practical setting, with accessible growing space, clear organisation and the ability to moderate warmth rather than pursue it.
Edition one / choose for the season, not the photograph
Choose a leaf type that suits your intended harvest.
There is no single best greenhouse spinach. Smooth-leaved types are an elegant choice for baby leaves: straightforward to wash, quick to dry and well suited to close sowing. Savoyed leaves bring more texture and substance for mature harvests, but their folds can retain soil and condensation, so they need wider spacing, airflow and particularly careful washing.
For spring production, prioritise varieties described as slow to bolt. For autumn and winter, choose a named hardy variety suitable for overwintering, and consider stated resistance to spinach downy mildew. Resistance is not immunity: disease races change, and wet foliage or crowded plants still create favourable conditions. Treat varietal resistance as one useful layer alongside early watering, clean cropping, sensible spacing and dependable ventilation. Read the current seed-packet description because availability and resistance claims vary between suppliers.
The most rewarding greenhouse harvest is not the largest sowing. It is a fresh, well-timed patch ready to cut precisely when the kitchen needs it.
Buy fresh seed from a reputable supplier, especially for late-summer sowings. If the greenhouse border is still holding summer heat, wait until conditions moderate or sow modules in a cooler place before moving the young plants. Handle the root ball carefully, as spinach dislikes an interruption to growth. Direct sowing remains the simplest approach for most autumn, winter and early-spring crops.
Edition two / sowing density
One seed, four distinct crops.
Sow spinach at roughly 2cm deep. Density determines the finished harvest: sow closely for tender baby leaves, or provide more room for broad leaves and repeated picking.
A / baby leaf
Close band
Harvest young
B / mature leaf
Rosettes
Final spacing 15cm
C / rows
Clear lanes
About 20cm apart
D / containers
Movable crop
At least 30cm deep
Baby-leaf bands
Sow thinly but closely across a narrow band, at about 2cm deep. The aim is a clean, brief crop rather than a congested patch kept beyond its useful stage. Cut when the leaves are young and upright, before crowding prevents foliage from drying promptly. Baby spinach is usually most successful as one generous cut followed by another small sowing.
Spaced mature plants
Thin seedlings first to about 7.5cm apart, then harvest alternate plants so the final rosettes stand around 15cm apart. That spacing supports repeated outer-leaf picking and lets air move through the crop. Eat the thinnings: they are not wasted plants, but the first tender salad or panful from the sowing.
Rows that remain accessible
Set greenhouse rows about 20cm apart as a practical starting point, opening the spacing further where the house is humid or the bench crowded. Choose a layout that lets you water and inspect plants without repeatedly brushing wet foliage. Easy access reduces damage, improves drying and makes early signs of pests or disease easier to notice.
Containers on a bench
Choose a pot or trough at least 30cm wide and deep, with unobstructed drainage. Fill it with a good peat-free multipurpose compost that retains moisture without becoming airless. Sow a band for baby leaves or thin plants to about 15cm for mature rosettes. A generous container gives roots a steadier reserve of moisture than a shallow seed tray.
After emergence, thin decisively rather than treating every seedling as something that must be preserved. Useful spacing is also a leaf-health measure: open foliage dries faster and is less hospitable to downy mildew and other problems encouraged by prolonged humidity.
Edition three / the cool-light almanac
Manage the day, not only the thermometer.
The greenhouse advantage is protection from extremes, not permanent heat. The RHS advises that spinach grows best in mild conditions around 15–20°C. Established plants appreciate cool, even conditions, while hot, dry interruptions encourage bolting. Germination in an unheated house may be unhurried, but steady moisture and moderate temperatures are more valuable than forcing artificial speed.
Day length matters alongside temperature. A suddenly bright, warm spring week can push mature plants towards flowering even when nights remain chilly. Open roof vents and doors before heat accumulates, use shade sparingly as the sun strengthens and harvest mature leaves promptly. The design of Classic Aluminium Greenhouse provides useful context when planning glazing, ventilation, bench space and movable containers for a productive cool-season zone.
Place a minimum/maximum thermometer at crop height instead of relying entirely on the outdoor forecast. A greenhouse can be cold at dawn and unexpectedly hot at bench level by mid-afternoon. Record what the leaves and root zone actually experience, particularly on clear days following a cold night.
SeasonLate winterEarly springLate springAutumn
HouseProtectVent earlyShade and ventRetain moisture
SowYesRepeatOnly if coolPrime window
BoltingLowRisingHighLow
HarvestSlow, sweetQuickCut youngSteady
Edition four / the root-and-leaf exchange
Build a root zone that keeps the rosette growing.
Spinach has a small, busy root system and responds poorly to dramatic wet-and-dry swings. Begin with fertile, well-drained soil enriched with well-rotted organic matter, or fresh peat-free multipurpose compost in containers. Aim for moisture retention and an open structure, not a heavily enriched hotbed. Where the same greenhouse border is cropped repeatedly, renew it thoughtfully rather than adding fertiliser by habit.
SoilFine seedbed
CompostWell rotted
WaterAt soil level
FeedOnly if needed
AirVent early
Soil and compost
Prepare a fine, weed-free surface and remove old roots before sowing. Break down large lumps so seed depth remains even, then firm the surface lightly without creating a hard, glossy crust that sheds water. Incorporate well-rotted organic matter into a greenhouse border where needed. In containers, use fresh peat-free multipurpose compost with an open texture and reliable drainage.
Water without wet leaves
Water enough to moisten the active root zone, then check beneath the surface before watering again. The compost should remain evenly moist rather than saturated or dust-dry. A careful watering can directed towards the soil is generally preferable to routinely soaking the leaves. Water in the morning so foliage and the compost surface can dry before the cooler night period.
Feed with evidence
A freshly prepared border or new container compost generally needs no routine liquid feeding for a short spinach crop. After several cuts, a pale plant making slow growth may benefit from a light, balanced feed applied according to its label. Extra fertiliser cannot correct low light, excessive heat, poor drainage or root stress, and too much nitrogen can create soft, lush growth.
Air completes the watering plan
Vent after watering and on bright mornings whenever conditions permit. Moving air reduces condensation, helps leaves dry and keeps a dense crop easier to manage. A greenhouse can remain humid even when the wider garden feels dry, especially after irrigation or a cold night. Treat ventilation as part of irrigation practice rather than an optional extra.
Edition five / continuous rather than crowded
Sow in small editions, not one oversized issue.
A greenhouse makes overplanting remarkably easy. Resist the urge to fill every open surface. A sequence of modest sowings provides leaves at different stages, preserves room for foliage to dry and makes it easier to remove a declining batch before it compromises the healthy crop behind it.
Issue 01Day 0Sow a bandKeep evenly moist
Issue 02Day 14–21Sow againThin first strip
Issue 03Day 28–42Repeat if coolBegin cutting
First issue: establish
Sow one modest band or a 30–45cm strip. Keep the seed zone evenly moist until seedlings emerge, without saturating it. In favourable light, baby leaves may be ready in roughly a month, although winter growth is substantially slower. Label the sowing with its variety and date so each batch remains identifiable when later strips begin to appear.
Second issue: overlap
Two to three weeks later, sow the next small strip while conditions remain favourable. Thin the first sowing as true leaves develop and use the thinnings in the kitchen. This repeat turns a single flush into an overlap: one batch establishes, another fills out, and the oldest approaches harvest instead of every leaf arriving at once.
Third issue: maintain the rhythm
Repeat only if the greenhouse remains cool and bright enough for dependable establishment and good leaf quality. Begin taking outer leaves from the oldest rosettes, inspect beneath the canopy for wet patches or pest damage, and clear the earliest crop before it stretches towards flowering. Succession sowing is about timing and quality, not maximising plant numbers.
Know when to pause
If the greenhouse is running hot and the days are lengthening quickly, stop sowing spinach simply because space remains. Move container crops outdoors into light shade if suitable, or clear and reset the area for a warm-season crop. A deliberate pause protects the quality of established plants and prevents wasting seed in conditions that favour bolting.
Edition six / harvest with intent
Three ways to cut spinach, each with a different promise.
01
Baby leaf
Shear above the growing point.
02
Outer leaves
Leave the centre intact.
03
Second cut
Treat regrowth as a bonus.
Baby leaf: quick and clean
When leaves reach roughly 5–8cm and remain tender and upright, shear the band just above the growing point. This suits close sowings and produces a useful bowl quickly, but is best understood as a primarily one-cut crop. Carry the harvest straight to the kitchen, wash it promptly and sow the next narrow strip if the season remains favourable.
Outer leaves: the household method
For well-spaced rosettes, take the largest outer leaves first and preserve the small centre. This is the most dependable approach for a longer household harvest because the crown can continue producing. Do not strip every leaf at once. A compact plant with a working centre and enough remaining foliage will recover more steadily between visits.
Cut and come again: a measured second act
Once the plants are sturdy, cut a baby-leaf band just above its growing point, water the root zone and allow it light and airflow while it recovers. A second cut may follow, but it is generally smaller and less certain as days lengthen. Regard regrowth as a useful bonus, not a reason to retain an ageing crop beyond its best stage.
Harvest in the morning after surface moisture has dried, using clean scissors or fingers. Do not keep a bolting crop merely because it remains green: a rising centre and elongating stem show that premium eating quality is closing. Take the usable leaves promptly, remove roots and debris, then prepare the space for the next suitable crop.
Edition seven / the bolting escalator
Act while spinach is still a compact rosette.
Bolting is not always a failure of care; it is the plant’s natural move towards flowering. A greenhouse can accelerate that transition when heat, increasing day length and moisture stress arrive together. The response is operational rather than chemical: shorter cropping cycles, earlier ventilation, steady morning watering, selective shade and timely harvesting.
1. Compact centre
Prime harvest stage.
2. Upright centre
Harvest within days.
3. Stem extension
Final cut; clear plants.
Compact centre: the crop is in its useful phase. Continue taking outer leaves or make a clean baby-leaf cut, while establishing the next small sowing.Upright centre: new leaves narrow, become more arrow-shaped and stand above the outer rosette. Open vents earlier, check moisture and harvest generously within days rather than weeks.Stem extension: the plant is committed to flowering and eating quality will decline. Take the remaining sound leaves, remove the plant and clean the space.
Edition eight / the leaf clinic after dark
Read the mark before reaching for a remedy.
Most spinach problems leave useful clues. First identify where a symptom begins: old foliage, new growth, leaf margin, underside or within the tissue. Remove clearly damaged leaves, inspect the wider crop and correct the environment before treating a minor mark as an emergency. Wet nights, stale air and crowding often explain several symptoms at once.
Older leaves
Pale or yellow
Upper leaf
Angular yellowing
Inside leaf
Tunnels or blotches
Leaf edge
Holes or bites
Older leaves: roots, saturation or age
Pale older foliage may indicate shaded ageing leaves, a root zone held too wet or a crop that has been cut repeatedly without enough fresh growth. Check drainage, watering frequency and the condition of new leaves before adding feed. If only the oldest leaves are declining while the centre remains sound, selective harvest and improved conditions may be sufficient.
Angular yellow areas: possible downy mildew
Inspect beneath pale or yellow patches for greyish or purplish growth. Downy mildew is favoured by prolonged leaf wetness, high humidity and crowded foliage. Remove affected material, stop evening watering, increase ventilation and leave more space in the replacement sowing. There are no fungicides available to amateur gardeners for downy mildews, making cultural control the principal tool.
Tunnels and blotches: leaf miners
Leaf-mining larvae feed within the leaf, leaving winding tunnels or spreading translucent blotches. Remove affected leaves promptly and clear crop residues rather than allowing damage to accumulate. Where the pest repeatedly affects spinach, protect the next young crop with fine mesh. A few damaged leaves need not end an otherwise healthy, well-timed succession.
Ragged margins: inspect after dark
Check after dusk, beneath pots and along greenhouse thresholds for slugs and snails. Keep floors and bench areas tidy, remove damp hiding places and hand-pick where practical. Tender seedlings need particular protection. Distinguish chewing damage from disease before choosing a response: holes and missing margins call for a different investigation from yellow patches or mildew beneath the leaf.
Edition nine / a United Kingdom adjustment
Let local light and greenhouse temperature set the calendar.
North, Scotland and exposed gardens
Establish autumn sowings early enough to form compact rosettes before light levels fall. Winter growth in an unheated house may almost pause, then resume as days lengthen. In late winter and spring, use the greenhouse to moderate repeated cold swings, but ventilate promptly on bright days. Frost risk can persist later than expected, so let your crop-height thermometer refine the calendar.
Central England, Wales and mixed climates
Use both principal windows: late February to April, followed by batches from late August through September and into October where conditions permit. Spring crops can shift quickly from ideal growth to bolting, so sow modest quantities every two to three weeks. Watch the forecast and interior humidity rather than closing the greenhouse automatically; damp, still conditions can be as troublesome as cold.
South, coastal and warm urban gardens
Expect the spring spinach window to be compressed. Start early, choose slower-bolting seed and ventilate before the greenhouse becomes hot. Use shade sparingly, and be ready to move container spinach outdoors into light shade as spring strengthens. Once sustained warmth arrives, clear true spinach and reserve fresh seed for a cooler late-summer or autumn sowing.
For gardeners choosing a structure around this kind of extended-season growing, the Classic Aluminium Greenhouse is a flexible starting point. Keep a border or generous container available for quick leafy crops, preserve clear paths for watering and harvesting, and prioritise dependable roof and door ventilation before the stronger spring sun arrives.
Reader’s desk / greenhouse spinach FAQ
Questions worth asking before the next sowing.
Can spinach grow in an unheated greenhouse?
Yes. Choose a hardy variety and establish it before the darkest period of winter. Growth becomes very slow in low light, so the value of a cold greenhouse is protection and leaf quality rather than rapid production. Keep the compost evenly moist but not saturated, and ventilate briefly during mild weather to release stale humidity. Harvesting will accelerate naturally as daylight returns.
What temperature is best for greenhouse spinach?
Spinach performs best in mild, cool conditions. The RHS gives approximately 15–20°C as a useful growing range. The exact reading is less important than avoiding abrupt heat and drought, particularly as spring days lengthen. A minimum/maximum thermometer at crop height will show whether bright afternoons are overheating the leaves even when the outdoor forecast still appears cool.
How often should I water spinach under glass?
Water according to the root zone rather than a rigid timetable. Check a finger’s depth into the compost: it should feel cool and evenly moist, never saturated or bone dry. Containers generally need more frequent attention than greenhouse borders. Water in the morning at soil level, then ventilate so any damp foliage and the compost surface can dry before night.
Can I harvest spinach more than once?
Yes, if the plants remain healthy and compact. For mature rosettes, remove the largest outer leaves while preserving the centre. Baby-leaf bands may regrow when cut above the growing point, although a second harvest is usually smaller. Do not demand indefinite regrowth: once plants tighten or begin rising towards flower, a fresh sowing is usually the better answer.
Why did my spinach seedlings fail to emerge?
The seed zone may have become too warm or dried between waterings, especially during a late-summer start beneath glass. Wait for cooler conditions, shade the compost lightly or begin modules in a cooler place. Use fresh seed, sow at roughly 2cm depth and maintain even moisture without saturation. Label the date before assuming slow germination in a cold house has failed.
How do I prevent downy mildew in a greenhouse?
Begin with resistant seed where available, but combine it with clean trays, prompt debris removal and adequate spacing. Water the root zone early in the day and keep the period of leaf wetness brief. Ventilate after watering and whenever mild conditions allow. If yellow patches appear with greyish or purplish growth beneath, isolate or remove affected foliage and do not retain diseased debris beside the crop.
Sources and further reading
Keep reliable UK references close at hand.
More from Bloomcabin: UK greenhouse setup guide · water-wise greenhouse gardening guide · Bloomcabin UK greenhouse collection
- Royal Horticultural Society — How to grow spinach
- Royal Horticultural Society — Growing vegetables in a greenhouse
- Royal Horticultural Society — Downy mildews
- Royal Horticultural Society — Watering garden plants
- AHDB — Aerial oomycetes cultural-control review
- Met Office — April gardening, daylight and frost advice
- RHS guidance for growing and harvesting spinach
Conditions, varieties and pest pressure differ between UK gardens. Use current seed and product labels, observe the climate inside your own greenhouse and follow relevant local plant-health advice when diagnosing an uncertain problem.
● ● ●
Winter / spring / autumn
Make the greenhouse work before summer begins.
A greenhouse earns its place not only by ripening heat-loving crops, but by making cool-season food possible while the wider garden is waiting. Give spinach a clean border or deep trough, room to breathe, steady moisture, early ventilation and a succession plan. The resulting harvest becomes one of the calmest and most useful rituals of the growing year.
Explore the adaptable, classically proportioned Classic Aluminium Greenhouse and create a cool-season growing space with the clear layout, protected light and practical ventilation that serious home gardeners value.
Classic Aluminium Greenhouse