
How to propagate plants from cuttings in a greenhouse
Bloomcabin greenhouse notebook / propagation edition
How to propagate plants from cuttings in a greenhouse
A cutting is not yet a miniature plant. It is a measured piece of living material that must retain moisture, form new roots and adapt to independence under conditions composed with care.
In a greenhouse, propagation becomes less dependent on a fortunate windowsill and more like a repeatable nursery practice. The aim is not to force every species into one method, but to match the cutting type, clean preparation, airy medium, filtered light and responsive humidity to the plant in front of you.
For gardeners planning a dedicated propagation bench, the Classic Aluminium Greenhouse provides a composed, durable setting where ventilation, tools, mature plants and seasonal propagation work can be organised together.
SourceHealthy, correctly identified stock plants—never stressed, diseased or affected by pests.
ExposureBright filtered light, even moisture, suitable root-zone warmth and fresh air rather than a sealed, saturated chamber.
RevealPot on only after branching roots can support the cutting beyond its protected environment.
The greenhouse advantage is not simply warmth. It is the ability to separate the fragile rooting phase from outside weather, then adjust one condition at a time.
Fresh cuttings lose water through their leaves but have no established roots with which to replace it. They also need oxygen around their bases, an evenly moist medium that remains open, and sufficient gentle light to keep tissue functioning without overheating it. Outside, drying wind, heavy rain, sharp sun or a cold night can upset that balance quickly. Under glass, you can shade, vent, water and observe with much finer control.
That does not mean keeping the greenhouse hot and humid at all times. Excessive heat increases leaf stress, while persistent condensation and saturated compost invite decay. A good propagation bench is a modest microclimate within the greenhouse: clean, protected, lightly shaded and ventilated when necessary. Think of it as controlled exposure rather than confinement.
Proof 01 / source material
Select stock plants before selecting tools
The condition of the donor plant is carried into every cutting. Begin with a plant that is growing actively at the appropriate season, is well watered and shows normal leaf colour and firm, undamaged stems. Check carefully for aphids, scale, mealybugs, webbing, distorted growth, unexplained lesions, leaf spots and root stress. A cutting cannot leave a systemic pest or disease problem behind simply because it forms roots.
For most leafy softwood and semi-ripe cuttings, early morning is practical because shoots are naturally turgid. Place collected material in shade, work in manageable batches and prepare it promptly. Flowers, buds, fruit and seedheads compete for limited resources and complicate moisture balance, so favour non-flowering shoots or remove buds where the plant-specific method permits.
Choose vigorous, pest-free shoots with normal colour, firmness and proportion.
Take material from an identified plant that you are entitled to propagate.
Prefer suitable non-flowering growth over dramatic but exhausted or damaged tips.
Water a dry parent plant the previous day; never collect drought-stressed growth.
Proof 02 / choose the method
There is no universal cutting
Let growth habit, season and tissue maturity determine the method. Nodes matter in many stem cuttings because rooting potential is often concentrated nearby. Leaf, cane and root methods depend on species capable of producing complete new plants from those particular tissues.
Softwood
Fresh, flexible growth
Usually taken in spring and early summer from actively growing ornamentals and shrubs. It can root rapidly, but its tender leaves also lose water quickly.
Semi-ripe
Partly matured shoots
Useful for many evergreen shrubs, climbers and herbs from later summer into early autumn, including hebe, lavender and choisya.
Hardwood
Dormant, fully woody sections
Commonly used for currants, dogwoods, roses and willows from mid-autumn to late winter. These leafless sections lose less water, but orientation and timing matter. Keep the top and base unmistakable.
Leaf and cane
Species-specific sections
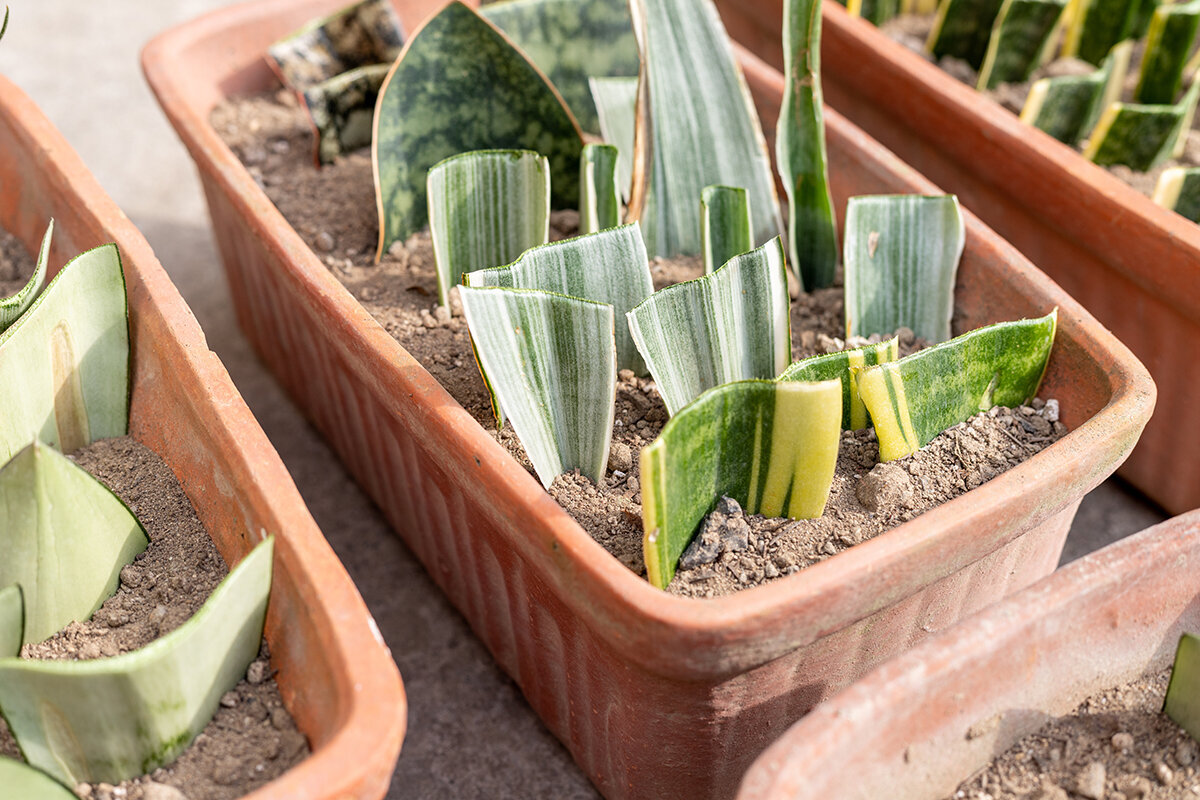
Streptocarpus, begonias, peperomias and selected succulents can produce plants from leaf material. Cane sections suit some dracaenas and dieffenbachias. A leaf that forms roots is not necessarily capable of developing into a complete plant.
Root
Quiet underground potential
Root cuttings suit only selected perennials that naturally produce shoots from root sections, including oriental poppy and primula. Do not use them for variegated forms, as plain-leaved offspring may result.
Fleshy exception
Let the wound dry
Some succulent and fleshy cuttings benefit from a short drying period before entering a relatively dry, airy medium. Close humidity can be counterproductive and encourage decay.
Proof 03 / precise preparation
Prepare with clean, deliberate cuts
Use sharp secateurs, floral snips or a knife suited to the stem. Crushing tissue is not equivalent to cutting it cleanly. Clean the working surface and containers before starting, and wipe blades between plants or whenever moving from questionable material to clean stock. Have labels, moistened medium and a humidity cover ready in advance. Make an insertion hole with a dibber before placing the cutting so tender basal tissue—and any permitted hormone coating—is not scraped away.
01
Sanitise
Begin with clean trays, pots, labels, tools, hands and fresh propagation medium. Do not reuse dirty containers or bring garden soil onto the bench.
02
Take the cutting
For a typical leafy stem cutting, select a healthy tip or stem section with appropriate nodes. Exact dimensions depend on the species, although many soft tips are approximately 5–10 cm long.
03
Reduce demand
Remove lower leaves that would be buried or touch the medium, together with flowers or fruit. Where especially large leaves cause crowding or water loss, reduce their area cleanly without stripping all useful foliage.
04
Respect orientation
Keep stem sections the right way up. For hardwood material, a top cut above a bud and basal cut below one help preserve orientation; follow guidance for the species.
05
Insert, then label
Place the appropriate node where the method requires it, firm the medium gently and water as needed. Immediately record the plant, cultivar, date, cutting type, treatment and batch code.
Basal cut · lower node · retained leaves · medium line
Cutting anatomy
Read the anatomy, then adapt it by species
The familiar leafy stem cutting is a useful starting point, not a rule that overrides individual plant biology. Consult reliable plant-specific guidance before wounding woody stems, retaining a heel, burying nodes, removing leaves or applying rooting hormone.
- Basal end: enters pre-moistened medium; cut cleanly and avoid bruising or crushing it.
- Lower node: is commonly inserted for leafy stem cuttings while all retained foliage remains above the surface.
- Retained leaf area: supports photosynthesis, although excessive foliage increases water loss before roots develop.
- Upper bud or tip: remains above the medium and can develop into the visible new shoot.
- Insertion depth: should provide stability without placing leaves or vulnerable tender tissue beneath the surface, where they may decay.
Proof 04 / controlled exposure
Build a rooting climate, not a wet box
Most fresh leafy cuttings benefit from raised humidity because they cannot yet replace water efficiently. High humidity should not, however, mean stagnant air, dripping foliage or saturated compost. Aim for firm leaves, fresh air and an evenly moist, open root zone.
Filtered lightUse bright indirect light, shade netting or a sheltered bench. Direct summer sun through glazing can scorch enclosed foliage.
Humidity coverA clean propagator lid or supported clear cover reduces water loss. Vent it when condensation persists or the air becomes stale.
Root-zone warmthWhere appropriate, thermostatically controlled bottom heat can encourage rooting. Warm the medium without overheating foliage or keeping the compost permanently wet.
Air exchangeUse roof vents, doors and propagator vents deliberately. Protect tender leaves from a strong, drying draught near an opening.
DrainageRaise trays on slatted staging, use open drainage holes and never leave the rooting medium waterlogged.
In the UK, a mild, wet morning can become a bright, dry afternoon beneath glazing. Check conditions around the propagation tray during the warmest part of the day, not only on arrival in the cool morning. A bench beside a ventilator, a shaded lower shelf and a heated propagator can behave like three different climates within the same greenhouse.
Proof 05 / rooting medium
Give the base air and water together
The rooting medium should be clean, free-draining, appropriately fine and capable of holding the cutting upright. Ordinary garden soil is generally unsuitable: it varies considerably, compacts in small pots and may carry pests, pathogens or weed seeds. Start with fresh peat-free propagation material, moisten it before filling and allow excess water to drain. It should hold lightly when squeezed without dripping.
| Medium | Air capacity | Moisture retention | Best use and caution |
|---|---|---|---|
| Perlite-led mix | High | Moderate | A light starting point for many tender and houseplant stem cuttings. It drains freely, so monitor small cells before they become too dry. |
| Coir and perlite | Moderate to high | Moderate to high | Useful where steadier moisture is wanted without sacrificing porosity. Use clean material and avoid compressing the mixture while filling containers. |
| Peat-free compost and grit | Moderate | Moderate | A dependable home-propagation blend when reputable cutting compost and clean coarse grit are used. It offers anchorage but must not be packed densely. |
| Water rooting | Low around base | Very high | Convenient for a few easy houseplants. Water-formed roots may need a gradual transition into potting mix, and the vessel should be kept clean. |
Proof 06 / root development
Do not confuse callus, new leaves and established roots
Some species form callus before roots, while others root directly. A cutting may also produce a new leaf from stored energy even though its roots remain weak or absent. Resist pulling it out repeatedly to inspect the base. Instead, look for firm, sustained growth, subtle resistance when the stem is nudged and pale roots visible through drainage holes. A callused base alone does not mean the cutting is ready.
Pot on once a small but branching root system can support water uptake outside the humidity enclosure. Move the cutting into an individual pot containing a suitable peat-free potting mix, water it in and retain bright, indirect light. Then reduce humidity gradually over several days to a fortnight. This hardening phase matters: foliage raised beneath a close cover must adapt to ordinary greenhouse air before moving to a more exposed bench or the garden.
Stage 1Freshly inserted: tissue is hydrated, but functional roots have not formed.
Stage 2Initiation: callus or first roots appear; moisture and humidity still require close attention.
Stage 3Branching roots: sufficient structure is present for gradual hardening and careful potting on.
Proof 07 / diagnostic negatives
Read the symptom, then change its underlying condition
Remove cuttings that are clearly rotting or covered with mould before trouble spreads. Otherwise, diagnose calmly. One symptom can have several causes, so change one or two variables rather than disrupting the entire bench, then record the response.
Negative A
Wilted while the medium is wet
The leaves may be losing water faster than the cutting can replace it, or basal tissue may already be compromised. Direct sun, excessive leaf area, dry collection material and early decay are possible causes.
Correct: soften the light, inspect for decay, use a ventilated humidity cover and confirm the medium is moist rather than saturated.
Negative B
Dark, soft stem bases
Decay often follows excess water, damaged tissue, poor drainage, unclean tools or a cover that is never vented. Rooting hormone cannot correct an airless medium.
Correct: discard affected material, clean the tray, restart in fresh porous medium and introduce measured air exchange.
Negative C
Pale patches or crisp leaves
Glazing and a clear propagator cover can intensify heat and solar stress. Cuttings require useful light, but exposed foliage can overheat before roots are functioning.
Correct: move the tray into bright shade, diffuse sharp sunlight and check leaf conditions during the warmest part of the afternoon.
Negative D
Mould, algae or no progress
Persistently wet surfaces, old compost, poor light, a cold root zone or material taken at unsuitable maturity can stall rooting. Some species simply require a different method or more time.
Correct: improve hygiene and ventilation, remove failures promptly, assess seasonal timing and consult reliable guidance for the particular plant.
Proof 08 / batch record
Let every batch teach the next
Propagation improves when it stops being a one-off experiment. Keep a notebook or durable label system beside the bench. In a UK greenhouse, your particular microclimate matters more than a generic calendar: a shaded lower shelf, a position near an automatic ventilator and an exposed bench beneath clear glazing will produce different results, even when they are only a few metres apart.
Record failures as carefully as successes. The goal is not a perfect rooting percentage, but to discover which stock plants, cutting maturities, media, dates and greenhouse positions consistently produce sturdy young plants.
Example bench record
BatchHEB-02 / semi-ripe hebe / eight cuttings
SourceNon-flowering, pest-free shoots collected early in the day
MediumMoistened peat-free cutting compost with perlite in clean cells
EnvironmentBright shade; vented propagator; free-draining tray; no direct midday sun
ObservationDay 10: firm foliage; Day 24: anchored; Day 35: branching pale roots
LessonNext batch: compare heel cuttings with clean basal cuts and record pot-on dates.
Greenhouse questions
FAQ
Use these answers as a starting point, then consult species-specific guidance for valuable, woody, protected or difficult-to-root plants.
Do all cuttings need rooting hormone?
No. Many freely rooting houseplants and herbaceous plants establish without it. Hormone can improve consistency for some reluctant or woody material, but it cannot replace fresh stock, hygiene or appropriate conditions. Follow the product label, place a little powder in a separate container to prevent contamination, and omit it where the species roots readily without treatment.
Should a humidity cover stay closed all day?
Not automatically. A cover can slow water loss from fresh leafy cuttings, but it requires regular inspection. If foliage remains dripping, the compost stays saturated, a sour smell develops or mould appears, open the vents and reassess light, watering and air movement. Succulents and other decay-prone plants may require little or no enclosure.
Can I root cuttings directly in greenhouse soil?
Clean pots or cell trays filled with fresh, porous propagation medium are usually more dependable. Garden soil and established greenhouse beds can be variable, dense and difficult to keep evenly aerated, and they may contain pests or pathogens. Separate containers also make batches easier to label, monitor, isolate and move when light or temperature changes.
How long does greenhouse propagation take?
Timing depends on species, cutting type, season, donor condition and the climate around the tray. Tender material may root relatively quickly, while hardwood cuttings can take far longer. Assess branching roots and stable growth rather than relying on a fixed number of days.
Which greenhouse setup best supports a propagation bench?
Prioritise a level, washable bench, clear drainage, adjustable shade, ventilation and enough room to keep batches separate. The Classic Aluminium Greenhouse provides a durable structure for a dedicated propagation area. Its Classic Aluminium Greenhouse can accommodate orderly staging, seasonal plants, tools and a clean working zone.
Sources and further reading
Trusted references for the propagation bench
More from Bloomcabin: planning a greenhouse setup for UK conditions · aluminium greenhouse product information · UK greenhouse gardening guide
