
Installing a Pergola on Composite or Timber Decking

Pergola installation guide
A pergola can be planned above a timber or composite deck, but the decking surface alone does not show where a suitable fixing can go. The important checks are beneath the boards: what carries the deck, whether proposed post positions line up with sound structure, and whether installers can reach the approved anchoring points. Assess those details before settling on a layout or booking installation.

Deck boards are not the pergola’s support structure
Timber and composite decking provide the finished walking surface, but the board you see is only one part of a deck. Boards usually span joists or another supporting frame, and their fixing methods and layouts vary. Composite boards may use proprietary clips or screws; timber boards can also be installed in different ways. Neither material label tells you the joist spacing, condition or connection to the ground. A neat surface, fascia or trim may conceal a gap between supports, while a board joint need not sit above a joist. Treat the board pattern as a clue to investigate, not proof that a pergola foot can be anchored there.
A pergola also behaves differently from a table or planters. Its feet connect a tall frame to a limited number of points, and the frame can experience downward and sideways forces; wind may also try to lift it. Those forces have to travel from each post base through the deck framing, its support posts or another designed connection and ultimately into suitable support. A deck that feels firm underfoot has not automatically been assessed for that load path. Check the complete route, including the joints between members and the way supports meet the ground or a building. Surface appearance alone cannot confirm that the route is appropriate for the exact pergola design.
Locate the joists, beams and deck supports
Plot the proposed post centres on a measured deck plan before assessing the surface. Establish the direction and position of the joists, any supporting beams, the deck’s posts and how those supports meet the ground or a building. Construction drawings, photographs or invoices can provide clues, but compare them with what is visible now: repairs, extensions and alterations may have changed the layout. Mark the deck edges, stairs, railings, level changes and overhanging sections. Note where framing changes around openings, steps or a previous addition. A support line that looks close on a sketch may not sit beneath the intended fixing. Accurate locations matter because the model’s approved post positions may not be movable to suit whichever joist is easiest to reach.
Where the underside is open, inspection can reveal the framing direction and the connections between joists and beams. Record what is visible, but do not use a member’s apparent size, material or condition as a substitute for structural assessment. If the underside is enclosed, existing deck records or a specialist’s inspection may be needed. An annotated sketch showing board direction, known supports and intended post centres will make a site visit more useful. Use the Bloomcabin Pergola product page to identify the exact model when requesting its installation and anchoring documents; the listing itself cannot show how that model connects to your deck.
Check the deck’s condition and history
Inspect the whole deck, not just the spots beneath the proposed posts. Note unevenness, unusual movement, loose or lifting boards, splits, softened timber, discolouration, corrosion around connectors, cracked composite or signs of earlier repairs. These are observations to investigate, not a diagnosis: a problem may be hidden where joists meet a beam, at a post top or beside a wall. A clean composite surface does not confirm that its frame is sound, and new surface boards do not prove that older supports were replaced. If the underside is visible, record the condition of joints and bearing points as well as the boards, and photograph areas that an installer cannot see from above.
Deck history can change the assessment. Ask when it was built, whether it has been repaired or extended, and whether framing was cut or moved for steps, services or another feature. Keep any drawings or records that show the original layout, but do not assume they describe later work. A deck designed for everyday use is not automatically approved for a pergola’s different forces. Rail posts, bench supports and fascia boards are not substitutes for identified structural members unless the design specifically makes them part of the load path. If records and a visual check leave the structure uncertain, arrange for a deck specialist or structural professional to inspect concealed areas before fixing positions are agreed.
Match the post layout to the exact model
Start with the drawing for the precise pergola model, size and configuration being considered. Confirm the footprint, post-centre positions and any base or fixing details shown in the approved instructions. Overlay that plan on the measured deck: do the posts fall over identified support, sit close to an edge or land between joists? Check the stated limits on post position and whether adjustment is permitted. Moving a post a short distance to meet a joist can change the frame’s intended geometry or connection, so do not assume it is acceptable. Check clearances around posts and bases too, including railings, steps, doors and other fixed features. The roof outline alone is not a substitute for the fixing footprint.
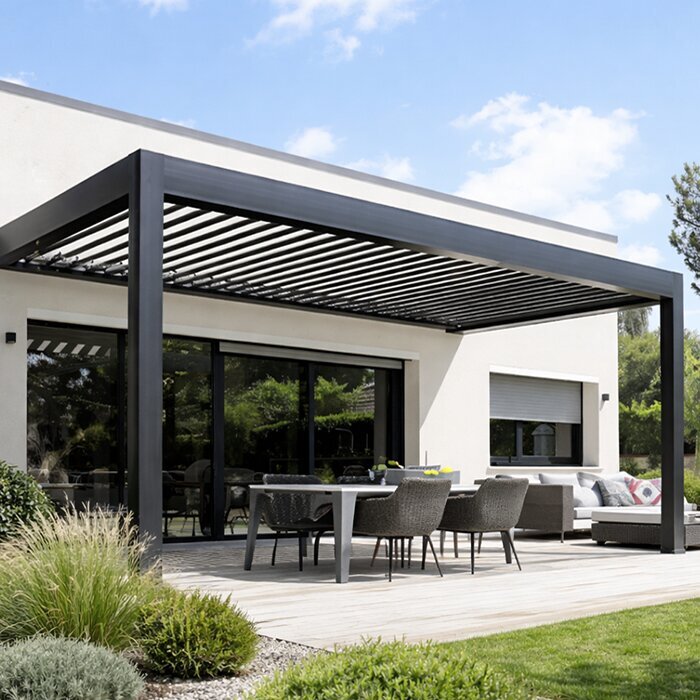
Ask for a model-specific anchoring drawing that identifies the assumed substrate and the fixing arrangement, together with any requirements for the supporting structure. It should relate to the exact model and configuration in the proposal, not a similar-looking frame or generic image. If you are considering the Bloomcabin Bioclimatic Aluminum Pergola, use its product name when requesting the drawings, and confirm which size and configuration they cover. If the documents do not show the foot details, post positions or substrate assumptions clearly, request clarification before parts are ordered. Keep the drawing beside the site plan and record any discrepancies, so the supplier and the person assessing the deck can resolve them before installation.

Select an anchoring detail that reaches the structure
There is no universal pergola fixing method for a deck. Depending on the approved design and site, the route may connect into identified deck framing, a separately designed support below or another suitable structure. The method has to be specified for the exact model; a photograph of a similar installation is not a substitute. A fixing that passes through a board is not automatically anchored to that board: the key question is what it engages with and how forces continue from there. Likewise, reaching a joist does not prove that the member, its connections or that position are adequate. Ask the designer or installer to explain the complete load path and the evidence used to assess it.
Do not substitute longer screws, larger brackets or a different anchor simply because a fixing misses the frame; that changes the design and may damage the deck without resolving the load path. Composite systems have their own installation rules, while timber framing must be assessed for its condition and arrangement. Read the approved instructions alongside an inspection, not as general permission to drill through any board that looks sound. For the Bloomcabin Lean-To Pergola, request details of both the wall-side and deck-side connections so the assessor can consider the complete arrangement. If a proposal places new supports below the deck, clarify whether boards must be lifted or cut, who reinstates the surface and how post positions follow the approved plan. Support dimensions are site-dependent; there is no universal footing size to copy.
Plan access to every fixing point
Physical access can determine whether an otherwise suitable fixing detail is workable. Check whether the deck underside is open or boxed in by fascia, skirting, storage, an enclosed area or landscaping. Above the deck, note built-in benches, planters, screens, steps and doors that might block access to a drill, spanner, post base or removable panel. If the approved detail requires work from below, mark exactly where an installer must reach it and whether there is enough room to fit the specified parts. A narrow hatch or a gap between buildings may look accessible on a plan but prove awkward in person; verify the route before agreeing the fixing positions.
Agree who will move furniture, lift or remove boards, and put the decking back afterwards. Some systems use clips or profiles that need a particular removal method; an installer should not assume boards can be prised up and reused without damage. Check whether opening the deck reveals the intended support and whether tools can reach it without changing the approved hardware. Identify pipes, cables, lights and drainage routes before drilling or removing sections. If you select the regular Bloomcabin Pergola, ask the installer to mark the access needed at each proposed fixing point on the site plan. Include room for tools and inspection, not just space for the post itself. Agree how any removed boards or panels will be reinstated and whether replacement pieces will be needed.
Keep drainage and deck movement in the design
Water must keep moving through or away from a deck as its design intends. Boards may have gaps, drainage channels, an edge outlet or a fall; do not let a post base or new structure obstruct those routes. A fixing through a finished surface can create an interface that needs a specified detail, particularly if water can reach concealed timber, a membrane or another sensitive layer. Ask the installer how each penetration will be detailed without blocking board gaps or outlets. Do not assume a bead of sealant will solve every interface, or that a continuous-looking surface is watertight. Photograph outlets, perimeter gaps and any places where water already collects so the details can be discussed before the post positions are set.
Movement also matters. Timber responds to changes in moisture, while composite decking has its own movement allowances and fitting requirements. The pergola connection has to follow both the exact pergola instructions and the deck system’s requirements; a tight clamp or completely filled gap may not suit every interface. If the deck includes a membrane or concealed waterproof layer, locate it and agree who will detail any penetration before work begins. When requesting installation information for the bioclimatic pergola model, include photographs or drawings of these layers and the existing drainage routes. This helps the installer identify interfaces that need further assessment. Put drainage, movement and maintenance details in the installation scope rather than leaving them to be improvised on the day.
Check wall-mounted and freestanding load paths separately
For a freestanding layout, every post base needs a verified route into suitable support, so assess each fixing point instead of approving one corner and assuming the others match. Framing can change direction or depth near steps, edges, openings and later additions. A beam may support some posts but not others, while apparently similar areas can have different histories. The installation drawing should show the intended post positions; the site assessment then needs to confirm what sits below them and whether it is suitable. Do not add or remove a post, move a foot or span a gap just to make the frame fit the deck unless the approved design allows that change. Pay particular attention where the deck has been extended or altered.
A wall-mounted or lean-to arrangement has a different load path: the wall connection and any deck-side posts each need the supports shown in the approved design. The wall material, framing and fixing locations must be checked for that arrangement; a nearby house wall is not automatically suitable, and the deck cannot compensate for an unverified wall connection. Weather detailing where the pergola meets the building may need coordination too. If you are considering the lean-to model listing, request the wall and deck anchoring information together, then have both parts assessed at the property. A change of format is a design choice, not a shortcut around checking the substrate.
Ask for evidence before agreeing the installation
Before accepting a proposal, ask what evidence the installer will use to confirm the deck’s construction and condition. Useful information may include the exact pergola’s approved anchoring detail, a measured site sketch, photographs of exposed framing and an assessment explaining how each post load reaches suitable support. Make assumptions explicit: which deck members are present, what could not be inspected, and whether opening up or reinforcement is being considered. Ask who assessed the existing structure and who checked that the product drawing matches the observed layout. A verbal assurance that the deck feels solid or that a particular screw is strong enough does not show that the full connection has been assessed.
Clarify who is responsible for reconciling the model drawing with the deck and who will pause work if the actual framing differs. The written scope should state whether board removal, local alteration, repair, reinstatement and work to a wall or independent support are included or excluded. If inspection requires opening the deck, agree in advance how that work and any unexpected findings will be handled. Request a record of final fixing locations and approved changes, so future maintenance does not depend on memory. For a proposal involving the Bloomcabin Pergola model, make sure the quotation names the chosen configuration and refers to the relevant drawing. Keep site photographs and assessment records with that proposal, including any limitations on what could be inspected.
Reconsider the support plan if the deck cannot be verified
Sometimes the right result of an assessment is that the proposed deck-mounted arrangement cannot be verified as drawn. Pause rather than placing the feet on the nearest board or asking an installer to improvise. Possible next discussions include moving post positions only within approved limits, exposing concealed framing, having a professional design reinforcement, using an independently designed support or choosing a different site. These are options to assess, not instructions for a standard retrofit. A new support below or beside a deck can involve excavation, buried services, surface removal and reinstatement; its form and dimensions depend on evidence about the site and the pergola. A heavier-looking bracket does not resolve a missing support.
Compare revised options by the work they require as well as their appearance. Moving the pergola may preserve more of the existing deck, while retaining the original position may involve opening a larger area or replacing boards that cannot be reused. Ask for the revised scope to distinguish investigation, structural work and surface reinstatement, so you can compare proposals fairly. If a change includes considering the wall-mounted pergola option, allow for assessment of the building connection as well as the remaining post supports. Retain the drawings and inspection records for the arrangement ultimately chosen; they will help explain what lies beneath the finished surface. If no suitable support route can be established, relocating or deferring installation is better than concealing an uncertain connection beneath a tidy finish.
Frequently asked questions
Can I bolt a pergola directly to composite decking?
Do not assume the boards alone can support the fixings. Use the exact pergola’s approved anchoring detail and check it against the joists, beams and supports beneath the deck. A screw through a board is not suitable simply because it feels tight.
Does timber decking make anchoring easier?
Not by itself. Timber and composite are different surface materials, but neither tells you the framing layout, support connections or condition underneath. The right assessment depends on the complete deck structure, the specified fixing detail and access to the intended support.
Is lining up a post with a joist enough?
No. The joist’s position is only one part of the check; its condition, connections and location relative to edges also matter. The pergola drawing must allow the proposed position, and the deck’s suitability should be assessed rather than assumed.
What if I cannot get underneath the deck?
Do not drill by guesswork. Gather any deck plans or construction photographs and arrange a site assessment. The installer or structural professional can decide whether an existing opening, temporary board removal or another form of inspection is needed before agreeing a fixing method.
Who should check the proposed fixings?
Ask the pergola supplier for the model-specific approved anchoring information, then have the existing deck assessed by a suitably qualified structural professional or deck specialist. The installer should confirm that the proposed detail matches the site and explain how differences will be handled.
A sound pergola installation on decking depends on an evidenced connection from each post to suitable structure, not on the apparent strength of the surface boards. Map the frame, check its condition, match the proposed layout to the model’s approved detail and make sure the fixing points are accessible. If any part of that route remains unknown, pause the deck-mounted plan and assess a support arrangement that can be verified.
