
Pergolas Over Hot Tubs: Size, Ventilation and Weather Protection
Outdoor living planning report
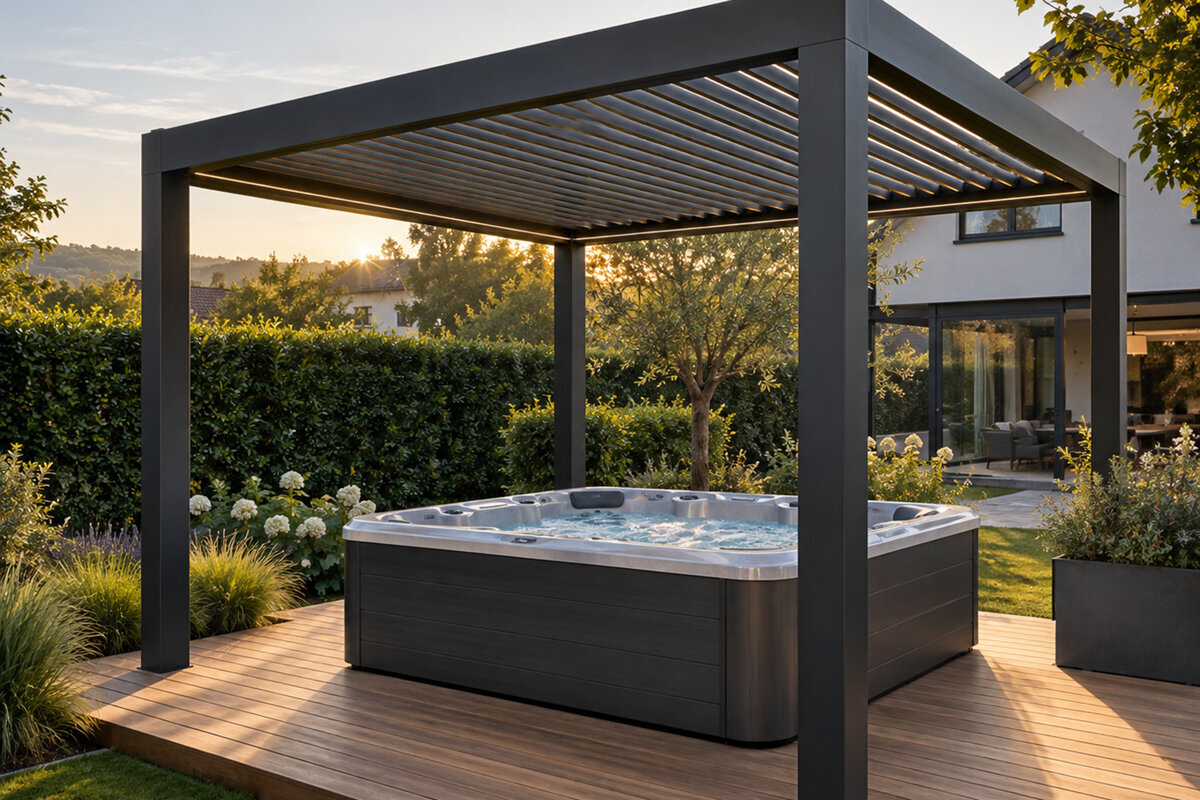
A pergola over a hot tub should make the space feel calmer, not more enclosed.
A well-planned pergola over a hot tub can turn an exposed corner of the garden into a more usable retreat. The successful schemes begin with practical clearances, fresh air, drainage and a realistic view of how the space will be used through changing British weather.
The practical answer
A pergola over a hot tub works best when it shelters the bathing area while preserving clear access around it. Start with the tub’s actual footprint, its cover and opening method, steps, service access and the approach from the house. Then position posts and roof edges so they support those movements rather than interrupt them.
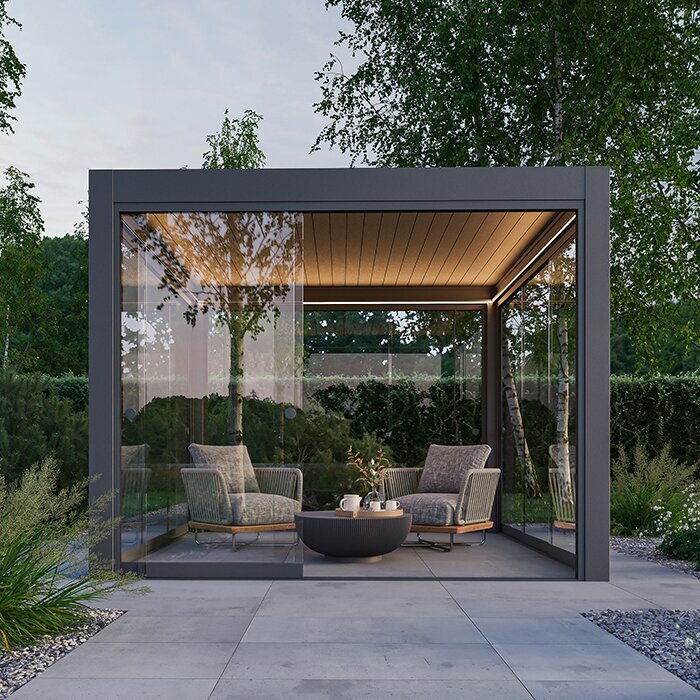
Ventilation deserves equal attention. Warm water creates steam, particularly in cool weather, so a roofed setting should retain generous open sides and a route for air to rise and disperse. Consider whether adjustable shade, side screening and drainage will improve comfort without turning the installation into an enclosed room.
01
Measure the living zone
Allow for bathers, lifted covers, towels, steps and maintenance, not only the shell dimensions shown on a product sheet.
02
Keep air moving
Use open elevations and avoid trapping steam beneath a low, heavily screened roof, especially beside doors or glazed walls.
03
Match shelter to habits
Choose the degree of roof cover and privacy around how often, when and with whom the hot tub is likely to be used.
Plan shelter, airflow and circulation together before choosing the structure.
Hot tubs invite a slower kind of outdoor living, yet their surroundings need to work hard. Swimmers need somewhere dry and safe to step out, towels need a sensible home, and the route back to the house must remain manageable after dark or in rain. A pergola can frame that experience, giving the area purpose without making it feel detached from the garden.
The first decision is not simply which roof looks right. It is how much of the hot tub zone needs shelter, where steam will travel, and whether users can move around the cover, controls and steps without squeezing past posts. Looking at the entire setting also helps prevent a handsome structure from blocking a favourite view or narrowing a useful path.
For British homeowners, weather protection is rarely about sealing every side. It is about creating a flexible threshold between house and garden: shade when the sun is strong, cover from a passing shower, and enough openness for the space to stay comfortable. This guide sets out the checks worth making before a hot-tub pergola becomes part of the landscape.
Inspection 01 · Inspection sheet one
Begin with the real hot tub footprint
Measure the installed tub rather than relying on a brochure size. Include any projecting controls, the cover’s resting position, steps and the space needed to enter comfortably with a towel in hand. A pergola that traces the shell too closely can feel awkward from the first use. It can also make routine tasks, such as checking water or moving furniture, unnecessarily difficult.
Walk the proposed perimeter before committing to a layout. Think about where people will stand while talking to bathers, where robes will be hung, and whether children or guests can pass without crossing a wet threshold. Posts should sit outside those natural movement lines. If the tub is near a boundary, also consider how the pergola’s overhang and visual weight will read from neighbouring gardens.
- Mark the tub, cover swing, steps and walking routes on the ground using tape or a temporary line.
- Check the view from indoors as well as from the garden; the structure will become part of both scenes.
For adjustable overhead shade around an active bathing area, explore a bioclimatic aluminium pergola while planning clear movement around every side.
Inspection 02 · Inspection sheet two
Choose a proportion that suits the garden
A generous roof can make a hot tub feel like a destination, but scale matters. The structure should relate to nearby paving, planting beds, doors and the house rather than appearing as an isolated canopy. Where the tub occupies a compact terrace, a carefully proportioned shelter may be more effective than extending cover across the whole surface. Leave enough visual breathing room for planting and daylight.
Height changes the character of the space as much as width. A roof set too low can make steam and conversation feel contained; one that is visually too high may lose the sense of intimacy people expect from a bathing retreat. Consider sightlines when seated in the water and when approaching from the house. The aim is a defined outdoor room with a relaxed connection to the wider garden.
- Use existing paving joints, wall lines or planting edges to test whether the proposed roof footprint feels orderly.
- View the outline from principal windows before finalising its depth, height and relationship with the façade.
If you prefer a straightforward framed shelter with an open garden character, consider a regular aluminium pergola sized as part of the terrace rather than merely over the tub.
Inspection 03 · Inspection sheet three
Treat ventilation as a comfort essential
Steam is part of hot-tub use, particularly on still, chilly evenings. A roof can make the experience more sheltered, yet it should not prevent moist air from escaping. Retain open faces wherever the site permits, and consider the prevailing breeze rather than screening every elevation by default. A pergola is generally most comfortable when it gives air several ways to move through and above the seating area.
Pay particular attention when the tub sits close to the house. Steam near doors, windows and roof junctions needs thoughtful management, and regular use may influence where you place screening or overhead cover. Avoid assuming that a sheltered corner is automatically the best corner. The more enclosed the setting becomes, the more valuable it is to discuss the practical arrangement with the hot-tub supplier and appropriate installation professionals.
- Keep the most useful open side facing the garden or prevailing airflow instead of closing all elevations equally.
- Avoid placing dense screens immediately above or beside the point where bathers enter and leave the water.
For a roof approach that can help you tune shade and openness, look at a bioclimatic pergola for hot-tub ventilation alongside the manufacturer’s operating guidance.
Inspection 04 · Inspection sheet four
Plan weather protection in layers
Rain rarely arrives from directly above, so roof cover alone is only one layer of protection. Think about the direction of driving showers, the exposed edge of the terrace and the route users take from house to water. A pergola can make that transition more pleasant, especially when paired with sensible lighting, non-slip walking surfaces and a dry place for towels, but it cannot remove every weather inconvenience.
Side treatments deserve a measured approach. Screens can soften wind, offer privacy and create a stronger backdrop, yet too much screening can make the enclosure darker and less airy. Use them where they answer a particular problem: an overlooked boundary, a low evening sun or a breezy flank. Keep other sides lighter so the garden remains visible and steam does not feel trapped around the bathers.
- Identify which edge receives wind-driven rain by observing the terrace during different weather, not by guesswork alone.
- Place towel storage and seating beyond the wet exit route, where they remain useful without obstructing access.
For a clean, open framework that can be combined with considered screening, view a regular pergola for weather shelter as one element of a wider terrace plan.
Inspection 05 · Inspection sheet five
Build privacy without losing outlook
Hot-tub privacy is often more about eye level than complete enclosure. Start by noting overlooked windows, gaps in boundaries and the angles from which the water is visible. A targeted screen, a planted layer or a repositioned approach path may solve the issue more elegantly than surrounding the whole structure with solid panels. The best result still lets bathers see sky, foliage and the depth of the garden.
Privacy should also work in the darker months, when interior lights can make a garden feel more exposed. Consider how lighting inside the house, on the terrace and within the bathing zone affects sightlines after dusk. Soft, carefully directed lighting can support safe movement without making the area a bright display. If screening is part of the design, ensure it does not interfere with access, airflow or the tub’s cover.
- Map overlooking from standing and seated positions; the view from the water can differ greatly from the view on paving.
- Use planting and partial screening to create depth, rather than relying only on a continuous hard boundary.
Where flexible shade and a refined outdoor-room feel are priorities, a bioclimatic pergola with privacy options can form a considered starting point.
Inspection 06 · Inspection sheet six
Protect access, servicing and daily use
A hot tub is not a fixed ornament. Its cover may need room to lift or slide, filters and controls require access, and occasional servicing needs clear working space. Keep the pergola’s posts, screens and furniture away from these essential zones. Confirm requirements with the hot-tub manufacturer before setting out foundations, since an attractive layout that prevents maintenance access can become a costly frustration later.
Also plan the route to the tub as part of the experience. It should be obvious, evenly lit and comfortable underfoot, with no need to weave around furniture or squeeze between a post and a wall. Consider where wet feet will travel and how bathers will return to the house in winter. A small bench, hooks or a dry landing point can improve everyday use more than an elaborate decorative feature.
- Ask the hot-tub supplier to identify service panels, cover clearance and any equipment access before the structure is ordered.
- Keep a clear route from house to steps, including space for people carrying towels, drinks or maintenance supplies.
For an unfussy frame around a practical access layout, browse a regular aluminium pergola for terraces before deciding where furniture and screens will sit.
Inspection 07 · Inspection sheet seven
Coordinate drainage, surfaces and lighting
The ground beneath and around the tub needs to cope with splashes, rainfall and frequent barefoot traffic. Review the condition, levels and drainage of existing paving before adding a roofed structure. Water should not be directed towards door thresholds, neighbouring land or a route people use after bathing. An installer can assess how the chosen arrangement relates to the site and the hot tub’s own installation requirements.
Lighting should support safety first, then atmosphere. Gentle illumination at steps, changes in level and the path back to the house is more useful than a single harsh fitting. Plan cables, controls and any accessories early so they do not become visible afterthoughts. Keep electrical work within the remit of suitably qualified professionals, and make sure lighting positions do not complicate cleaning, cover use or planned screening.
- Inspect existing falls after rainfall to understand where water already gathers and whether the terrace needs attention.
- Use layered lighting for paths, steps and seating, while avoiding glare across the water or into neighbouring gardens.
For a more adaptable roof-led setting above a carefully prepared surface, consider a bioclimatic aluminium pergola system as part of the complete outdoor scheme.
Inspection 08 · Inspection sheet eight
Check approvals, boundaries and quotations
Before work begins, establish what applies to your property and proposal. Planning considerations can depend on the structure’s size, location, height, proximity to boundaries and the character of the home or area. Do not rely on a neighbour’s project as a guide. Check the latest advice from the relevant local authority, and seek professional help where the site or proposal raises uncertainty.
A clear quotation conversation should cover more than the pergola itself. Share accurate site photographs, measurements, levels, access constraints and the intended position of the hot tub. Ask what preparation is assumed, who is responsible for any groundwork, and how the chosen configuration relates to its written product information. If you have home insurance concerns, discuss the proposed addition with your insurer rather than making assumptions about cover.
- Record boundary positions, nearby doors, drainage points and overhead features before asking for a design recommendation.
- Compare quotations by scope, preparation assumptions and configuration, not by headline figure alone.
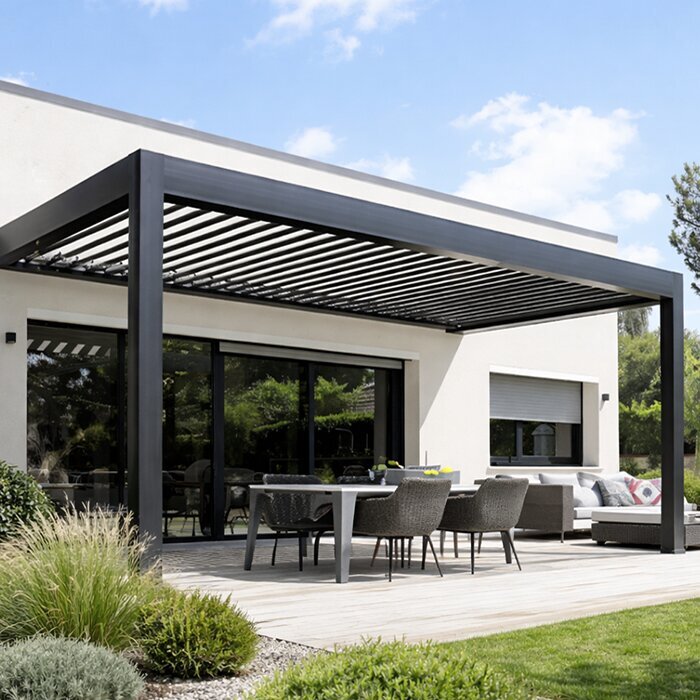
When your brief calls for a simple architectural canopy, start with a regular pergola for garden hot tubs and discuss the final configuration against your site conditions.
Comparison
Roof and layout choices at a glance
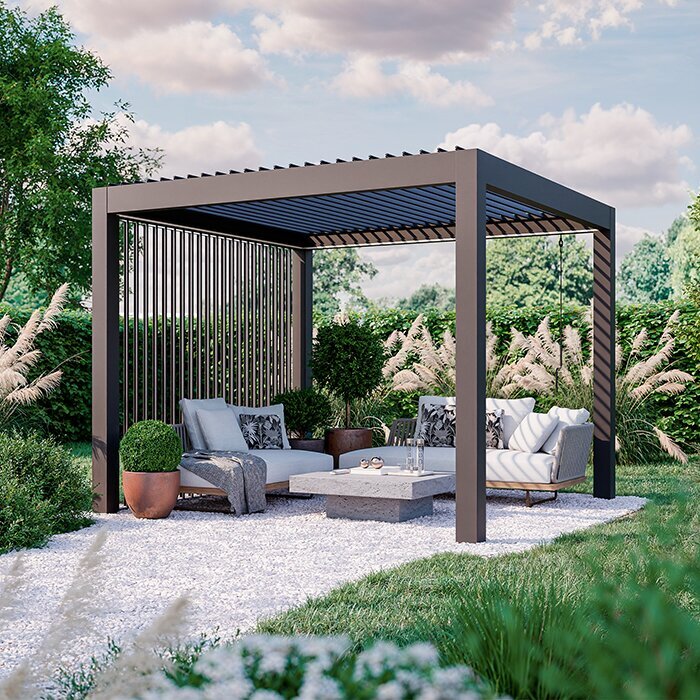
The right route depends on exposure, desired flexibility and how open you want the bathing space to remain. This comparison is a planning aid, not a substitute for checking the chosen product configuration, site preparation and hot-tub requirements.
| Planning factor | Bioclimatic approach | Regular approach |
|---|---|---|
| Overhead experience | Adjustable roof treatment can support changing shade and openness. | Fixed framed character suits an intentionally open terrace setting. |
| Ventilation priority | Consider settings that maintain air movement during steaming conditions. | Use generous open sides and avoid excessive surrounding screening. |
| Weather response | Useful where day-to-day flexibility is a central part of the brief. | Best where shelter is balanced with an airy garden feel. |
| Visual character | Creates a more defined, adaptable outdoor-room expression. | Keeps the structure visually simple and deliberately light. |
| Best starting question | How will shade, air and privacy change across the day? | How can the frame improve the terrace without enclosing it? |
A sensible planning sequence
Work from the tub and its use outward. This order prevents the common mistake of choosing a pergola silhouette first, then trying to force steps, cover access, screening and drainage into the leftover space.
01
Survey the installed position
Measure the actual tub, cover movement, steps, controls, service areas and routes from the house. Photograph the site in daylight and after dark.
02
Mark the usable perimeter
Set out a temporary roof outline and proposed posts. Walk it with another person, including the path taken when carrying towels or supplies.
03
Observe exposure
Note sunlight, wind, rain direction, overlooking and steam behaviour across several visits. This reveals where selective shelter is more useful than enclosure.
04
Resolve ground and services
Review paving levels, drainage, lighting and electrical requirements with appropriate professionals. Keep maintenance access visible in every version of the layout.
05
Confirm the final scope
Check local authority guidance, supplier requirements and quotation assumptions. Make sure the chosen configuration reflects the site rather than an idealised plan.
Hot-tub pergola pre-order checklist
Use this checklist before asking for a final proposal. It focuses on the details that affect daily comfort, future access and the way the structure sits within a British garden.
01. Measure the tub itself, including cover movement, steps, controls and the working area needed for routine maintenance.
02. Mark posts outside circulation routes so bathers can enter, exit and pass around the water without awkward pinch points.
03. Check sightlines from neighbouring windows, upper floors and adjacent seating before deciding where privacy screening is genuinely needed.
04. Retain open routes for fresh air, especially near the house or on sites where steam may linger.
05. Assess rain direction, not just overhead cover, then decide which edge benefits most from selective side protection.
06. Review paving condition, drainage falls and wet-foot routes before finalising the shelter footprint or furniture arrangement.
07. Plan restrained lighting for steps, paths and thresholds, with controls that are convenient from both house and garden.
08. Check current local authority guidance, installer assumptions and insurer questions before committing to the final design.
Frequently asked questions
How large should a pergola over a hot tub be?
Size it around use rather than the shell alone. Allow room for steps, cover operation, safe circulation, service access and a dry place for towels or seating. A temporary outline on the ground is valuable because it reveals whether posts or roof edges will interrupt the natural route from the house.
Will a pergola trap steam from a hot tub?
It can feel stuffy if the roof is low or too many sides are heavily screened. Preserve generous openings and give warm, moist air a route to rise and disperse. The precise arrangement should also respect the hot-tub manufacturer’s guidance, especially where the tub is close to the house.
Can I add screens to a hot-tub pergola?
Yes, but use them to solve specific issues such as overlooking, low sun or a breezy boundary. A fully screened arrangement may reduce outlook and airflow. Test the important viewing angles first, then use partial screening or planting where that achieves privacy with a lighter result.
Is a pergola enough protection for year-round hot-tub use?
A pergola can make the setting more comfortable in variable weather, but the experience still depends on exposure, clothing storage, lighting, surfaces and the route to the house. Consider it as one part of a weather-aware outdoor space, rather than a promise of complete protection in every condition.
Do I need to check planning rules for a pergola?
It is sensible to check current guidance with the relevant local authority before proceeding. What applies can depend on location, dimensions, boundaries, property type and local designations. If the proposal is unusual, close to a boundary or otherwise uncertain, seek suitably qualified professional advice early.
Where should lighting go around the hot tub?
Prioritise the path, steps, changes in level and the transition back to the house. Soft, directed fittings usually create a calmer result than bright general lighting. Coordinate positions with the pergola layout and have any electrical work considered and completed by suitably qualified professionals.
Plan your hot-tub setting
Create shelter without closing in the garden
The most successful pergola over a hot tub starts with the unglamorous details: clearances, cover access, wet routes, airflow and drainage. Once these are resolved, the structure can do what it should—give the bathing area a sense of place, improve comfort and connect it more naturally to the rest of the garden.
Whether you favour an adaptable roof treatment or a simpler open frame, let the site lead the choice. Take measurements, observe the garden in real weather and ask informed questions about the final configuration. Bloomcabin can then become part of a well-composed outdoor setting rather than an addition that asks the space to compromise.
Explore pergola options with your site measurements, access needs and preferred level of shelter in mind.
