
How to Plan a Pergola on a Sloping Terrace
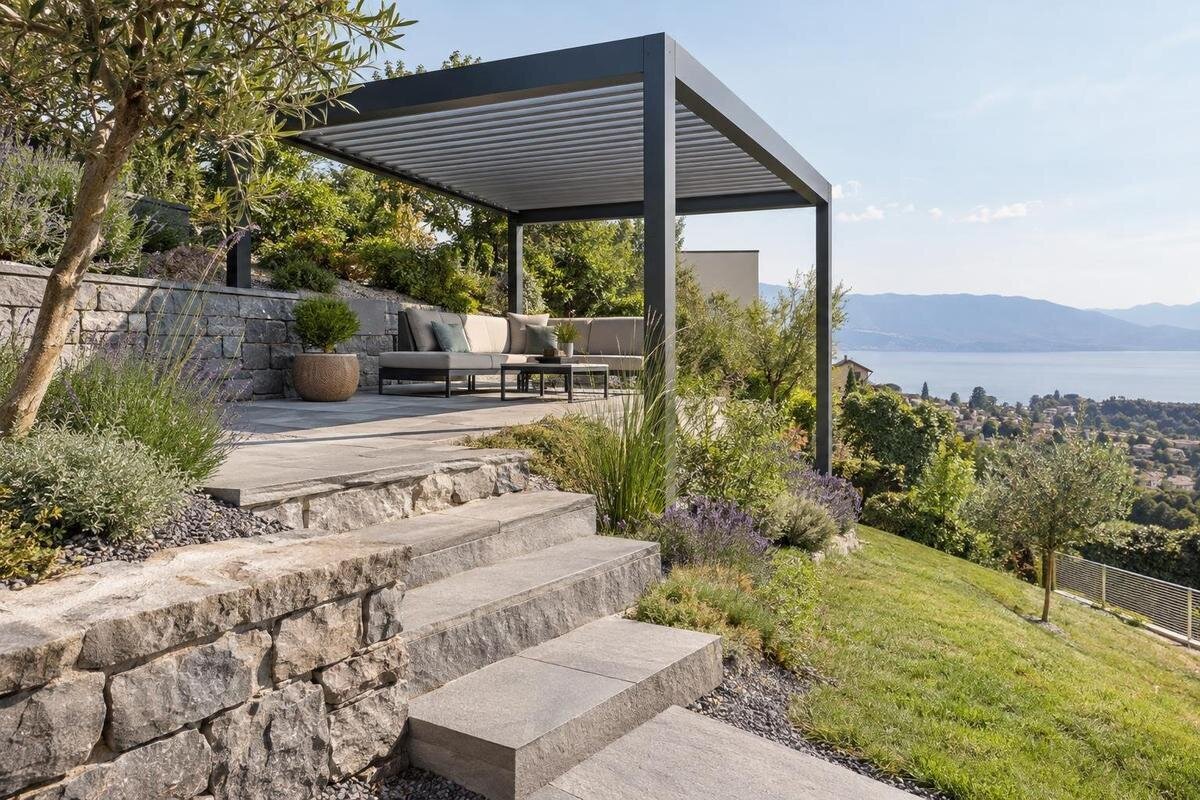
Pergola planning guide
A terrace can slope to carry rainwater away, while a pergola still has to follow the geometry specified for its frame and roof. The paving fall, roof plane, post arrangement and anchoring are related, but none can be inferred automatically from another. A useful plan records the terrace levels and asks whether the exact model permits the proposed post positions and support heights. This guide explains how to document the slope, set the required roof height, account for drainage and access, and identify when a site assessment is needed before the layout is agreed.

01
Keep the terrace fall separate from the roof plane
A sloping terrace presents two different level questions. The paving is commonly laid with a fall so rainwater can move towards a drain or outlet; the pergola has its own specified roof geometry, which may require a level reference plane. Those planes are not interchangeable. If the frame simply follows the paving, its appearance, clearances and compatibility with the design could change. Conversely, setting the pergola roof level does not mean the terrace beneath it should be made level or that its drainage can be ignored. Establish the existing surface fall and the roof plane required by the chosen model as separate items on the plan.
Use the exact model’s installation drawings and written requirements rather than judging from a photograph. If you are considering the Bloomcabin Bioclimatic Aluminum Pergola, request the drawing for the selected size and configuration. Its name alone does not establish whether the roof must be level, whether supports may differ in height or how the posts may be fixed. Read the drawing’s level references carefully: a dimension measured from a post base may mean something different from one measured from finished paving. Mark which dimensions are prescribed and which adjustments are expressly allowed. If the documents do not address sloping ground, obtain a model-specific answer before setting out the posts.
Survey the levels at every proposed post
Mark the proposed post centres on a plan, then record the finished surface level at each centre and wherever a step, channel drain, threshold or change in paving affects the footprint. Note the direction of the fall and whether it is even across the area; older terraces can include crossfalls, shallow dips or separate paved planes. Measure the actual intended support locations rather than relying on the four terrace corners alone. Also mark nearby edges and drains. This survey shows which supports sit at different finished levels and gives the installer a basis for comparing the site with the model drawing, without guessing post heights from a general impression of the slope.
Use one clear datum for every reading, and state whether the figures refer to finished paving or a different reference level. A surveyor’s level or laser level can help when the fall is subtle or the terrace has several planes; for a complex site, ask an installer or surveyor to record it. Keep the readings, a marked plan and photographs together, labelling the high and low sides. Do not assume the slope is uniform because a single edge-to-edge measurement looks straightforward. Avoid converting readings into proposed post lengths until the approved arrangement is known, since the required roof plane may not be achieved by directly adjusting each corner.
02
Set the required roof height before choosing post lengths
Choose the intended roof height using the model’s dimensions and the usable clearance beneath it, not only the height visible from outside. A sloping floor changes that clearance across the footprint if the roof plane is level: the high side may be the limiting point, while the low side has a different relationship to steps or doors. Check eaves, window openings, wall lights, vents and access routes near the frame. If roof components move or open, allow only the operating space described for that model. Mark the lowest available clearance on the survey so it can be checked against the chosen design before the supports are ordered.
Do not choose a convenient height at one corner and ask the installer to make the rest fit around it. Establish the intended top and underside levels from the selected design, then compare them with the measured terrace level at each support. When reviewing the bioclimatic pergola options from Bloomcabin, record the precise configuration beside your clearance measurements so that different options are not compared using the same assumed height. Distinguish overall frame height from the clear space beneath beams or other components. Ask how any permitted adjustment affects those dimensions and the connections. If clearance is tight, resolve it before ordering rather than relying on an unapproved change during installation.
Confirm that the post layout is approved for the slope
A pergola layout may rely on defined post centres and relationships between posts, beams and roof components. On a sloping terrace it can seem straightforward to use taller supports on the low side, shorten posts on the high side or move a support clear of a drain. Each change affects more than the visible height: it can alter frame geometry, connection positions and the route by which loads reach the base. Accept such changes only when they are included in the chosen model’s instructions or approved in a design for that installation. Do not cut, extend, pack, tilt or reposition structural parts without that approval.
Put the proposed post centres on the same drawing as the level survey and compare them with the model’s installation plan. For an enquiry about Bloomcabin’s bioclimatic pergola, label each support position so that any permitted height variation can be assigned to the correct post. Ask what reference keeps the roof in its required plane and whether the posts must bear on prepared bases at specific levels. Separate the height of each supporting base from the length of the post above it; they are different dimensions. If the standard layout conflicts with a drain, step or boundary, obtain an approved revised design rather than moving a post informally.

03
Identify the structure beneath the paving
The visible terrace finish tells you where the posts would stand, not what will support them. Beneath paving there may be a slab, bedding layer, sub-base, waterproofing, a suspended deck or a combination of materials; appearance alone cannot confirm the construction, condition or suitability of a particular fixing. Existing services or drainage runs may also pass under proposed supports. Find any construction records, maintenance information and previous drawings, then arrange an inspection if the build-up remains uncertain. The evidence needs to relate to the actual post locations, especially where a change in level or an edge suggests that the construction may vary across the terrace.
Ask the installer or structural professional to compare the substrate evidence with the anchoring details approved for the pergola model. Surface tiles, slabs and paving units are finishes, not proof that an anchor can transfer loads into the supporting structure. For the Bloomcabin Lean-To Pergola, include the proposed support locations in the enquiry so the relevant fixing requirements can be reviewed against the actual construction. Identify where substrate information is confirmed and where investigation is still needed; an unknown layer should not be recorded as a suitable base. There is no single footing size for every sloping site. Have the proposed support and fixing details agreed before cutting or disturbing the finish.
Coordinate terrace drainage with roof drainage
Trace where water currently travels across the terrace. Mark gullies, channel drains, downpipes, outlets and any low points where water collects, and note whether their positions change across the slope. Keep this surface-water route distinct from anything the pergola roof may do. Some roof designs shed water at particular edges or provide specific collection points; others may allow water to pass through. Check the documentation for the selected model rather than assuming that a pergola redirects rain in a particular way. This matters when choosing post centres and deciding whether an outlet, threshold or drain needs to remain accessible.
The installation plan should show both sets of water routes where relevant: the terrace fall and the roof’s documented discharge points. When assessing Bloomcabin’s lean-to pergola, request its water-handling details and mark any specified outlets on the site plan. Check whether water would reach a drain or cross a walking route, and whether that drain would remain accessible for cleaning. Proposed bases should not obstruct the existing surface-water route. Do not flatten a working paving fall to simplify frame setting-out, or move a drain or roof outlet without an agreed design. Where the intended discharge route is unclear, resolve it with the installer before finalising the support positions.
04
Treat steps, retaining edges and nearby walls as constraints
A terrace may change level at a step, raised planter, retaining edge or boundary wall. A proposed post close to one of these features needs more than a tape-measure check: the support beneath the surface and the way the edge is retained may not be apparent. Do not assume that paving near a wall is tied into it, that a wall can support a pergola or that a post base can sit close to an edge without affecting the supporting structure. Record distances and level changes, and show them on the site plan. If excavation or a new footing is proposed nearby, ask for a structural assessment of the interaction.
Note whether the terrace falls gradually towards an edge or changes height abruptly at a step. Show the level on both sides of that feature, not just the level where a post would stand. If you are considering the Bloomcabin Pergola, include these measurements in the site enquiry alongside the proposed footprint. Photographs from above and from the side can help explain the arrangement, while drawings of the boundary construction can help the professional assess what supports it. Keep any uncertain edge construction clearly identified on the plan. Where access or maintenance responsibilities are shared, settle the practical arrangements before work is planned, including access for inspecting the completed supports.
Check clearances on the high and low sides
Plot the complete footprint, including every post centre, against doors, windows, steps, handrails, furniture routes and access to drains. On a falling surface, clearance changes across the footprint if the roof plane remains level: the high side may have less space beneath it than the low side. Check the lowest clearance against the actual walking route and the way doors or windows open, not just the corner that is easiest to measure. Note features that need occasional access, such as an external tap or inspection cover, so a post or base does not make them difficult to reach. Include any narrow passage that must remain usable beside the structure.
Use a dimensioned plan for the exact model. Bloomcabin’s regular pergola listing gives an area range of 97–258 sq ft, but area alone does not establish overall dimensions, post-centre spacing or headroom. Put the chosen configuration on a scaled site drawing, using its confirmed dimensions rather than estimating a rectangle from the area figure. Compare the footprint with thresholds and the usual paths across the terrace, then check the available height at the points where people will pass beneath the frame. If furniture is part of the intended use, show its normal position and the space needed to walk around it. A clear space on plan is not necessarily a convenient route across a slope.

05
Review the model information alongside the site assessment
An installation decision needs both product information and site evidence. The model drawings should show the permitted configuration and anchoring arrangement; the site assessment should show terrace levels, underlying support, edge conditions and drainage. Ask the supplier or installer to confirm which drawing applies, whether the proposed post positions and any difference in support heights are accepted, and what evidence supports the chosen fixings. If the substrate, retaining edge or proposed foundations need structural judgement, use an appropriately qualified professional for that assessment. A generic sketch or a similar installation elsewhere is not a substitute for reviewing these conditions together.
Make the enquiry specific: send the measured plan, photographs, details of what lies beneath the finish and the exact model name. If the proposal is for the Lean-To Pergola from Bloomcabin, state that clearly and identify any configuration details still awaiting confirmation. Separate unanswered questions from agreed dimensions so the reviewer can see what needs resolving. Request a response that identifies the applicable drawing and addresses roof level, support-height differences, anchoring and drainage conflicts. If an alteration is proposed, establish whether it is covered by the model requirements or needs a revised design, and who is responsible for approving it. Retain the response with the plans as the record of the reviewed proposal.
Keep one agreed plan for installation
Before work starts, bring the decisions into one dated plan: selected model and configuration, required roof plane, measured surface levels at each support, post centres, known substrate, approved anchoring information, drainage routes and clearances to preserve. Attach the relevant drawing and note any site-specific approval; do not leave verbal changes scattered across messages. If a measurement is revised after paving is lifted or the base is exposed, update the plan and have the change checked before continuing. This gives the person who surveyed the terrace and the person setting out the frame a shared record of what was agreed.
Review the final plan against the physical site before fixing anything. Confirm that the datum still refers to the intended finished surface, no drain or access point has been missed, and the roof height and post positions match the approved drawing. A different paving level, hidden construction or obstruction can invalidate an earlier assumption, so pause and obtain an updated answer when conditions differ. The aim is not to make a sloping terrace appear level on paper; it is to fit the approved pergola geometry to verified site levels while preserving the terrace’s drainage and access.
Frequently asked questions
Can a pergola be installed on a sloping terrace?
Possibly. The fall itself does not rule out a pergola, but the chosen model must allow an approved post arrangement that suits the site. The support beneath each post and the available clearances also need to be assessed.
Should the pergola roof follow the paving fall?
Not by default. The paving fall helps manage surface water, while the roof plane must follow the requirements for the chosen model. Confirm any permitted variation in the installation drawings.
Can different post heights compensate for the slope?
Only if the model’s instructions or an approved site-specific design allow them. Do not cut, extend, pack or reposition structural parts on the assumption that this will preserve the frame geometry.
Is the paving itself enough to support the posts?
The visible finish does not show what lies beneath it or confirm that the structure below can accept the fixings. Have the substrate at the proposed post positions assessed against the approved anchoring details.
What should I provide for a site assessment?
Send a plan with levels at the proposed post centres, the high and low sides, drainage points, nearby steps and edges, photographs, any information about the terrace construction and the exact model you are considering.
A sloping terrace is not automatically unsuitable for a pergola, but its paving fall is only one part of the plan. Map the finished levels, establish the roof plane and clearances required by the exact model, then confirm that its approved post arrangement and anchoring can be supported by the terrace construction. Keep drainage, edges and access in the same review. When model drawings and site evidence agree, the design can be assessed on its real geometry rather than on a guess based on the surface alone.
