
What Should a Complete Pergola Kit Include?
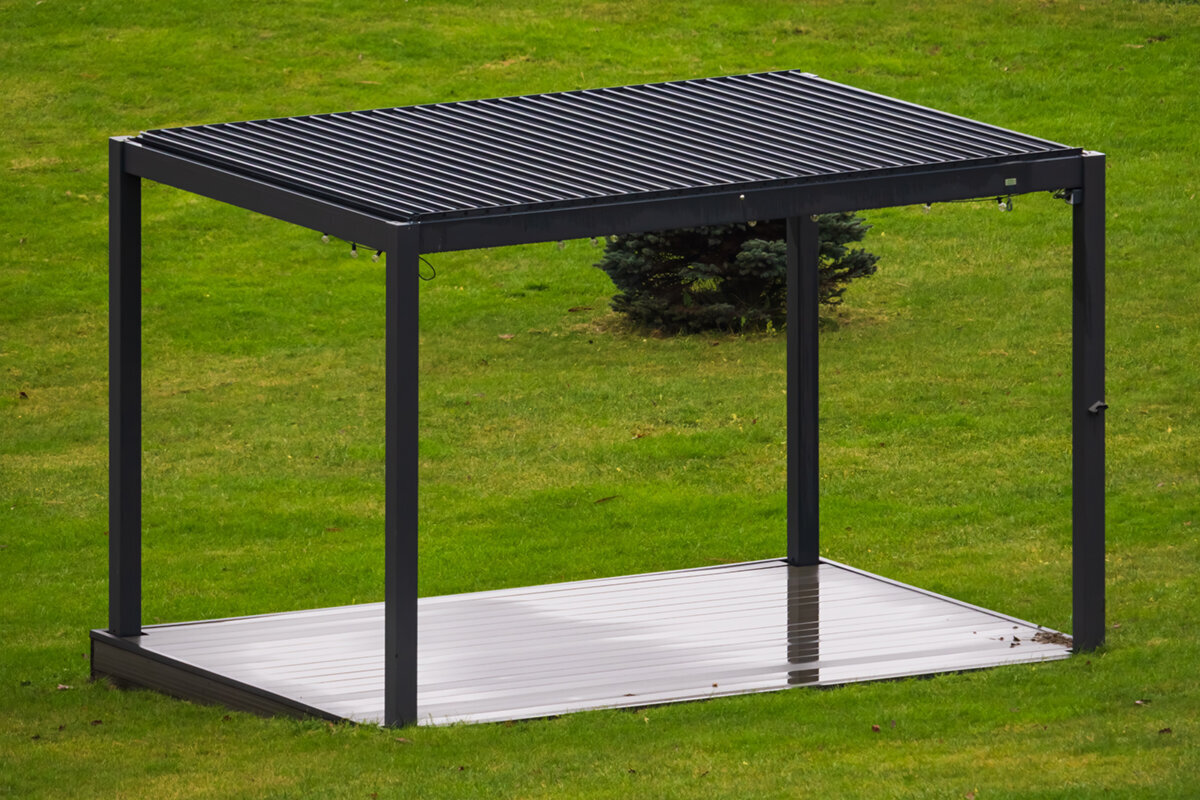
Pergola buying report
What should a pergola kit include—and what usually costs extra?
The word “complete” can conceal important differences between pergola kits. One package may cover the frame and roof alone; another may include drainage, controls or installation support. This report helps you identify the real scope before comparing specifications or requesting a quotation.
The short answer
A complete pergola kit should clearly identify the structural frame, posts, roof arrangement, connection hardware, drainage approach and operating components appropriate to the selected design. It should also state the dimensions, finish and included accessories, so there is no ambiguity between the visual proposal and the supplied product.
Screens, lighting, heating, sensors, installation and groundwork are often selected separately or supplied through a tailored scope. They are not less important because they are optional; they simply need their own line items, compatibility checks and responsibilities. Ask for a written inclusions and exclusions list before treating two offers as comparable.
01
Core kit
Confirm the frame, posts, roof, fixings, drainage components and controls required for the exact pergola configuration are individually described.
02
Options
Treat side screens, lighting, heaters, privacy elements and automation as deliberate design choices, with location, colour and controls agreed early.
03
Services
Clarify who surveys the site, prepares the base, installs the kit, connects electrics and manages any planning or access questions.
A practical inspection guide for British gardens, patios and terraces.
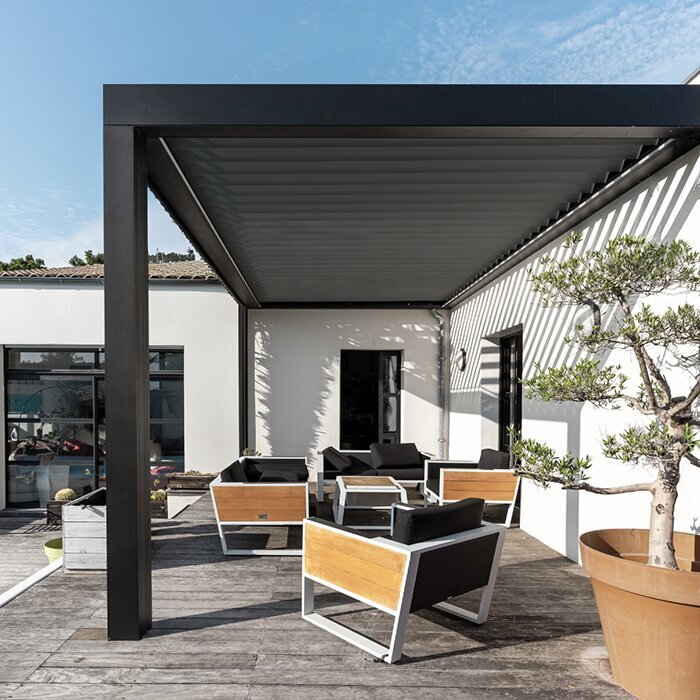
For a British homeowner, a pergola is rarely just a frame in the garden. It may define an outdoor dining area, cover a terrace beside the house or make a previously exposed patio more usable. That makes the kit contents important: the structure must suit the chosen location, while the final arrangement must suit how you plan to live outside.
Start by separating essentials from enhancements. The essentials are the components needed to create the selected pergola as designed: its supporting frame, roof system, structural connections and the specified fittings. Enhancements such as side screens, lighting, sensors and furniture can be valuable, but they should be listed distinctly rather than assumed to be included.
A well-prepared specification also separates products from services. Ground preparation, electrical work, installation, access equipment and disposal can sit outside a product package, depending on the project. Treat every quote as a scope document: read what is named, ask about what is omitted and make sure the chosen configuration is practical for the site.
Inspection 01 · Inspection sheet 01
Begin with the structural package
The foundation of any pergola kit is the load-bearing arrangement: posts, perimeter beams, roof-supporting members and the connections that bring them together. A useful product schedule names these elements and shows the chosen footprint, height and colour. It should be clear whether the visual shown is the standard configuration or includes additions that alter the overall appearance.
Do not assume that every fastener or site interface belongs in the box. Some kits include the assembly hardware for the pergola itself while fixing methods depend on the substrate beneath it. Ask what is supplied for structural assembly, what must be selected after a site review and whether the proposed base is suitable for the intended installation.
- Check the drawing matches the quoted footprint, post positions, frame finish and roof type, rather than relying on a generic lifestyle image.
- Ask whether assembly fittings, post-base components and any substrate-specific anchors are included, specified separately or expected from the installer.
For an adjustable-roof option, inspect the structural scope of a bioclimatic aluminium pergola before adding comfort features.
Inspection 02 · Inspection sheet 02
Read the roof description closely
“Roof included” is not a sufficiently detailed description. A pergola roof may be a fixed cover, a fabric-based solution or a louvred arrangement, and each affects the components, controls and drainage design that belong in the package. Establish exactly what sits above the frame, how it is supported and what positions or operating method apply to the selected product.
The roof also determines which accessories make sense later. A fixed arrangement may call for a different lighting route or side-screen layout than a moving system. If illustrations show an open, closed or partially shaded setting, ask whether that is an inherent feature of the chosen model or simply a presentation of an optional configuration.
- Request the roof material and operating description in writing, including any handles, motors, remotes or controls needed for the selected version.
- Check the drawing for roof overhangs, clearance around doors and windows, and the relationship between the roof edge and nearby trees.
If you prefer a straightforward covered garden structure, review a regular aluminium pergola with its roof specification stated clearly.
Inspection 03 · Inspection sheet 03
Make drainage a named item
Rainwater management deserves its own line in the specification, not a vague promise that the pergola has drainage. Look for the route water is intended to take from the roof edge to the ground, and consider where it will emerge relative to paving, thresholds, planting and neighbouring boundaries. The route must work with the finished garden as well as the pergola itself.
A drainage arrangement can involve integrated channels, outlets, downpipes or a connection planned on site. The relevant components may be part of a particular configuration, while below-ground drainage and connections are project work. Discuss this before the base is built, especially where existing falls, drains or patio levels restrict the available route.
- Ask where each outlet will be positioned and whether its visible finish, routing and termination are included in the product scope.
- Confirm responsibility for drains below ground, connections to existing systems and any alterations to paving required for water management.
Where the roof system channels water through the frame, explore the drainage detail on a bioclimatic pergola system alongside your patio plan.
Inspection 04 · Inspection sheet 04
Separate screens from the frame
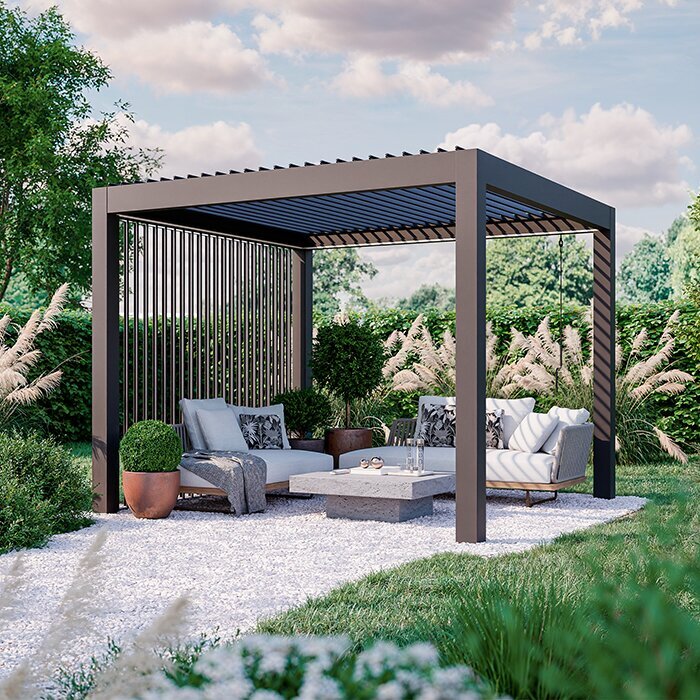
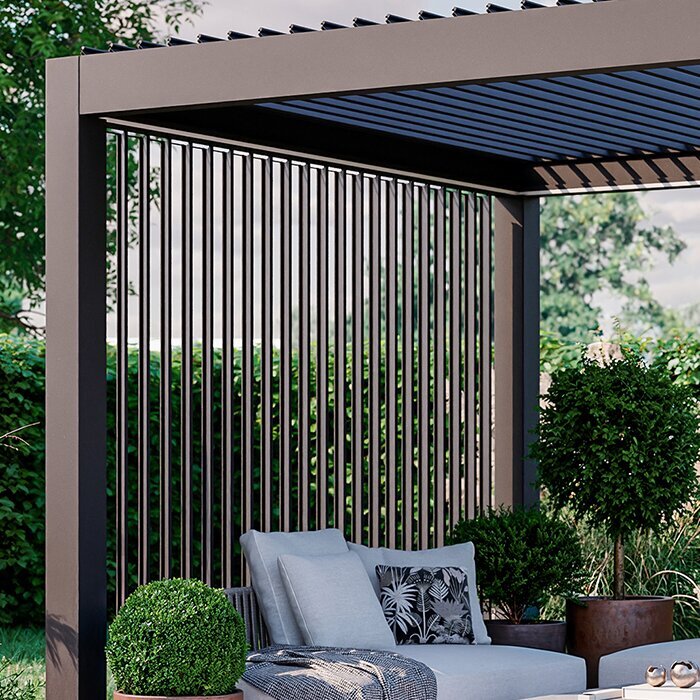
Side screens can transform how a pergola feels, providing shade, privacy or a degree of shelter from a breeze, but they should not be presumed to accompany every kit. Their number, location, fabric or panel choice, colour and operation need defining. A screen on one elevation can be more useful than screens on all sides if it addresses the afternoon sun or a close neighbouring view.
Think about screens as moving elements within a real garden. They need clearance from dining chairs, doors, planting and steps, and their cassette or guide arrangement must suit the chosen frame. If screens are intended for more than one side, map their positions on the drawing and check whether corner conditions or post locations affect the layout.
- Mark the sunward and overlooked sides of the patio before selecting screen positions; symmetry is not always the most comfortable solution.
- Ask whether screen cassettes, guides, handles or motor controls are included, and whether the chosen colour coordinates with the frame.
For a simple outdoor canopy, consider screen choices alongside a regular pergola frame rather than assuming they are standard.
Inspection 05 · Inspection sheet 05
Plan lighting and power early
Lighting is easier to integrate when it is planned with the pergola rather than after the patio has been finished. Decide what you need it to do: illuminate a dining table, create a softer evening atmosphere, make steps more visible or extend the use of an outdoor kitchen. The chosen purpose influences fixture position, switching and cable routes.
A kit may accommodate lighting without supplying every fitting or electrical connection. Ask whether lights, drivers, switches, remote controls and cable-management parts are part of the selected package. Electrical work should be scoped appropriately for the site, with responsibility for supply and connection made clear rather than left between product and installation teams.
- Create separate lighting zones for eating, circulation and ambience so one switch does not dictate every evening setting.
- Agree cable entry points before foundations or paving are completed, while keeping future servicing and access in mind.
For integrated evening use, discuss compatible lighting with a bioclimatic pergola roof during the design stage.
Inspection 06 · Inspection sheet 06
Treat installation as its own scope
A pergola kit and a completed installation are not automatically the same purchase. The installation scope can include survey work, delivery handling, assembly, site protection, lifting equipment, fixing to the prepared substrate and a final handover. Access through the house, narrow side passages, slopes and overhead obstructions can all affect what is practical on the day.
Groundwork is particularly important. Existing paving may look sound but may not be the appropriate structural base for the selected pergola. Before work begins, establish who assesses the substrate, who designs or prepares foundations where needed, and how levels are checked. It is sensible to confirm arrangements with the installer and obtain advice relevant to the individual site.
- Record access widths, gate restrictions, changes in level and overhead cables or branches before agreeing an installation approach.
- Separate product assembly from base preparation, electrical work, paving repairs and waste removal when reviewing the project scope.
If selecting a fixed-roof garden design, ask how installation is handled for a regular aluminium pergola kit on your particular base.
Inspection 07 · Inspection sheet 07
Check controls, operation and care
Where a pergola includes moving elements or powered accessories, the handover should cover more than the visual finish. Ask which controls are supplied, how they operate the selected functions and where instructions will be kept. Consider who in the household will use them, whether controls need a convenient location and how they fit into the way you use the terrace day to day.
Care requirements should also be understood before purchase. Leaves, pollen and garden debris can influence how often a roof, channel or screen area needs attention. Request the relevant care guidance for the exact configuration, including any operating advice for changing weather. A sensible maintenance routine protects both appearance and practical use over time.
- Confirm the supplied control method, the functions it operates and whether every intended accessory is included in that control arrangement.
- Keep product instructions accessible and include roof edges, channels and screen tracks in your regular garden-maintenance planning.
For powered roof and accessory discussions, choose a bioclimatic pergola configuration that matches your preferred level of control.
Inspection 08 · Inspection sheet 08
Finish with a complete schedule
The most reliable definition of complete is a schedule that lets you picture the installed result. It should connect the product name to dimensions, colour, roof type, posts, drainage, screens, lighting and controls. Then it should identify the site works and services needed to turn those components into a finished outdoor room. A polished rendering cannot replace this document.
Use the schedule to ask the final practical questions: What arrives as product? What is installed? What is excluded? What depends on the survey? If your property is subject to planning, conservation, leasehold or other restrictions, seek guidance from the relevant local authority, freeholder or professional adviser before proceeding. For insurance implications, check directly with your insurer.
- Keep the approved drawing, option list and service scope together, so changes to one item do not quietly alter another.
- Ask for exclusions in plain language, particularly electrical connections, foundations, drainage works, permissions and landscaping reinstatement.
A written scope makes it easier to configure a regular pergola package without confusing accessories with essentials.
Comparison
Core kit, options and project services
Use this evidence table to classify each element before you compare proposals. The exact contents depend on product choice and site conditions, so it is a prompt for questions rather than a promise that every item is supplied in every package.
| Item | Usually part of the product | Often selected or arranged separately |
|---|---|---|
| Frame and posts | Specified structural members and assembly connections. | Substrate assessment and site-specific anchoring method. |
| Roof arrangement | Chosen roof components and relevant operating parts. | Upgraded controls or additions shown only in visuals. |
| Drainage | Configuration-specific channels or outlets where specified. | Below-ground runs, connections and paving alterations. |
| Side screens | Only when named in the selected configuration. | Additional screens, special positions and control choices. |
| Lighting | Only fixtures and components expressly listed. | Electrical supply, connection and external circuit work. |
A practical pre-order process
A short planning sequence prevents a “complete kit” from becoming an incomplete project. Work through the product, the location and the people responsible for each task before confirming a configuration.
01
Measure the living area
Mark the proposed footprint, doors, pathways, dining chairs and garden boundaries. Include space around posts and screens, not merely the table beneath the roof.
02
Choose the roof approach
Decide whether your priorities are fixed cover, adjustable shade, daylight or a particular visual character. Then request the matching roof description and operating details.
03
Map water and power
Identify existing drains, changes in paving level and a realistic electrical route. Discuss these early, before base work or decorative landscaping makes alterations difficult.
04
List desired accessories
Write down screens, lighting, privacy measures and controls separately. For each, note its purpose, position, colour and whether it needs power or clearance.
05
Approve one scope
Compare the final drawing with the component list and service responsibilities. Resolve exclusions, site dependencies and unanswered questions before you regard the project as ready.
Pergola kit inspection checklist
Use this checklist alongside the drawing and quotation. A positive answer should be supported by a named component, clear responsibility or a site-specific note—not an assumption.
01. The product name, footprint, height, frame colour and post positions match the arrangement you intend to buy.
02. The roof type is named, with the relevant operation method and any associated controls clearly described.
03. Structural assembly components are identified, while substrate-specific fixings are addressed for your particular base.
04. The intended water route, outlets and responsibility for any below-ground works are recorded.
05. Every side screen is listed by position, colour, operation and any guides or control components.
06. Lighting fixtures, switching, cable routes and responsibility for electrical connection are separated clearly.
07. Installation, access equipment, groundwork and waste arrangements have their own agreed scope where relevant.
08. Any planning, leasehold, boundary or insurance questions are checked with the appropriate independent party.
Frequently asked questions
Does “complete pergola kit” normally include installation?
Not necessarily. A kit may describe the supplied pergola components, whereas installation is a service with its own site, access and base requirements. Ask whether survey, assembly, anchoring, electrical coordination and handover are included. If they are not, establish who will carry them out and how responsibilities meet.
Are side screens usually included with an aluminium pergola?
Side screens are commonly treated as accessories rather than an automatic part of the frame. Their value depends on orientation, privacy and wind exposure, so a tailored layout is often preferable. Check the quantity, positions, fabric or panel choice, controls and colour in the written schedule before assuming they form part of the kit.
Should drainage be included in the quote?
The proposed drainage approach should be described, but the precise division of product components and site works can vary. Ask where water leaves the pergola and who is responsible for any ground-level or below-ground connection. This avoids discovering late in the project that patio alterations or drainage works need separate planning.
Can lighting be added after the pergola is installed?
It may be possible depending on the product and site, but early planning is usually tidier and simpler. Agree intended light locations, cable routes, switching and electrical responsibility before installation. This helps avoid visible retrofitted cabling or disruption to new paving, while keeping the selected lighting scheme purposeful.
What should I ask about the base?
Ask who assesses the existing surface, whether it is suitable for the selected configuration and what preparation is needed if it is not. Clarify levels, drainage, fixing locations and responsibility for foundations or paving work. An installer or relevant professional can advise on the conditions present at your property.
Do I need to check planning or insurance?
Requirements and policy terms depend on the property and project. Before committing, check planning-related questions with the relevant local authority and any leasehold or conservation restrictions with the appropriate party. Contact your insurer directly to understand whether you need to notify them or provide details of the proposed work.
Review your configuration
A complete kit is a clear scope
The right pergola package is not defined by the longest accessory list. It is defined by clarity: a selected frame and roof, a documented drainage approach, named controls and accessories, plus an honest account of the work needed on site. That clarity makes the finished space easier to plan and the proposals easier to assess.
Use Bloomcabin product information as the starting point, then make the schedule specific to your garden, terrace and priorities. When each inclusion, option and service has an owner, you can choose an aluminium pergola with greater confidence and create an outdoor setting that feels considered rather than improvised.
Build your questions around the frame, roof, drainage, accessories and installation scope before requesting your final specification.
