







Spacious garden sauna with terrace
Osa 350 outdoor sauna – 3.5 × 3.5 m with panoramic glazing and thermo-wood terrace
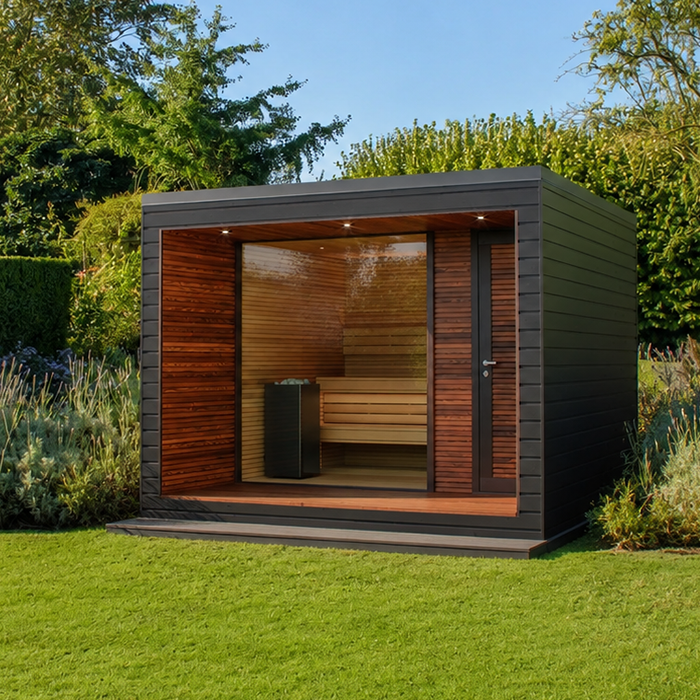
The Bloomcabin Osa 350 is a spacious outdoor sauna measuring approximately 350 cm wide, 350 cm deep and 266 cm high. Across 12.25 m², it combines the sauna room with an integrated terrace of oiled thermo-wood. Panoramic glazing admits ample daylight and opens up views of the garden. Thermally treated timber, the insulated construction and lighting coordinated for the interior and terrace make the Osa 350 a distinctive outdoor retreat. It suits anyone seeking more than a single sauna cabin and wishing to create a garden sauna area for lasting use.
Before choosing a site, check the technical and logistical requirements in full. The foundation, electrical connection and delivery can only be planned reliably once the Osa 350’s position and orientation are fixed. Work from the documentation for your selected version and coordinate every preparation stage early with the relevant qualified contractors. To compare different designs and their space requirements first, explore further models in the Bloomcabin sauna range.
Dimensions and features
Osa 350 at a glance
The external dimensions of approximately 350 × 350 × 266 cm describe the Osa 350 structure itself. When assessing the site, also consider how terrace access connects to existing paths and garden areas. Mark out the complete footprint in the proposed location and add adjacent walking and access zones to the site plan. This helps you judge proportions realistically in relation to the house, boundaries and planting, and identify possible pinch points before the site is finally selected.
350 × 350 × 266 cm
With a footprint of 12.25 m², the Osa 350 has the presence of a self-contained room in the garden. The key question is therefore not only whether it fits the intended area, but whether its proportions work with the property and neighbouring garden spaces. Near the house, views from indoor rooms and short, safe walking routes between home, sauna and garden also matter. A well-considered connection makes moving between sauna room, terrace and living area easier.
Thermo-wood terrace
The integrated oiled thermo-wood terrace creates a clearly defined area in front of the sauna room. Shoes can be left here, towels set aside and short breaks taken between sauna sessions. Plan the adjoining garden so loose soil and splash water do not unnecessarily reach the timber. A safe, walkable route to the house makes the sauna easier to use after dark and in wet weather.
Panoramic glass front
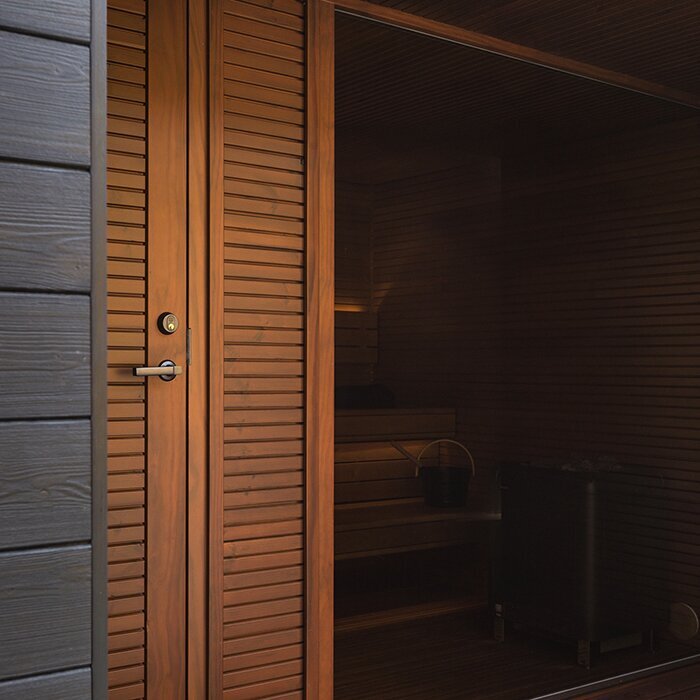
The extensive glazing brings generous daylight into the sauna room and makes the chosen garden view an important part of the sauna experience. Orient the panoramic front towards an area you will enjoy looking at while using the sauna. Hedges, walls or restrained planting can frame the view and integrate the sauna into the garden, but should not stand directly in front of the glass.
Digital control and Wi-Fi option
The Osa 350 is designed for an electric sauna heater with digital controls; depending on the selected equipment, a Wi-Fi option may also be available. Before ordering, confirm whether the heater, controls and Wi-Fi function are included in your chosen delivery specification. The documents for that version are decisive. Electrical requirements depend on this configuration and must be professionally prepared at the installation site; an ordinary garden socket is not sufficient.
Space concept
Sauna room and terrace as one retreat
The Osa 350 links the sheltered sauna room directly to the outdoor area in front. This creates an easy sequence: arrive via the terrace, enter the sauna, step outdoors between sessions and then return to the house by a short route. Because the terrace is an integral part of the sauna, it should not be crowded with belongings. Position furniture and movable equipment so the door and walkways remain clear, the glass front stays unobstructed and the exterior lighting can do its job.
It is worth viewing the garden at different times of day when deciding on orientation. The panoramic front can emphasise an attractive landscape aspect, but it also makes the illuminated interior visible from outside in the evening. Check not only the view from the sauna, but also possible sightlines from paths, windows and neighbouring areas. Screening should stand clear of the structure, avoid unnecessarily restricting airflow and retain access for cleaning the glazing.
The Osa 350 is especially effective on properties where its size is deliberately incorporated into the garden design. Clearly defined paths and an uncluttered setting prevent the structure from feeling cramped. Low beds or restrained planting can shape the transition between terrace and garden. Vigorous plants immediately against the façade or roof, however, make cleaning, inspection and maintenance harder. The site should therefore offer privacy and convenient access without covering the exterior sides needed for upkeep.
Timber surfaces
Materials for sauna room, façade and terrace
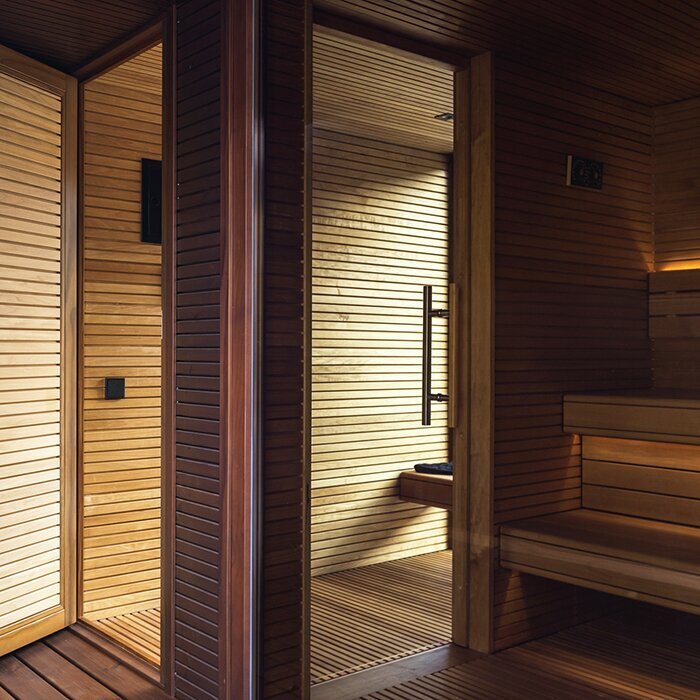
The external cladding is made from lacquered, thermally treated softwood, while the pale timber lining inside the sauna creates a warm, calm atmosphere. The two areas face different demands: moisture, sunlight and dirt affect the outside, while heat, humidity, skin contact and regular sauna use are key indoors. Cleaning and care must therefore suit each surface. Aggressive all-purpose cleaners and unsuitable coatings can alter the colour and finish.
Thermal treatment improves timber’s suitability for changing outdoor conditions, but does not make it maintenance-free. Colour changes, minor surface marks and natural grain variation are normal in wood. Inspect surfaces regularly, paying particular attention to places where water could remain for longer. How often the oiled terrace needs retreatment depends on use and exposure. Before applying a suitable care product, timber must always be clean and dry; follow the manufacturer’s relevant care instructions.
Insulation and roof
Insulated walls, roof and floor for regular sauna use
The Osa 350 has insulated walls, roof and floor. This effectively separates the heated sauna room from the outdoor environment. How quickly the interior heats up and how temperature develops during use still depend on the starting temperature, ventilation, frequency of door opening and heater operation. Insulation is therefore no substitute for correct ventilation or settings suited to the installed heater. Follow the documentation for the specific sauna configuration and heater when heating, operating and ventilating.
The EPDM roof with an overhang provides the Osa 350’s upper weather protection. During site planning, consider where roof water can drain so it does not collect by the foundation, in front of the entrance or on adjacent paths. A position directly beneath heavily overhanging branches increases leaf and twig debris and makes maintenance more difficult. Keep the roof edge accessible for later inspections. The roof is not intended as a storage surface, for walking on or for occupancy.
Lighting concept
Separate lighting for terrace and sauna room
IP65 LED spotlights illuminate the terrace and help with orientation at the entrance after dark. Step edges, objects left behind and wet areas are easier to spot, but lighting does not replace clear, safe walkways. Arrange access so nobody needs to walk through beds or over uneven ground to reach the sauna. Check the lighting effect after dark and design the surroundings to minimise unwanted light entering living rooms or falling onto neighbouring properties.
The sauna room has dimmable LED strips behind the backrests and beneath the benches. This indirect light avoids a dominant ceiling light and can be adapted to the activity. Brighter light is useful for entering, cleaning and tidying; a lower setting creates a calmer atmosphere during a sauna session. Use lighting and controls only as intended. Because heat, moisture and electricity are combined, work on cables, fittings or controls must only be carried out by a qualified professional.
Heater and operation
Match electric sauna equipment professionally to the Osa 350
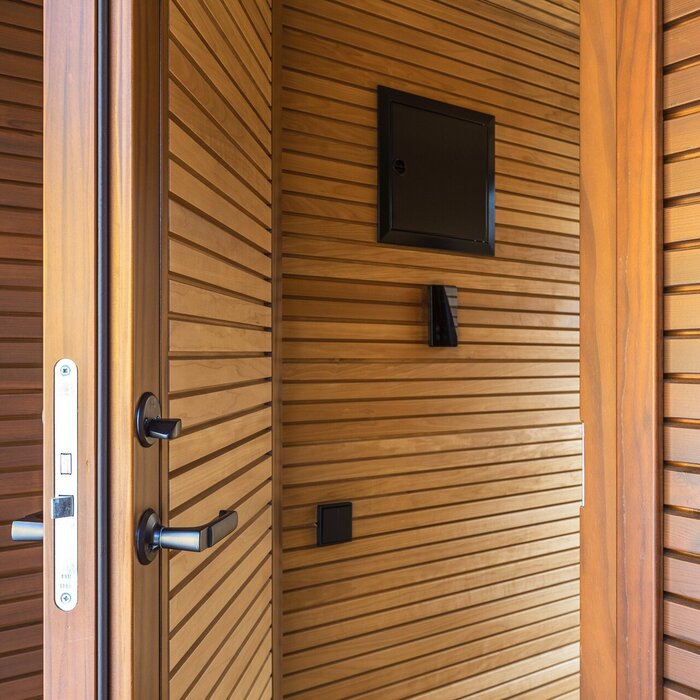
The sauna heater, digital control and sensors form a technically coordinated system with the sauna room. Their installation and setup depend on the chosen configuration. Required clearances, connection, operation and use are governed by the Osa 350 product documents and the instructions for the heater actually fitted. Have these documents ready before installation and arrange for the planned version to be checked by a competent professional. Components should not be altered independently, as unauthorised changes can affect intended function, operation and proper installation.
The digital control brings together the intended operating functions for the sauna heater. If your chosen configuration includes a Wi-Fi option, its requirements and setup steps must also be followed. Familiarise yourself with all displays, settings and shut-off options before first use. Even when using remote operation, only switch on the heater after checking on site that the heater area is clear and that no towels, cleaning materials or other items are on or directly beside hot parts.
A qualified, locally registered electrical contractor must undertake all electrical planning. This includes heater output suited to the chosen configuration, cable routing, protection, controls and proper connection. Give the contractor the Osa 350 technical documents and selected heater specification early. Supply lines and connection points can then be prepared in the correct place before assembly and commissioning. Temporary extensions or improvised connections are unsuitable for a permanently installed outdoor sauna. If there is damage, an unusual smell or an apparent electrical fault, keep the installation switched off until the cause has been professionally established.
Site, delivery and assembly
Prepare the location, foundation and unloading position fully
The Osa 350 needs a level, stable base accurately aligned across the entire footprint. A concrete slab is considered the ideal solution. Before it is built, check position, elevation and external dimensions against the product documentation. The base must support the structure permanently and must not encourage distortion. Unevenness cannot be sensibly corrected with loose packing or point support alone. Anyone constructing the foundation should receive the model information and planned orientation. Confirm the project’s approval route with the relevant municipality before installation.
Preparing the site also includes effective drainage for rainwater and cleaning water. Falls and adjacent surfaces must not direct water towards the building or allow it to pool against timber components. Leave sufficient working space around the Osa 350 so the glass front, façade, roof edge and technical areas remain accessible. Fixed privacy screens, dense planting and furniture that is difficult to move can make cleaning and maintenance unnecessarily hard. Plan such garden features only once the clearances needed for assembly and upkeep are certain.
A crane or forklift is required for unloading. Check the entire route from public access to the intended unloading position. Entrance width, bends, load-bearing capacity, slopes, gates, branches, overhead lines and other obstacles can affect use of the delivery vehicle and lifting equipment. Coordinate delivery early with the responsible delivery or specialist contractor, who will make the final assessment of conditions on site. Standing areas for the vehicle and lifting equipment must also be suitable and accessible; an apparently clear area is not automatically strong enough or large enough.
From assembly to commissioning
Install prefabricated modules correctly and check the completed build
The Osa 350 is assembled on site from prefabricated modules. Keep the whole assembly area clear, protect delivered parts from dirt and damage, and ensure all prepared connection points remain accessible. Packaging and components must not obstruct manoeuvring routes, lifting operations or work on the foundation. During assembly, only the model-specific installation instructions apply. Additional drilling, penetrations or changes to load-bearing, insulated or sealed components should only be made after professional clarification.
Before assembly, inspect the delivery for visible transport damage and document any observations clearly. Once installation is complete, inspect all accessible areas together. Doors must open and close freely, glass surfaces must show no visible damage, and cladding, fittings and connections must be complete and neatly installed. The terrace should also be clean, clear and safe to walk on. Technical functions are checked only after correct professional connection and in accordance with the relevant instructions. Keep the sauna, heater and control documents together and readily available afterwards.
Before regular use begins, the interior must be completely fitted out and cleaned, and all technical work completed. Before heating, take time to become familiar with the digital control displays and settings, ventilation options, lighting and shut-off functions. Also check that the door and access route can be used without obstruction. Everyone using the Osa 350 should know how to leave the sauna and stop operation at any time. Explain these basic operating points before using it together.
Everyday use
From preparation to drying after a sauna session
Prepare the sauna session fully before heating begins. Benches and floor should be clean and clear; remove damp textiles from the previous use from the interior. Place fresh towels and drinks within easy reach without blocking the space around the heater. Leave wet or heavily soiled shoes on the terrace to reduce dirt and moisture entering the sauna. Set the lighting first so benches, floor and controls are clearly visible. Dim the light only once the interior is prepared and everything has been placed safely. Use the sauna only for as long and as intensely as feels comfortable, and leave the room if you feel unwell. Where several people are present, they should look out for one another. Sauna infusions may only be carried out as described in the installed heater’s instructions. Unsuitable liquids, excessive quantities or accessories placed on hot parts can damage the heater and must not be used. Between sauna sessions, the terrace offers an outdoor area directly at hand. Keep its surface free of towels, shoes and other trip hazards, especially when wet. In cool weather, make the temperature change deliberately and according to your own comfort. Because the terrace is open, a weather-appropriate access route is important. Keep a towel or bathrobe handy without blocking the walkway or door.
After the final sauna session, remove loose dirt and take all damp towels, floor coverings and other textiles out of the interior. Use the provided ventilation options so the sauna room, benches and other timber surfaces can dry fully. Damp items must not remain in the closed sauna until the next use. Once it has cooled, check that the interior is dry and that no textiles or other items have been left behind. The Osa 350 is then clean and ready for the next sauna session.
The terrace serves as both a transition zone and an outdoor surface. Remove sand, soil and leaves while dry where possible, before they settle on the timber with moisture. Do not allow standing water to remain on the wood for extended periods. Lift movable furniture, mats and containers regularly so trapped moisture can be noticed early and the area cleaned. Items that collect water or permanently obstruct air circulation are not suitable for a fixed position on the terrace.
Cleaning and care
Care for sauna timber and floor grates correctly
How do I clean the interior gently?
Remove hair and loose particles from benches, floor and floor grates as needed. Wipe suitable surfaces with little water and a product appropriate for sauna timber; avoid soaking the wood and using aggressive cleaners. Remove floor grates only in line with their construction and dry them completely before refitting. Also check hard-to-see areas under benches, without opening or altering electrical components.
Exterior surfaces and glass
Care for glass front, façade timber, terrace and roof
Clean the panoramic glass with a suitable glass cleaner and soft, clean cloths. Abrasive sponges and other scratching tools are unsuitable. Prevent cleaning products from running unnecessarily onto adjoining timber surfaces. At the same time, clean frames and edges and check visible fittings for dirt or noticeable changes. Damaged glass and components that do not function correctly should be assessed professionally. Do not make unauthorised adjustments to fittings or glass components without appropriate instructions.
External cladding and the oiled thermo-wood terrace each need care suited to their existing surface treatment. Clean the timber gently first and allow it to dry completely before applying an intended care product. Test unfamiliar products in an inconspicuous place and follow the relevant manufacturer instructions. A product suitable for the terrace is not automatically suitable for lacquered exterior cladding. Use additional coatings only where they are compatible with the existing treatment. To compare the Osa 350 with other sizes or designs, see further models in the Bloomcabin outdoor sauna range.
Check roof and surroundings
Remove leaves, twigs and loose deposits from the EPDM roof without damaging the membrane with sharp tools.
Regularly inspect the roof edge, visible connections and water run-off from ground level for noticeable changes.
Trim plants so they do not continually rub against the façade, glazing or roof, and inspection routes remain clear.
Also inspect the terrace and exterior timber after unusual exposure, and have visible damage professionally assessed.
Keep drainage areas clear so rainwater does not stand at the foundation or directly in front of access.
Record completed care and technical work to make the sauna’s condition easier to track over time.
View the Osa 350 in the shop