
Planning a Comfortable Winter Route From House to Sauna
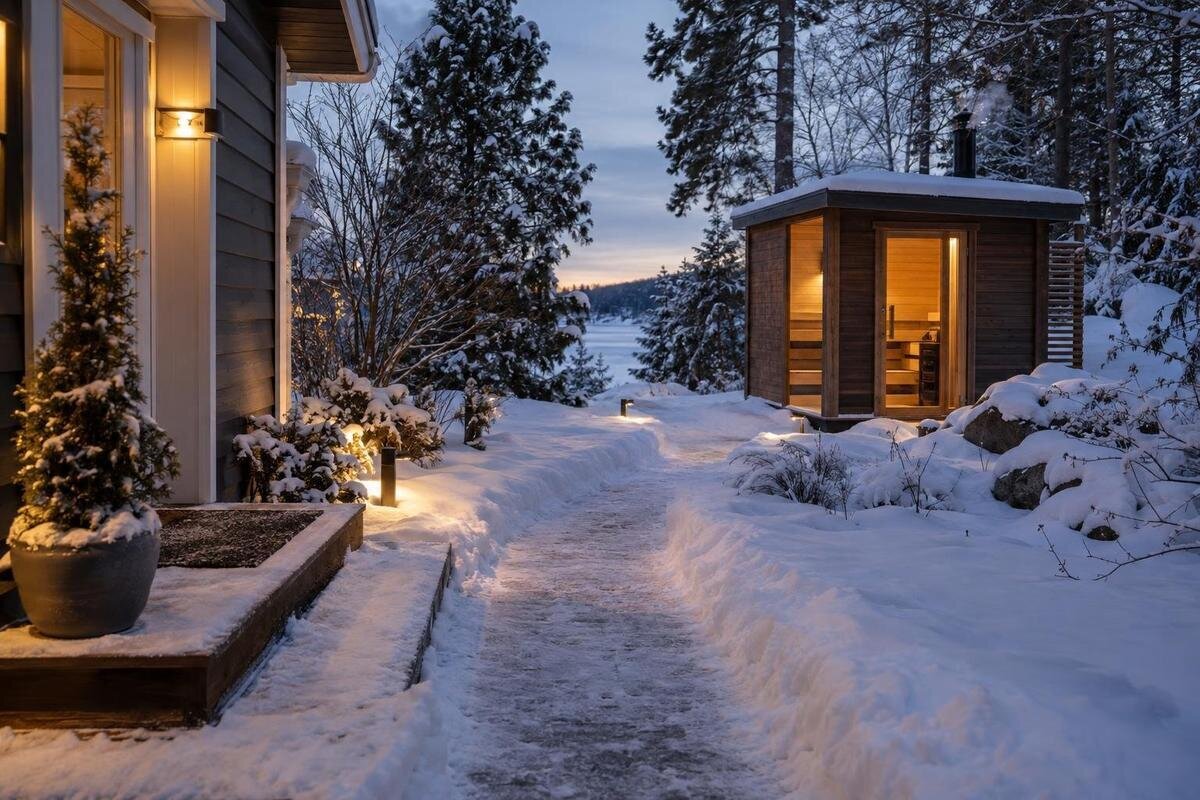
Winter sauna access
An outdoor sauna can be close to the house and still be awkward to reach after a snowfall. The walk includes more than the distance between two buildings: the house threshold, changes in grade, the place snow gets pushed, roof drip lines and room to use the sauna door. In a Canadian winter, thawing and refreezing can complicate a route just as much as fresh snow. Plan it as a maintained part of the property, with a surface, shelter and clearing routine that fit how your household actually moves between the two doors.
01
Map the route from doorway to doorway
Start with the house door you use most often and the sauna's actual entrance, rather than drawing a straight line between the buildings' centres. Walk the proposed line on the property and mark fixed obstacles: stairs, retaining edges, gates, garden beds, downspouts, vents, service access and places where water or drifting snow already collects. Note where the yard is open to wind, where snow tends to bank, and which surfaces become wet during a thaw. A route that bends slightly to avoid a low point or roof drip edge may be easier to maintain than the geometric shortest line. Include the return trip and landings at both thresholds; a path that reaches the sauna but leaves no room to open the door or step aside is incomplete. Photographs of trouble spots in wet weather can help distinguish persistent drainage issues from a temporary snowbank.
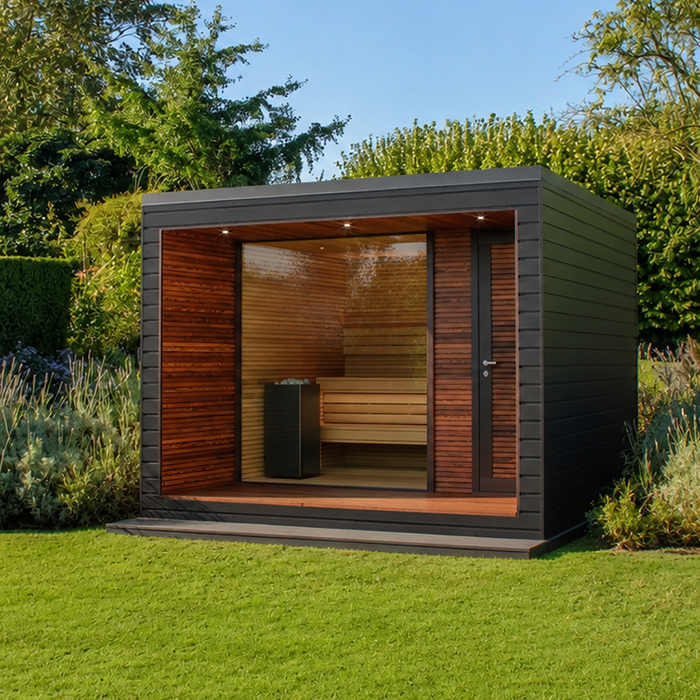
Keep listed floor area separate from the outside footprint and approach clearance. The Thermowood Barrel Sauna LCF 300 listing gives a floor area of 6.89 m²; use the current manufacturer drawing to establish exterior dimensions and entrance position. Add the door swing and landing to your sketch, then measure the walk between the two thresholds. Label building, landing and path measurements separately so the space needed outside the sauna remains clear. Reserve space for snow storage and drainage on the same sketch rather than fitting them around the finished route.
Balance a direct walk with exposure
Keep a winter route as direct as the site allows, because every extra turn and surface transition adds space to clear and another place for snow to drift or meltwater to collect. Direct does not mean exposed: a short line under a roof edge that sheds water across the pavement can be less practical than a slightly longer sheltered route with good drainage. Observe where wind-driven snow gathers and whether driveway plowing or drifting narrows the approach. Avoid routing people across an uncleared lawn or temporary boardwalk just because it shortens the summer walk. Also consider whether you leave from a mudroom, deck or side entrance; wet boots and a carried robe may make a nearby place to pause useful, but it should not narrow the path. If two routes seem possible, compare them after a snowfall: which can you clear without pushing snow into a doorway, garden bed or drain?
Consider what you carry: a robe, towel, water bottle, footwear or supplies. You should be able to reach both doors without stepping over stored items or balancing at a narrow point. The Thermowood Barrel Sauna S 140 listing reports a floor area of 1.93 m²; plan the outdoor landing separately, including somewhere to set items down without blocking passage. Allow for people travelling in both directions. If someone uses a mobility aid or needs a steadier surface, discuss turning and threshold requirements with them; seek qualified advice where new construction or grading is involved.
02
Allow room for snow clearing and movement
Set width according to the clearing method and use, not a generic online figure. Measure the shovel or snow-clearing equipment you will actually use, and allow room to push or move snow aside without leaving a raised ridge on the walking line. Include space to turn at bends and at the sauna entrance. A narrow channel can look tidy on a plan but leave nowhere to place snow; piled banks can squeeze the usable width further as winter goes on. Keep the route broad enough for people to pass obstacles and carry the items they commonly bring, while preserving access to doors, gates, drains and steps. Use the tightest pinch point as the test; an average width can hide a blocked turn or landing.
Include landings and transitions when setting the width. Allow extra space where someone turns, crosses a raised threshold or stops to open a gate or door. The HC-150 model listing identifies 2.97 m² as floor area; use its exterior drawing for building placement and mark the walkway dimensions separately. Show doors in their open position where their swing takes up space, and check that your clearing equipment can reach the entire landing. Have new steps, ramps or retaining edges reviewed by a qualified local professional rather than guessing at grades or structural details.
Shelter the most exposed parts of the route
Covering every metre is not essential for comfort. A roofed stretch at the house exit, along the most exposed section or immediately outside the sauna may reduce direct exposure to snow and wind, while leaving other parts open. Choose cover by observing how wind-driven snow and rain arrive at the site, not by assuming a canopy will keep the whole path dry. A roof edge can concentrate meltwater at exactly the spot people step; locate the walkway beyond that drip line or give water a planned route away from it. Keep the door approach clear enough to open and stand while handling the latch or footwear. A short, well-placed cover may be easier to maintain than a roofed corridor running the whole distance. Consider the change between covered and uncovered ground too, where snow may blow in.
Treat a canopy or roof as a separate structure with its own site and snow-load requirements. Do not assume a pergola, garden shelter, sauna roof or decorative cover can carry local winter snow or safely connect to another building. Have the supplier, builder or a qualified professional specify the design, including wind exposure, drainage and snow shedding. The HC-225 product page lists 4.4 m² of floor area, not roof dimensions or attachment permissions. Follow the sauna's instructions for any proposed connection, and leave access to maintain the shelter's drainage features.
03
Choose a surface for winter upkeep
Choose the walking surface for winter upkeep as well as appearance. A firm, stable path with a finish intended for outdoor use gives you a defined line to clear; the right option depends on site drainage, installation and how the finish behaves when wet and cold. Pavers, concrete, stone and exterior decking each have different joints, edges and maintenance needs, so compare the actual surface specifications rather than choosing by name alone. Ask how the selected finish handles freeze–thaw exposure and what preparation it needs. No ordinary path finish should be treated as ice-proof. A texture that helps under wet conditions may still be covered by packed snow or a thin glaze of ice, while a surface that is easy to shovel can become slippery when water freezes on it. Ask the installer how snow clearing, sweeping and repairs affect upkeep.
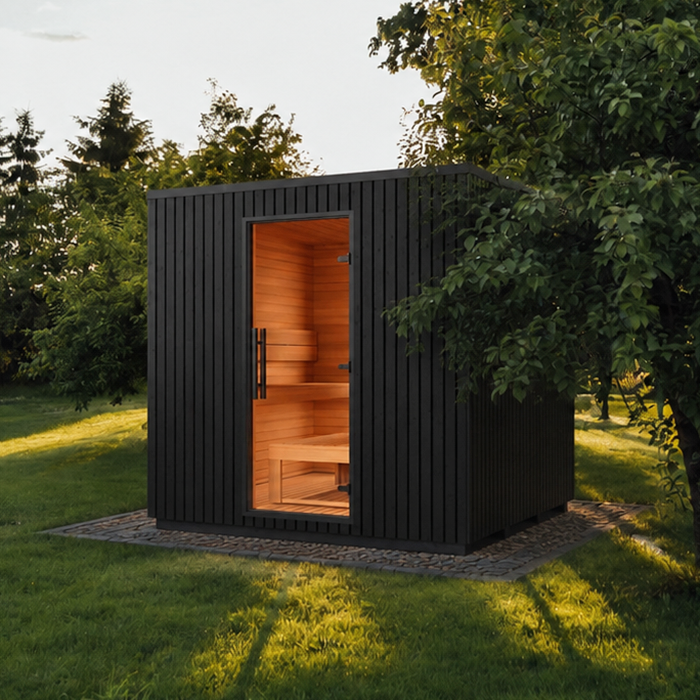
Check transitions at decks, paving, steps and doorways. Lifted edges, loose pieces or abrupt level changes can catch a shovel and interrupt a clear route. Loose gravel may migrate or be difficult to clear with some tools. Before using grit or de-icer, check compatibility with the surface, nearby planting and sauna materials. When budgeting for paving around the N-210 sauna, measure the route and landings separately from its listed 4.43 m² floor area. Confirm that the finish suits your clearing method, and consider how a repaired section would meet the existing surface.
Keep runoff and meltwater off the path
Trace where water goes during snowmelt, rain and a thaw followed by a freeze. Check downspouts, roof edges, low spots, existing drains and the ground between the house and sauna; a small stream across a frequently used path can repeatedly freeze. Avoid locating the walking line beneath a concentrated drip or where runoff naturally ponds. Plan so water from either building does not discharge across the route, and do not simply move the problem toward the other building or a neighbouring area. If drainage is unclear, observe the site through a wet spell before finalizing paving, or ask a qualified landscape or drainage professional to assess the levels. Also note where snow piles will melt in spring. Keep drain grates reachable after snowfall, rather than hiding them under a pile or stored item.
Include snow-storage spots in the drainage review. Piles over drains, against thresholds or where meltwater returns across the path can create work later. When placing the N-250 model, use its current exterior plan and on-site measurements to locate building edges and runoff points; its listed floor area is 5.27 m². Get site-specific advice for grading, drainage changes or work near foundations. Check the path's installation guidance so its base and joints suit the site, and note gutters and discharge points that will need clearing.
04
Plan where cleared snow will go
Plan snow storage around the clearing method you will use. A shovel needs somewhere to push and stack snow; a snowblower or plow needs room to turn and an unobstructed route. Mark storage areas away from entrances, gates, drains and the return path. If considering the LC-260 sauna, keep this outdoor working space separate from its listed 5.12 m² floor area on your sketch. Avoid bottlenecks where snow is difficult to remove. If a contractor clears the driveway, account for where their equipment travels and where their snow piles could block the sauna path.
Decide who clears the route and how they will reach the tools before each use. Store shovels, scrapers and traction materials where they are accessible from the house without crossing the uncleared stretch, and keep them off the walking line. Account for any snowplow berm at the driveway and for banks that grow over successive clearings. Reserve room to move those banks later. In a shared household, agree which doors and landings are cleared first, where snow can be piled and when accumulated banks need moving, so one person's work does not block another cleared section.
Treat ice as a separate maintenance task
Snow removal and ice management are different jobs. A cleared path can still develop ice after freezing rain, runoff, a thaw during the day or overnight refreezing. Inspect the full route, both landings and the door threshold, not only the central strip; look for glaze, compacted snow and water coming from above. Remove loose snow before it is pressed into a slick layer where practical, and keep enough light to notice changes in the surface on dark winter evenings. Exterior lighting can make the route easier to see, but it does not improve traction; plan it separately and use fixtures intended for the location. Check transitions between sunny and shaded sections after a thaw, since conditions can differ across a short stretch.
Use traction treatments only after checking that they are compatible with the paving, nearby plants and materials around the sauna, and follow the product label. Grit can add a rougher layer temporarily, but it may need replenishing and eventual cleanup; a chemical de-icer can affect some surfaces or planting, so do not treat any one product as universally suitable. Keep a scraper or other suitable tool available, but avoid methods that damage the path finish. No treatment guarantees safe footing in every condition. If ice repeatedly forms in one place, look for the cause—roof drip, blocked drainage or a low spot—and address that source where possible instead of relying solely on repeated applications.
05
Coordinate the path with the sauna's actual layout
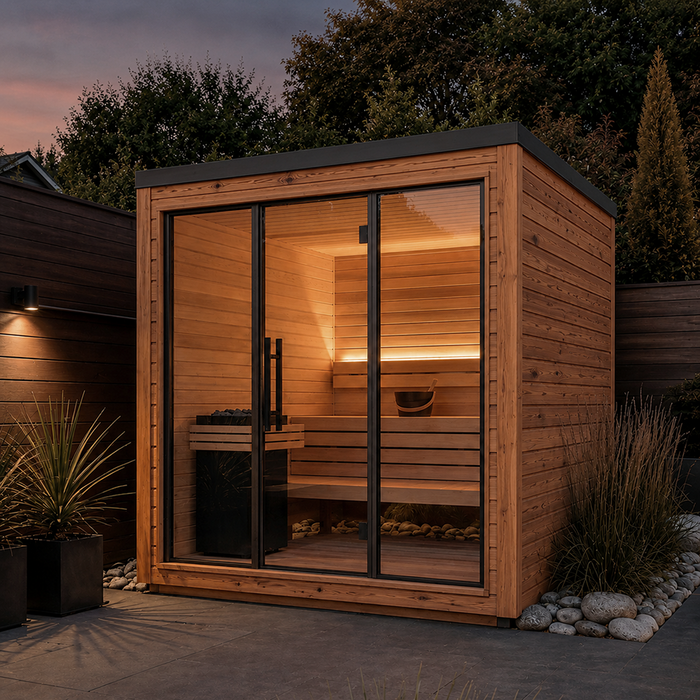
Coordinate the route with the exact sauna configuration and installation documents. Confirm the entrance side, exterior dimensions, required clearances and service access rather than estimating from a photo. The HCF-300 Thermowood Barrel Sauna listing reports 6.89 m² of floor area; use the exterior drawing to mark its building outline, threshold and door swing alongside the path, landings, shelter and snow storage. Check the approach needed for delivery and installation before committing to permanent paving. Keep that access distinct from the everyday walking route where the two have different requirements.
Treat the walking surface and sauna base as separate design decisions. The path should reach a usable threshold without covering openings or obstructing access required by the manufacturer. Verify whether steps, lighting or a canopy are supplied before coordinating the site. A threshold mat must remain stable, avoid collecting water and leave the door free to open; it is not a substitute for drainage. Ask the installer what working space is needed during setup and later maintenance, and keep that space accessible rather than assuming the walkway alone will be sufficient.
Test and review the route through winter
Before construction or moving heavy materials, mark the proposed route with a temporary line, cones or removable markers. Walk it in both directions, open every door and gate, and carry the things you usually bring. Check whether another person can wait clear of the door swing without standing in snow. If conditions allow, test after snowfall, during a thaw and after freezing; the same spot may behave differently each time. Note whether planned snow piles would block a drain or narrow a turn. A route that works on a dry summer day may still need changes for winter.
Set a simple seasonal inspection routine around conditions rather than assuming a fixed interval suits every property. Before winter, check the surface, edges, steps, drainage outlets, downspouts and lights; after heavy weather or freeze–thaw, look again for settlement, ponding, broken edges or fresh ice sources. Clear debris that impedes drainage and repair changes that make the walking line uneven, using material-specific instructions or qualified help where needed. A short note about where ice appears or snowbanks grow will make adjustments easier next season. The aim is not to eliminate winter conditions but to keep the whole door-to-door route understandable, passable and manageable with the maintenance you can sustain.
Frequently asked questions
How close should the sauna be to the house?
There is no universal distance. Choose a practical door-to-door route while preserving the clearances and service access in the sauna's current installation documents. Consider snow drift, drainage, installation access and how much pathway your household can maintain. A slightly longer walk may be easier to use if it avoids a persistently wet or exposed stretch.
Does the whole walkway need to be covered?
No. Shelter can be most useful at an exposed section or near a doorway, where people pause and handle the door. A partial cover still needs a plan for wind-driven snow and roof runoff; it does not guarantee a dry or ice-free path.
What surface works best for a winter sauna path?
There is no single best surface for every property. Look for a firm, stable finish intended for outdoor use, and compare drainage, joints, maintenance and compatibility with your clearing method. Any surface can become icy, so plan for snow removal and appropriate ice management as well.
How wide should the route be?
Set the width for the clearing tool or machine you will use, the people and items moving along it, and the space needed at turns, gates and doors. Check the narrowest point and the landings rather than relying on the average width. A fixed measurement cannot account for every site or household.
How can I prevent ice from forming?
You may not be able to prevent it in every winter condition. Reduce recurring sources by managing roof drips, runoff and low spots, and clear snow before it compacts where practical. Inspect the route after thawing or freezing rain, and use only treatments compatible with the surface and nearby materials.
Winter comfort comes from a route that works as one connected system: clear entrances, a surface you can maintain, enough room for snow removal, and water directed away from the walking line. Mark the route on the property, verify the sauna's actual layout, and consider how it behaves after snow and thaw. A practical design is one your household can keep passable for the full season, not simply the shortest line on a summer site plan.
