
Sauna Bench Levels: What to Review Before Buying
SAUNA BUYING GUIDE
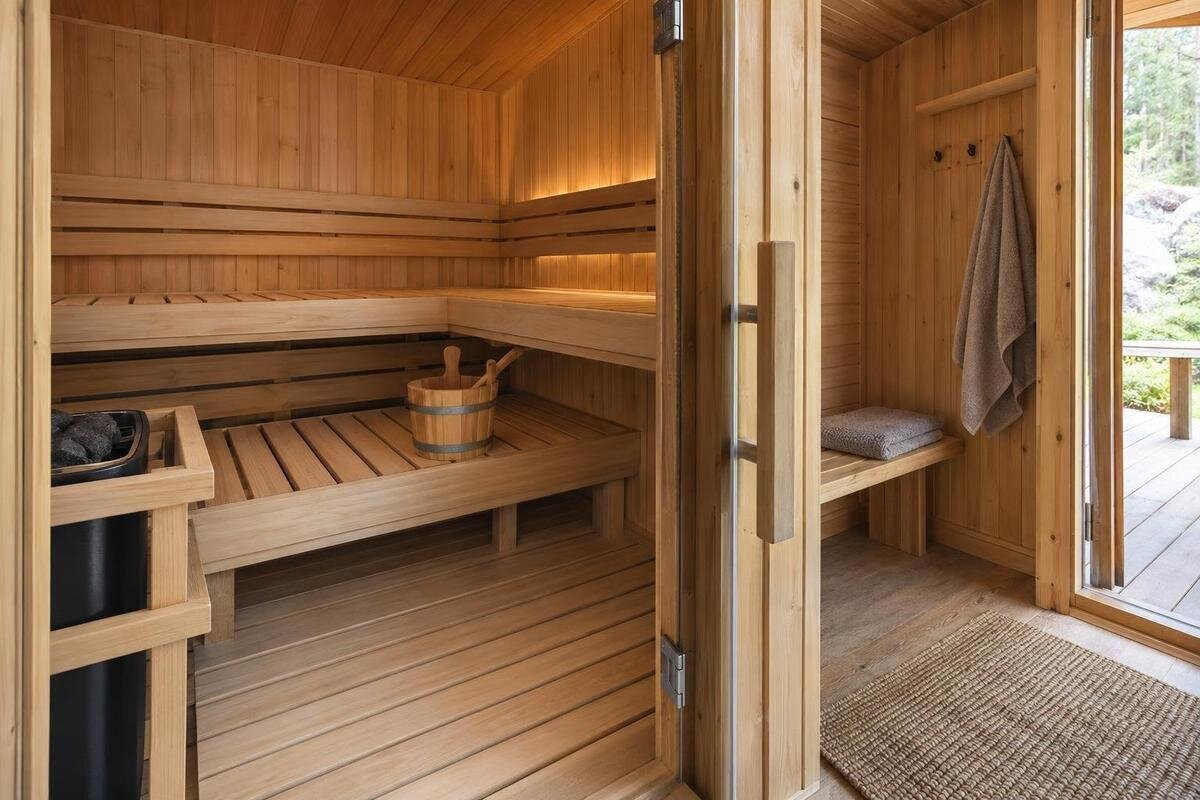
Bench levels affect more than the appearance of a sauna interior. The height and depth of each seat, its position under the ceiling, and the route between benches shape who can sit where and how easily people share the cabin. A product photograph may show an arrangement, but perspective can hide usable dimensions; a floor-area figure cannot reveal the interior layout. Before buying, compare a dimensioned plan and elevation for the exact model and configuration with the people who will use it. There is no single bench height or number of tiers that suits every cabin.
01
Why bench levels change how the cabin is used
Bench height is not just a visual detail: it places a seated person in relation to the floor, ceiling and any other seat. That affects getting on and off, placing feet and shifting between positions. Height and location also shape where a sitter is in relation to the heater and the rest of the room, but no one elevation guarantees a particular experience. Ceiling shape, heater placement and the manufacturer’s layout instructions matter. Treat each level as part of the whole interior arrangement, not as an isolated comfort claim or specification. Two layouts can occupy a similar area yet place seats differently, so area alone cannot answer a height question.
Decide who will use the cabin and how they expect to sit before comparing tiers. One person may want an upright position; another may value room to recline, stretch their legs or change posture. Those preferences depend on usable bench length and depth as well as headroom, not simply the number of visible seat surfaces. A raised seat may feel natural to one user and awkward for another; a short lower surface may function as an access step or foot support rather than a full sitting place. Note the likely postures and regular group size, then see whether the drawing gives you enough information to assess them.
Read the plan and elevation together
Read the plan alongside a side elevation or cross-section. A plan shows how the benches sit in relation to the entry, heater and other fixtures, but it cannot show seat height. An elevation can show the difference between seating surfaces and the ceiling above them, yet may not reveal usable bench length or clearance beside a seat. The HCF-300 model listing identifies a Thermowood Barrel Sauna and states an area of 6.89 m²; that figure does not identify its internal bench levels. Request current, dimensioned views for the exact version under consideration instead of judging from a perspective image. If only one view is available, ask what the missing view would establish.
Check that the drawing names the same model and configuration as the product page or quotation. Find the units, dimension arrows and reference points. A floor-to-seat dimension differs from a component size, and an outside dimension is not usable interior clearance; a number without its reference point can be easy to misread. If the drawing is illustrative or has no dimension labels, use it to understand the arrangement, not to estimate fit. Ask for the manufacturer’s current plan, elevation and assembly instructions, and confirm which drawing applies to the supplied configuration. In a curved or sloped cabin, also check where a measurement is taken, since interior space can vary by location.
02
Compare seat height, depth and headroom
Separate the height of the finished sitting surface from the height of the frame or support beneath it. Ask whether the measurement ends at the top surface where a person sits, and whether the floor and bench dimensions refer to assembled, finished surfaces. For depth, look for the clear front-to-back seating area rather than assuming the full timber or support depth is usable. If a backrest or raised edge is shown, check how the drawing measures the space available for sitting. The LCF-300 product page lists the same area of 6.89 m² as the HCF-300. Matching area figures do not establish matching seating dimensions, so compare the labelled seat heights, depths and headroom separately.
Consider seat height together with the space immediately above and in front of the bench. Headroom is the clearance at the seated position; with a sloped or curved ceiling, it can change along the bench. Seat depth affects sitting posture and the space available for legs in front of the bench. Body size and preferred posture differ, so no universal depth or headroom number proves comfort. Compare models using the same reference points, and ask the manufacturer to clarify any differences in how the dimensions are measured. A cross-section can help show the clearance at the part of the bench where someone will actually sit. Mark missing measurements as unknown.
Understand single-level and tiered seating
A single-level layout has one main seating height; a tiered arrangement provides seats at more than one elevation. Neither description establishes how many people can use the cabin or whether the arrangement suits a particular group. A low surface in a drawing may be an access step or foot support rather than a seat, and a product image may not make that difference clear. When reviewing the S-140 sauna listing, distinguish the surfaces intended for sitting from those intended for access or foot support. Check the exact plan and package details before counting each surface as a seat. A clear elevation should identify the surfaces and their intended roles.
For tiered seating, compare the vertical difference between surfaces, how a user reaches the upper seat, and whether someone on the lower level can sit without blocking movement. These are layout questions, not a reason to add, remove or repurpose parts: follow the manufacturer’s assembly instructions for the intended arrangement. Verify whether a step, movable seat, backrest or foot support shown is included or merely illustrated. A single seating height may suit users who prefer one consistent elevation; tiers may appeal if occupants want different positions. Let the drawing establish what the model supplies, rather than using “two levels” as shorthand for comfort or capacity. Check how both levels relate to the entry route and heater position.
03
Match bench positions to the people using them
Compare actual positions with the people who will use them, not with an abstract standard. Stature, knee movement, balance and preferred posture differ; a high seat that works for one adult may be difficult for a shorter person or someone who does not want to step up. If several people share the cabin, ask whether each can use a preferred seat or whether a lower alternative matters. For a model under consideration, such as the HC-150 sauna, use those preferences to identify the seat measurements you need. Talk through how the seating will be used before deciding how many positions count as usable, including whether people expect to sit upright or change posture.
A simple at-home check can make the drawing easier to judge. Mark the bench outline on the floor with tape to visualize its length and the route beside it, then compare the labelled seat height with a stable chair of similar height. This is only a rough posture check; it does not reproduce the sauna or prove suitability. Never balance loose boxes or climb onto improvised platforms to imitate a raised level. Consider whether a person can sit down and rise again, not simply whether they can reach the seat while standing. If someone has a specific concern about reaching, sitting or standing, obtain exact dimensions and assess the actual arrangement with them.
Trace movement from the entrance to each seat
On the plan, trace the route from the entrance to each intended seat. Check whether a person can reach a lower or upper bench without crossing another occupant’s feet, squeezing between a bench and heater, or standing where the door interrupts the route. Include the open door if its swing is shown; a seat may look clear with the door closed but be harder to approach in use. If the HC-225 model is on your shortlist, compare its dimensioned interior plan with the routes you have identified. Pay particular attention to the narrowest point beside a bench end, rather than judging the passage by its widest section.
Think through ordinary exchanges: one person sits while someone else enters, an occupant stands, or someone needs to leave before the group is ready. If the route works only when others shift, decide whether that is acceptable in your household. Mark the bench outline and intended movement lane on the same scaled plan rather than comparing total area with a rough seat count. At a tight point, ask for a labelled clearance; a wide-looking product photograph does not reveal the narrowest gap. Check corners as well as the centre of an aisle, since a bench end or other projection can restrict a turn.
04
Check the heater and other fixtures against the benches
Read the bench plan alongside the exact heater location and the clearances specified for that heater. A cabin drawing may show where the heater is intended to sit, but it does not replace the heater manual or establish that a changed bench position is acceptable. For the N-210 sauna configuration you are considering, compare the sauna and heater manufacturers’ instructions to understand the relationship between the heater and seating. Involve a qualified professional where installation questions arise. Do not move a bench to solve a fit issue without confirming the specified arrangement, and do not treat the room-area figure as a heater-to-bench clearance measurement.
Check doors, windows and fixed fittings at the height of each seat, not only as symbols on the plan. A handle, sill, trim or opening may take up part of a bench run or affect where a seated person can place their back or legs. Use the elevation to see vertical relationships and the plan to see the remaining usable length. Confirm that the drawing matches the door, window and other configuration being bought; do not carry measurements across versions just because the photographs look alike. If a fixture is not dimensioned, ask for its position before counting the full illustrated bench as usable.
Plan how a group will share the seats
Consider how occupants will sit together. A long bench can place people in one shared row; facing benches may support conversation but can bring feet and knees into the same central space. These are general layout possibilities, not claims about a specific model. When comparing the N-250 seating arrangement, use the current plan to establish whether its seats face one another or run along one wall. Then consider whether the arrangement suits the group’s preference for conversation, quiet sitting or an open route. Think about where someone would sit at the end as well as in the middle, and whether those positions leave enough space for the intended posture.
Do not turn bench length into a seat count using a rule of thumb unless the manufacturer states a capacity and the illustrated layout supports it. Space per person varies with posture and how much room neighbours want, while a corner, heater or fixture can shorten the usable run. On a scaled plan, mark intended sitting positions, leg space and a route out. If only the overall bench length is shown, ask whether that figure means clear seating length and whether pictured backrests or accessories are included. This makes group-layout comparisons more useful than choosing by a nominal occupant number.
05
Consider cleaning access around each level
Access for cleaning can be overlooked when attention is on seat height. Check whether the plan leaves room to reach the floor below a bench, the wall behind it and the junction between levels. A gap that looks adequate in a perspective image may be awkward to reach in practice. If you are considering the LC-260 sauna, include these less visible spaces in your review of its drawing and product manual. Look at how you would reach each area with the benches in their supplied positions, rather than assuming that an apparently open gap will be easy to use. Include access in the comparison if straightforward upkeep matters.
Confirm which components can be removed and what the manual says about moving them for cleaning. Do not assume a lower platform is movable or that a bench can be lifted simply because it looks separate in a photograph. Ask whether the recommended routine requires access under or behind a surface, and whether the supplied arrangement leaves enough room without disturbing fixed parts. Follow the product’s care instructions for cleaning methods. This is especially relevant in tiered layouts, where an upper bench may limit access to a lower level or the floor; choose a configuration you can maintain as supplied.
Confirm the exact supplied configuration
Before buying, reconcile the model name and options across the product page, dimensioned drawing, assembly manual and configuration being quoted. Identify every bench, step, backrest or foot support shown, and ask whether it is included or illustrative. Check whether dimensions refer to internal clear space, exterior size or individual components, and whether they describe finished, assembled surfaces. A product image or area label can help identify a model but does not supply an unstated bench measurement. Keep the comparison tied to the exact model and configuration instead of transferring details from a similar-looking sauna. If a drawing shows alternate orientations, confirm which one applies.
If the product listing and manufacturer document conflict, pause until you know which drawing applies; do not choose the more convenient number. Keep the current drawing and instructions that match the order, and note which seat heights, depths, headroom, routes and heater relationships are confirmed. Mark missing values as unknown and compare another documented layout rather than assuming a universal standard. The aim is not to redesign the cabin from scratch; it is to know what seating arrangement the specified configuration provides before you commit. Check the document revision if the manufacturer identifies one.
Frequently asked questions
What is the ideal sauna bench height?
There is no single height that suits every cabin and user. Seat elevation needs to be considered alongside the ceiling, other bench levels, heater location and the people using the sauna. Compare the finished seat height shown in the current drawing for the exact configuration rather than relying on a general rule of thumb.
Is a two-level bench better than a single-level one?
It depends on how the cabin will be used. Two levels can offer different seating positions, but the upper seat also needs a suitable route up and the lower one must remain usable. Compare both arrangements for headroom, movement and the preferences of the people who will use them.
Can a product photo show me how high the seats are?
A photo may help you understand the general arrangement, but perspective can hide scale and clearances. It cannot reliably establish seat height, usable depth or headroom. Use a dimensioned plan and elevation for the exact model and configuration, and ask for clarification if a key measurement is missing.
Does the sauna’s floor area tell me how many people can sit inside?
No. A floor-area figure does not show the bench lengths, seat depths, fixtures or movement space. Look for a stated capacity and compare it with the actual seating layout. If no capacity is provided, do not convert the floor area or bench length into a seat count using an assumed rule.
What if the drawing does not show a bench measurement?
Ask for a current, dimensioned plan or elevation for the exact configuration and confirm what the measurement refers to, such as the finished sitting surface or the assembled component. Until that information is available, treat the measurement as unknown rather than assuming the model follows a standard.
Choose a bench arrangement by considering how people will sit, reach each position and move through the cabin, rather than by the number of tiers or the area figure alone. Compare labelled seat heights, usable depth, headroom and clearances against the actual drawing, then confirm the relationship to the heater and the parts included. A clear drawing cannot decide what each user will find comfortable, but it can separate documented dimensions from assumptions. If an important measurement or configuration remains unclear, keep it unresolved until you have the matching information.
