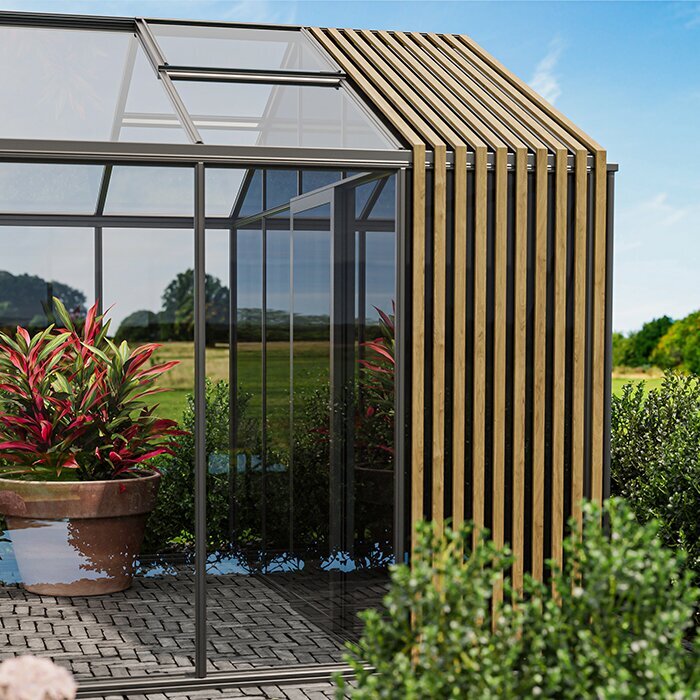

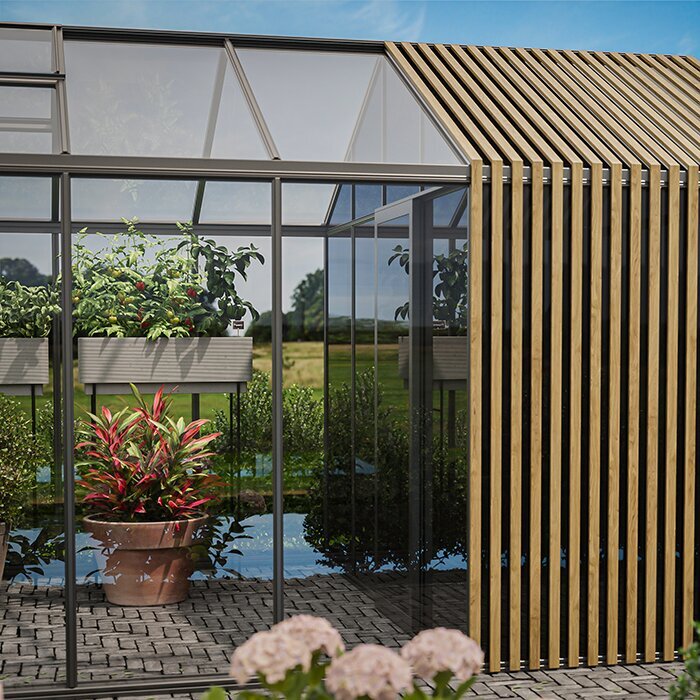





Visible Accoya timber paired with greenhouse storage under one roof
Classic aluminium greenhouse for growing, equipment and garden supplies
Our greenhouse with integrated storage places a light-filled cultivation space beside an enclosed store featuring natural Accoya® timber. A shared roof covers the two rooms, so another shed need not occupy a separate part of the garden and tools can stay beside the greenhouse. Each room nevertheless has a defined purpose: plants occupy the glazed section, while the adjoining store holds pots, equipment and supplies.
The Accoya timber model is available in a wide choice of sizes . Glazing can be specified in toughened safety glass or polycarbonate. First decide how the available area should be apportioned between cultivation and storage. Before opening the configurator, note your intended crops, current equipment and preferred interior set-up. For wider guidance on this two-room arrangement, see aluminium greenhouses with integrated storage.
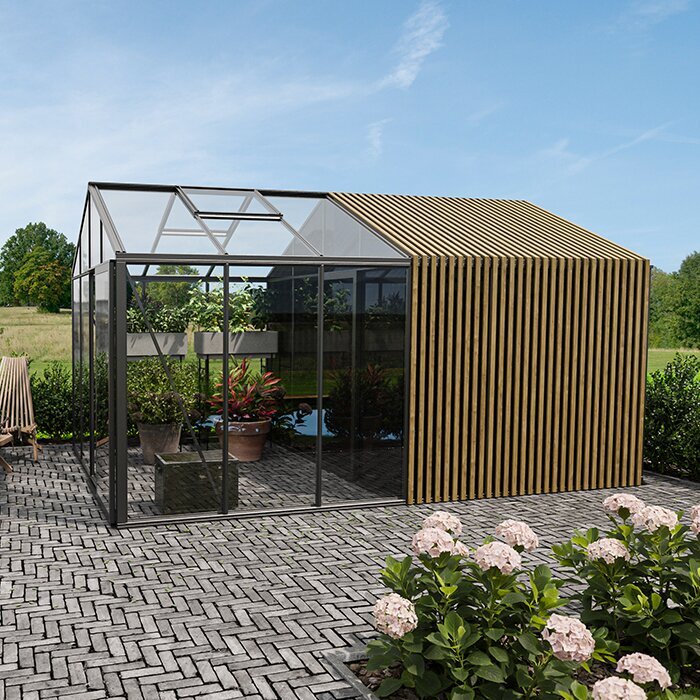
Grow and store beneath one roof
A bright plant room alongside dedicated storage for tools and supplies
Keeping a store within the greenhouse streamlines routine work. Watering kit, compost, tools and pots are close to where each task takes place. Sowing, pricking out, potting on and everyday tending therefore involve fewer trips to the house or another outbuilding. You can assemble everything before starting and return it to the store when the work is finished.
Beds, containers and benches can consequently occupy a continuous section of the plant room, with unobstructed routes making maintenance and cleaning easier. Place equipment that requires neither daylight nor the cultivated atmosphere in the store. If an item reacts poorly to damp or temperature changes, consult its storage directions before deciding that the room is appropriate.
See our aluminium greenhouses page for an overview of our aluminium constructions.
Defining features of the design
Cultivation, organised equipment and one harmonious garden design
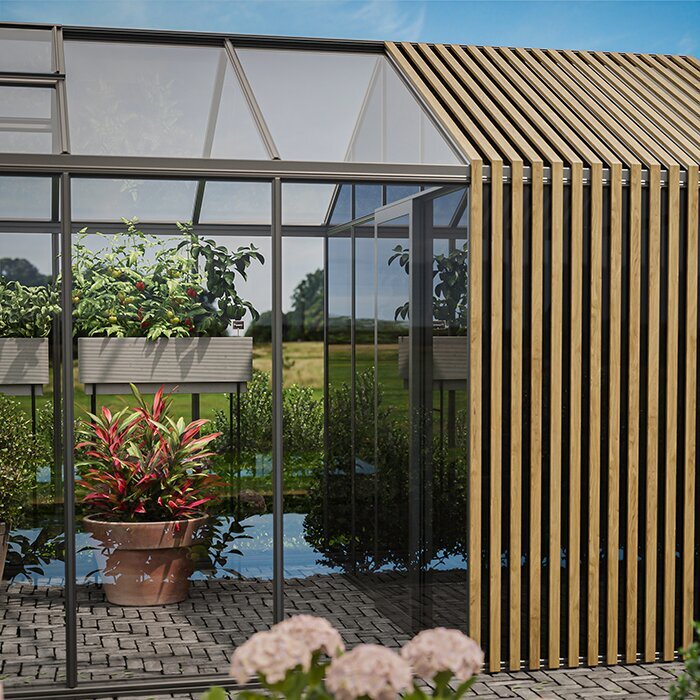
Because the store is built into the design, it does not resemble a cupboard attached later. The aluminium framing and exposed Accoya carry the same visual language through the two rooms. Straight metal lines are softened by authentic timber texture, whose grain and varying tones give the structure a warmer character.
Integrated storage
Shelves, supports and floor positions may be arranged in the enclosed room around the equipment you own. Stored materials stay off the glazed cultivation section, yet tools and consumables remain close enough for convenient use.
A layout based on actual space needs
The chosen configuration determines how much of the building can be assigned to cultivation or storage. Calculate each requirement independently, then mark both on the usable plan. Allow working room beside benches and shelving for retrieving equipment, repotting and moving comfortably between the rooms.
Accoya timber as a natural contrast
Warm timber tones stand apart from the metal profiles and even glazing. When choosing a RAL finish, consider the house and wider garden together with Accoya's untreated starting shade and its prominent grain.
Accessible exterior areas
Keep an adequate margin free on every side. Glazing, rain gutters and outer faces will then remain reachable for upkeep, and objects placed outside will not impede either entrance.
Accoya timber in detail
Accoya: modified real timber for visible outdoor use
Radiata pine is transformed into Accoya by acetylating the wood through to its centre. The treatment substantially limits moisture uptake without disguising the fact that this is genuine timber, complete with its own grain and tonal differences. Against accurately formed aluminium profiles, that organic surface prevents the building from appearing solely functional or industrial.
Reduced moisture uptake makes the timber more dimensionally stable and decay-resistant. Accoya is durability class 1.
Bloomcabin specifies Accoya without a surface treatment, preserving differences in tone and grain. Outdoor exposure gradually alters the initial colour, potentially producing a silver-grey finish. Account for that evolution when deciding on the surrounding aluminium colour. Clean soiling away at intervals with a mild method, and do not allow junctions to remain wet. Any cleaner, maintenance aid or finish should be used only when the Accoya instructions identify it as appropriate.
Find further information in our aluminium greenhouse FAQ.
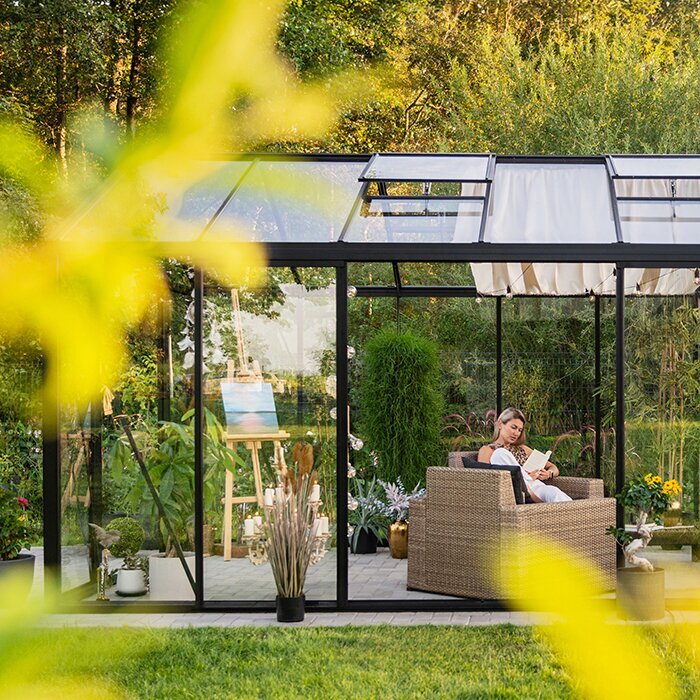
Coordinate cultivation space with storage
Set up both spaces around typical working routines
Approach the building as a pair of linked rooms, each serving a separate purpose. Plan around the order of everyday actions rather than beginning with a particular shelf or bench: enter, fetch what is required, care for the plants, clear waste and return each tool. Preserve the routes used during that sequence. Equipment must not interfere with doors, while benches should remain accessible without crossing hoses, pots or raised floor edges.
Growing area
Reserve this room for plants and activities that benefit from daylight and the greenhouse environment. Place taller crops where their shadows will have least effect on shorter ones. Benches must leave doors and roof-window controls usable. Allow for seasonal growth as well, since a plant's mature height can be considerably greater than its size when first positioned.
✓ Vegetable beds and plant containers
✓ Propagation and work benches
✓ Tomatoes, cucumbers and trained climbers
✓ Watering and repotting
Storage area
Use this room for belongings that can be kept away from daylight. Decide in advance which weights belong directly on the floor and which possessions may be supported securely by racks or appropriate brackets. Provide firm, level positions for liquids. Only keep food, combustible materials or similarly sensitive goods here when the instructions for those goods allow such conditions.
✓ Short and long-handled garden tools
✓ Pots, trays and labels
✓ Growing media, fertiliser and garden consumables
✓ Cushions and seasonal accessories
Technical details
Key information on dimensions, glazing, heights and build
Two model ranges make up the available versions. External measurements alone are not enough: ridge and doorway heights affect entry, spaciousness, tall planting, the movement of long tools and the type of interior fit-out that can be accommodated.
01. Size configurations
Twenty configurations are offered. Assess the working floor layout and how it can be shared between plants and equipment, instead of basing the decision solely on an empty patch in the garden.
02. Widths
One range measures 235 cm across and the other 310 cm. Add a suitable margin beyond those dimensions on both sides to accommodate assembly and future upkeep.
03. 235 cm models
On versions measuring 235 cm across, the ridge reaches 232 cm and the doorway is 165 cm high. Check the height of large tools and fittings before selecting a version so they can be brought inside.
04. 310 cm models
For the 310 cm range, ridge height is 267 cm and door height is 185 cm. Its greater enclosed volume should be considered when positioning high-growing plants and managing ventilation throughout use.
05. Glazing
The options are polycarbonate and 4 mm toughened safety glass. Glass allows an unobstructed view into the building and towards the plants, whereas polycarbonate diffuses the appearance and affords additional privacy. Consider the desired brightness and visibility in both rooms, as well as how the greenhouse will sit within its surroundings.
06. Construction
Aluminium framing, roof windows, rain gutters and an aluminium base make up the structure. The selected version determines whether one or two sliding door panels are fitted. Its design ratings are 30 m/s for wind speed and 210 kg/m² for snow loading. Those ratings depend on correct assembly, dependable anchoring and use for the intended purpose. The greenhouse carries our 12-year guarantee under the relevant terms.
Through the gardening season
A well-organised workspace from spring until the season ends
Propagation trays, compost and pots tend to be prominent during spring. Watering and maintenance kit becomes more important in summer, followed later by harvest containers and cleaning supplies. Organise the store so it can follow this changing pattern. Avoid dedicating every position indefinitely to occasional equipment; use adaptable zones that can be changed without emptying the room. Basic labelling also shows when consumables need replenishing or damaged tools need removing.
Opening the roof windows renews the air and lets unwanted warmth and moisture escape from the cultivated room. Keep their controls accessible and adjust them to the conditions rather than following a fixed routine. Watch for damp that lingers after irrigation. Roof water enters the built-in gutters; provide an onward route that prevents pooling beside the base, erosion of paths or persistent wetting of nearby components. Irish rainfall and exposure vary, so drainage and operation should reflect the particular site.
Details of the guarantee terms are available in our guarantee information; find further practical advice under useful information.
Order in the storage room
Allocate practical zones for tools, pots and seasonal belongings
Base the arrangement on an item's mass, how often it is needed and how readily the area can be cleaned. Set aside floor room for bulky machines before adding racks. Slim holders can secure implements that are liable to tip. Lidded, clearly marked boxes make small pieces easy to locate, provided their contents tolerate the temperatures reached inside the store.
Keep tools within easy reach
Position secateurs, gloves and small maintenance implements close to the doorway between the rooms. Fit dependable holders for longer tools, preventing them from falling or placing blades and points across the walking route. Brush off attached soil when work ends and, whenever practicable, let wet equipment dry before returning it to storage.
Pots, compost and smaller supplies
Do not build a stack of empty pots higher than you can dismantle safely. Store compost and fertiliser as directed by the maker, using suitable containers or original packaging with unambiguous labels. Keep tags, ties and sowing accessories apart from bulk supplies on a surface that can be wiped clean.
Seasonal accessories
Accessories used only at certain times of year may remain here if the environment is appropriate for them. Dry fabrics thoroughly before putting them away and clean everything else. As neither frost protection nor climate regulation is provided, move vulnerable goods to somewhere that satisfies their stated storage requirements.
Keep the plant area clear
Good organisation makes the crop room simpler to inspect, maintain and clean. With tools removed from working areas, dropped compost, dead foliage and other debris are easier to clear. Access around the plants also helps you notice pest activity, disease or irrigation faults sooner.
Arrange it ergonomically and clearly
Put everyday items within reach and heavier equipment below
Assign an accessible home to every tool or accessory used regularly. At a glance, you can then identify equipment that is serviceable and supplies that require cleaning or replacement. Keep the connecting route for movement rather than overflow storage; possessions left there disrupt tasks and create a trip hazard.
Store everyday supplies close to the crop room at a comfortable reach, generally above knee level but below the shoulders. Light objects used occasionally may occupy higher positions. Place weighty sacks and machinery near the floor to avoid overhead lifting. Maintain working clearance beside each shelf, and orient projecting or sharp hardware away from places where people move.
Racking and brackets can exploit vertical space, but fixings belong only in parts approved to receive them. Identify suitable attachment locations before making holes. Any independent shelving should resist tipping and leave the sliding door, glazing, base and connection points open to view.
Finding a suitable size
Balance planting, interior fittings and comfortable circulation
Prepare one list for each room. In the cultivation section, record beds, benches, containers and how tall every planned crop will become. For the store, note bulky tools, stock and the total shelving length required. Draw these elements to scale on the plans for each possible configuration. This exercise can expose cramped passages and inaccessible corners even where the outer structure fits the available plot.
Lower overall heights and a narrower body make the compact range easier to place in restricted gardens. The broader range provides additional circulation space and some versions offer two sliding door panels. Examine the approach through the garden too: extra doorway width is useful only where the preceding route is sufficiently broad, even and accessible for your equipment.
Review the drawing as it would function in practice, showing open doors, benches in use and crops at maturity. No shelf should hide a handle or restrict a window control. Include a spare working patch where you can briefly set down a container or open a sack while keeping the principal passage free.
Our guidance on purchasing and delivery appears on the shopping & delivery page.
Foundation and assembly
Prepare the site, foundation and drainage carefully
One framework supports the cultivation room and store, making accuracy across the full base essential. Construct it to the required measurements with a flat, stable and square finish. Minor errors may prevent the profiles, glass and sliding doors from lining up correctly. Assess the ground and run-off before starting, and locate buried services. Where the correct foundation is uncertain, have the property and proposed solution reviewed by a competent specialist.
Consider every stage between unloading and final placement. Record the dimensions of gateways and narrow passages, including corners, changes of level and steps. Prepare an orderly, clean staging area beside the greenhouse position for glazing, profiles and timber components. Protect delicate pieces there from foot traffic, dirt and gusts.
Although the supplied aluminium base helps with construction, proper ground support and reliable anchoring are still required. Follow the assembly manual, then verify level, verticals and both diagonals before installing any glazing. Cutting or modifying structural and bracing components may compromise the building as a whole. Obtain skilled help for any operation that cannot be completed confidently and safely.
The steps for placing an order are set out on the ordering page.
Comparing the options for your garden
When the combination makes more sense than two separate buildings
Choose a Classic greenhouse without the store where nearly all available floor area is needed for cultivation and suitable equipment storage already exists. Daily tasks will then involve bringing tools and supplies in from that other location.
A freestanding shed may be given its own dimensions and located independently. It also occupies another part of the property, requires a second base and lengthens the journey between stored equipment and plants. Its placement and style need to be coordinated with the greenhouse. This arrangement can work well for especially bulky machinery or where complete separation of the activities is preferred.
This Accoya design is appropriate when convenient access to equipment and a consistent architectural appearance take priority over maximising cultivation floor area. Ordinary greenhouse tools can remain beside the plants without adding another outbuilding. Even so, compare the enclosed store with everything you currently own before purchase. Undersizing it may eventually force supplies back into the crop room.
Greenhouse storage questions answered
Frequently asked questions about planning and use
What makes a practical room division?
Mark beds, benches, equipment, racks and circulation space on your plan. Select a configuration that allows the two rooms, doors and windows to operate together without obstruction.
Which belongings suit the built-in store?
Use it for appropriate tools, pots, growing accessories and consumable garden supplies that you want to keep outside the glazed crop room. Always follow the stated conditions for the particular item before storing it there.
Why is Accoya timber used?
Accoya retains authentic wood grain while offering strong dimensional stability. Acetylation limits the Radiata pine's moisture uptake, increasing its resilience against decay associated with dampness.
What care does untreated Accoya require?
Clean away dirt at regular intervals with mild methods approved for Accoya, and prevent junctions from remaining persistently damp. Follow the applicable maintenance guidance before applying any finish. A gradual shift towards silver-grey is a normal consequence of exposing this untreated wood to the weather.
What distinguishes polycarbonate from glass?
With toughened safety glass, sightlines into the plant room remain unobstructed. Polycarbonate gives a more diffused appearance and shields the interior to a greater degree. Decide which option provides the desired balance of brightness, visibility and privacy across the cultivation and storage sections.
When should the roof windows be operated?
Adjust the roof windows in response to heat, solar gain and moisture inside the structure. Keep the controls unobstructed, and reassess the internal atmosphere routinely because the amount of ventilation required varies during the growing year.
Can I attach shelves and brackets to the structure?
Use only parts intended to receive attachments, and identify approved fixing locations before making a hole. Independent shelving needs secure footing and must leave doors, glazing, the base and connection points accessible.
Which pages cover maintenance and ordering?
Practical guidance on cleaning and inspecting glass, profiles, doors, roof windows, gutters and exposed connections appears under useful information ; details of placing an order are under ordering page.
Bloomcabin
Combine cultivation and equipment storage within a single structure
Bloomcabin's Classic design brings an Accoya-finished store and glazed cultivation room together for gardeners who want equipment nearby. Select a configuration by considering the available plot, crops to be grown, volume of belongings and the sequence of everyday greenhouse work.
Use those planning notes when completing the configurator, then compare the result with conditions in the actual garden. Confirm that the selected building can travel from the unloading position to its foundation and that its arrangement will remain convenient during everyday work. Further preparation guidance is available on the useful information page.
Check before configuring
✓ Compare each usable layout carefully with the available footprint
✓ Allow room for mature plants, work benches, equipment and clear walkways
✓ Select glazing for the preferred brightness, privacy and clarity
✓ Plan stable standing areas plus suitable shelves and brackets for storage
✓ Relate the RAL finish to Accoya's changing tone and garden surroundings
✓ Ready the foundation, anchors, drainage and route needed for assembly
Configure your greenhouse with built-in storage