
Why Does My Automatic Greenhouse Vent Opener Stay Closed?
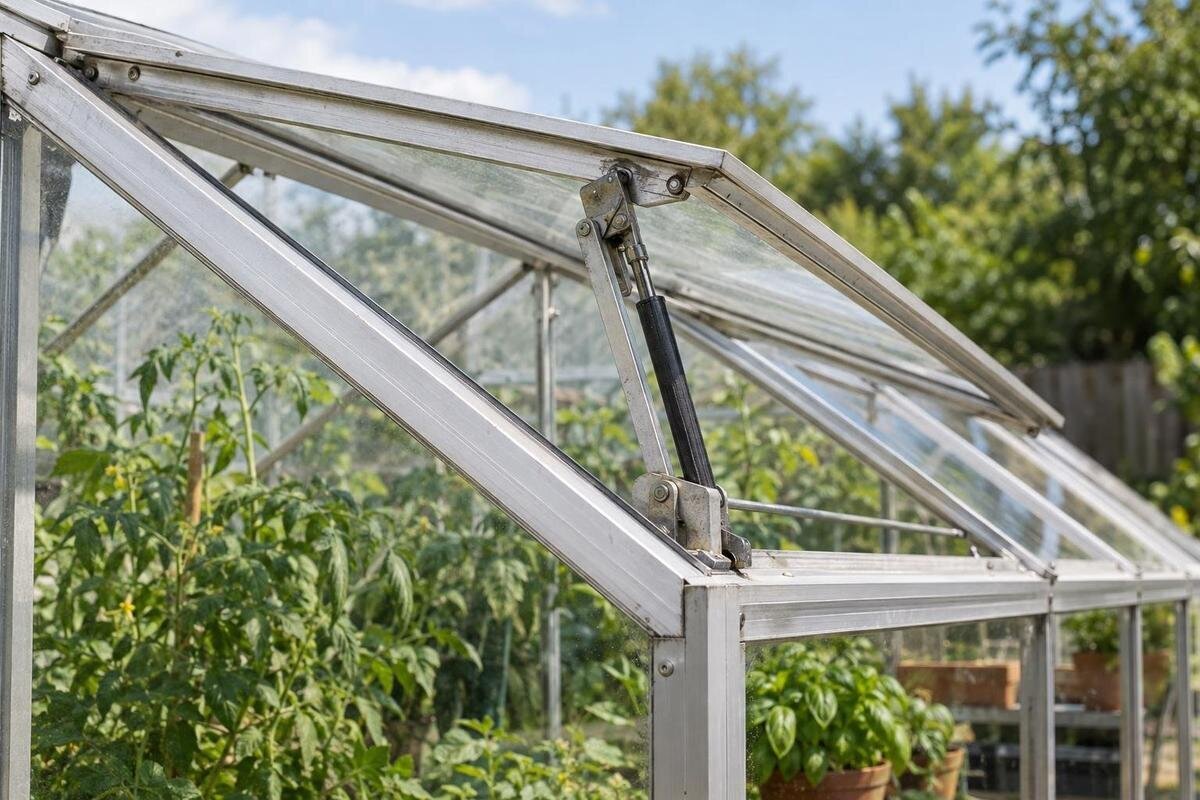
Greenhouse troubleshooting
When a greenhouse vent stays closed, it can be hard to tell whether the opener is waiting for a warmer temperature or something is stopping it moving. The safest way to find out is to follow the instructions for the exact opener, then compare measured conditions with what the mechanism is designed to do. Check the temperature near the actuator, the adjustment, the vent’s free movement and any visible obstruction in that order. Don’t force the window or dismantle a sealed actuator.

Identify the symptom and opener model
Start by describing exactly what stays closed. Is the vent fully latched, does the opener arm move without lifting the window, or does the vent begin to open and then stop? Note the time, weather, sunlight on the actuator, vent position and whether other vents behave the same way. A greenhouse can feel warm at plant level while the air around the opener is still below its operating point, so a hand on the glass or a general impression is not a reliable test. Keep clear of hinges and moving parts; don’t pull the vent open against the mechanism. If you can do so from a safe position, take an overall photo before touching anything.
Find the make and exact model of the opener before adjusting it. Its manual should explain the temperature response, any permitted adjustment, how the actuator is mounted and the approved vent or load range; it may also describe a safe test. Record the greenhouse model too, since the vent, hinge and bracket arrangement belong to the structure as well as the opener. If your paperwork names the Classic Aluminium Greenhouses range, the listing can help you match the greenhouse name, but it does not identify the fitted opener or confirm compatibility. If the manual is missing, ask the opener maker or supplier for instructions for that exact model rather than borrowing settings from a similar-looking unit.
Check the opener’s specified temperature
Read the manual’s stated opening temperature and, if given, the point at which the vent should be fully open or close again. These can describe different stages of movement. Some thermostatic mechanisms extend progressively as the temperature rises, so a first movement near a stated threshold does not necessarily mean the vent should be fully raised at that same reading. Follow the manual’s wording about when movement should begin and how the temperature is defined. A general description such as automatic opener is not a precise setting, and a setting shown for another model may not apply.
Compare the instructions with conditions at the opener, not a forecast, outdoor reading or thermometer across the greenhouse. If the local temperature has not reached the documented point, the closed vent may be behaving normally; wait for suitable conditions rather than changing the setting to force an earlier opening. If the reading has reached the stated point, allow the response time described in the manual before deciding nothing is happening. Record the greenhouse model alongside these observations. If yours is a Lean-to Greenhouse, use its build paperwork to identify the vent, while taking the trigger temperature from the opener’s own manual.
Measure the air beside the actuator
Use a separate thermometer or data logger close to the actuator, in the surrounding air, without touching the greenhouse frame or the actuator itself. Keep the instrument out of direct sunlight, while noting whether sunlight is warming the opener. A reading beside a hot support or in a shaded corner elsewhere may not represent conditions at the mechanism. If the manual specifies where to take a reading, follow that direction. Use the same thermometer and position for repeat observations, and allow its display to settle before recording a result; otherwise, small differences between readings may be due to measurement rather than a change in the opener’s behaviour.
Record the temperature at regular intervals around the time the vent should respond, alongside the vent position, changes in sun or cloud, and any shade or plant growth near the actuator. Humidity can be useful context, but it does not show that a temperature-operated mechanism has reached its trigger point; temperature is the key reading unless the manual says otherwise. Label your log with the greenhouse model, such as Limited Edition Aluminium Greenhouse, and the opener’s make and model so the observations can be matched to the right equipment. Don’t warm the actuator with a hairdryer, hot water, heater or flame: an artificial heat test can be unsafe and may not reflect normal operation.
Compare responses across vents
Compare like with like. If two matching openers serve similar vents, note whether both stay shut at the same time and compare their local temperatures and settings. Several closed vents on a cool morning point first to a shared temperature condition; one behaving differently makes a local obstruction, adjustment, mounting issue or wear more worth checking. Neither pattern proves the cause. Openers may be different models, or the vents may have different exposure to sunlight and shade. Record which vent each observation refers to, rather than treating the greenhouse as one uniform space. When identifying vents in a T-Model Orangery Greenhouse, refer to the paperwork for that structure rather than the layout of another greenhouse model.
Repeat observations as the greenhouse warms and later cools, if conditions allow, and write down when movement begins and stops. Some manuals specify separate opening and closing points, so the mechanism may not reverse at precisely the temperature at which it began to open. Keep the thermometer in the same place and avoid comparing readings taken in different parts of the greenhouse. If one vent opens sooner, check that the units are the same model and that their settings match before drawing conclusions. A short, time-stamped log is more useful to a supplier than a description such as it was hot, and helps show whether the pattern follows temperature or a particular vent.

Adjust only as the manual allows
Some openers allow adjustment; others have a fixed setting or require a particular sequence. Find the exact adjustment instructions before touching a screw, chain, collar or other control. The direction and amount of adjustment are not universal, so don’t guess which way to turn a part. Photograph the original position and note any reference marks shown in the manual. If an adjustment is permitted, make only the change and number of turns specified, one change at a time, while keeping your hands clear of pinch points. Don’t loosen mounting bolts, alter the opening stroke or shorten a chain to compensate for a vent that is binding unless the manual specifically directs you to do so.
After a permitted adjustment, wait for the temperature and response conditions the manufacturer specifies. A brief observation in different conditions may not test the mechanism properly. If there is still no movement, return to the documented baseline if the manual allows it, then check the other causes in this guide. When asking about an adjustment, give the opener details and the greenhouse model shown in your paperwork, such as Pyramid Greenhouse. Include the original setting and the precise change you made. Avoid making several changes at once: doing so makes it harder to identify what affected the result.
Check vent movement and opener capacity
Check that the vent is free to move as its maker intends. From a safe standing position, look for a hinge out of line, contact with the frame, a stiff pivot, a latch still engaged, a stay that has not been released, or a seal catching. Look for a gap that appears uneven, but don’t yank the window to test it. A roof-level or heavy vent may need an installer or another person to inspect it safely; don’t climb onto the greenhouse or put yourself beneath an unsupported sash. Disconnect an arm or test a vent by hand only if the exact manual gives that procedure, and support the vent as directed.
Compare the actuator’s documented capacity and permitted vent arrangement with the actual opening. The manufacturer may specify a maximum window size or load as well as mounting details. Appearance is not a dependable guide to capacity, and you should not infer a load rating. A vent, bracket or panel changed since installation can alter how the opener works; report any changes, added accessories or replacement parts when asking for advice. If the opener was supplied separately, ask the greenhouse and opener suppliers to confirm the pairing. Identify the greenhouse precisely, for example as a Limited Edition Aluminium Greenhouse with Built-in Storage, and explain which vent the opener serves.
Look for latches and other obstructions
Inspect the full path through which the window and linkage travel. A plant label, tie, twine, netting, shade cloth, curtain, loose cable, tool or stored item can catch the opening edge or arm; a small clip or latch can hold a vent shut. Check both sides of the opening and where the arm meets the sash. Look between the panel and frame too, where a trapped item may be hard to see. Remove only a loose obstruction you can reach without forcing the mechanism. If a piece is attached as a restraint or support, release it only as the instructions say; some components may be there to keep the vent stable.
Look for dirt, grit, leaves or corrosion around visible pivots, but don’t flood the mechanism with oil or spray. Cleaners, lubricants and disassembly may be unsuitable for a particular design, so use only the maintenance method stated by the manufacturer. Wind pressing on the vent can complicate an observation; don’t hold the sash open against a gust or use force to overcome resistance. If you cannot tell whether a component is an obstruction or part of the vent assembly, ask the supplier before removing it. Include the greenhouse model from your paperwork, such as Bloomcabin Prestige Greenhouse, and a photograph showing where the component sits.
Inspect the actuator and its mounting
With the mechanism at rest, visually check that the brackets sit in the positions shown in the exact manual and that the arm is not twisted or visibly out of line. Look for loose or missing fasteners, a bent rod, cracked parts, corrosion or contact between moving components. Compare the installation with the manual’s diagrams, including the position and orientation of the actuator. A photo of the whole vent and close-ups of its attachment points can help the manufacturer spot an obvious mismatch. Don’t lift the sash to get a closer look if the opener may not support it safely. For a high or awkward vent, stop and arrange an inspection from safe access.
If anything appears bent, cracked, loose, leaking or seized, stop using the opener until the maker advises what to do. Don’t dismantle a sealed actuator, straighten a rod by force, or improvise replacement pins and brackets; a small component may be part of the vent’s moving support. Keep hands away from joints while observing movement, and don’t remove an actuator under load. When contacting support about a Spacious Greenhouse, identify both the greenhouse and opener and describe the visible damage or mounting concern. Include photographs taken from a safe position rather than trying to expose hidden parts. Avoid working overhead or in windy conditions.

When to arrange servicing or replacement
Sort your observations into a few clear patterns: the temperature stays below the manual’s trigger point; the temperature reaches it but the actuator does not respond; the actuator starts but the vent binds; or the mechanism moves while the vent remains latched or held. The first pattern may be a normal temperature response. The others point to checks of the setting, compatibility, obstruction or installation, but they are clues rather than confirmed diagnoses. If the actuator responds at the specified temperature but the vent remains closed, check for a latch or restriction before changing the setting. Keep the log and photos with the manual so you can show what you observed, not just the final position of the vent.
Contact the opener maker, greenhouse supplier or installer when the manual does not cover the symptom, a component is damaged, or a safe movement check is not possible. Send photographs of the full assembly and mounting points, model labels, relevant temperature readings, the setting as found and any changes already made. Ask them to confirm the adjustment procedure, load compatibility and approved replacement part. A replacement should match the exact model or be explicitly confirmed as compatible with the vent and mounting; a similar shape is not enough. Keep the existing parts in place until the supplier advises what to remove, particularly if the vent could become unsupported.
Keep the greenhouse safe while you investigate
Until you know the cause, don’t use the actuator as a handle, wedge or stop. If you need ventilation in the meantime, use only doors or vents that can be operated normally and safely, following their own instructions. Don’t prop a high sash with loose timber or another improvised support, and don’t test movement in strong wind. If the vent is beyond easy reach or its condition makes it unsafe to open manually, don’t attempt a workaround from a ladder or roof. Arrange a safe inspection instead, and keep people clear of any vent that might move unexpectedly.
After an approved repair or adjustment, observe the opener through a normal warm-and-cool cycle and note whether it starts, reaches its intended travel and returns as the manual describes. Check again during ordinary use, but avoid repeated tweaks in response to every short change in weather. Keep the manual, model details and final settings together so you can tell what changed if the problem returns. The aim is not to make every vent open at the same moment; it is to confirm that this opener responds according to its own instructions and can move its matched vent freely.
Frequently asked questions
Can I warm the opener with a hairdryer to test it?
No. Don’t apply a hairdryer, hot water, a heater or a flame unless the exact manual describes a safe test using that method. Artificial heat can make the response unsafe or misleading. Check the manual or ask the manufacturer how to test your model.
Should the vent open as soon as it reaches the temperature in the manual?
Check whether the manual gives a temperature for the start of movement, full opening, or closing. These may be different points, and some mechanisms move progressively as the temperature rises. Follow the manual’s description and use a reading taken near the actuator.
Why does one vent open while another stays closed?
The vents may have different opener models, settings, sun exposure or local temperatures. A latch, obstruction, stiff hinge or mounting issue could also affect one vent. Compare their manuals and readings rather than assuming they should behave identically.
Should I oil a stiff vent hinge or opener arm?
Only use a lubricant or maintenance method specified in the exact manual. First look for visible obstruction or misalignment without forcing the vent. Unapproved lubrication or disassembly can complicate the diagnosis.
When should I replace the opener?
Consider replacement if the unit is visibly damaged or still fails to respond under the conditions and setup specified in its manual. Ask the manufacturer or supplier to confirm a replacement is compatible with the vent and mounting. Similar appearance alone is not enough.
An automatic vent opener that stays closed may simply be below its specified operating point. When readings show it should be responding, the useful clues are what it is attached to, whether the vent is free to move and how the unit was set up. Keep the manual, temperature log and photos together, and work through the checks without forcing the sash or altering parts outside the instructions. That gives you a safer answer than repeated adjustment or replacing a part on guesswork.
