
Is Bubble-Wrap Insulation Right for a Glass Greenhouse?
GREENHOUSE INSULATION
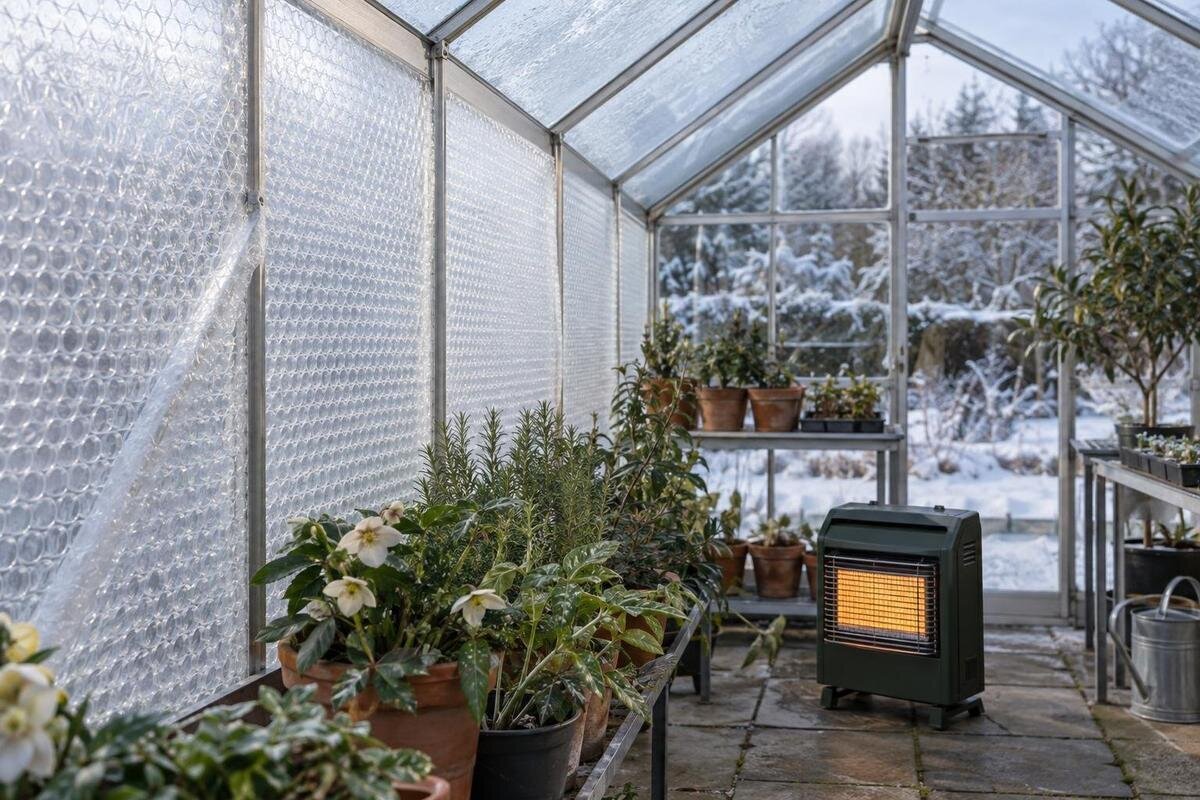
Bubble-wrap insulation can help a glass greenhouse lose heat more slowly, particularly through covered glazing, but it is not a guaranteed way to hold a chosen temperature or cut a power bill. The trade-off is practical: the film reduces some incoming light, changes where moisture condenses and must be secured without interfering with vents, doors or glazing. Whether it suits your greenhouse depends on its construction, winter use and the plants’ light needs. A reliable decision compares heating demand and light levels before and after a small trial, under similar conditions, and checks that the film and fixings suit the frame.

What bubble-wrap insulation changes
Bubble wrap adds a layer of air-filled material between the greenhouse interior and the glazing. The air cells, plus any air space specified for the installation, slow heat transfer through a covered pane; they do not stop it. The result depends on the film, the glass and frame, how the sheet is held, and whether air can move behind or around it. When the greenhouse is warmer than outdoors, less heat escaping through covered glazing can mean less heat for a heater to replace while it holds the same target. The film does not create warmth, so an unheated greenhouse can still cool below the temperatures your plants need.
That potential benefit has a daytime counterpart. Film can reflect, absorb or scatter some incoming light, even if it looks clear, and it may reduce solar heat entering as well as light reaching crops. The balance changes with winter sunshine, cloud, outside temperature, how much glass is covered and whether heating runs during daylight. Bubble-wrap insulation is therefore not automatically an all-round winter gain. It is most plausible where a heater is used to hold a consistent target, the covered glass is a meaningful heat-loss path, and measured light remains adequate for what you grow.
Estimate the heat loss through glazing
Measure glazed area rather than using floor area as a stand-in. Include only the panes you intend to cover, separating roof, side and end surfaces and noting doors and vents. A simplified estimate of heat passing through a surface is its U-value multiplied by its area and the inside-to-outside temperature difference. With U expressed in W/m²K and area in m², the result is a rate of heat transfer in watts. It describes heat passing through the stated assembly, not total greenhouse heating demand or a guaranteed saving. Use a U-value only if it applies to the actual glazing and insulation arrangement, not to a bubble sheet in isolation.
Heat also escapes through frames and the floor, and through air exchange at vents or gaps around doors. Those losses are outside the simple glazing estimate; bubble wrap cannot compensate for a poorly fitting door, and it must not cover a vent intended to operate. If you are comparing structures at the same time, the T-Model Orangery Greenhouse is listed in variants from 16.52 m² to 30 m². That catalogue area range is not glazed area or a heat-loss rating. For any chosen variant, confirm the panel material, dimensions and specifications before estimating coverage.
Measure heater use in comparable conditions
Set a baseline before covering the glass. Over several cold periods, record the indoor temperature in a representative plant area, the outdoor temperature, the heater setting and its energy use. Note when doors or vents are opened, whether the greenhouse gets direct sun, and any marked changes in wind or cloud. Keep the normal growing routine and heating target consistent. These notes matter because a warmer spell or a sunny day can reduce heater use even if the insulation has made no difference. If you change several things at once, you will not know which change affected the result.
After installing a small test area, repeat the record over similar periods. Compare nights of similar length and outside conditions; avoid setting a mild, sunny period before installation against a cold, windy one afterwards. A rough comparison can divide the energy used by the heating period’s degree-hours: add the positive difference between the indoor target and outdoor temperature for each hour. This is only a screening measure, not a certified heat-loss test. Where a meter does not show kWh, documented heater input multiplied by actual running hours is a rough estimate for a simple, single-output electric heater. Using elapsed hours instead of actual running time, or overlooking changes in output, reduces its accuracy.
Check the light available to plants
The amount of light that reaches plants depends on the film and how it is fitted. A material’s transparency to the eye does not show how much plant-relevant light it transmits. Ask the film supplier for published light-transmission information, ideally including photosynthetically active radiation, and check whether the figure applies to the product in the intended arrangement. When comparing Pyramid Greenhouse options, establish the panel material and its light transmission for the exact version. Consider the glazing and added film together rather than using the film’s transparency alone to judge how much light will reach the plants.
For a practical comparison, take readings at crop height in the same positions before and after a small trial, and repeat them at similar times on comparable days. A photosynthetically active radiation meter is more relevant to plant light than a basic lux meter, which is weighted to human vision. If you only have a lux meter, use it as a relative check under consistent conditions, not as a direct measure of light available for growth. Record the weather as well: a cloud passing over the greenhouse can change a reading more than a test film does.

Manage condensation without blocking ventilation
Plants and moist growing media add water vapour to greenhouse air. When that air meets a surface below its dew point, water can condense. An insulating layer changes surface temperatures and where the cold surface sits, so condensation may form on the film, on the glass behind it, or in a space between layers. It is not possible to assume from the word bubble wrap alone that the amount of condensation will increase or decrease. Water may collect out of sight or drip onto leaves, pots or fittings, so inspect both the visible surface and any accessible space behind the sheet.
Do not cover vents, louvres or their opening mechanisms to reduce heat loss. The greenhouse still needs its intended ventilation, managed for the plants and conditions, even when insulation is fitted. Check for damp patches, persistent moisture and water collecting after cold nights, and make sure the covering does not obstruct normal air movement. For greenhouses with built-in storage, such as the Limited Edition range, review the precise model’s vent and door layout as part of the coverage plan. Mark the openings and mechanisms that need to remain accessible before deciding where to attach each sheet.
Match the film and fixings to the frame
Choose a film whose supplier states that it is suitable for the intended greenhouse exposure. Useful details include its performance in UV light, light transmission, temperature range and whether it is intended for repeated seasonal removal. Ordinary packing bubble wrap does not automatically have those properties, so do not assume that a clear appearance means it will stay clear or durable in greenhouse conditions. Instructions may also specify which way the sheet faces, whether a gap is required and how overlaps should be handled. Follow the information for the product you actually buy rather than relying on a general rule.
Fixings need to suit both the film and the greenhouse frame. A clip designed for one frame profile may not fit another, while tape or adhesive may affect a surface, seal or finish. Do not drill glass or force a fixing against a pane; avoid arrangements that could put pressure on glazing. For the Prestige Greenhouse, ask which clips fit the selected frame profile and whether the proposed attachment is approved. Give the supplier the exact model details and the film you intend to use, rather than asking whether greenhouse clips fit in general. If the guidance remains unclear, get advice from a qualified installer or glazing professional.
Plan coverage around openings and access
Work out the sheet quantity from the surfaces you plan to cover, not from the greenhouse footprint. Measure each pane and allow for the actual roll layout and any overlap specified by the film supplier. Leave vents and doors uncovered and usable. The catalogue lists the Spacious Greenhouse in variants from 47 m² to 70 m²; that range indicates catalogue scale, not the amount of film needed. For any model, calculate from the selected version’s glazing dimensions rather than assuming its listed area is the surface area to insulate.
Plan around door movement, window openers, latches, paths and access to plants. A sheet that makes a vent awkward to operate or conceals a damaged seal can create a new problem while reducing heat loss. Keep the glazing accessible enough to inspect and clean, and consider how the film will be removed when it is no longer needed. If a product is described as reusable, follow its supplier’s instructions for removal and storage. A neat coverage plan should let you check the panes, operate the greenhouse normally and reach the plants without disturbing the insulation.
Compare greenhouse-specific alternatives
Bubble wrap is not the only option. You could compare it with a greenhouse-specific thermal screen, a removable night-time covering or a small temporary enclosure around a group of plants. Each has different requirements for fixing, access and moisture management. A removable covering may reduce the daylight penalty if it is taken out of the light path during the day, but that involves regular handling and must not obstruct ventilation. Repairing an unintended draught may also be worth investigating, but distinguish a leak from a designed vent and use a repair compatible with the greenhouse.
Compare documented information for the whole arrangement, not an insulation figure for one material against a figure for a different assembly. Look for relevant heat-loss and light-transmission data, and ask how the proposed option fits the exact greenhouse. When comparing the Classic aluminium greenhouse range, ask about the selected version’s glazing, ventilation layout and compatible insulation accessories. Those details let you assess the proposed covering as part of the greenhouse rather than as a material on its own. Once compatibility is established, a controlled trial can help you judge performance where the published information does not answer your practical questions.

Estimate costs using your own energy rate
Use a measured change in energy use to estimate a change in the variable part of your bill. For electric heating, subtract the trial-period kWh from the baseline kWh, then multiply the difference by the applicable rate on your plan. If your rate varies by time of day, use the rate that applied during the heating periods rather than a general average. A fixed daily charge will not normally fall just because the heater uses fewer units. For other heating fuels, compare the same metered fuel units over similar periods; only convert them using documented heater information and a stated method.
Do not turn a short trial into a guaranteed seasonal saving. Winter weather, daylight, heater settings and ventilation all affect use, and a lower reading over a mild week may not represent colder conditions. Include the cost of the film and fixings, their expected reuse, replacement and the time needed to fit or remove them when judging value. If you are budgeting for a lean-to greenhouse, use the chosen model’s exact layout to establish the exposed glazing area; the catalogue format does not provide a heat-performance rating. Apply the same approach to any greenhouse style: compare your measured heater use, rather than attaching an assumed saving to the design.
Trial coverage before insulating the whole greenhouse
If the film and fixing supplier confirms a compatible arrangement, test a limited area before covering the greenhouse. Keep the heater target and normal ventilation practice unchanged, and record energy use, temperature and light before and after. Check for condensation around the test area as well. Repeat the comparison over several similar periods; one cold night or a single cloudy-day light reading is weak evidence. Do not close vents or change several growing practices to make the test easier to interpret. The aim is to see whether the film makes a useful difference under the conditions in which you actually use the greenhouse.
Use the result to decide how much, if any, of the remaining glazing to cover. If energy use falls consistently and light and moisture remain acceptable, extend the insulation only where it suits your growing plan. If the result is unclear, repeat the trial or compare another option rather than buying material for every pane. For a model in the Limited Edition aluminium greenhouse range, use the trial results alongside its confirmed glazing and frame details when deciding whether to extend coverage. Stop or revise the plan if the covering interferes with ventilation, access or inspection.
Frequently asked questions
Will bubble wrap keep a greenhouse frost-free?
No. It can slow heat loss through the covered glazing, but it does not make heat or guarantee a minimum temperature. The result depends on the greenhouse, weather, ventilation and any heating. Monitor the temperatures your plants actually experience rather than assuming the wrap will prevent frost.
How much light does bubble wrap block?
There is no single figure for every film. Light transmission varies with the material, coverage, condition and installation. Ask for the supplier’s light-transmission information, preferably for plant-relevant light, and compare readings at crop height before and after a trial.
Should bubble wrap touch the glass?
There is no universal arrangement. Some products may specify contact with the glazing; others may call for a gap. Follow the film and greenhouse suppliers’ instructions, and consider where moisture could collect. Do not assume a particular bubble direction or spacing suits every system.
Can I use ordinary packing bubble wrap?
Do not assume it is suitable for prolonged greenhouse exposure. Packaging film may not have published information about UV exposure, light transmission or repeated seasonal use. Ask its supplier about those conditions; if the answer is unclear, choose a product specified for the intended setting.
How can I tell whether the insulation saves energy?
Compare measured heater energy while holding the same target temperature, using periods with similar outside temperatures, wind and sunlight. Record ventilation and heater settings too. Use actual kWh where available, then multiply any measured reduction by the applicable energy rate on your plan.
Bubble-wrap insulation is worth considering when a heated greenhouse loses substantial heat through glazing, the fixings are compatible and a trial shows that heating use falls without an unacceptable loss of light or increase in moisture problems. It is a poor fit when daylight is already limiting, ventilation would be obstructed or the frame has no confirmed attachment method. Judge it by comparable energy readings, crop-level light and condensation checks—not by a promise of a particular temperature or bill reduction.
