
Building and Maintaining No-Dig Greenhouse Beds
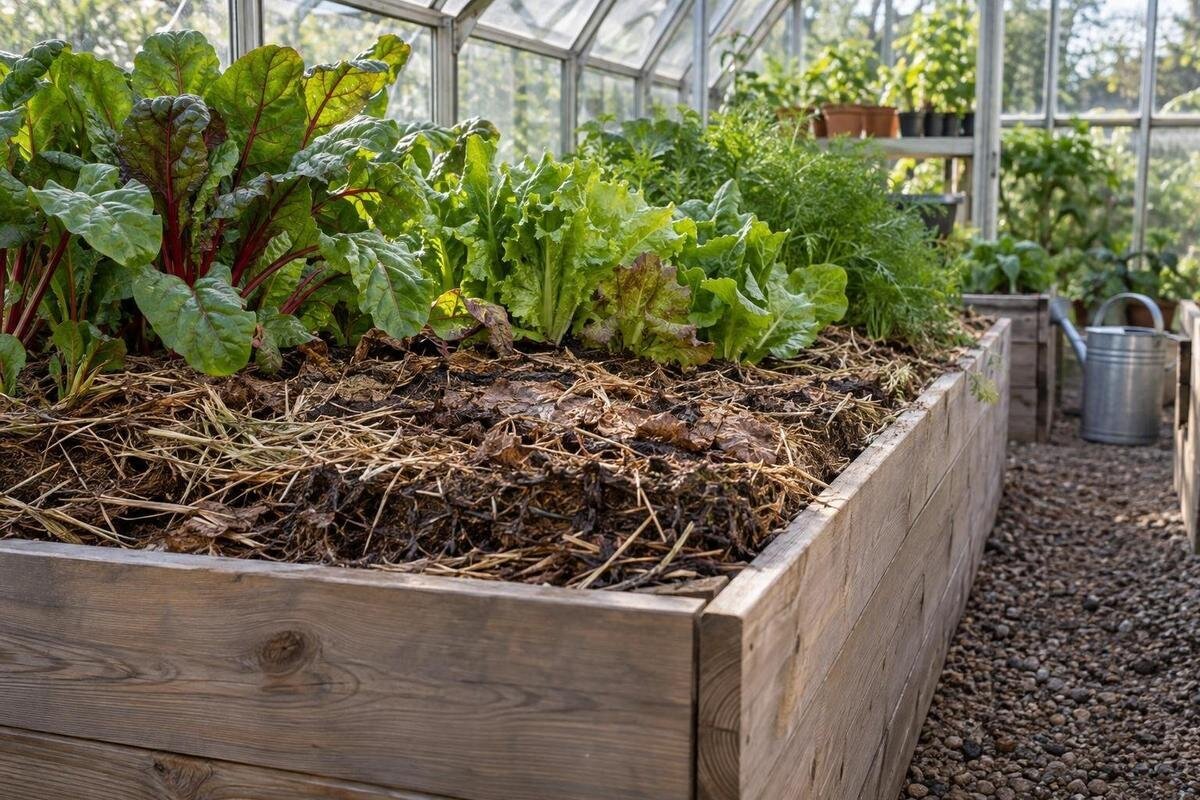
Greenhouse growing
Under a greenhouse roof, a no-dig bed needs more planning than a layer of compost over existing ground. It must suit the soil below, stay protected from foot traffic, receive water deliberately and leave room for access. This guide explains how to set out permanent beds, prepare the surface, measure additions and maintain the growing area without routinely turning the soil.

01
How no-dig beds work under a greenhouse roof
No-dig describes how a permanent bed is managed, rather than a bed that is never touched. Routine digging, rotary cultivation and turning the whole soil layer are avoided; organic matter is placed on top, and people stay on the paths. Sowing, transplanting and removing a crop still create small areas of disturbance. The aim is to leave the bed’s wider structure in place between crops, not to forbid every small tool or planting hole. Keeping the same bed boundaries and walking routes from one crop to the next reduces unnecessary rearrangement. It is an ongoing way to care for soil, not a one-off layer applied at setup. This approach will not, by itself, cure unsuitable, compacted or badly drained ground.
Under a greenhouse roof, the bed is sheltered from rainfall, so water supply becomes a deliberate part of the method. A surface addition cannot depend on rain to settle it or supply moisture. Decide whether plants will grow in the existing soil or in a contained raised bed, then mark growing and non-growing areas before adding material. The Aluminium Greenhouses listing gives floor-area options from 3.77 m² to 28.08 m²; treat that as total greenhouse area, not planted space. Compare the particular option with a sketch that includes paths, access and any area used for other purposes. This distinction matters for working out both water needs and the amount of material to spread.
Measure bed space, paths and reach
Measure the usable interior of the greenhouse you plan to use, rather than drawing beds from an outside footprint or catalogue area alone. Mark the door, fixed equipment, opening panels, supports and likely water access. Then plot each permanent bed and the paths around it. Choose bed width according to whether you can reach from one or both sides; the practical test is whether you can tend every plant without stepping into the soil. A long bed is not automatically more useful if its far end is awkward to reach or harvest. If pots or trays will share the space, include them in the drawing rather than treating every open patch as future bed area.
Keep the route from the entrance clear, and plan how tools, compost and harvested crops will be carried through the greenhouse. Leave room to work along bed edges, and make sure mature plants or their supports will not block access to neighbouring crops. The Bloomcabin Prestige Greenhouse is listed in floor-area options from 3.77 m² to 28.08 m². Use the particular option under consideration to test your bed-and-path sketch: the total area range does not specify bed widths or a planting layout. A plan should still work when plants are mature, not just on an empty floor.
02
Choose in-ground or framed beds
In-ground beds use the existing soil beneath the greenhouse, with paths defined alongside them. They need no frame to function; a clear edge can help keep amendments and loose path material from spreading across the growing surface. The soil can remain a permanent strip even if no raised structure is built around it. Where you add a frame over existing soil, it mainly defines or contains the bed; it does not remove the need to assess the soil below. Keep the edge easy to work around and visible, so it does not become an obstacle or disappear under path material. A marked boundary also makes it easier to see which areas should remain untrampled.
Raised sides can define a bed and place its surface at a more convenient height, but raised sides alone do not create a complete growing system. A bed over a hard, impermeable floor needs suitable growing depth and a way to manage excess water; check that the complete design and materials suit the intended crops before filling. Storage also affects planning: the Limited Edition Aluminium Greenhouses with Storage are described as including storage, so show that use separately on your sketch rather than counting the entire greenhouse as planted space. In-ground and contained beds can sit in the same greenhouse, but mark their boundaries and maintenance needs clearly.
Check the existing soil before covering it
Check the ground before covering it with a frame or surface layer. Look for established perennial weeds, persistent standing water, compacted areas, uneven low spots and a history of poor growth. Thin annual weeds can often be removed at the surface, but burying established weeds beneath a modest addition is not a reliable way to remove them. If the greenhouse is not yet in place, assess the intended bed area before it is covered; if it is already covered, use controlled watering to observe where water pools or drains slowly. Note whether the issue affects one patch or the whole bed, as the pattern can help guide further investigation.
Consider where the soil came from and whether its previous use is known, particularly if you plan to grow food. If contamination is possible, or crop failure has repeated without a clear cause, arrange a suitable soil assessment before adding material: a clean-looking surface does not make unknown soil safe. The Lean-to Greenhouse page lists floor-area options from 3.69 m² to 14.34 m², but that range says nothing about drainage or soil quality at your site. Treat site suitability as a separate decision from choosing a greenhouse. Very compacted or waterlogged ground also needs its cause understood before it is covered.

03
Prepare the surface without turning the bed
Clear loose rubbish and spent plant material from the bed, and deal with weeds before establishing the permanent surface. Cut annual weeds close to the ground or remove them at the surface; take extra care with perennial weeds that can regrow from roots or fragments. Avoid routine digging through the whole bed just to make it look tidy. If vigorous weeds are established, pause and choose an appropriate control approach rather than assuming a thin layer will suppress them. Remove or manage crop residues according to their condition and crop-specific advice, rather than burying everything by default. The aim is a workable starting surface, not sterile soil.
Smooth only what needs smoothing and keep path soil separate from the beds; moving material back and forth can blur the boundaries you want to preserve. Do not compact the growing area while preparing it. Once the surface is clear, measure the actual bed area before estimating additions. The Limited Edition Aluminium Greenhouses listing gives floor-area options from 3.77 m² to 28.08 m²; use a selected greenhouse option only as an outer limit, because paths and working space are not part of the bed surface. Mark the bed edges before applying anything so the measured area is easy to verify.
Add organic matter by measurement
Choose an organic surface material that is suitable for growing plants and consistent enough to spread evenly. Mature compost or another well-decomposed soil conditioner may be appropriate, but the right choice depends on its contents, the existing soil and the crop. Check the supplier’s description and crop-specific guidance rather than treating every compost-like material as interchangeable. Avoid unknown material or fresh, unstable additions around established plants. Organic matter can change soil texture and nutrient supply; more is not automatically better.
Spread additions across the surface instead of incorporating them through the bed. Estimate the amount from bed area and intended layer thickness: square metres multiplied by millimetres gives an approximate volume in litres, before settling. For example, 6 m² with a planned 10 mm layer is 60 litres; that is a calculation example, not an application recommendation. For several beds, calculate each one separately and add the amounts together. Choose a suitable thickness using material information and crop-specific advice. The Spacious Greenhouse listing gives floor-area options from 47 to 70 m²; those figures describe greenhouse area, not the bed surface that should receive an addition.
04
Water beds that receive no rainfall
Because the roof excludes rainfall, the watering plan needs to match the actual bed and crop. Do not rely on the greenhouse feeling humid or on the surface layer looking dry: check moisture where active roots are, using a small hand check or tool that avoids damaging plants. The surface may dry before deeper soil does, and different beds may not be at the same stage or receive the same amount. Check more than one place along a bed, especially if a water source reaches it unevenly. Adjust to what you observe, crop growth and conditions inside rather than following a fixed calendar.
Apply water so it reaches the growing area without routinely flooding paths or washing surface material away. Whether you use a watering can, hose or irrigation system, check that water reaches each part of the bed and note persistent pooling or dry patches. Route hoses so they do not obstruct routine work on the paths. The T-Model Orangery Greenhouse page lists floor-area options from 16.52 m² to 30 m²; map water access against the selected bed plan instead of assuming the total floor area is one evenly watered surface. Slow drainage calls for investigation, not simply more frequent watering.
Protect beds during planting and harvesting
Keep work and foot traffic on the paths once beds are established. Carrying bags, kneeling or setting down a wheelbarrow on the growing strip can compact the surface and work against the low-disturbance approach. Keep paths clearly visible and wide enough for your normal tasks, and store tools where you can reach them without crossing beds. If a path starts to disappear beneath mulch or plant growth, restore its boundary rather than shifting the walking route onto soil. Plan how you will bring compost or other additions in, too, so loads do not have to be dragged across the beds.
During planting, make only the holes or narrow openings the crop needs, then arrange surface material around plants without burying stems. At harvest, remove spent crops and manage diseased debris according to crop-specific guidance; do not turn the entire bed simply to clear it. Rotate crop groups between permanent beds where the layout allows, and record which bed held each crop. If space limits rotation, a record still helps you avoid repeating the same planting pattern unknowingly. The Pyramid Greenhouse page lists floor-area options from 5.53 m² to 18.9 m²; check the chosen option against a plan that leaves working access as well as planting space.

05
Respond to problems before adding more material
Watch the bed’s surface and drainage instead of automatically adding another layer whenever plants look poor. If water pools, runs off or passes through one patch much faster than another, inspect both the surface and the soil below; compaction, uneven levels and a restricted route for water need different responses. Repeated additions can also raise the bed and obscure its edges, so check the surface height against paths and frames. A thick layer may conceal a symptom without fixing its cause. A crust or unusual deposit cannot be identified by appearance alone; assess the water and soil where appropriate before choosing a correction.
When growth is uneven, compare affected plants with nearby ones and check watering first; nutrient imbalance, disease and environmental stress can look similar. Avoid adding more compost or fertiliser solely on the basis of one symptom. If the problem persists, use a soil or water test and crop-specific advice, then make one measured change and observe the result. If a crop disease or contaminated soil is suspected, seek suitable advice before reusing the bed. Low disturbance does not mean ignoring problems; it means correcting an identified cause without unnecessary whole-bed cultivation.
Bed care between crops
Treat each crop change as a chance to reset the surface and access, not to rebuild the bed from scratch. Remove previous crop material, check that paths remain clear, inspect how evenly the bed is moist and note whether the surface has settled or become uneven. Add a suitable top layer only when the bed condition and crop plan call for it. Permanent beds do not require an annual addition by default; amount and timing depend on the existing surface, crops grown and material used. If a problem emerged during the crop, write it down before conditions change.
Keep brief notes on crop placement, watering, additions and recurring problems. Record which bed received each addition and how much you applied, rather than noting only that the greenhouse was topped up. A simple sketch of bed edges and water points can help you locate the same patch after crops have been cleared. Compare these notes with what you observe during the next crop: does poor growth recur in the same place, or does it follow a change in planting or watering? This record helps distinguish a bed needing surface renewal from one with an irrigation, drainage or soil issue, so each crop change builds on what you have learnt.
Frequently asked questions
Does no-dig mean I can never use a spade?
No. Sowing and transplanting involve small holes, and you may need to remove weeds or crop residues. The aim is to avoid routinely turning or cultivating the whole bed. Use small, targeted disturbance where it is useful, and keep regular foot traffic on the paths.
How thick should the surface layer be?
There is no single depth that suits every material, soil and crop. Check the material information and crop-specific guidance, then measure the bed area to estimate the amount. A volume calculation helps you order or prepare material; it is not a recommended application rate.
Can I start a no-dig bed on any greenhouse floor?
No. Check the existing ground and drainage before covering it. If a bed sits on a sealed floor, it becomes a contained growing system and needs suitable growing depth and a way to manage excess water. A surface layer cannot correct unsuitable ground below it.
How often should I water a greenhouse bed?
Use the moisture around the roots, the crop’s growth and the conditions in the greenhouse to guide watering rather than following a fixed schedule. Check more than one part of each bed and make sure water reaches the growing area without persistent pooling.
Do permanent beds need new soil every year?
Not automatically. A permanent no-dig bed is managed by observing its surface, drainage and crop growth, then making a measured addition or other correction when needed. Repeated problems call for investigation; covering them with fresh material does not identify their cause.
Successful no-dig beds have stable boundaries and repeatable care: people walk on paths, organic matter is measured for the bed surface, and water is managed because the roof keeps rain out. Assess the soil before covering it, and investigate problems rather than hiding them under a fresh layer. With those conditions in place, a permanent greenhouse bed can be renewed from above while its main structure remains undisturbed.
