
Can a Rainwater Tank Supply Greenhouse Drippers?
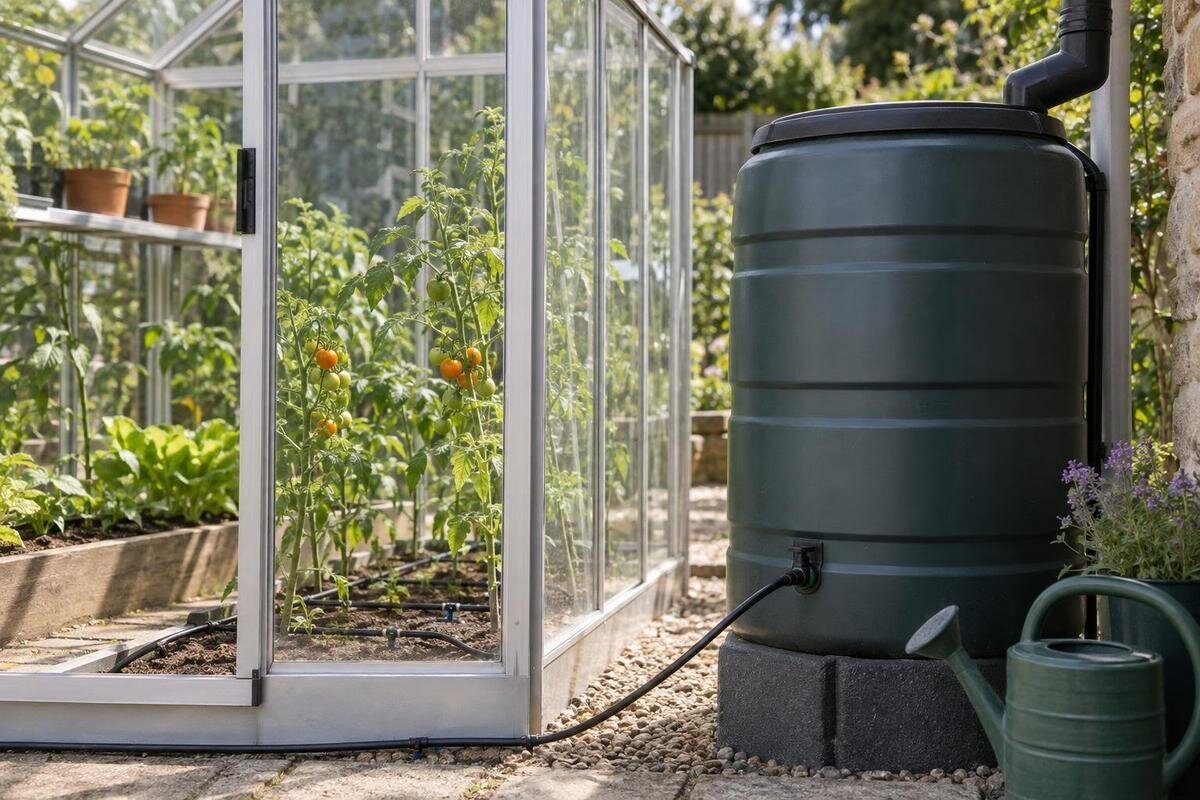
Greenhouse irrigation
A rainwater tank can supply greenhouse drippers by gravity, but only if the pressure remaining at the emitters meets the irrigation maker’s requirements and the line delivers enough water for your planting plan. The key measurement is the vertical height from the tank’s water surface to the drippers, not the tank’s capacity or the height of its lid. That head falls as the tank empties, while filters, valves and pipe runs use some of the available pressure. A complete flow test at the lowest level you plan to use is far more reliable than assuming a dripline will work.

Can a rainwater tank run greenhouse drippers?
Yes, a rainwater tank can supply greenhouse drippers when the available gravity head is enough for the selected irrigation components. In a gravity-fed setup, pressure comes from the vertical difference between the tank’s water surface and each emitter, rather than from a pump. A dripline designed for a pressurised tap may not behave well at low head, whereas an emitter explicitly rated for gravity or low-pressure operation may suit. The word dripper alone does not tell you the minimum pressure or expected output. Water visibly coming from an outlet proves only that some water is passing, not that plants will receive a reliable rate.
Keep pressure, flow and stored volume separate. Pressure is the push available at a point in the line; flow is the volume delivered over a period; tank capacity is the water held in reserve. A large tank can still have too little head, while a line that starts well may deliver less at distant emitters. Many emitters running together can also use more water than expected. The useful question is whether the complete system, at the water level you plan to use, meets both the emitter maker’s pressure requirements and the watering demand of your actual planting layout.
Measure the head at the lowest tank level
Measure the vertical difference from the tank’s water surface to the drippers, not from the tank base, lid or outlet fitting. The height of the water surface creates the static head. A horizontal gap between tank and greenhouse does not add pressure, though a longer pipe route can increase friction loss. If emitters sit at different heights, the highest ones usually have the least head, all else equal. To assess the least favourable point, use the lowest tank surface you expect to draw from and compare it with the highest emitter. This height is not the same as a pressure reading while water is flowing.
As the tank level falls, the water surface drops and gravity pressure declines. Assess both the full tank and the lowest level you intend to use, rather than relying on the more favourable measurement. If you are comparing a Lean-to Greenhouse, mark its proposed position, the tank and the highest planting point on your site sketch. Record the vertical measurement separately from the distance the supply pipe must travel, so the two are not confused when discussing the layout with an irrigation supplier. Use the emitter maker’s head or pressure guidance to interpret the height available. Raising a tank can increase head, but a full tank is heavy; have a competent professional assess any support rather than improvising a platform. Set your lowest planned water level before selecting emitters, so every component is assessed against the same condition.
Account for resistance in the pipework
Water loses pressure as it moves through pipework and components. Long runs, narrow-bore tubing, elbows, joins, filters and valves all contribute resistance, and the effect can be more noticeable when several lines draw water at once. The farthest outlet is often the hardest to supply. When comparing Limited Edition Aluminium Greenhouses, use the chosen footprint and final site position to plan the route from tank outlet to last emitter. Draw the shared supply pipe and each branch separately, then mark the proposed filter and valves. This makes it easier to explain the complete route to an irrigation supplier, rather than describing only the length of dripline inside the greenhouse. Include the pipe needed to reach the entrance and the route around your planned beds or benches.
Follow the irrigation supplier’s recommendations for pipe size and maximum run. Avoid adding unnecessary bends or connectors, and keep the supply route as direct as practical. A larger-bore supply line can reduce friction compared with a narrower one, but it will not make an emitter operate below its specified minimum pressure. Include the outlet, filter, valve and drippers when checking the whole system. If one branch is much longer than another, test each branch rather than assuming they will perform alike.
Choose emitters specified for low pressure
Check the manufacturer’s operating-pressure range and the flow rate stated for that range. Look for clear information that the emitter is suitable for gravity feed or the low pressure available in your setup. A flow figure without its test pressure is not a reliable prediction for a tank-fed line. Some drip tape and individual drippers are designed for lower-pressure use, but the product information needs to say so. If the operating requirements are not clear, ask the supplier before buying rather than finding out after the line is laid.
Pressure-compensating emitters are not automatically the answer: they are designed to maintain a more consistent output within a specified pressure range, and that range may start above what gravity can provide. Other emitter designs may change output as pressure changes. When planning irrigation for a T-Model Orangery Greenhouse, compare emitter specifications against the head available at your planting positions. Keep the stated operating range and rated flow together in your notes; comparing flow figures alone can hide different pressure requirements. If you intend to combine different emitter types, identify each type on the layout so their test results can be interpreted separately. Avoid treating holes punched in tubing as equivalent to rated emitters, since their output and consistency are not specified in the same way.

Include filters, valves and rainwater connections
Rainwater can carry leaves, grit and other debris from the collection surface or tank. A filter protects the drippers only if its rating meets the irrigation maker’s requirements and it is kept clear. A clogged or unsuitable filter can restrict flow, which matters more when the available head is low. Check where the filter will sit and whether you can reach it for inspection and cleaning without disturbing the planting layout. If you intend to collect roof water from a Pyramid Greenhouse, check the selected model’s drainage details and whether the gutter or outlet parts you need are listed as compatible or included. Keep the collection connection and irrigation filter as separate items in your buying plan: confirming a route into the tank does not establish what is needed between its outlet and the drippers.
Treat every valve and control as part of the pressure check. Some automatic valves or timers need particular minimum pressure or flow to open and operate reliably; others may be specified for gravity-fed use. Read the requirements for the exact component and test it in place. A pressure reducer cannot create pressure, so do not add one without checking that the remaining pressure will still suit the emitters. Confirm which irrigation parts are included in any kit and which need to be sourced separately.
Test the complete system at a low tank level
Test the layout with the filter, valves, tubing and all the lines you intend to run connected. Start with the water near the lowest level you expect to use, since a test with a full tank can give a misleading result. Open the same number of zones that will run together in normal use. When planning a Limited Edition Aluminium Greenhouse with Storage, include the actual growing area and intended irrigation equipment positions in your test layout, rather than testing a short line beside the tank. Do not assume the greenhouse includes a filter, timer or tank; check the listing and plan for the components you will actually use. Note which valves are open and which branches are connected before collecting water. A result is useful only if you can relate it to the arrangement that produced it.
Collect water from several emitters, including one near the start of a line and one at the far end. Use labelled containers and the same repeatable interval for each collection, then measure the volume with a jug. Choose an interval that lets you read the collected volume clearly, and record that interval alongside every result. It is a measurement period, not a recommended watering duration. Label each sample with its branch and position so you do not lose track of which outlet produced it. Check for leaks or connections that let water escape, and repeat the test if you change a filter, valve, pipe route or emitter. If the result falls short, retain the tank level and system configuration in your notes. Where practical, change one part of the arrangement at a time and repeat the same collection method, making the before-and-after results easier to compare.
Compare output along each line
A single working dripper does not confirm that the rest of the line is supplying water evenly. Compare measured output near the inlet, partway along and at the far end, and repeat this for each branch. Differences can point to low available pressure, a partial blockage, a kink or a leak. They can also reflect intentional differences between emitter types, so compare the results with the product’s stated performance rather than expecting every outlet to match exactly.
If some emitters deliver less, first check for obvious leaks, blocked filters and obstructed tubing, then repeat the same collection test. When preparing a layout for a Bloomcabin Prestige Greenhouse, mark sample points along the actual crop rows and pipe runs. Include the highest emitter as well as the farthest one if they are in different positions. Give each sample point a simple label that you can reuse when checking performance later. Compare like-for-like emitters under the same test conditions, rather than combining results from different types or tank levels. A suitable gauge used while water is flowing can help confirm pressure, but use a gauge and setup appropriate for the low-pressure range or ask an irrigation supplier to measure it.
Match the flow to the planting layout
The number of emitters and the crops they serve affect the total flow required. Count the actual pots, beds or planting points in your plan and check each emitter’s rated output at its specified pressure. Greenhouse floor area is useful for sketching a layout, but it does not say how many plants you will grow or how much water they need. The Spacious Greenhouse listing covers 47 to 70 m²; use that footprint to organise the growing space, then count the proposed emitters within it. Keep a record of which planting points each branch serves, including any different emitter types. This lets you relate the measured delivery to your crop-specific watering plan rather than relying on a generic rate for the whole enclosure. Distinguish the flow an emitter is rated to deliver from the amount you actually collect during your test.
If too many lines running together reduce performance, dividing them into zones can lower the simultaneous flow through shared pipework. That may reduce friction losses, but it does not increase the tank’s stored volume or change the static head. Group the proposed branches clearly on your layout and note which will run together. Make sure any valve or timer for each zone can work at the available pressure, then test the intended combinations at the lowest planned tank level. If you intend to run zones separately, assess each one that way rather than using results from a test with every branch open. Keep expected water use in view as well: a successful flow test shows what the system delivers, not whether the tank holds enough water for all the zones you intend to water.

What to change if gravity flow is inadequate
If a test shows weak or uneven delivery, check the simple causes first: a dirty filter, a partly closed valve, a kink, a leak or an unnecessarily long route. Rework the layout only within the pipe and run recommendations for the irrigation components. A lower-loss route or fewer emitters running together may help, but neither will make an incompatible dripper suitable for insufficient pressure. If you raise the tank to gain more head, get a competent professional to assess a stable support for the full tank.
A different emitter explicitly rated for the available head may be a better fit. A pump is another possible option, but its pressure and flow need to match the irrigation components and planned number of emitters; choosing one by greenhouse size alone is not enough. If you are comparing Aluminium Greenhouses, keep the enclosure choice separate from pump selection and use your proposed irrigation layout to define the latter. Give the irrigation supplier the emitter specifications, intended zone combinations, pipe route and low-level test results. Explain whether the problem affects the whole system or only particular outlets, rather than describing it simply as weak flow. Use that information to guide the choice, and arrange pump installation in line with the manufacturer’s instructions and appropriate professional advice.
Maintain performance as the tank level changes
Keep the tank inlet screen and irrigation filter in the condition and cleaning schedule specified by their makers. Rainwater debris can build up, and a restriction that seems minor in a pressurised system may have a noticeable effect on a low-head line. Inspect tubing and connections for leaks or kinks, and flush lines only as directed by the irrigation supplier. If you add emitters or extend a branch, repeat the flow test: a change in total demand or route can alter how the rest of the line performs.
Check how the system behaves at more than one tank level, especially before relying on it for a long period without regular observation. Rainfall does not guarantee that the tank will be full when watering is needed. What reaches the tank also depends on the collection surface, so consider debris and other material entering the water and check local guidance if you plan to use it on edible crops. Keep the test results with your irrigation notes; they give you a useful comparison if output changes later.
Frequently asked questions
Does the tank’s water level need to be above every dripper?
For gravity feed, the water surface needs to be above the emitters, including the highest ones. That alone does not guarantee enough pressure: check the emitter’s operating requirements and test the line as the tank level falls.
Will any dripline work from a rainwater tank?
No. A product’s stated flow may depend on a minimum pressure that a gravity-fed tank cannot provide. Choose emitters whose manufacturer specifies suitable low-pressure operation, then test them in your complete setup.
Can I use an automatic timer?
Only if the specific timer and valve are designed to operate at the pressure and flow your tank supplies. These components can add resistance, so include them in the test rather than checking the drippers on their own.
Does a full tank give better pressure than a nearly empty one?
Usually, because a higher water surface provides more gravity head. The difference matters when a system is close to its minimum operating requirements, so test at the lowest level you plan to use.
How can I tell whether the flow is adequate?
Run the complete system and collect water from near, middle and far emitters over the same repeatable interval. Compare the measured output with the emitter maker’s information and your planting plan; there is no single suitable rate for every greenhouse.
A gravity-fed tank can supply greenhouse drippers when the available head meets the emitters’ requirements and the complete system delivers enough water for your planting plan. Test at the lowest water level you intend to use, with every filter and valve in place, and compare output along each line. If delivery is inadequate, the results can help you decide whether to simplify the route, divide the lines into zones, change emitters or investigate a matched pump. Tank capacity alone cannot establish whether the drippers will work; measured delivery at the least favourable outlets is the more useful guide.
