
Choosing a Drip Irrigation Setup for Your Greenhouse
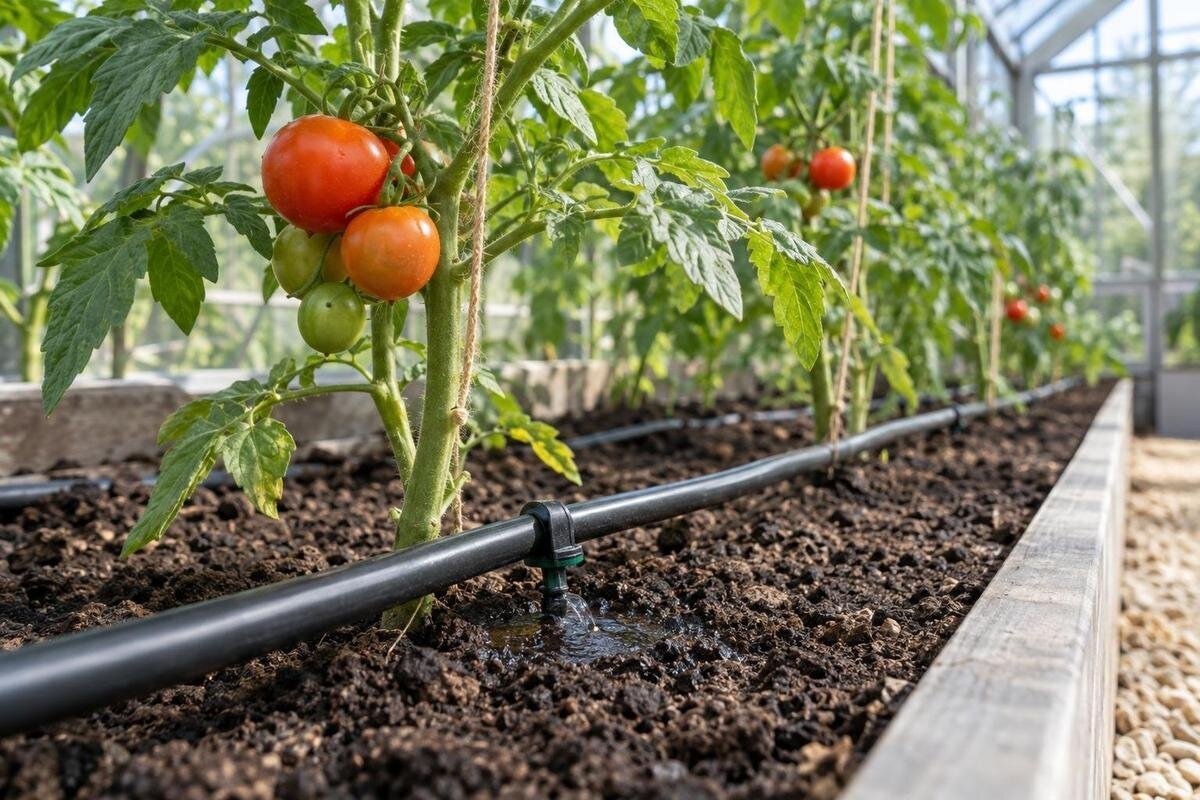
Greenhouse watering
Greenhouse drip irrigation is more than a length of hose with a few drippers attached. Pots, grow bags and planted beds call for different emitter arrangements, while filtration, pressure and flow all affect whether water reaches every outlet. A reliable setup starts with a map of where crops sit, then matches the pipe layout to the water source and the way you garden. This guide covers emitter choices, filters, pressure checks, zoning and commissioning so you can compare systems on practical grounds. It does not prescribe a universal watering duration: crop, growing medium and greenhouse conditions change how quickly roots need water.

Map the growing area before buying tubing
Before buying tubing, draw the greenhouse as it is actually used. Mark beds, grow bags, individual pots, benches, paths, doors and the point where water enters. Add the approximate length of each planted row, and note whether containers move during the season. This sketch informs line length and zone count; total floor area alone does not. Keep access to crops and doors clear so tubing does not cross a busy route. If you are still comparing structures, the Classic aluminium greenhouse range is listed from 3.77 to 28.08 m², a span that makes it important to plan from the chosen footprint.
Measure the route a pipe will actually follow, including turns around benches, rather than measuring a straight line from the tap to the far bed. Mark raised benches and any noticeable height change between the supply and outlets; these details can affect the system design, so include them when checking a kit’s specifications. Record the number and approximate size of containers, crop spacing in rows, and any plans to expand. A labelled sketch with dimensions is more useful than a list based only on the greenhouse’s length, and it can be updated if you rearrange the growing area.
Group containers and beds into useful watering zones
Group plants by how they are grown and how often their root zones need attention. A large pot, a small pot and a grow bag may not wet at the same rate, even if they hold the same crop. Growing medium, container volume, planting density and position all matter. Beds can also contain crops at different stages. Identify groups that could share a watering setting without regularly leaving one area too wet or another too dry. Split a bed or container group when its needs differ enough to make a shared run time difficult to manage.
Physical location can be a useful boundary: keep a row on one branch, or group pots on a bench, if that makes inspection and shut-off easier. Avoid creating a separate zone for every small difference; more valves and controls add complexity, so group plants that can genuinely share a setting. Leave flexibility if pots move, with accessible connectors or a spare branch that can be capped as the system instructions allow. The Lean-to Greenhouse range is listed in sizes from 3.69 to 14.34 m²; use the actual growing layout for the chosen structure, not its total area, to decide how many groups need separate control.
Choose drippers for pots and dripline for rows
Point-source drippers suit layouts where each pot or plant position is separate: a supply tube runs along the bench or bed, with outlets placed where needed. They can be repositioned as containers change, but every branch and connector is another point to inspect. For a larger container or a plant with a broader root area, choose the number and position of outlets using the emitter guidance and observed wetting, rather than assuming one dripper per pot. Check whether an emitter is fixed-rate or adjustable and what operating pressure its stated output requires.
Dripline has outlets built into the tube at set intervals, so it can follow a planted row without adding a separate dripper at every plant. Compare emitter spacing, stated output, allowable line length and pressure range with the row plan. Fixed spacing may not suit widely spaced crops or a short, mixed bed. A higher stated output is not automatically better: water delivered too quickly may run off before it soaks in. If you are considering a Limited Edition aluminium greenhouse, use your crop plan to work out how much dripline you need and where individual drippers would be more practical.
Match filtration and pressure control to the water source
Choose a filter by checking the requirements for the emitters and other components, not just by looking at the water source. Fine outlets can be affected by particles, so use the mesh or micron rating specified by the system manufacturer. Water from a tank or other stored source may carry debris that needs attention; check the water and filter regularly. A filter removes particles it is designed to catch, but should not be treated as a solution for every water-quality issue. Make sure it is accessible for cleaning, and follow the maker’s instructions for the filter type you select.
Check whether the system needs a pressure regulator and confirm that its operating range suits the emitters. Outlet flow can vary if pressure is outside the stated range, and different emitter types may have different requirements. Follow the kit diagram for component order; it may specify a filter, pressure control, mainline and branches in a particular sequence. When planning irrigation for a T-Model Orangery Greenhouse, include these components in the supply route rather than allowing space for tubing alone. If connecting to a household supply, ask a qualified plumber or the relevant water supplier about suitable connection and backflow arrangements.

Measure the supply under running conditions
A pressure reading taken when no water is flowing may not show what the system receives during use. Check pressure at the intended supply point while water is running, using a suitable gauge and following its instructions. Note whether other usual water uses are happening at the same time, as they may affect the result. If the reading changes noticeably under different conditions, discuss that with the system supplier before choosing emitters or controls. Do not assume that pressure at the tap will be the same at the far end of a long or branching layout.
A bucket and a timer can help you check how much water the supply delivers at the tap, but this does not replace a pressure reading or a test of the installed system. Compare the measured supply with the combined emitter output for a zone, using the manufacturers’ figures at the relevant operating pressure. If the proposed zone demand is beyond what the supply can provide, ask about dividing it into smaller zones or choosing a different design. The Pyramid Greenhouse range is listed from 5.53 to 18.9 m²; compare the crop layouts you are considering and count their outlets before assessing each zone’s demand.
Route lines for access, flushing and expansion
Plan a main supply line and branches around the planted areas, with valves placed where you can reach them. Route pipes along the edges of beds or benches where practical, and keep paths, doors and everyday access clear. Follow the system instructions on pipe type, connections and supported line lengths; a layout that works on paper can be awkward if it obstructs normal greenhouse use. Keep the filter, pressure controls and joins accessible for inspection. If lines cross an area where people walk, reconsider the route or use an appropriate way to secure and protect them.
Some systems have ends or fittings that can be opened for flushing; allow room to reach them and follow the manufacturer’s method. Avoid sealing an end permanently if the design requires it to be flushed, and do not assume every line uses the same fitting. If you are considering a Limited Edition Aluminium Greenhouse with Storage, mark the storage area on the plan you use before fixing pipe routes, and keep access to it clear. Allow for likely changes to pots or beds, but do not add unused branches without checking how they affect the system’s pressure and flow.
Manual controls and timers for separate zones
Manual valves can be suitable when you are happy to open and close each zone yourself. A timer can make repeated watering more convenient, but it does not remove the need to inspect the plants and system. Check that the timer is compatible with the supply pressure, flow and connection, and that it can operate the valves or emitters in your chosen layout. If different groups need separate settings, a single control for the whole greenhouse may be difficult to manage. Decide whether each zone needs its own valve or control before buying components.
Set a routine only after observing how the root area responds. Greenhouse conditions, crop growth, pot size and growing medium affect how quickly plants need water, so a single fixed duration is not reliable for every layout. Check moisture below the surface as well as around the emitter, and adjust the setting if the soil becomes saturated or remains too dry. Keep the programme easy to change as conditions and plant growth shift. For a Bloomcabin Prestige Greenhouse, record the crop groups and their watering settings alongside your layout, so you can keep track of adjustments through the season.
Test distribution before relying on the system
Before settling on a routine, commission the system according to its instructions. Flush the pipework if required, check the filter and connections, and run one zone at a time. Catch water from several outlets for the same period, including points near the supply and at the end of each run. Compare the results rather than assuming that a line with water at its far end is delivering evenly. If a test requires emitters to be disconnected or end caps opened, use the method supplied with the system rather than improvising.
Check the wetting pattern in the root area, not just the surface beneath each outlet. Look for dry areas between dripline outlets, water pooling around a dripper or runoff from a pot. If results vary, check for a kink, blocked emitter, loose connector, pressure issue or line length beyond the manufacturer’s guidance before extending the run time. Repeat the test after changing the layout or components. If you are planning for the Spacious Greenhouse range, listed from 47 to 70 m², mark test points on your layout so the checks include the furthest outlets on each branch.

Maintain filters, emitters and pipework
Inspect filters at intervals recommended by their manufacturer and clean them as directed. Check connectors, end fittings and visible tubing for leaks, kinks or movement, and look for outlets that are blocked or delivering differently from their neighbours. Stored water and other sources can carry particles that collect in a filter or line. Do not use wire, tools or cleaning chemicals on an emitter unless its maker says they are suitable; a damaged outlet may continue to give an unreliable flow. Keep notes on which parts need attention so recurring problems are easier to trace.
Recheck the system when you change the water source, add branches, move containers or replace emitters. If every outlet seems weak, start by checking the supply, filter and pressure-control components; if one outlet is affected, inspect its connector, nearby tubing and emitter. These are useful first checks, not a diagnosis of every fault. Avoid trying to solve uneven delivery simply by increasing pressure, as that may take components outside their stated range. Use the system instructions or ask the supplier for help if cleaning and inspection do not explain the problem.
Compare system contents with the crop plan
Before buying a kit, compare its contents with your sketch. Check the total tubing length, the type and number of emitters, emitter spacing, connectors, valves, filter, pressure control and any fittings needed to close or flush line ends. Confirm the stated pressure range, required supply flow and maximum recommended line length for the parts you plan to use. A kit’s headline tubing length does not show how many branches or outlets it can supply. Count what your layout needs and identify any components that must be sourced separately, without assuming they are included.
Check that the connection suits your water source and that replacement emitters, filters or fittings can be identified by their specifications. If your system may grow, ask whether additional lines can be added without changing the requirements for the existing zones. Compare instructions for maintenance and compatibility, not just the initial package contents. Keep the greenhouse sketch, component details and test notes together; they make it easier to troubleshoot later or reproduce a successful layout. Where a specification is missing or unclear, ask the system supplier rather than guessing from the appearance of a fitting.
Frequently asked questions
Does each pot need its own dripper?
Not always. The right number and position depend on the pot’s size, growing medium, plant and the emitter’s output. Start with the emitter guidance, then check whether water reaches the root area without pooling or running off. Larger containers may need more than one outlet, but test the wetting pattern before settling on an arrangement.
Do I need a filter for greenhouse drip irrigation?
Check the requirements for the emitters and other components in your system. Small outlets can be affected by debris, so use a filter with the rating specified by the system manufacturer. Water from a tank or other stored source may need particular attention to particles and organic debris. Clean the filter as directed.
Can I connect a drip system straight to a garden tap?
Only if the system is compatible with the tap’s available pressure, flow and connection. Some setups require pressure control or other components; follow the system instructions rather than assuming a direct connection will work. For a connection to a household water supply, ask a qualified plumber or the relevant water supplier about any backflow requirements.
How can I check that water reaches every outlet?
Run the system and compare outlets near the supply with those at the far end. Catch water from several emitters for the same period, then inspect the soil or potting mix below the surface. Uneven results can point to a blocked outlet, kink, pressure issue or unsuitable line length. Test again after making changes.
Can pots and beds share one irrigation system?
They can share a supply, but may be easier to manage on separate branches or zones. Pots and beds can differ in how quickly their root areas need water, so one shared setting may suit some plants poorly. Group areas that can use the same control setting, then test their wetting patterns before relying on the arrangement.
A suitable greenhouse drip system follows the plants you actually grow, works within the measured supply and uses filtration and emitters that meet their stated requirements. Map the layout, separate crops that need different control, and test the wetting pattern before setting a routine. Those checks matter more than choosing a kit by tubing length alone, and they give you a clear basis for comparing options and adjusting the setup as the greenhouse changes.
