
Mulching Greenhouse Beds: Materials, Moisture and Slugs
Greenhouse growing guide
In a greenhouse, mulch is sheltered from rainfall, so its effect on a bed can last longer than it would outside. A cover may slow moisture loss at the soil surface, but a damp-looking layer can conceal dry soil beneath it, while a persistently moist layer may shelter slugs. The useful choice depends on the crop, how water reaches its roots, and whether you can inspect the bed easily.

Before choosing 1
Moisture beneath mulch in a greenhouse
Under a greenhouse roof, rainfall does not normally reach the bed, so water depends on the routine you provide. Mulch shades the soil and can slow evaporation at its surface, but it does not stop crops drawing water through their roots or correct an uneven supply. Sun, ventilation and plant size still affect how quickly a bed dries. Humid air, condensation or damp leaves do not prove the soil at root level has enough moisture. A covered surface may stay damp while plants use water lower down, and neighbouring beds can dry at different rates if one gets more sun or carries larger plants. There is no watering interval that suits every mulched greenhouse bed.
Plan the beds and watering route together. Draw the growing area, paths and places you can reach with a hose or watering can before settling on a fixed layout. When considering the Lean-to Greenhouse, compare the dimensions of your selected size with this drawing. Include the space you need to stand beside a bed and move the cover, not just the planted area. Trace how you will water the far side without stepping on the soil, and identify any corners that would be difficult to inspect. Those corners deserve particular attention in the layout: mulch can conceal an uneven water supply, and a check near the entrance will not tell you what is happening at the opposite end. Make access part of the bed plan rather than trying to fit it around planted beds later.
Match the cover to the growing task
Decide what job you want the cover to do. A loose mulch can shield the surface from watering splash, slow direct evaporation and limit light reaching weed seedlings. It will not remove established perennial weeds, and it cannot repair a bed that stays waterlogged. Sheet materials may block more light but change where water lands; compost behaves differently because it breaks down and adds nutrients. Choose one main purpose rather than expecting a single material to solve unrelated problems. In a greenhouse, ease of inspection and watering are part of that purpose, not afterthoughts.
The crop and its stage matter too. Leave direct-sown rows clear until seedlings are established; a cover can interfere with seed-to-soil contact or shade small seedlings. Transplants need a clear gap around each stem, while pots and grow bags have their own watering surfaces and do not automatically need the same cover as a bed. If you are comparing the Limited Edition Aluminium Greenhouses, mark each growing system on your layout and check the dimensions for the size you are considering. Separate permanent beds from areas used for containers or sowing. This makes it easier to decide which surfaces need mulch now and which should remain uncovered. It also gives you a realistic covered area for ordering material: paths, working space and containers should not be counted as bed surface.
Before choosing 2
Loose organic mulches: straw, leaves and clippings
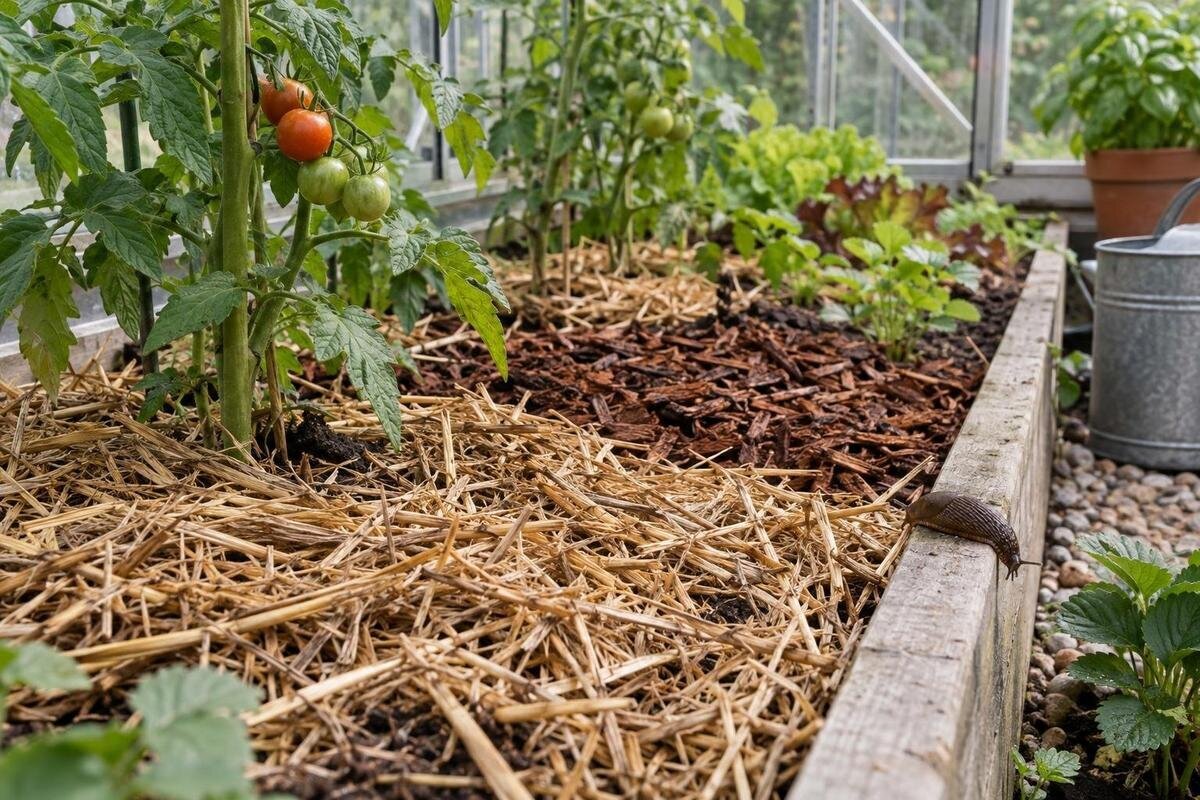
Straw is a loose cover that can be shifted for planting or inspection; choose clean material and check for seed heads. Its open spaces can shelter slugs when it stays damp, so a loose texture is not automatically pest-proof. Leaf mould is finer and tends to settle against the soil, but whole leaves can stick together into a mat after watering. Shred or crumble them before use, then lift any layer that sheds water or seals the surface. Mature, crumbly leaf mould is easier to spread evenly than a heap of wet, unbroken leaves.
Grass clippings need more restraint. Use clippings from an untreated lawn, let them wilt or dry first, and add them in thin layers rather than as a thick, wet mass. Packed grass can settle into a dense mat that slows water reaching the soil evenly and conceals damp patches. Check the bed after watering and pull aside any clippings that have matted. These covers break down at different rates, so watch how much remains before adding more. For a bed layout within a T-Model Orangery Greenhouse, estimate the quantity from the individual bed surfaces. Keep those measurements separate from the enclosure’s total floor area. You can then spread material across each bed in manageable batches and see where the layer is uneven, instead of emptying a whole bag onto one spot and working outwards.
Compost and woody covers behave differently
Mature, clean compost can serve as a surface cover when its nutrient contribution suits the crop and your feeding plan. Unlike straw or a sheet, it breaks down and adds nutrients, so include it as an input rather than treating it as a neutral barrier. If you are unsure whether a particular compost suits the crop, check crop-specific guidance and avoid material of unknown origin. Compost can also hold moisture near the surface, so look beneath it before watering. A layer that gradually disappears may need topping up, but that does not mean more should be added automatically.
Bark and wood chips last longer, but can be cumbersome to clear when you replant an annual bed. Keep woody material on the surface rather than digging fresh material into the soil; breakdown within the bed can temporarily tie up available nitrogen. Mineral covers do not break down and can make later cultivation or top-dressing harder, so consider how you will maintain the soil before using them. If you are planning beds for a Pyramid Greenhouse, include the working space needed to move a persistent cover aside. Think through a complete planting change: where will you put the lifted material, how will you reach the soil, and can you return the cover without mixing it into the bed? A long-lasting material is only convenient if those routine jobs remain manageable.

Before choosing 3
Sheet and fabric mulch need a water plan
A sheet or ground-cover fabric changes how water reaches the bed. With an impermeable sheet, water applied on top may run towards an edge or collect around openings instead of wetting the whole root area. Porous fabrics vary, so check the product instructions rather than assuming that water will pass through at the rate your crop needs. Fit the material around the plants and bed edges without covering access points you need for inspection. These covers can block light effectively, but a hidden, dry strip beneath them is easy to miss.
If you use irrigation lines, put them in position and test them before covering the bed. Check each part of the row with the cover in place, then lift an edge to confirm that water is reaching the soil rather than stopping at the sheet or running away. With surface watering, direct water through openings and check more than one spot. Arrange the cover so you can lift it for weeding or inspection without dismantling the whole bed. If you are considering the Limited Edition Aluminium Greenhouses with Storage, include both beds and storage access in your drawing. Check the selected product’s layout to see where the two uses meet. Avoid planning a bed edge that you can only inspect by moving stored items each time; regular access matters as much as finding room for the cover itself.
Check the soil beneath the cover
Do not decide whether to water from the colour or feel of the mulch alone. Move it aside in several places and check the soil at the depth where the crop’s roots are drawing water. A finger can help with a shallow check; a small hand trowel can expose a deeper layer, provided you work carefully around roots. Check both ends of a bed if they receive water differently. One damp patch does not show that the whole bed is evenly moist, and soil that looks dry at the surface may still be moist below.
After watering, repeat the check to see whether moisture has reached the soil beneath the cover. Dry organic material may absorb some water at first, so water gradually and look for an even result rather than relying on a single heavy application. If the surface stays wet but the bed below is dry, adjust how water is delivered or check for a matted layer that is shedding it. When planning beds for a Bloomcabin Prestige Greenhouse, mark several accessible checking points on your layout, including the far end of each watering route. Use those same points when comparing conditions before and after watering. Consistent checking locations make the comparison more useful than choosing whichever patch is easiest to reach on the day, while still allowing you to investigate any visibly uneven areas.
Before choosing 4
Keep stems and paths open
Keep mulch clear of stems and plant crowns, particularly around young transplants. Material pressed against the base can prolong dampness there and make early damage harder to spot. Do not pile it against lower leaves or close over a planting hole so completely that you cannot see where the stem meets the soil. Leave enough room to check the plant base, remove fallen leaves and reach the soil when needed. A clear ring is also useful when you move the mulch aside to water or inspect the root zone.
Mulch affects the soil surface, not the air movement around the crop. Keep greenhouse paths and the space between plants clear enough to reach beds and remove trimmings; loose material on a path can be carried back onto the bed or get in the way. When assessing the Spacious Greenhouse, use the dimensions of the selected size to draw the paths between your proposed beds. Check the access needed for ordinary maintenance, not just walking through: you should be able to reach a plant base, lift a section of mulch and remove debris without stepping onto the growing soil. A larger total floor area does not by itself resolve an awkward arrangement. Decide where these jobs will be done before allocating all the available space to planting.
Check for slugs beneath damp cover
Mulch does not automatically cause a slug problem, but damp, sheltered material can provide hiding places close to seedlings and low leaves. The risk depends on the material, how wet it stays and whether plant debris or other cover is nearby. Look for feeding damage and slime trails, then inspect beneath the mulch rather than removing it all without checking. Pay particular attention to the edges of beds, clumps of leaves and the underside of material that has stayed wet. A tidy bed is easier to inspect than one with loose debris scattered through it.
Lift small areas of cover at a time, including near pots and path edges, and check when slugs are more likely to be active, such as at dusk or early in the morning. If you repeatedly find slugs or feeding damage, thin the layer, clear plant scraps and inspect again; avoid solving the problem by letting the crop’s root zone dry out. If you are considering the Aluminium Greenhouses, use your proposed bed layout to identify the edges you will need to reach for these checks. Include places beside pots and at the ends of rows, rather than checking access only along the main path. Keep track of where you find activity so you can revisit those areas after changing the cover and judge whether the adjustment has helped.

Before choosing 5
Estimate mulch from bed area
Measure the surface of each bed you intend to cover, not the whole greenhouse floor. For a rectangular bed, multiply its length by its width; split an irregular shape into smaller rectangles and add their areas. Leave out paths, planting gaps that will remain uncovered and any section you plan to keep bare for sowing. If you have several beds, calculate each separately before adding the totals. This gives a more useful estimate than ordering material from the greenhouse’s overall area, which also includes access and any pots or other growing systems.
For loose mulch, estimate volume by multiplying the covered area by the layer depth you have chosen for that material and crop. Keep the units consistent: square metres multiplied by metres gives cubic metres, and multiplying cubic metres by 1,000 converts the result to litres. For example, if your measured area is 4 square metres and your chosen depth is 0.02 metres, the calculation is 4 × 0.02 = 0.08 cubic metres, or 80 litres. This is an arithmetic example, not a recommended depth. Use crop-specific or product guidance to choose the layer thickness. Sheet materials need an area estimate instead, taking account of how the product is fitted. Loose material can settle after watering, so spread it in batches and check the depth across the bed rather than making one deep pile.
Adjust the layer as crops grow
Apply mulch over soil that is already evenly moist, not over a dry surface in the hope that the cover will fix it. Keep sowing rows open, leave gaps around stems and begin with an even layer that you can lift easily. After the first watering, check beneath it at several points. If water does not reach the soil, correct the watering method or thin and reposition the cover before adding more. A small trial area can show how a material settles and how readily you can inspect the bed in your own greenhouse.
As the crop grows, move the cover aside for planting, weeding and checks, then return only what still suits the bed. Remove clumped material that blocks water and clear fallen leaves or crop debris that could hide slugs. Add organic material gradually when it has broken down, and keep persistent woody material separate from the soil if you plan to replant soon. If moisture becomes hard to judge or slug activity increases, thinning or lifting the cover is a practical adjustment. The useful layer is one that remains easy to water through, inspect and maintain.
Frequently asked questions
How deep should mulch be on a greenhouse bed?
There is no single depth that suits every crop and material. Follow any crop-specific or product guidance, begin with a modest, even layer and check that water still reaches the soil. Keep the material clear of stems and adjust it if it mats or hides slugs.
Can I use compost as mulch?
Mature, clean compost can be used as a surface cover when its nutrient contribution suits the crop and your feeding plan. It breaks down and adds nutrients, so it is not an inert alternative to straw or a sheet. Check the soil below it as you would with any mulch.
Should I mulch before sowing seeds?
Leave the sowing row clear so seeds can make contact with the soil and seedlings are not covered. Once seedlings are established, move mulch back around them while keeping it clear of the stems. Follow the growing requirements for the crop you are sowing.
How can I tell whether a mulched bed needs watering?
Move the mulch aside and check the soil at root level in several places. Repeat the check after watering to confirm moisture has reached the bed, including its far end or any area served by a separate emitter. The appearance of the cover alone is not a reliable guide.
Does mulch bring slugs into a greenhouse?
Mulch does not automatically cause a slug problem, but damp, sheltered material can provide places to hide. Lift it and inspect the soil, bed edges and nearby debris, especially when you notice feeding damage. If activity increases, thin or temporarily remove the cover and check again.
For greenhouse beds, mulch works best as a manageable surface treatment: choose it for a clear purpose, confirm that water reaches the roots and keep the cover easy to lift. If moisture or slug activity changes, adjust the material or its coverage rather than persisting with a layer that no longer suits the bed.
