
How to Trace Condensation Drips onto Greenhouse Plants
Greenhouse troubleshooting
Water on leaves at first light does not, on its own, show whether the roof is leaking or the greenhouse needs more ventilation. Condensation, rain entry and watering can leave similar wet patches, but their timing and routes differ. A simple drip map, repeat photographs and overnight temperature and humidity notes let you follow moisture back to a pane, frame or joint. The aim is to identify a repeatable source before changing vents, adding shade or moving plants.

Draw a map of wet leaves and drip points
Before wiping leaves or moving pots, sketch the greenhouse and mark benches, beds, the door and each vent. Use a fixed reference, such as a post or bench corner, and label affected patches A, B and C instead of writing “near the middle”. Note whether each leaf has isolated beads, a broad sheen or a clearly bounded wet area, and whether neighbouring plants at the same height are dry. Record the date, the time you first noticed the water and the affected plant positions. Use the same labels during later inspections, even if the leaves have dried.
Take one wide photograph from the same position each morning, then a close view of the leaves and the surface above them. Keep the roof edge, glazing bars and nearby vents in the wide frame; a close crop alone can hide the route. If the drip point is visible, photograph it before touching or wiping it, and mark its location on a copy of your plan. Include the time with the image and note whether you took it before watering or after rain. Repeating the same view, distance and direction makes small changes easier to spot. If you have to move a plant, record that too.
Use rain and timing to separate a leak from condensation
Condensation is more likely when droplets appear on the inside of glazing after the greenhouse cools overnight, especially if beads form across several panes or return in the same places. A rain leak is more likely when water starts during or soon after rain and follows one seam, fastener or roof-to-wall junction. Neither clue proves the source: rain can coincide with a cool, humid night, and water may travel along a frame before falling. Note what gets wet first—the pane, a joint, the underside of a bar, or only the plant—rather than naming the cause from the leaf alone.
From a safe position inside, photograph the suspected joint and check whether it is wet before drops reach the foliage. Record rainfall and wind-driven rain separately, but do not climb onto the roof or remove glazing to test it. Compare the same area after a dry night as well as after rain; a repeated dry-weather pattern supports condensation, while a rain-linked point needs closer inspection. If your greenhouse is a wall type, the Lean-to Greenhouse listing identifies a 3.69–14.34 m² range. Use the manual for your exact installed version to identify the wall junction, rather than treating a product category as a drawing.
Record when the drops appear overnight
Timing adds another clue. Make an early-evening check and a consistent first-light check: are surfaces already beaded, is the first water on the foliage, or do drops appear later? You do not need to stay awake through the night; a logger can show when air temperature and relative humidity changed, while photographs show when visible droplets were present. Write down the first time you noticed wetness, not an assumed time it began. A dawn snapshot alone cannot show when a drop formed or whether it travelled before falling.
Repeat the checks over several nights and include rain, cloud cover if known, watering time, door use and vent positions. A pattern that returns after nights with similar records is more informative than one unusually wet morning; a night after heavy watering is not a clean comparison. Record the exact greenhouse model and size as well as the settings: the Limited Edition Aluminium Greenhouses range is listed from 3.77 to 28.08 m², but that range does not identify the vents fitted to any one build. Compare like-for-like layouts rather than applying one set of observations to a differently configured structure.
Find the cold surface above each wet patch
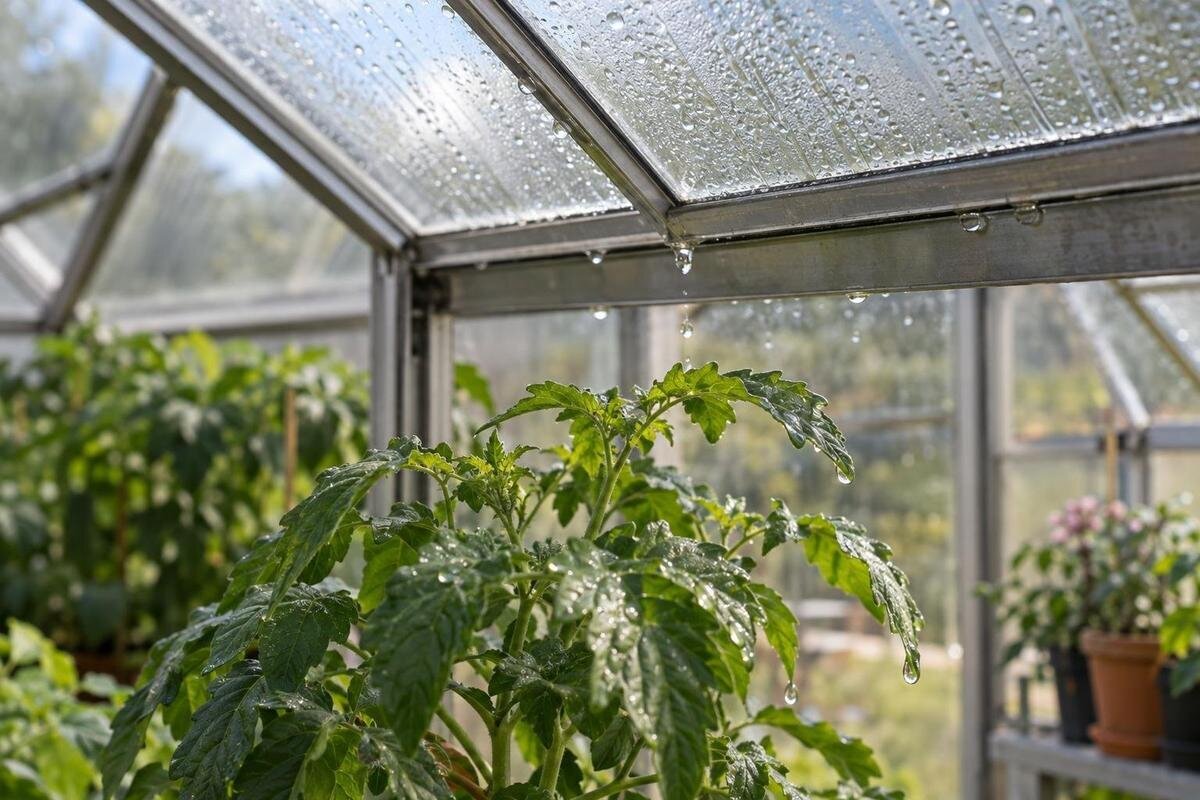
Look at the inside face of the roof before looking only at the plant below it. Condensation may begin as fine beads on a pane or a cooler frame member, then merge and run towards an edge, bar or gutter before dropping. A broad wet film and one narrow track are different clues. Mark the exact wet surface on your plan and compare it with a nearby dry pane at the same time. If you have a thermometer suitable for surface readings, note the same points consistently; a hand on the glass is not a reliable temperature comparison. Keep the time with each observation.
When considering another greenhouse as a response, verify its glazing, frame and vent details for the particular size rather than infer them from its shape or name. The T-Model Orangery Greenhouse listing gives a 16.52–30 m² range; that area information does not establish which surface will cool first or where droplets will run. Compare relevant drawings or model documentation with the route you have actually recorded. A different footprint alone is not evidence that roof condensation will disappear, so check whether the feature you hope to change is genuinely different.

Compare temperature and humidity at plant and roof level
Put a temperature and relative-humidity logger near the plant canopy, out of direct sun, water spray and the immediate airflow from a vent or doorway. If you have a second sensor, place it higher in the greenhouse without touching the roof, glass or frame; label the position rather than calling it simply “top”. Do not set an instrument where a falling drop can wet it. Keep it clear of a heated propagator or misting point, which may give readings that do not represent the rest of the greenhouse. If you have only one logger, keep it in one position for the full comparison, then repeat later at another height.
Use the same sensors, positions and recording interval on each comparison night, and write down where they were placed. Air temperature and relative humidity describe the air at the sensor, not the temperature of the glazing; relative humidity can also shift as air cools. Read the records alongside dated photographs, not as standalone proof. The Pyramid Greenhouse listing covers 5.53–18.9 m²; when considering a particular size, plan where readings will represent the growing area rather than treating one point as a map of every corner. If readings differ by position, keep the labels and note the difference instead of averaging it away.
Follow the water along the roof and frame
Now follow the likely route backwards. From the wet plant, look straight up and then along the roof bars, glazing edges, frame members, vents and gutters. Water can run along a sloping surface or support before it detaches, so the place where a drop lands may not sit directly below the place it formed. On your photograph or plan, draw arrows only for routes you can see; use a question mark where the trail disappears. Compare several drips: a shared route towards one bar is a stronger clue than one isolated drop.
Photograph the first visible bead and the point where it leaves the surface, if both can be seen from inside. Check whether a line ends at a frame joint, opening edge or seal, but do not pry at seals, loosen parts or dismantle an opener. If the route is near a storage section or another junction, label that separately. The Limited Edition Aluminium Greenhouses with Storage range is listed from 5.52 to 28.08 m²; an assembly drawing for the exact version, not the name alone, is what can identify the relevant joins. This distinction helps separate water running from a cold pane from water entering at a joint.
Treat ventilation and shade as variables to test
Ventilation is a variable to document, not a diagnosis you can make from wet foliage. Note which vents were open, closed or moving, and when you observed them; include any automatic control setting shown in the equipment manual. Ventilation can affect both moisture and temperature, so a change may alter one while also cooling another surface. Record observations with the current settings before changing them. Do not force a vent, override an automatic opener or change its mechanism to test a theory; follow the instructions supplied for the equipment.
Treat shade in the same measured way. It changes the light reaching the greenhouse, but it does not repair a leak or guarantee that moisture will not condense overnight. Check whether a proposed shade is compatible with the exact structure and follow the maker’s instructions; do not assume an unverified option fits. The Bloomcabin Prestige Greenhouse listing covers 3.77–28.08 m², but the product name and area range do not establish a specific vent or shade configuration. Check the actual specification for the size and version under consideration, and record when any shade is in place or moved.
Change one condition and compare similar nights
Once photographs and logs point towards condensation, change one management factor at a time. Depending on your setup, that could be a vent schedule permitted by the equipment manual, when shade is used, or another repeatable practice you have already identified. Avoid combining several changes. Keep the plant arrangement and sensor positions fixed where practical. If watering time changes at the same time as a vent setting, a drier leaf does not tell you which change mattered. Compare the recorded drip route as well as the wetness of the foliage, so your trial remains focused on the source you are investigating.
Compare nights with broadly similar weather and note when they are not comparable; outdoor temperature, rain and wind can all differ. After each change, take the same photographs, record the same readings and mark any new drip location. For a larger structure being considered, the Spacious Greenhouse listing gives a 47–70 m² range, but area alone does not tell you the vent layout or whether shade will suit the proposed arrangement. Check those details for the exact size before using it as a comparison. If nothing changes, return to the map and inspect another surface rather than escalating several settings at once.

Protect plants without losing the evidence
You can protect a plant while preserving the original observations. Photograph its position first, then move it temporarily if continued dripping is a concern. Mark the move on your plan, since changing plant height can change where a drip lands. To keep observing the original drip point, place a clean tray beneath it, clear of leaves and vents. A tray confirms that water is falling from above, but it does not prove whether the source is condensation or rain. Empty it promptly and keep the floor clear to avoid a slip.
Separate roof drips from water applied to foliage: log overhead watering, misting and splashes from nearby tasks, and inspect leaves before these sources have time to dry. If the roof is dry but leaves are wet, consider an irrigation or leaf-level source and repeat the observation rather than assigning it to the roof. When redesigning plant positions, the Aluminium Greenhouses listing spans 3.77–28.08 m²; use the exact plan and vent details to assess the layout, because floor area alone does not show where plants or drip paths will sit. Keep the original mapped arrangement as a reference, even after temporary moves.
Know when to consult the supplier or installer
Ask a qualified greenhouse installer or the manufacturer for a model-specific assessment if water appears at one joint after rain, tracks behind a frame, or is associated with a visibly damaged panel or seal. The same applies if tracing the route would require roof access, removing glazing or dismantling a vent. Do not climb onto the roof or take components apart to confirm a suspicion. Use the equipment and assembly manuals for identification; a recurring wet area is evidence to investigate, not a verdict that a particular part has failed.
Send a concise record: greenhouse model and size, a plan of wet plants and drip points, dated wide and close photographs, rainfall and watering notes, vent positions, and temperature and humidity logs with sensor locations. Say whether the inside roof or frame was wet before the leaves, and whether the pattern repeated on dry nights. This helps an installer distinguish a moisture-management question from a possible water-entry point and discuss the relevant ventilation configuration or repair. Keep the original images; annotations are useful, but should not replace them.
Frequently asked questions
How can I tell a leak from condensation?
Look for when and where water appears. Condensation often forms on the inside of cool glazing overnight; a leak is more likely to follow one joint during or after rain. Neither clue is conclusive on its own, so compare the same spot on dry and wet nights and photograph the surface before the drops reach plants.
Why are the leaves wet when the roof looks dry?
The roof may have dried before you checked, or water may have travelled along a frame and fallen away from its starting point. Watering, misting or splashing can also wet foliage. Photograph the area early, inspect the route above the leaves and record any irrigation before deciding where the water came from.
Should I leave greenhouse vents open overnight?
There is no single setting that suits every greenhouse or night. Ventilation can affect both moisture and temperature, so opening a vent may change more than one condition. Record the current arrangement first, follow the equipment manual and compare one permitted change at a time.
Will shade stop condensation dripping?
Not necessarily. Shade changes the light reaching the greenhouse, but it does not repair a leak or guarantee that moisture will not condense overnight. Check that any proposed shade is compatible with the exact structure, then record its position and compare the results rather than assuming it will solve the problem.
Where should I put a temperature and humidity logger?
Place it near the plant canopy, away from direct sun, spray and a vent's immediate airflow. If you have a second sensor, place it higher in the greenhouse without touching glazing or the frame. Record each position and keep it consistent: the readings describe air at the sensor, not the roof surface.
The most useful diagnosis is a repeatable chain in the evidence: a particular interior surface becomes wet, water follows a visible route, and foliage below receives drops on nights with a matching record. Keep the map, photographs and logs together. If the path points to a joint or remains unclear, use the model-specific manual and have an installer assess that point safely.
