
Greenhouse Drainage: Tackling Water Pooling After Watering
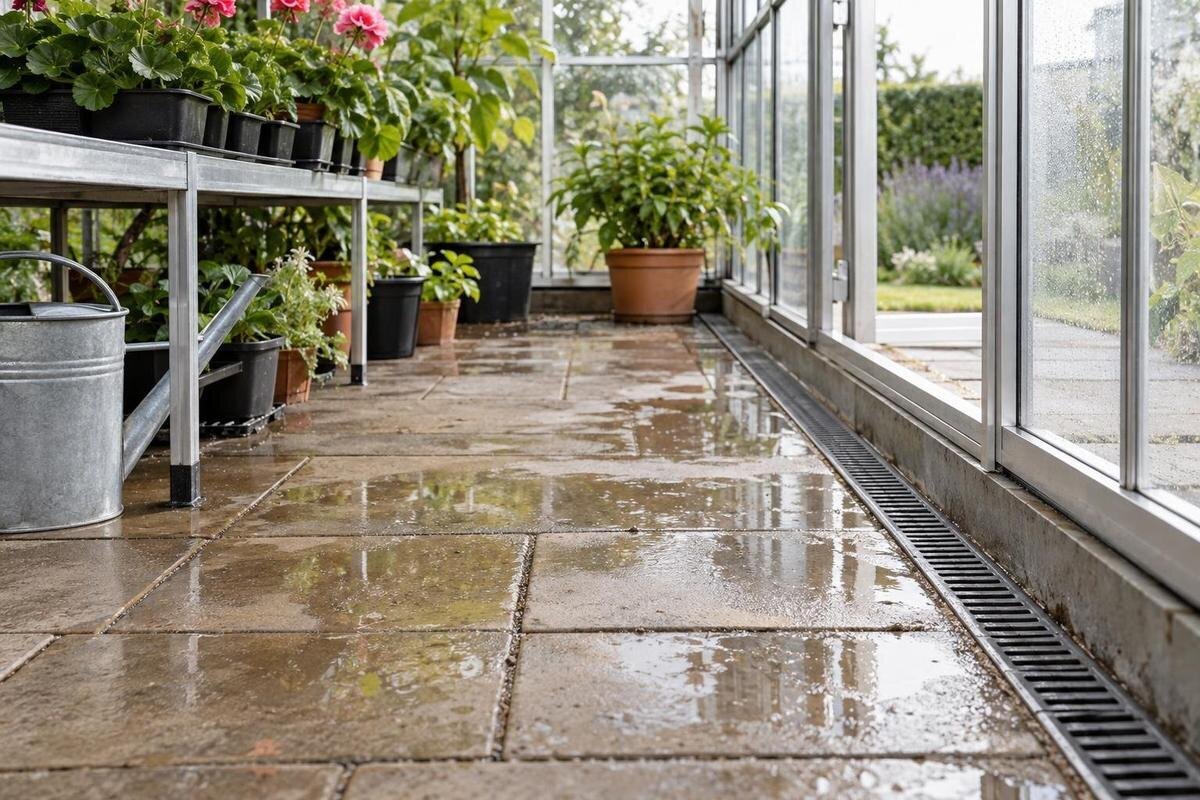
Greenhouse drainage
Water left on a greenhouse floor after watering can be a spill, a low spot, water escaping from a hose or planter, or a drainage route that is not carrying water away. The puddle’s position alone rarely identifies the cause. Sketch the floor and its surroundings, then repeat the same controlled watering test while watching where water starts, turns and collects. This shows whether you are dealing with the watering setup, the floor surface, an outlet or water arriving from outside. Find that route before changing paving, cutting a channel or altering the greenhouse base.

Why water pools after watering
A puddle that appears soon after watering does not automatically mean the drain is blocked. Water may run off a bench or pot, spill from a tray, escape from a hose or irrigation line, or gather in a shallow depression. It may also be water arriving at a threshold or wall-side edge and only becoming visible indoors. First identify what is wet: a pool sitting on top of the floor, saturated soil, a damp patch beneath a pot, or standing water in a saucer. Those are different observations and point to different routes. Note whether the pool forms at once or builds gradually.
Record when the puddle appears, how it changes, and whether the same place is wet after rain or before watering. Note the method—watering can, hose or drip line—and whether one area or several were watered. A pool that forms immediately beside one watering area is different evidence from moisture that develops along an edge over time. Photograph the scene before moving pots, mats or benches, which can hide the starting point. Write down the floor’s starting condition too: an earlier watering run may leave it damp and make a later test harder to interpret. If the same patch stays wet between sessions, note that as well. Avoid walking through a slick patch while you observe it.
Draw the greenhouse and its surroundings
Draw an overhead sketch that includes the greenhouse floor and a band of ground just outside it. Mark the doorway, beds, benches, pots and trays, floor joints, visible cracks, taps and hose routes, along with every visible channel, grate or outlet. Add nearby walls, downpipes and hard paths if they could send water towards an edge. Use arrows only for movement you observe, a different mark for a stationary pool, and a note for the time or watering run that produced it. A photo helps show the layout, but it will not show the direction of flow on its own. Add a simple key for your symbols and date each test so you can compare the maps.
Keep the map facing the same way each time, and show where water could enter as well as where it might leave. Mark a high or low area only when observation supports it; do not infer a fall from a surface that merely looks flat. For a new installation, use the manufacturer’s drawing for the actual footprint rather than a generic rectangle. If you are considering a Lean-to Greenhouse, include the wall-facing edge and adjacent ground, because a wall and nearby surfaces can affect the route even though the product listing does not describe drainage at your site. Treat the sketch as an observation map, not a construction plan.
Repeat the watering test under the same conditions
A useful test changes as little as possible. Choose a period when rain is not reaching the greenhouse, note whether the floor is already damp, and use one normal water source at a time. Keep the position and method consistent. If using a hose, measure the amount delivered for a repeat rather than relying on the same elapsed time; flow can vary. If a container is easier, use the same labelled volume each time. Use enough water to trace the ordinary route, but do not deliberately flood the floor or saturate nearby soil. The aim is comparison, not a stress test of the drainage system.
Before applying water, record the starting condition and time. Watch as it leaves the can, line or potting area; note where the first wet trail appears, when it changes direction and where a pool forms. Repeat only when the floor is back to a comparable starting state, keeping source, area and amount consistent. If normal watering uses several beds or lines, test them separately first, then repeat the usual combination if needed. Observe at the same points in each run, such as while applying water and after a consistent pause; there is no universal waiting time that proves a floor is draining properly. Stop if water spreads beyond the area you can safely observe, and do not vary the test and clear an outlet at the same time.
Trace water back to its source
Follow the water backwards from the pool to the first place it touched the floor. Check beneath pot rims, trays, staging and watering equipment; water can run along an edge before collecting some distance from its source. Look for a hose connection or irrigation joint that drips, a tray that overflows, or potting mix and debris directing water into a seam. Note whether a trickle crosses a joint, stops against a raised edge, disappears into a porous patch or reappears lower down. Mark each turn on your plan rather than drawing a straight line from source to puddle. If the water starts above floor level, mark the drip point too; a wet frame or overhead surface may lead to a puddle elsewhere.
Turn off the other water sources and test the suspected source alone on another comparable run. Note whether the trail appears while that source is running and stops when it is turned off. Do not dismantle equipment or disturb a fixed floor just to expose a route. If water appears when watering has stopped, consider whether rain, roof drips or cleaning is being mistaken for watering runoff. When discussing a new installation, record the model you are considering, such as one from the Limited Edition aluminium greenhouse range, beside the matching drawing and site observations. This keeps the proposed layout and the observed water route together.

Check the floor surface and planted areas
Inspect the surface where the first water travelled, not only the deepest puddle. Look for loose growing medium, fallen leaves or grit covering a channel; an open joint or shallow depression; water collecting at the edge of a mat; or a change where paving meets soil. Note whether the surface absorbs water, lets it pass through or keeps it on top. A fine film and a pool sitting in a hollow are different observations. Water can disappear into one section and gather at a lower edge without an obvious surface stream. Where the floor changes material, treat that boundary as a separate observation: water may slow there, pass through a gap or turn along an edge.
Before changing the floor, establish its purpose and how the greenhouse base is supported. Filling every joint, laying an impermeable layer or adding loose material can hide the route or push runoff elsewhere; it is not a diagnosis. If you are planning flooring or planting areas for a T-Model Orangery Greenhouse, use the model-specific base drawing before deciding where joints or beds will sit. Work out where routine watering runoff is meant to go, including water that crosses the boundary between a planted area and a path. Keep that boundary visible on your sketch so you can compare it with the route observed during the test.
Inspect outlets and their discharge
Find every visible floor drain, channel, gully or outlet and add its position to the map. Before touching it, note whether test water reaches it, passes beside it or never gets close. Look for obvious leaf litter or potting mix at the surface, and note whether a grate or channel appears obstructed. A clear opening is only one observation: it does not confirm that the pipe beyond is open or that the outlet has somewhere suitable to discharge. Record what you can actually see rather than assuming there is a drain beneath a wet patch. Note where a channel slows or changes direction too.
If it is safe and the outlet is meant to receive this water, observe its response to a modest, normal test; stop if water backs up or spreads. Do not pour in a large volume or remove a fixed grate to force a result. If water enters but drains slowly, backs up or emerges elsewhere, a drainage professional can trace the downstream route. Do not assume an outlet reaches a stormwater connection simply because it disappears from sight, or probe beneath a floor to find a hidden route. The Pyramid Greenhouse listing identifies a model, not drain positions; locate outlets from site plans or on-site inspection, never from the greenhouse style alone.
Rule out water arriving from outside
Look outside as well as in. Water may reach the greenhouse from a higher garden bed, a sloping path, a downpipe discharge or a wet boundary, then become visible at a threshold or floor joint. Check whether the exterior surface is already wet before watering, whether water is arriving from an adjacent roof or hose, and whether the same inside patch appears after rain. Note the direction from which it approaches; a puddle beside the frame does not show whether it began inside or outside. Include visible paths and changes in level in the sketch, but do not guess at water moving underground.
Compare a controlled watering run on a dry day with an observation after ordinary rain, and keep those results separate. If pooling occurs only when the outside is wet, investigate the surrounding ground and visible downpipes rather than repeating indoor tests. Take photos inside and outside at the same time, if practical, so the conditions can be compared later. If you are considering Limited Edition Aluminium Greenhouses with Storage, include the whole chosen outline and adjacent paths on the map, confirming the outline from the correct manufacturer’s drawing. Do not redirect water towards another building or neighbouring property as a quick fix. Have a qualified drainage professional assess a new discharge route if its destination or effect is unclear.
Use the model’s base drawing before changing the floor
Before changing paving or installing a channel, check how the greenhouse base meets the floor and surrounding ground. A cut, raised edge, added layer or new outlet may affect support, access and where water goes; the right response depends on the actual construction and site. Do not use a generic dimension, online sketch or the apparent flatness of a floor to set levels. If proposed work touches the greenhouse base, waterproofing or buried services, involve a qualified groundwork or drainage professional. This matters especially where the existing route is hidden or the discharge point is unclear. Show the proposed route on your sketch, not just the location of the puddle.
Give that person the sketch, dated photos, repeatable test notes and the manufacturer’s base drawing for the exact model. Ask how the proposed route and discharge point fit the installation, and whether the base, floor or nearby services need consideration. The Bloomcabin Prestige Greenhouse listing names a foundation option, but that is not a drainage plan for your site. Confirm which drawing applies to the chosen model and configuration. Mention later additions such as paving, raised beds or a relocated downpipe, as these can change what water reaches the greenhouse edge. The drawing shows the base arrangement; a site review establishes a practical water route and destination.

Choose a repair that matches the cause
Choose the smallest remedy that addresses the evidence. If water starts at a loose hose connection, tray or container, correct that source and repeat the same test. If loose debris is blocking an accessible surface channel, clear it only where you can do so safely and understand what the outlet serves. If ordinary watering causes splashing rather than water flowing across the floor from elsewhere, adjust where you apply the water and retest. Change one thing at a time and update the sketch. Check that a change has not created a new wet patch elsewhere, and compare results under conditions like those of the original test.
Persistent pooling, water returning through an outlet, water arriving from the surrounding ground, or a proposal to add a drain or change floor levels calls for site-specific review. A drainage or groundwork professional can use your test log, photographs and model drawing to trace the route and assess its destination; avoid choosing a channel or soakage solution from appearance alone. For a planned Spacious Greenhouse, the model name does not determine what the site needs—base plans and actual ground conditions do. Wait for review before making a change to the base or discharge route.
Record the result and retest
Once a likely cause has been addressed, repeat the same watering test and compare it with your original map. Use the same source, route, measured amount and starting condition; note whether water still reaches the same seam, whether a different pool forms and how long visible water remains under comparable conditions. Do not judge from one run if the first test began on a wet floor or the weather has changed. A separate observation after rain is useful, but keep it apart from the watering comparison so one result does not mask the other. Date the retest and note what you changed.
Keep the sketch, dates, photos, outlet observations and advice with the greenhouse paperwork. Record the exact model and base arrangement rather than writing only “greenhouse”. If you chose a model from the Aluminium Greenhouses range, keep its matching manufacturer’s drawing rather than just the general category name; a future installer or drainage professional needs to know which arrangement is in place. When you tidy the greenhouse, check accessible outlet surfaces for loose leaves and debris. Update the log if paving, beds or equipment changes how water reaches the floor. That makes the next unexplained puddle easier to compare with a route you have already tested.
Frequently asked questions
Does a puddle after watering mean the greenhouse drain is blocked?
No. A spill, leaking hose, overflowing tray, shallow dip or water arriving from outside can produce the same sign. Watch where water first reaches the floor and whether the test water actually reaches an outlet before deciding that the drain is the cause.
How can I separate watering runoff from rainwater?
Record the weather and the floor’s starting condition, then make a small, consistent watering test when no rain is reaching the greenhouse. Compare it with a separate observation after ordinary rain. If pooling occurs only in wet weather, trace the route around the outside as well as the interior.
How much water should I use for a drainage test?
There is no universal amount. Use a modest quantity that represents your normal routine and is enough to show the route without deliberately flooding the floor. Measure it, or keep the same source and setting for each repeat; consistency matters more than a preset volume.
Should I add gravel or cut a drain channel?
Not until you know where the water starts and where the new route would discharge. Loose material or a channel can shift pooling or affect the base. For work involving paving, floor levels, drainage or the greenhouse foundation, ask a qualified groundwork or drainage professional to review the site.
Is the greenhouse product page enough to plan drainage?
No. A product page identifies a model, but it does not establish your site’s levels, outlet position or discharge route. Use the manufacturer’s base drawing for the exact model alongside an on-site sketch and, if you are changing the base or adding drainage, qualified review.
A dependable diagnosis comes from the sequence, not the puddle alone: record the starting conditions, map the first wet path, repeat the same modest watering test and check where water is meant to leave. If the route stops at a loose hose or an accessible surface obstruction, address that cause and retest. If water backs up, arrives from outside, or the proposed fix touches the floor or base, take the map, photos and exact model drawing to a qualified drainage or groundwork professional. That keeps a small watering problem from becoming an untested change to the greenhouse base.
