
Planning a Greenhouse for Garden Workshops and Demonstrations
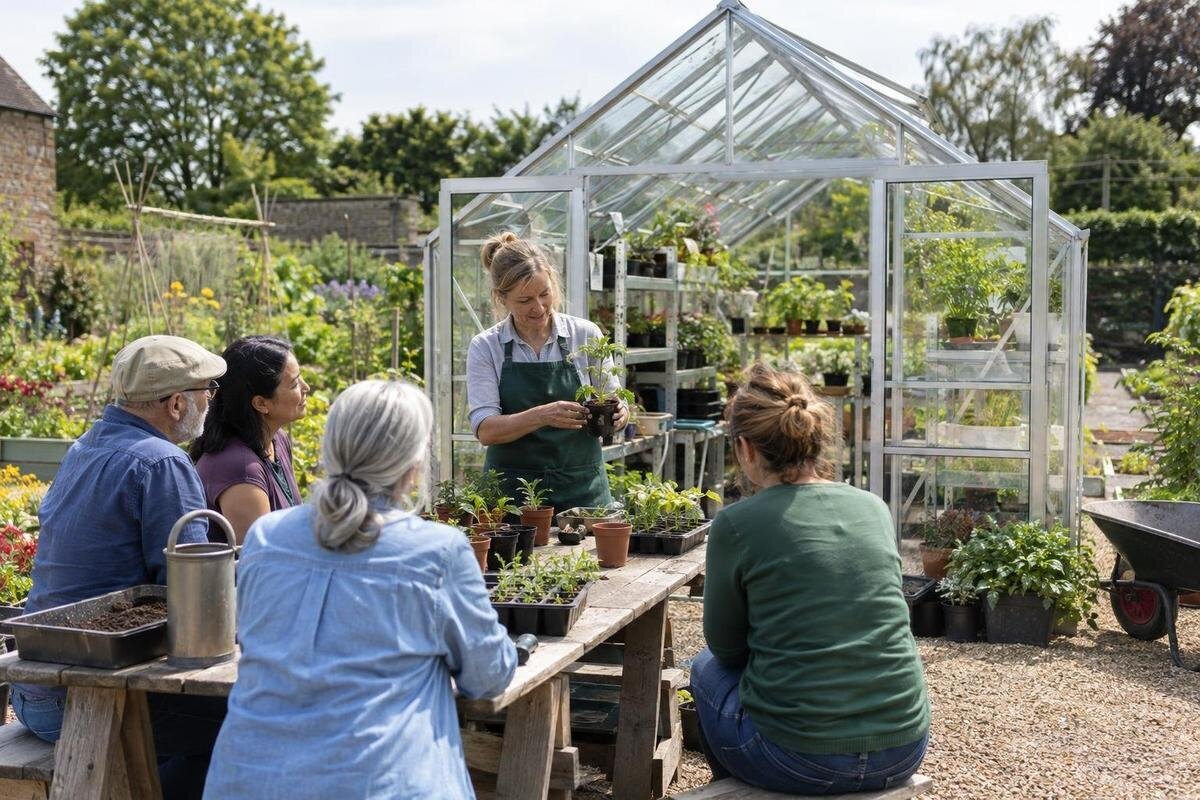
Greenhouse planning
A greenhouse for garden workshops has to do more than hold plants: it must let participants see a task, move between activities and handle materials without obstructing one another. The useful layout depends on what each session asks people to do, how many will work at once and which services the activity needs. Plan the demonstration, shared work surfaces and routes as one teaching space, then compare that arrangement with the actual greenhouse footprint. This helps prevent a catalogue floor-area figure being mistaken for an attendance limit or evidence that a particular layout will fit.

01
Define the workshop before choosing a floor plan
Write down what a participant should be able to do by the end of the session. A seed-sowing class needs people to handle small materials and follow a sequence at a bench; a pruning or potting demonstration may need a clear view of one plant and room to practise afterwards. Those activities use floor area differently. Note whether everyone will take part or some will observe, and whether people work individually, in pairs or in small teams. Record any task that involves carrying pots, watering or looking closely at a specimen. The learning aim helps identify which surfaces, tools and routes matter, rather than leaving you to begin with a headcount alone.
Map the session from arrival to departure: welcome, explanation, live demonstration, participant practice, questions and reset. Mark which stages happen at the same time. If one facilitator must prepare materials while another leads, they need separate places and an unobstructed route between them. Decide whether the greenhouse remains a working growing area outside class times or is cleared for scheduled sessions. That affects which benches can stay in place, what must be stored elsewhere and how long set-up takes. A written sequence can expose clashes early, such as participants needing the same bench that the presenter uses to lay out tools.
Keep the demonstration in clear view
Stand in the proposed presenter position and check what each participant would see, not just what looks balanced on a plan. People need a view of the presenter’s hands and the plant or tool being discussed; a tall display, post, tray stack or another person can hide that detail. Sketch standing and seated viewpoints, including those at the back of the group, and note where the demonstrator will place materials. If the task is small or relies on close detail, plan how people can rotate through a viewing position or use a camera and display. Do not assume a crowd can gather around a bench without blocking other work.
Glazing and light can also affect visibility. Reflections or a bright background behind the presenter may make small movements harder to follow, so test the teaching position at the time of day the class is likely to run. The presenter should be able to reach supplies and turn towards the group without stepping into a route. The Bloomcabin Oasis Pyramid Greenhouse is listed in sizes from 5.53 m² to 18.9 m². When comparing options, mark the demonstration bench and viewing positions on each plan rather than judging visibility by floor area. During a site visit, ask someone to stand at the back while another person demonstrates a sample task.
02
Set capacity by active workstations
Set a realistic maximum number of people by counting active places, not by dividing floor area by an assumed allowance. Include the demonstrator, a helper, anyone watching and the people working at the same time. A class of twelve with six paired workstations needs a different arrangement from twelve people each handling seedlings. Decide whether a participant can work beside someone seated, whether the whole group must gather for the demonstration and where someone taking a break can wait without entering the work zone. These details give you a practical capacity based on the session, rather than a headline number that ignores what participants will be doing.
Plan for the busiest moment first: every workstation occupied, the demonstrator in place, tools out and a route still available to the entrance and any service point. Then consider the beginning and end, when people may gather to sign in or collect materials. The Limited Edition Aluminium Greenhouse with Built-in Storage is listed in sizes from 5.52 m² to 28.08 m². For each option, distinguish the storage space from the space available for participants; neither the total area nor the presence of storage establishes workshop capacity. Leave some flexibility for a support person or a participant who needs a different working position instead of filling every edge with benches.
Separate demonstration, practice and reset areas
Arrange the work areas in the order people and materials use them: preparation, demonstration, participant practice, then washing or sorting. A dedicated demonstration surface helps focus attention; shared benches give people a place to repeat the task without standing behind the presenter. Where the workshop moves between tasks, keep wet or soil-heavy work apart from clean materials, notes or refreshments. If a session combines propagation and potting, decide where seedlings arrive, where potting mix is handled and where finished pots wait. A layout that makes the sequence easy to follow is simpler to teach and quicker to reset.
Bench length is only part of the calculation. Allow room for trays, hand tools, labels and elbows, then show where tubs or a trolley can go without narrowing a route. Decide whether participants will stand, sit or alternate, and provide a workable position for the activity. Check the participant benches against the demonstrator’s surface: benches that look generous on an empty drawing may leave little room to watch. The Bloomcabin Prestige Greenhouse is listed in areas from 3.77 m² to 28.08 m². Compare the specific model drawings with your bench arrangement, including the space needed to move from watching the demonstration to practising the task.

03
Plan routes between the entrance and each activity
Trace the route from the outside approach to the entrance, each work zone and the exit. People carrying pots or tools should not have to cut through another group’s station. Keep frequently used paths clear of potting supplies, stored trays and temporary displays, and mark where a queue could wait without blocking an activity. Check door openings and thresholds on the chosen drawings, not just the space inside. If participants move between indoor and outdoor parts of a lesson, show both areas on one plan; the doorway should not become the only place where people can gather.
Where possible, rehearse the route at full scale. Mark proposed bench edges with tape, set out boxes similar in size to usual supplies, and ask a few people to walk through while carrying them. Repeat with chairs, a mobility aid or a trolley if these are relevant to your group. The Bloomcabin Orangerie is listed in areas from 47 to 70 m². When comparing these larger footprints, trace the complete route between the entrance and each teaching station, including any turns around benches. Include the external approach and unloading place too; otherwise a clear internal aisle may lead straight into a bottleneck at the door.
Manage plants, tools and consumables
Make an inventory for the actual session rather than designing around a vague idea of garden tools. List the items the presenter handles, the kit each pair or team needs, consumables such as labels and pots, and anything used only during set-up. Decide which equipment must be within reach and which can be issued as needed. Keep sharp or bulky tools under the organiser’s control and provide a return point so equipment is not left on participant benches or in a travel route. For classes with children or beginners, a helper can manage distribution while the presenter demonstrates.
Plan for growing stock as well as class materials. Plants may be damaged by bags, coats or queues, while moving trays for every session takes time and can interrupt routine care. Mark any crops or display plants that must remain undisturbed, and separate them from the teaching area on your layout. Include places for used labels, plant offcuts and general rubbish, plus a way to manage damp tools after class. The Aluminium Classic Greenhouse is listed in areas from 3.77 m² to 28.08 m². Compare options using a scaled plan that shows both the plants staying in place and the equipment brought out for lessons.
04
Match services to the tasks
List the services each workshop genuinely uses. Potting may need a hand-washing point and access to water; propagation or plant care may need water nearby, while another demonstration may not. Note where hoses, buckets or filled watering cans will be carried so wet routes do not cross the main circulation path. Think through where wastewater and soil will go before settling on the position of a sink or workbench. Discuss proposed plumbing and drainage with a qualified professional; do not assume that a convenient tap, drain or connection is available at the chosen location.
Power may be useful for task lighting, a display or a teaching device, but requirements depend on the session. List the equipment and where it will be used, then ask a qualified electrical professional to assess any proposed arrangement. Avoid running loose leads across work areas. Also consider how the presenter will be heard: a small group may manage around a central table, while a larger one may need an audio aid. The Lean-to Greenhouse is listed in areas from 3.69 m² to 14.34 m². When considering a model, mark the proposed service points and the equipment they would supply on the teaching plan; proximity to a building does not establish which connections are available.
Plan for changing greenhouse conditions
Conditions inside a greenhouse can change with sun, season and weather, so consider participant comfort as well as the needs of plants. A warm, still space may not suit a long practical session even when plants are thriving; an open door may bring wind or rain across the demonstration. Think about when ventilation, shading or temporary screens might be needed and whether they could affect visibility, noise or plant care. Ask the supplier and relevant building professionals about the chosen model and site rather than assuming that a general greenhouse description establishes the conditions participants will experience.
Choose an arrangement that can adapt as conditions change: allow a group to move away from direct sun or draughts, and keep sensitive materials where rain cannot reach them. Consider lighting and contrast for demonstrations, and have an alternative plan if the practical activity needs to move or be rescheduled. The catalogue lists Limited Edition Aluminium Greenhouses from 3.77 m² to 28.08 m². When comparing configurations, check whether your alternative teaching position would still leave room for participants and materials. Discuss ventilation and shading for the specific model and site rather than treating a larger footprint as a guarantee of comfortable workshop conditions.

05
Test a layout against actual model drawings
Before selecting a size, obtain the footprint and internal layout information for each option you are considering, then reproduce it to scale. Mark doors, structural members shown on the drawing, fixed benches and equipment; add the clear floor needed at each station. Plan for the busiest lesson, not an empty greenhouse or a staged photograph. Check that someone can approach the demonstration, use a workstation and leave without squeezing through another activity. A listed floor-area range helps narrow comparisons, but it cannot replace model-specific drawings and a plan of the complete session.
Use the same layout to compare alternatives, including where plants will stay when classes are not running and where set-up equipment can be kept. The T-Model Orangery Greenhouse is listed in areas from 16.52 m² to 30 m²; trace the activity zones onto the available plan for the model you are considering instead of assuming every option has the same shape. Write down details still unknown, such as door clearance or service locations, and ask the supplier or an appropriate professional for them. If the layout cannot fit without losing a clear route, consider changing the group size, activity or footprint. For a project-level discussion, share the session plan and service needs, not just a target area.
Plan access and day-to-day operation
Plan how the session will run, not just how it looks when set up. Decide who welcomes participants, explains tool use, leads the demonstration, answers questions and resets the work area. For a shared garden, schedule classes so they do not interrupt watering, pruning or other routine jobs. Keep a repeatable checklist for putting out materials, clearing paths, returning equipment and sorting waste. A sign-in or waiting point outside the growing benches may help prevent late arrivals from walking through an active task. Note which amenities, such as toilets or a sheltered waiting area, are elsewhere on the site.
Consider the people who will use the space: provide a clear route, options for sitting or standing where practical, and a way to see and hear without having to crowd forward. Ask the intended group about access needs early, then test the layout with them or a suitable adviser. For a public or community programme, discuss the proposed use, site conditions and any approval questions with the local council or qualified design professionals before committing to construction or services. Requirements depend on the project, so do not assume a domestic garden arrangement automatically covers a group activity.
Frequently asked questions
How many people can a greenhouse workshop hold?
There is no reliable attendee number from floor area alone. Count the active workstations, the people gathered around the demonstration, the presenter and any helper, then check that routes and entry space remain clear. Test the busiest part of the session with the actual benches, trays and equipment.
Does everyone need to see the demonstration at once?
That depends on the task and group size. If people need to see fine detail, one crowd around a bench may block sightlines and access. Consider smaller viewing groups, rotating places or a camera and display, and make sure each option fits the layout and the way the class will run.
Which services should be planned for a teaching greenhouse?
List what the activities actually use. Potting may call for water and a managed place to wash hands; some demonstrations may need power, task lighting or audio support. Plan where services and equipment will be used, and ask qualified plumbing or electrical professionals to assess any proposed connections.
Can an existing growing greenhouse also host classes?
Possibly, if the session can run without disrupting routine plant care or putting crops in the path of bags, tools and queues. Mark what must stay undisturbed, allow time for set-up and clean-up, and check the intended use and site arrangements with suitable professionals where needed.
Is a larger greenhouse automatically better for workshops?
No. A larger listed area does not guarantee clear sightlines, convenient work zones or suitable services. Compare the actual model drawings with a plan of the busiest session, including benches, equipment and routes. If it does not fit, consider changing the activity or group size as well as the footprint.
Judge the plan by the busiest practical session, not by the empty greenhouse. Participants should be able to see the key task, reach a suitable work surface, move between stages without crossing active work and use the services the activity needs. Test the layout with the proposed group and equipment, then review it after a trial session; bottlenecks often appear during set-up or clean-up rather than the demonstration itself. Choose a greenhouse only when those working conditions fit the actual model and site.
