
Including a Greenhouse in a New-Build Landscaping Project
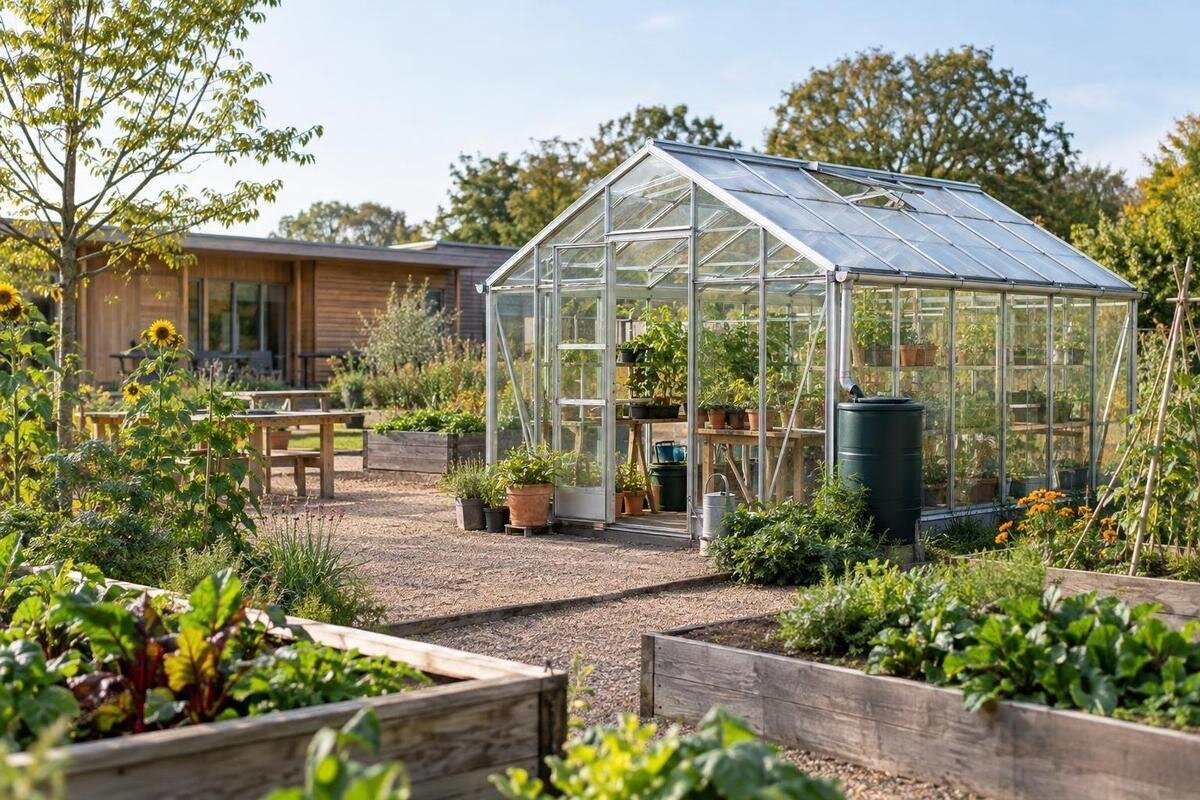
Greenhouse project planning
On a new-build site, a greenhouse is easier to plan while levels, paths and service routes are still being drawn up than after the garden is finished. If its location is left until late, the base can clash with paving, access can be blocked by planting, or a utility route can be buried before its destination is settled. Treat the structure as part of the landscape brief: agree its intended use and provisional location early, then coordinate its exact model requirements, ground preparation, delivery and installation with the people responsible for the rest of the site.

Include the greenhouse on the landscape plan early
Treat the greenhouse as part of the site layout, not an accessory to squeeze into whatever lawn remains. Mark a provisional footprint on the landscape plan alongside the house, driveway, paths, retaining features, fences, planting beds and outdoor living areas. Record what it is for—propagation, potting, general growing or another clear purpose—because that affects the floor area and working room you may want. Check views from the house and garden, the route between the greenhouse and useful outdoor areas, and space needed around its entrance. Keep the position provisional until levels, ground conditions and model-specific requirements have been checked.
Ask the project architect or designer, landscape contractor, builder and greenhouse supplier or installer to work from the same current site plan. Give each a chance to flag clashes before the design is settled: a later change to retaining, drainage, a fence or a service trench can alter the usable location. On the drawing, distinguish confirmed dimensions from placeholders and record who will provide the final greenhouse footprint and installation requirements. A coordination discussion while the plans are still changing helps expose conflicting assumptions before lawns, paths and planting beds are completed.
Coordinate finished levels and runoff
Have the proposed base, the surrounding finished ground and the nearby path or paving shown together on the site plan. The greenhouse needs a support arrangement that matches the selected model’s requirements; do not assume the lawn level, an existing slab or a generic detail will be suitable. Agree which level is the reference point, such as the top of the base or the finished surface at the entrance. This gives the builder and landscaper a common datum and helps avoid an awkward step, an uneven edge or a mismatch between the entrance and the route leading to it.
Consider water from the house roof, greenhouse roof, paving and higher ground as part of the same site drainage plan. Ask the landscape or civil professional to show how runoff will be managed so it does not collect at the base or cross the entrance. The listing for the Prestige Greenhouse with Metal Foundation gives an area range of 3.77 to 28.08 m², but does not specify the preparation needed for your site. Obtain the base requirements for the exact configuration before groundworks begin. Have the project team identify who will check the prepared area against the agreed levels before construction proceeds. If surrounding ground levels change during landscaping, bring that change back to the person coordinating the base and drainage rather than adjusting the entrance in isolation. Keep the greenhouse level and surrounding levels on the same drawing so both contractors can see how their work must meet.
Match the greenhouse footprint to its working area
A listed floor area is a useful comparison, but it is not enough to set out the greenhouse or the space around it. Get a dimensioned plan for the chosen model, including its external footprint and entrance position, then allow room for the way you intend to work. Consider where you will carry pots, move a barrow, stand while tending plants and place any separate bench or shelving you plan to use. Check that the entrance and nearby path remain practical when doors are open and equipment is in place, rather than measuring only the enclosed area.
If storage is part of the brief, the catalogue includes a Limited Edition Aluminium Greenhouse with Storage listing with areas from 5.52 to 28.08 m². Use that as a reference for shortlisting, then check the dimensions of the exact version under consideration. The area alone will not show where storage sits in the plan or how it relates to the entry and working space. Mark the items you expect to store, such as empty pots, bags and hand tools, and consider how you will reach them while other gardening work is under way. This helps distinguish space used for storage from space you want to keep available for plants and movement. Share the dimensioned drawing and your proposed internal arrangement with the landscape designer. They can then plan the surrounding path, paving and planting around both the selected footprint and the activities at its entrance.
Plan service routes before they are covered
List only the services needed for the intended use. You might want a hose point, a fixed water supply, lighting or power for particular equipment, but these are project choices rather than assumptions to make about every greenhouse. Decide where each service point should be in relation to the entrance and working area, and make sure the proposed position does not obstruct the route or conflict with the base. Include any relevant site drainage requirements in the wider plan rather than treating them as an afterthought.
Show the route and destination of each agreed service on the drawings before trenches, paths or planting are closed over. Have the relevant qualified tradespeople determine the design and installation details; do not rely on a landscaper or greenhouse installer to guess what another trade has planned. If you are considering the Lean-to Greenhouse, listed with an area range of 3.69 to 14.34 m², include the adjoining part of the site when discussing service access. Coordinate connections using the exact model information rather than its name or area. Distinguish services included in the current work from ideas reserved for later, so contractors know what they are actually being asked to provide. Ask the project lead to record any agreed provision for future work and who is responsible for it. Before a route is covered, make sure its location has been recorded for the final handover.

Agree responsibilities and installation sequence
Write down who is responsible for each part of the work. Depending on the project, responsibilities may include setting out, ground preparation, base design or construction, accepting delivery, assembling the greenhouse, installing separately planned services, and reinstating paths or planting. Name the person or contractor responsible, what information they need from others and when a decision is due. This makes it easier to spot gaps—for example, when everyone expects someone else to confirm the base requirements or arrange access for installation.
Map the dependencies rather than imposing a universal order. Service work, base construction, greenhouse installation, paving and planting can affect one another, and the right sequence depends on the project and the selected model. When considering the Limited Edition Aluminium Greenhouse, listed with areas from 3.77 to 28.08 m², ask the supplier or installer which site preparations must be complete before their work can begin. Build those requirements into the wider programme, including the point at which the prepared site will be accepted and who will confirm it is ready. Agree how a delay to one task will be communicated to the people booked for the following work. For example, a revised installation date should be reflected in the plans for access, surface protection and final planting. This gives each contractor a clear handover point without assuming that every greenhouse project follows the same construction sequence.
Keep a practical route open for delivery and installation
Trace the route from the site entrance to the proposed greenhouse location, not just the distance across the garden. Check gates, temporary fencing, stored materials, scaffolding, changes in level and any narrow turns with the people responsible for delivery and installation. Ask the supplier what access and handling information is available for the selected model, including relevant package dimensions and unloading arrangements. Do not assume that a product with a modest listed area will necessarily be easy to move through a constrained site.
Separate temporary construction access from the permanent garden route. Agree where items can be unloaded or staged, which finished surfaces need protection and whether other site work could block the route on the planned installation day. The Spacious Greenhouse listing identifies an orangery with a stated area range of 47 to 70 m²; that figure is not a package dimension or a delivery requirement. Get handling details for the exact design and check them against the builder’s site access plan. Mark any temporary access arrangements on that plan, including who will clear stored materials or move temporary barriers before delivery. Agree how long the unloading and staging areas need to remain available, rather than assuming everything will move straight to its final position. Where the delivery route crosses an area due to be finished, coordinate the timing and protection before paving, turf or delicate planting is completed.
Set out paths and finished surfaces around the entrance
Plan a usable route from the house or main outdoor work area to the greenhouse. Think about carrying trays and pots, moving a barrow, and being able to reach the entrance without crossing planted beds. The path’s width, surface and any space for turning depend on the site and how people will use it, so decide these with the landscape designer rather than relying on a standard dimension. Check the route on the plan against the selected greenhouse entrance and leave enough room for the intended movement around it.
Coordinate the path edge, paving level and greenhouse base so the finished transition is practical and does not send water towards the entrance. Confirm that edging, gates or steps will not conflict with the opening and use of the entrance. The Classic Aluminium Greenhouse listing gives a range of 3.77 to 28.08 m². Use the dimensioned drawing for your selected configuration to locate the entrance accurately within the paving layout. Ask the designer to show the junction between the path and base clearly, including where one contractor’s work ends and another’s begins. Before the path layout is finalised, review how you will approach the entrance carrying the items you expect to use. Consider where you can put down a tray or pot while opening the door without blocking the route. Resolve these details on the plan rather than leaving the paving contractor to interpret an approximate greenhouse outline.
Check shade and future planting
Assess how shade falls across the proposed site at different times of day and through the year. Existing buildings, fences and trees can affect light, and young trees may create more shade as they grow. A site visit and observations from the house can help, but ask the designer to consider seasonal conditions as part of the overall layout. Avoid choosing a position solely because it looks open on the current plan; check the actual surroundings and consider whether the intended growing use will suit that exposure.
Plan planting with mature size and maintenance in mind. A hedge or tree can change light and access over time, while beds close to the greenhouse may make cleaning or future work harder. Keep practical space for maintenance and consider how the structure will look beside the house, paths and other garden features. The T-Model Orangery Greenhouse listing gives a stated area range of 16.52 to 30 m². Use the exact plan and elevations to assess the position and scale of any shortlisted configuration within the landscape. Show proposed planting alongside it, rather than considering the greenhouse and planting plans separately. Identify which nearby plants are intended to provide screening and which areas need to remain open for access. Where those aims compete, discuss the planting position or choice with the designer before beds are formed. This keeps the long-term planting scheme consistent with the working space you have reserved.

Keep decisions, approvals and changes on record
Keep a decision record with the latest project drawings so everyone can distinguish an option under discussion from a confirmed selection. Record the greenhouse model and configuration, the information used to plan it, and the date the choice was agreed. For example, the Pyramid Greenhouse listing gives an area range of 5.53 to 18.9 m²; record the exact option rather than leaving the product range as the only reference. Note decisions that affect more than one part of the project, such as a revised position, entrance orientation or surrounding path layout. Identify which drawings need updating and who will issue them to the affected contractors. Keep earlier versions clearly separate from the current set so an old outline is not mistaken for the agreed footprint. This record complements the responsibility schedule: it explains what has been decided, while the schedule identifies who must carry out the work.
Use a written change process if site conditions, services or the landscape layout shift. Update the drawing, tell the affected contractors and confirm any timing or technical implications with them before the changed work proceeds. Ask the project lead to identify whether approvals or other site-specific checks are needed for the proposed design and intended use, and confirm those points with the relevant council or qualified professional. Do not assume that the wider new-build project automatically answers every question about a later greenhouse decision.
Complete the handover before the landscaping crew leaves
Walk through the finished area with the relevant project people while the location and work are still easy to compare with the plan. Confirm that the greenhouse, base, entrance route and nearby finished surfaces match the agreed layout. Check that any service points requested for the project are in their planned locations and that the responsible trades have handed over the information needed to use them. If something differs from the drawing, record the change and make sure the updated plan reflects what was actually installed.
Keep the final site plan with the greenhouse identification, relevant product and installation information, service-route records and any photographs taken before work was covered. Ask the supplier or installer for the applicable operating and care information, and pass it on to whoever will look after the garden. Keep these records together in a format the owner can readily access, rather than leaving them scattered across individual contractors’ messages. Identify any outstanding work, the person responsible and the agreed completion arrangements separately from the completed handover information. These records are useful if a future path, planting bed or service needs work: they help maintainers understand what is already in place without relying on memory or incomplete construction notes.
Frequently asked questions
When should we decide where the greenhouse will go?
Reserve a provisional location while the site and landscape plans are being developed, before final grading, service routes and hard landscaping are settled. Confirm the exact model and its installation requirements before the site team sets out the base.
Can we use a listed floor area to set out the base?
No. A floor-area figure is useful for comparing options, but it does not give the exact external footprint, entry position or base requirements. Ask for the dimensioned information and installation details for the specific model and configuration.
Do all greenhouses need water and electricity?
Not necessarily. List the services required for the intended use, such as a hose point, fixed water supply, lighting or power for particular equipment. Have relevant qualified tradespeople plan any connections and show their routes on the site plan before work is covered.
How can we avoid damaging finished landscaping during delivery?
Agree the route from the delivery point to the greenhouse location, the unloading area and any temporary protection before surfaces are finished. Ask the supplier for the handling and access information for the selected model, then coordinate it with the builder and landscaper.
How do we check whether approvals or other site checks are needed?
Ask the project lead to identify checks that may apply to the specific site, design and intended use, and confirm them with the relevant council or qualified professional before ordering. Do not assume the greenhouse is either automatically covered by, or separate from, the wider project.
A greenhouse planned alongside groundworks, services, paths and contractor responsibilities is less likely to force changes after the garden is finished. Keep the selected model’s information tied to the current site drawings, and hand over the final layout and service records to the people who will maintain the garden. That way, the greenhouse has a considered place in the landscape and a clear route for future work.
