
Growing Ranunculus in a Greenhouse
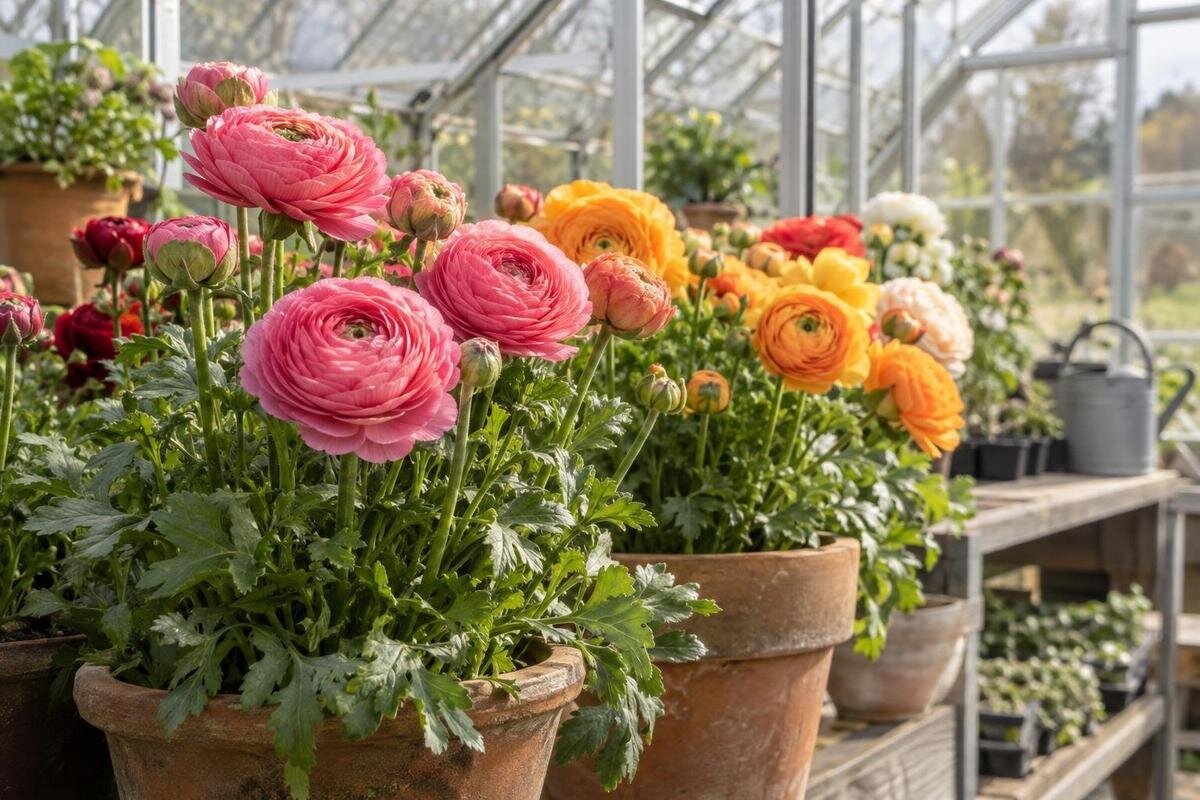
Cool-season greenhouse guide
Growing ranunculus in a greenhouse depends on a cool, bright growing period and a root zone that drains freely. In New Zealand, autumn planting is often used for spring flowers, but the right date depends on local conditions and the corm supplier's guidance. This guide covers corm selection and preparation, planting, greenhouse climate, watering, disease prevention and what to do after flowering.

Ranunculus grow best in cool, bright conditions
Ranunculus, especially common garden hybrids of Ranunculus asiaticus, are a cool-season crop rather than a heat-loving summer flower. They establish leaves and form flowers in bright light and moderate temperatures. As a practical guide while plants are actively growing, aim for about 10–15°C. If the greenhouse repeatedly reaches around 20°C or more during the day, plants may rush through growth, make shorter stems or finish flowering sooner. Responses vary with cultivar, plant stage and the length of warm spells, so treat these as working ranges rather than guarantees. A brief sunny peak is different from sustained heat, but repeated hot afternoons are worth correcting.
Under glass, you can reduce direct rain exposure and keep beds accessible, but a greenhouse does not guarantee frost protection or steady temperatures. Clear winter sun can warm the air quickly, while cold, wet soil may dry slowly. Dim light and still, humid air can give weaker growth than a bright, well-drained site outdoors. Think of cover as a way to manage exposure, not as a reason to keep ranunculus warm all year. The crop still needs its seasonal cycle: cool active growth, flowering, then natural dieback and dormancy. Protect young shoots from severe frost if needed, without holding the house at high temperatures.
Choose a planting window that suits local conditions
Autumn planting is a practical route to spring flowers for many New Zealand growers, often around March to May. Treat that as a broad seasonal guide rather than a fixed calendar. Local weather, greenhouse exposure, soil drainage and cultivar instructions all affect the date. Plant when the growing medium has cooled but remains workable and drains freely. If it is still warm, corms can start too early; if it is cold and saturated, they may sit without establishing and decay. A covered bed can have different conditions from an outdoor one, so assess the soil as well as the air before planting. Follow the supplier's advice if it gives a more specific window for your variety.
Plan the growing area before buying corms: allow for beds or pots, a path to reach the back row, and space to handle trays without crushing leaves. Keep dormant corms in a cool, dry place rather than leaving them in a humid greenhouse. The Limited Edition Aluminium Greenhouses with Storage are listed from 5.52 to 28.08 m², which gives a range of overall sizes to compare. Built-in storage is not automatically suitable for planting stock, however; check its conditions before putting corms there. Decide where tools and trays will sit, and keep dry storage separate from wet growing work.
Select sound corms and plan the batch size
Ranunculus planting stock is commonly sold as dry, claw-shaped corms. A somewhat wrinkled surface is normal in dormant stock; softness, wet patches, mould or a foul smell are warning signs. Choose intact corms, check the packet for cultivar, colour, expected height and planting advice, and keep varieties labelled. If you receive them before the planting window, store them dry and cool out of direct sun, following the supplier's instructions. Inspect a batch when it arrives, rather than waiting until planting day to discover damage. Keep suspect corms apart from healthy stock, and do not try to rescue soft, rotting material by soaking it.
Decide how many to plant from the space you can reach and ventilate, not from the maximum number in a packet. A small trial across one or two positions can show whether one end of the greenhouse is warmer or shadier. The Bloomcabin Prestige Greenhouse is listed from 3.77 to 28.08 m²; use that range as a first footprint comparison, then confirm the internal layout and usable bed area for the configuration you are considering. A floor-area figure does not tell you how many rows fit or whether you can reach each plant without stepping into a bed. Record cultivar names and planting dates so you can compare the trial fairly.
Soak and pre-sprout corms carefully
Dry ranunculus corms are often soaked before planting, but follow the label because preparation can differ. Where soaking is advised, a short soak of about three to four hours in clean, room-temperature water is a common approach. Drain the corms thoroughly afterwards and do not leave them submerged overnight. Plant promptly or follow the supplier's directions for pre-sprouting. If corms arrive moist or already prepared, do not add an extra soak without instructions. Use a clean container and fresh water for each batch rather than a shared bucket that may carry decay organisms between lots.
Pre-sprouting is optional, but it can help you check a batch before it goes into a bed. Set the hydrated corms in a tray with a lightly moist, airy medium and keep the tray in a cool place; it should not be warm or waterlogged. Check it regularly instead of leaving the corms unattended for a long spell. The medium should feel slightly damp, not release water when squeezed. When small roots or shoots appear, handle each corm gently and avoid snapping the new growth as you plant. Discard anything that softens or develops mould during this stage rather than putting it in with sound corms.

Use a free-draining bed or container mix
Ranunculus need a growing medium that holds some moisture but does not stay saturated around the corms. In a greenhouse bed, loosen compacted soil and check that excess water can drain away before planting. If the site puddles, use a better-drained bed or containers rather than relying on the roof to solve the problem. For pots, choose a suitable potting mix and containers with clear drainage holes; do not leave them standing in water. A moderately fertile medium is a sensible starting point. Avoid a strong fertiliser dose at planting unless the corm supplier recommends one, and use any feed according to its label.
Draw the bed and path layout on paper before filling the greenhouse. For a bed, mark where you will stand to tend the back row; for containers, allow somewhere to set down trays while moving pots. The Spacious Greenhouse is listed from 47 to 70 m², a range to consider when comparing larger growing areas. Use the actual dimensions of your chosen configuration to plan beds, paths and working space. Decide which areas will contain soil and which will remain clear before bringing in growing medium, rather than filling the space first and trying to create access afterwards.
Plant at a consistent depth and spacing
Set each corm with its clawed points facing down. A planting depth of about 3–5 cm and spacing of roughly 10–15 cm are useful starting points, but check the supplier's directions for the cultivar and corm size. Cover the corm gently; do not press it hard into compacted soil. Mark rows and varieties before planting so that labels are not lost among the new growth. A light watering can settle the medium around the corms, but avoid saturating a bed that is already damp. Consistent depth makes it easier to compare growth across a batch and spot an area that is staying too wet.
Leave enough room for leaves to develop without making a dense canopy. Tighter spacing may fit more plants initially, but it can restrict access and keep foliage crowded, making moisture and disease problems harder to manage. The Aluminium Greenhouses are listed from 3.77 to 28.08 m². Once you have allowed for paths, use your planned corm spacing to work out how many plants each row will hold. In pots, leave space for each plant to grow and for watering without splashing its neighbours. Adjust the number of corms if the variety is expected to grow taller or more vigorously.
Manage light, temperature and ventilation
Give ranunculus a bright position, with as much winter light as the site allows. Check for shade from trees, fences and nearby structures, and notice how that shade moves during the day. Glass does not guarantee strong light at plant level, especially if glazing is dirty or the crop is crowded. A clear greenhouse position can support sturdy growth, but a sunny site can also heat up quickly, so light and temperature need to be considered together. If you are considering a Lean-to Greenhouse, check the actual winter exposure and any shadows from the adjoining wall. The listed range is 3.69 to 14.34 m²; the footprint alone says nothing about light at the planting position.
Use a min–max thermometer at canopy height rather than guessing from the temperature outside. About 10–15°C is a useful guide during active growth; repeated daytime readings around 20°C or above are a signal to improve ventilation where conditions allow. Open suitable vents or doors during mild, sunny periods, then adjust as the day cools. The aim is to replace humid air without subjecting plants to an abrupt chill. Check the greenhouse configuration you are considering for its ventilation details; do not assume that a particular size or style provides a specific opening arrangement.
Water by checking the root zone
After planting, water enough to settle the medium, then check it before watering again. Ranunculus need an even supply while growing, but corms are vulnerable to a medium that stays wet and airless. Feel the soil or mix around corm depth rather than judging only by the dry surface. A pot can dry faster than a bed, while cool, cloudy weather may slow water use. Adjust to the conditions instead of following a fixed daily schedule. If a tray or saucer collects runoff, empty it so the container is not left sitting in standing water.
Water at the base of the plants where possible and avoid repeatedly wetting leaves and flowers. Morning watering gives splashed foliage time to dry as the greenhouse warms, and it is easier to notice leaks or waterlogged patches while checking the crop. When comparing the Limited Edition Aluminium Greenhouses, which are listed from 3.77 to 28.08 m², sketch how you will reach each row with a watering can or hose. Confirm the actual layout and any water access separately; the listed area does not describe a water system. Keep the route clear so you do not have to step over plants to reach the back.

Limit disease with clean handling and airflow
Cool conditions do not remove disease risk if the air and foliage stay damp. Grey mould (Botrytis) can affect ageing leaves or petals in humid conditions, while a persistently waterlogged growing medium encourages corm and root decay. Remove dead or damaged foliage promptly, and avoid leaving fallen leaves in the bed. If one plant develops soft growth, mould or unexplained collapse, separate it from the healthy batch and inspect nearby plants. Do not replant a suspect corm simply because its outside looks intact; damage can be hidden beneath the surface.
Clean used trays and tools before starting another batch, and do not reuse growing medium that has been contaminated by rotting plants. Keep a separate place for suspect plants so they do not remain among healthy stock while you inspect them. When comparing the T-Model Orangery Greenhouse, listed from 16.52 to 30 m², check the ventilation openings in the configuration you are considering. Plan rows so you can inspect foliage and remove fallen material throughout the crop's growth. Good hygiene and ventilation reduce favourable conditions for disease; neither makes the crop immune, so regular checks remain important.
Harvest flowers and manage dormant corms
For cut flowers, harvest when the buds are coloured and beginning to open, adjusting the stage to the cultivar and how you intend to use the stems. Use a clean, sharp tool and avoid damaging the leaves near the base. If you are growing the plants for display, let flowers open on the plant and remove spent blooms before they form seed. Keep healthy foliage after flowering: it continues to support the corm as the plant moves towards dormancy. Cutting leaves down while they are still green can weaken the corm for a later season.
When the foliage yellows naturally, reduce watering and allow it to finish dying back. Whether to lift the dormant corms depends on the bed and how wet it remains through summer; follow the supplier's advice, and avoid storing corms before they are dry and dormant. Allow for this dieback period when planning space for the next crop. If you are comparing the Pyramid Greenhouse, listed from 5.53 to 18.9 m², consider how much space will still be occupied by ranunculus after the flowers finish. Mark the rows before the foliage disappears so you can locate corms you intend to lift.
Frequently asked questions
When should I plant ranunculus corms in New Zealand?
Autumn, often around March to May, is a useful guide for spring flowers. Check that the growing medium has cooled and drains well, and follow the planting window supplied for your cultivar.
What temperature suits ranunculus in a greenhouse?
A practical guide during active growth is about 10–15°C. Repeated daytime temperatures around 20°C or higher can hurry the crop along, so ventilate when conditions allow and monitor the plants.
Do I need to soak ranunculus corms?
Follow the supplier's directions. Where a soak is recommended, it is usually brief—often around three to four hours. Drain the corms afterwards and avoid leaving them submerged overnight.
How often should I water greenhouse ranunculus?
There is no reliable fixed schedule. Check the medium around corm depth and water when it is beginning to dry, keeping it moist but never waterlogged. Adjust for the weather and container size.
Can I leave ranunculus corms in the ground after flowering?
Let the foliage die back naturally first. Whether to lift the dormant corms depends on your soil and summer moisture; lifting is worth considering where the bed stays wet.
Bright light, cool active growth, careful watering and clean handling are the foundations of a good ranunculus crop under glass. Keep notes on planting dates, temperatures and flowering so you can adjust the next batch to the conditions in your own greenhouse. After flowering, leave healthy foliage until it dies back naturally and manage the dormant corms according to the drainage and moisture of your site.
