
Using a Greenhouse to Start Plants for Raised Garden Beds
Greenhouse growing guide
A greenhouse can give seedlings a protected place to germinate and grow, but plants bound for outdoor raised garden beds still need a deliberate handover. The bed must be ready, seedlings must be at the right stage, and the change from a sheltered structure to outdoor conditions needs to be gradual. Work backwards from the intended planting window, raise only the number of plants your beds can take, and leave time to harden them off. The aim is a steady flow of sturdy transplants, not a crowded greenhouse full of plants waiting for space.

01
Using the greenhouse as a temporary nursery
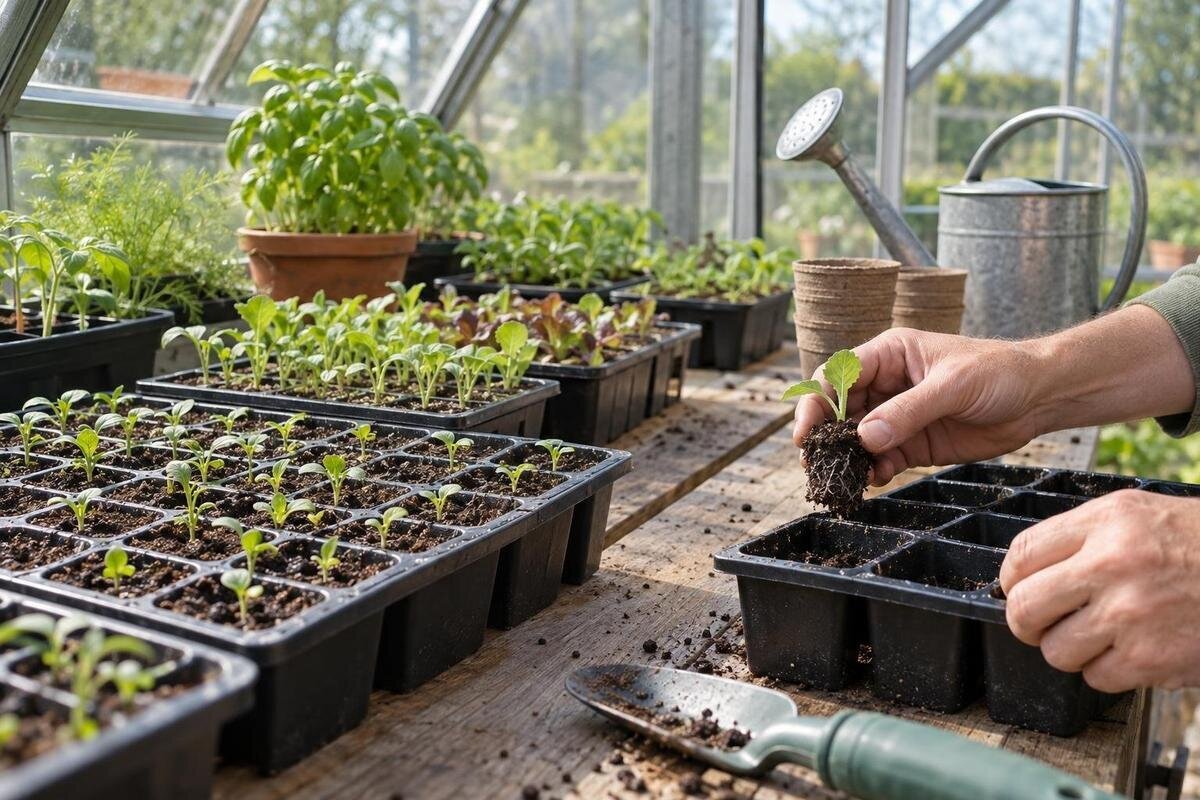
Treat the greenhouse as a temporary nursery: seeds germinate under cover, young plants grow to a transplantable stage, then leave for the raised bed. This gives you one place to monitor small batches and delays occupying outdoor planting space until the crop and bed are ready. It is different from growing vegetables to maturity inside the greenhouse. The seedlings' destination is still outdoors, so their eventual spacing, exposure and growing room must suit that site. Decide which surfaces are for trays and which need to stay clear for watering, potting or moving plants. Otherwise, the nursery can become crowded just as the first batch is ready to go out. This distinction affects both when you sow and how much space you need.
An unheated greenhouse may buffer rain or wind, but it is not necessarily frost-free or evenly warm. Sun can raise the temperature inside quickly, while cold nights and changeable weather can still stress tender plants. Raised beds have their own conditions: sun, airflow, rainfall, nearby shade and soil warmth. Follow crop-specific guidance and observe the bed rather than assuming the greenhouse has prepared seedlings for every outdoor condition. The goal is not the fastest possible growth, but a sturdy plant ready for the particular bed. If seedlings are weak or stretched, review light, warmth and timing instead of simply leaving them under cover longer.
Map bed capacity and greenhouse access together
Sketch each raised bed and decide what is going into it before ordering seed or filling a tray. Use recommended crop spacing to estimate planting positions, then note which crops need one planting and which will be sown in successive batches. Include paths and access in the plan: an area you cannot reach without stepping on growing soil is not useful planting space. If several beds are involved, mark where each batch will go and when that space should be available. This stops greenhouse output being planned against an imaginary bed area rather than the space you can prepare and care for. Keep separate notes if different beds will be ready at different times.
Think about the route between nursery and beds as well. A clear route makes carrying trays easier; water access and a place to set them down matter too. The greenhouse need not be beside every bed, but allow for daily checks and repeated trips. If a wall greenhouse is on your shortlist, the Lean-to Greenhouse page is one model to compare. Check the dimensions and siting requirements of the specific version against your wall, route and planned work area. Consider whether the location will work when trays are full and delicate, not just when the greenhouse is empty.
02
Set sowing dates by working backwards
Set a realistic plant-out window for each crop, then count backwards. Use the seed packet or reliable crop-specific guidance for germination and the time needed to reach a transplantable stage; timings vary with crop, variety and conditions. A greenhouse is not a reason to sow earlier than the bed can accept plants. If the soil is too wet to prepare, the forecast is unsettled, or the crop is sensitive to expected outdoor conditions, delay sowing or plan a later batch rather than holding seedlings in trays. New Zealand has no single sowing date that suits every garden: local climate, elevation, shelter and exposure all affect the window. Use a local calendar as a prompt, not a guarantee.
Allow for the whole handover, not germination alone: seedlings must reach the stage recommended for that crop, then acclimatise outside before planting. A calendar listing sowing date, expected bed availability and hardening-off period reveals overlaps, including when a new sowing may compete for the same surface as plants waiting to go out. The Limited Edition Aluminium Greenhouses range is listed from 3.77 to 28.08 m²; use the selected option's stated area as one planning figure, then check how much clear bench and access space the layout leaves. Compare your timetable with the nursery capacity you actually have, rather than an assumed number of trays.
Choose crops that benefit from transplanting
Not every plant benefits from a head start in a greenhouse. Some crops are commonly raised in trays because young plants transplant readily or an earlier start helps fit the crop into the bed plan; others establish best when sown where they will grow, particularly if disturbing young roots is a concern. Treat this as a crop-by-crop choice, not a rule that every seed belongs under cover. Check the seed instructions and local growing guidance for the variety, and consider how long it can stay in a container before planting. Use nursery space for crops where the protected start makes a practical difference to the outdoor plan.
Calculate numbers from the layout: count planting positions, allow for some seeds not germinating, and decide whether a small reserve is useful. Avoid automatically sowing a full extra tray; it takes space and may be ready at the wrong time. Keep varieties and sowing batches labelled so each can be directed to its intended bed. The Pyramid Greenhouse is listed in sizes from 5.53 to 18.9 m²; compare the chosen size with peak tray numbers and room to work, rather than treating listed area as bench capacity. If a crop is planned in succession, sow when its bed section will be available, not all at once.

03
Plan tray and bench space for the busiest period
Draw a simple bench plan before setting out trays. Allow for the space each batch will need as seedlings grow, not only immediately after sowing; plants may need separating, potting on or moving to a brighter position. Keep a working strip clear so you can lift trays, water evenly, label rows and inspect leaves without shifting everything. Decide where seed-raising mix, clean containers, labels and watering gear will sit, but do not let supplies crowd the seedling area. If you use shelves, consider access and whether each level receives appropriate light. Recheck the plan when batches overlap, and measure the trays you actually own rather than relying on a generic capacity estimate.
Separate batches by destination and sowing date. A clear label with crop, variety, sowing date and bed or batch prevents plants becoming anonymous just as they are ready to move. Leave space around foliage and avoid placing trays where drainage spills onto other plants. If storage is part of your greenhouse comparison, the Limited Edition Aluminium Greenhouses with Storage page lists options from 5.52 to 28.08 m². Check the exact configuration and storage details against the supplies you want close at hand; the product name and overall area do not tell you what will fit or how much bench space remains.
Manage greenhouse conditions as seedlings grow
An enclosed space is not a set-and-forget propagation room. On bright days, temperature inside can rise quickly, while a cool night can still affect tender plants. Check conditions where trays sit and use the openings or other controls provided by the specific greenhouse in line with its guidance; do not assume every model has the same ventilation features. Follow crop-specific light and temperature advice rather than chasing rapid growth. Insufficient light can produce weak, stretched seedlings; intense sun or dry air can cause stress. Check conditions more than once at different times, since one observation may not represent a whole bright day.
Water according to the mix and crop, checking trays instead of following a fixed routine. Seed-raising mix should stay moist for germination without being left waterlogged; let excess drain and do not overlook a dry tray. Keep the work area clean, remove dead material and inspect seedlings for pests or signs of poor health before problems spread. Note unusual weather and how plants respond, which can show whether timing or daily care needs changing. When comparing the Bloomcabin Prestige Greenhouse, use the listed 3.77 to 28.08 m² range to shortlist sizes, then check the chosen configuration's information for features relevant to air movement and access.
04
Harden seedlings off before the move
Hardening off is a staged transition, not simply leaving the greenhouse door open once. Begin when seedlings are healthy and the bed's planting window is approaching. Move trays to a sheltered outdoor position for a short period, then increase exposure to brighter light and moving air gradually over several days, adjusting for the weather and crop sensitivity. Avoid moving tender plants straight from steady greenhouse conditions into strong sun, drying wind or a sudden cold spell. If conditions turn harsh, return them to shelter and resume when suitable. Do not rush the final stage just because the bed is ready; allow plants to acclimatise to conditions they have not experienced.
Keep hardening-off batches labelled and easy to move so plants intended for different beds do not get mixed with new sowings. A sheltered outdoor spot can help if greenhouse benches are needed for germinating seed, but do not crowd trays or forget to check moisture once they are outside. The Aluminium Greenhouses page lists size options from 3.77 to 28.08 m²; compare the exact selected layout with your peak workload, including space to keep plants being hardened off separate from new seedlings. Plan the outdoor hardening-off area separately from the greenhouse layout.
Prepare each raised bed before seedlings are ready
Prepare the raised bed before seedlings are ready, so plants do not wait in trays while outdoor work is unfinished. Clear weeds, check that the soil is workable and arrange any crop-specific supports or markers before transplant day. Use the recommended spacing for each variety; mark positions if rows or mixed plantings could be confusing. Avoid working wet soil if it would compact, and allow time if the bed needs attention before planting. Preparation also means checking that you can water the new plants and reach them for follow-up care without disturbing neighbouring crops. Keep a bed map nearby so seedlings go into planned positions rather than wherever there is a gap.
Match bed preparation to the sowing plan: a section that will not be available should not be counted as a destination for an early batch. If you are planning seedlings for several beds, the Spacious Greenhouse page lists variants from 47 to 70 m². Compare the selected area with tray layout, working space and the peak number of plants you expect to raise; it cannot tell you how many seedlings the outdoor beds will use. Estimate demand from bed positions and crop spacing first. A larger nursery does not make the beds ready sooner, and an oversized batch can become difficult to manage.

05
Planting out and managing remaining seedlings
On plant-out day, water trays beforehand if they need it, then handle seedlings by the root ball or leaves rather than squeezing delicate stems. Plant at the crop-specific depth and spacing, firm the surrounding soil gently and water the bed so roots make contact with moist soil. Choose conditions that reduce avoidable stress, such as a mild, calm period rather than the hottest, windiest part of the day. Follow crop-specific guidance on depth and any temporary protection; there is no universal cover or watering schedule. If the weather is unsuitable, postponing briefly may be better than forcing the move. Check transplants over the following days and respond to their condition and the weather.
Keep only a modest reserve and label it clearly; leftovers can become crowded and overgrown, competing for space with the next batch. If sowings overlap, give newly germinated plants and seedlings still waiting for beds separate places and a manageable watering routine. The T-Model Orangery Greenhouse page lists variants from 16.52 to 30 m²; compare a chosen size with the space needed when the most batches overlap, not simply the number of beds.
Record the handover for next season
Keep brief, specific records for each crop: variety, sowing date, emergence, any potting-on, hardening-off start, plant-out date and destination bed. Add observations that explain the timing, such as an unexpectedly warm spell in the greenhouse, cold weather that delayed planting or a bed that remained wet. There is no need to write every day; record events that changed the plan. Note how many plants were actually planted and whether they established, too. This gives you more useful evidence than a general recollection that a batch was too early or too large, and makes the next adjustment more precise.
After a batch leaves, clear dead leaves and empty trays, clean reusable containers and reassess the working area before sowing again. Check that the next bed slot is genuinely available and any hardening-off space is free; otherwise change the batch size or delay sowing. Compare plan with outcome: were enough plants ready together, did they have room to grow, and did outdoor conditions hold them back? Keep what worked and change one timing or capacity choice at a time. For example, a later sowing or a smaller batch is easier to assess if you alter it on its own. The greenhouse can then run as a purposeful nursery cycle, with each batch leaving for a prepared bed instead of accumulating as spare plants.
Frequently asked questions
How far ahead should I sow for a raised bed?
Work backwards from the likely planting window for that crop and bed. Use the seed packet or crop-specific guidance for germination and growth time, then allow for hardening off. Local weather and the bed's condition may shift the date, so avoid sowing so early that seedlings must wait in trays.
Can I move greenhouse seedlings straight into a raised bed?
Usually, seedlings need a gradual transition. Harden them off by increasing their exposure to outdoor light and moving air over several days, adjusting to the weather and the crop. A sudden move from sheltered conditions can stress plants that have not yet acclimatised.
Should every raised-bed crop be started in a greenhouse?
No. Some crops suit tray raising, while others are better sown where they will grow or do not benefit from an early start. Check guidance for the crop and variety, then use greenhouse space for batches that fit your bed plan and transplant well.
Is an unheated greenhouse frost-proof?
No. An unheated greenhouse may buffer some weather, but it should not be assumed to stay above freezing or at a steady temperature. Monitor conditions and follow the crop's guidance when deciding whether seedlings are ready to go outdoors.
How many seedlings should I raise for each bed?
Count the planting positions using the crop's recommended spacing, then allow for some seeds not germinating and decide whether a small reserve is useful. Plan successive batches separately if beds will become available at different times, rather than raising a large surplus all at once.
Plan each batch around when its raised bed will be ready, how long it needs in the greenhouse and the time required for hardening off. When those stages are scheduled together, seedlings spend less time waiting and nursery space becomes available for the next sowing. Let crop guidance and conditions at your site set the timing, then use your records to improve the next handover.
