
Choosing Greenhouse Shade Cloth: Level and Placement
Greenhouse growing guide
Shade cloth is usually sold by a percentage, but that label does not tell you how much useful light reaches a crop inside your greenhouse. The right level depends on crop-specific light needs and readings taken at leaf height, not on a number borrowed from another grower. Map where the brightest and most shaded areas fall, then decide whether the whole growing area or selected beds need cover. Recheck after the cloth goes in: its stated rating is a starting point, not a prediction for every corner of the house.

Crop light requirements
Start with the plants, not the cloth label. Light needs vary with crop, cultivar and growth stage; seedlings, leafy growth and flowering or fruiting plants may not suit the same conditions. Look for crop-specific guidance, ideally expressed as photosynthetic photon flux density (PPFD) or daily light integral (DLI), instead of borrowing a percentage used by another grower. Check that the recommendation applies to greenhouse growing and the stage you are planning for. A phrase such as “full sun” is too broad to set a shade level because glazing and the structure change the light that reaches leaves. Note each crop’s target and its source, and separate crops with different needs on your growing-area sketch. If you use the same bed for successive crops, record planting dates as well.
Draw beds, benches and plant rows before deciding how much cloth to buy. The Limited Edition Aluminium Greenhouses with Storage listing gives a size range of 5.52 to 28.08 m², but those overall figures do not show how much of the growing area needs cover. Paths, shelving and unplanted corners may sit under the glazing, while tall plants can shade neighbouring rows. Mark the crops that need less light, their expected mature height and where you work. This plan can show whether the whole house or just one bench needs a reduction, without treating a product’s stated size as a shade specification.
How shade cloth percentages are defined
If a label says 30% shade, read it as the supplier’s estimate of light reduction under stated conditions, not a promise that each leaf receives exactly 70% of outdoor light. Confirm what the percentage measures: photosynthetically active light, visible light and a broader measure of solar energy are not interchangeable. Check whether the figure describes the cloth by itself and what test conditions apply. The rating helps compare products only when their definitions match; it does not account for glazing, frame shadows, greenhouse cleanliness, sun angle or shade from nearby objects. A shade percentage by itself also does not specify how much the temperature inside will change.
Separate the printed rating from the reduction you observe in your greenhouse. For example, if the same meter reads 100 units without cloth and 80 under a trial piece at the same location under comparable conditions, the observed reduction is 20%: (100 − 80) ÷ 100 × 100. Take the readings close together to limit changes in sunlight between measurements. That result describes those conditions; it does not prove cloth labelled 20% will behave identically across the house. When comparing the Bloomcabin Prestige Greenhouse with shade-cloth options, keep the two specifications separate. The greenhouse listing gives sizes from 3.77 to 28.08 m², while the cloth supplier’s rating describes light reduction. Neither figure tells you how much light will reach a particular crop.
Measure light where leaves grow
For crop-light decisions, use a quantum sensor that measures PPFD, normally reported in micromoles of photons per square metre per second (μmol/m²/s). Hold it level at the top of the crop canopy, and avoid shading it with your body, hand or meter. Take readings at the height of the leaves you are assessing; a sensor on the path may record a different exposure from one among the plants. A handheld reading is a snapshot, while a logging sensor can show how light changes through the day and help calculate DLI. A lux meter or phone app may help with rough comparisons on the same device, but neither is a direct measure of plant-usable light.
Measure several points rather than treating the doorway or centre aisle as representative. Include the brightest bed, the most shaded row and any crop zone with a different height or exposure, then repeat the grid at relevant times. A single reading can miss a narrow beam or a shadow cast by the frame. The Spacious Greenhouse listing gives sizes from 47 to 70 m²; at a larger scale, a map of readings is more informative than one measurement labelled “inside”. Record each point so you can return to the same places after adding shade. If the canopy grows or the benches move, note that change or take a new baseline.
Record a baseline before adding cloth
Take baseline readings before putting cloth up. If possible, choose both clear and overcast conditions and measure through the parts of the day when each crop receives direct or bright light. Record the date, time, cloud cover, sensor position and canopy height; otherwise, weather or placement differences can be mistaken for a cloth effect. A midday peak alone does not describe the full daily light supply. If you have a logger, use its readings to calculate DLI. With a handheld meter, repeat readings at regular intervals and remember that they are samples rather than a continuous daily total.
Use a site sketch to note outside influences too: a fence, tree, nearby building, greenhouse frame or existing plant can shade just one edge. In New Zealand, the sun’s angle shifts through the year, so a winter baseline will not describe summer exposure. The Aluminium Greenhouses listing gives sizes from 3.77 to 28.08 m²; whatever size you have, measure the particular beds and note when obstructions cast shade. This helps you avoid adding cloth where light is already reduced while leaving an unmeasured bright patch untreated. Take readings in comparable conditions when you come back to check the plan.

Choose a shade level from the measured light
Choose a cloth level by comparing your readings with the crop target, not by starting with the strongest shade available. If the crop guidance gives an upper light level, estimate how much reduction would bring the bright period into range, then test a sample or temporary section if the supplier permits. Check more than the single peak: a rating that helps at midday might reduce total daily light too far on cloudy days. Repeated readings help distinguish a consistent excess from one brief bright spell. The calculation is a starting point, though; the cloth’s stated rating and measurements inside the greenhouse need to be considered together.
Mixed planting is a reason to divide the greenhouse into zones, rather than make every crop fit one percentage. A wall-side bed and an open-side bed may receive different light, especially where the structure or a nearby building blocks part of the sky. The Lean-to Greenhouse listing gives sizes from 3.69 to 14.34 m²; for any specific layout, compare readings at both the sheltered and open rows instead of inferring a shade level from the greenhouse size. Where crop needs conflict, consider separate coverage above each crop group only if the structure and fitting instructions allow it.
Cover the crop zone that needs shade
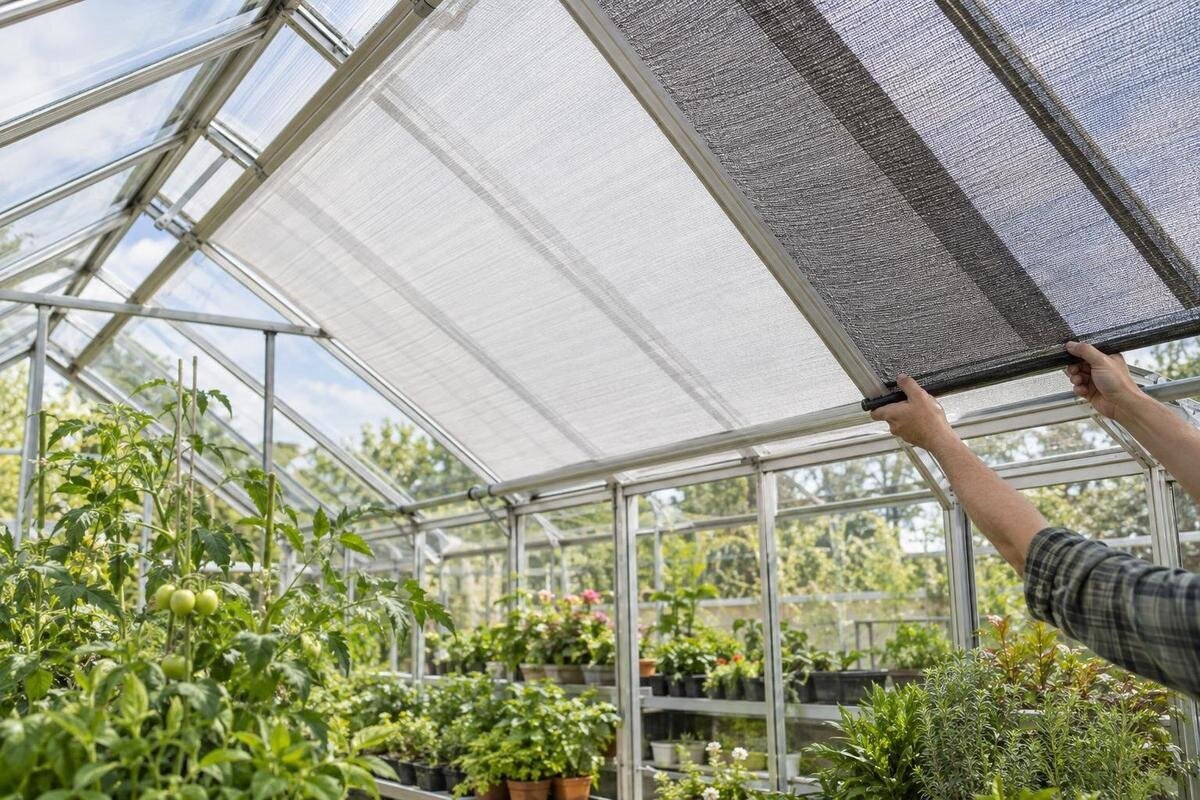
Place coverage over the crop area that needs the reduction, with the path of sunlight in mind. A narrow strip directly over one bench may miss leaves when the sun enters at a low angle; extending shade over adjacent beds can reduce light where it is still needed. Mark the crop canopy, not just the bench edges, and check the pattern in the morning, around midday and later in the afternoon. If plants move or grow into a different zone, update the plan. The aim is an intentional change over the selected crop, not a cloth outline that simply looks centred from the doorway.
Use the dimensions of the exact greenhouse variant when planning coverage. The T-Model Orangery Greenhouse listing gives sizes from 16.52 to 30 m²; those figures describe the listed greenhouse options, not the amount of cloth required or the shape of a planted zone. Measure the actual crop locations and note where shade falls at different sun angles. Keep paths clear and avoid placing cloth where it could interfere with doors, windows or vents. For a fixing position, follow the greenhouse maker’s instructions rather than assuming every frame accepts the same arrangement.
How sun direction affects shade placement
Sun direction changes where shade is needed. In New Zealand, the midday sun is generally in the northern part of the sky, while morning and afternoon light arrives from different directions; the exact path and length of the day vary with season and location. Check actual shadows rather than relying only on a compass or a photograph taken at one time. A series of photos from the same spot, or repeat readings at mapped points, can show whether the roof, frame, trees or buildings create a moving bright patch. This is useful when a crop receives direct light for only part of the day.
Use the exact model details for the greenhouse you have or plan to buy. The Pyramid Greenhouse listing gives sizes from 5.53 to 18.9 m², but a range of overall sizes cannot show how sunlight enters a particular version or lands on your beds. Note the edges of the bright patch at the hours you are trying to manage, then plan coverage around that area. Include shadows from nearby structures or trees in your map; do not assume the crop receives full sun just because no cloth is fitted. That distinction matters when estimating how much extra reduction is needed.
Plan for seasonal changes
Shade requirements change as seasons, crops and canopy size change. Cloth that gives a useful reduction during a bright part of summer may be unnecessary when days are shorter or a different crop occupies the bed. Avoid choosing a permanent percentage by calendar alone: use the crop’s light target and current measurements, and take seasonal readings if you intend to leave coverage in place for months. A temporary or adjustable arrangement can make seasonal changes easier, but check that the cloth, fixings and intended movement suit your greenhouse before relying on it. Where coverage cannot be changed easily, decide which crop and growing period the plan is intended to serve.
Write down when you add, move or remove coverage, along with the crop stage and readings. This gives you a useful record for the next season and makes it easier to separate changes caused by shade from those caused by weather or a new planting. When two crops have different requirements, separate them by bed or timing where practical rather than choosing a heavy reduction for the whole house. Change one part of the plan at a time when you can, and recheck light after the canopy grows; taller plants can alter the exposure of neighbouring rows.

Check dimensions and attachment compatibility
Check how the supplier specifies cloth dimensions before ordering. The required cut depends on the area you intend to cover, not just a greenhouse’s listed size. Use your crop-zone plan to identify where shade is needed, then measure the intended coverage area according to the cloth supplier’s instructions. The Limited Edition Aluminium Greenhouses listing gives sizes from 3.77 to 28.08 m²; identify your selected model and size when asking about suitable attachment points. Confirm whether the supplied cloth dimensions include any allowance required for fitting. A product photo or a generic clip does not establish that the proposed attachment will suit your frame.
Before fitting, confirm that the placement leaves doors, vents, windows and routine access unobstructed, and that the greenhouse maker’s guidance permits the proposed attachment. Do not fasten cloth to a part whose intended use is unclear. If the manual does not describe the frame or fixings you plan to use, ask the greenhouse supplier or a suitably qualified installer rather than improvising. This is a compatibility question, separate from choosing the shade percentage. Cloth can be the right level on paper yet impractical if it blocks an opening or cannot be placed over the crop area identified by your measurements.
Measure again after installation
After the cloth is in place, repeat the same measurement route at the same canopy heights and comparable times. Use the same meter and note cloud cover, date and any changes to crop position; otherwise, a lower reading may reflect a duller day rather than the cloth. Compare the covered area with your unshaded baseline and the crop’s published target. If you can leave a nearby uncovered reference area without compromising plants, compare both within a short period so conditions are similar. Save the readings alongside the cloth’s stated rating and the details of where it was placed.
Use measurements and crop-specific observation together. Growth or leaf appearance can signal that something is wrong, but those signs have several possible causes and should not replace a light reading or crop guidance. If one bed falls below its target while another remains too bright, revise the coverage area or use separate zones rather than automatically increasing shade throughout the greenhouse. Recheck when plants mature, benches move or the season changes. Keep what worked for a particular crop and site, but do not treat that setting as a universal recommendation for the next planting.
Frequently asked questions
What shade percentage should I choose for a greenhouse?
There is no universal percentage. Find a light target for the crop and stage you are growing, then compare it with readings taken at canopy height in the areas that matter. Use a cloth’s stated rating as a starting point, not a guarantee, and check the result after it is in place.
Does 30% shade cloth reduce light by exactly 30% inside my greenhouse?
Not necessarily. The rating depends on what the supplier measures and under what conditions, while glazing, sun angle, frame shadows and existing shade also affect the light reaching plants. To calculate the reduction you observe, use the same meter at the same location, taking readings with and without the cloth close together under comparable conditions.
Can I use a lux meter or phone app to measure plant light?
A lux meter or phone app may help compare relative readings when you use the same device and method, but neither is a direct substitute for a PPFD measurement. Phone accuracy varies, and lux readings cannot be converted to PPFD with one universal factor. For crop-light decisions, use a suitable quantum sensor if available.
Should shade cloth cover the whole greenhouse?
Only if your measurements and crop plan show that the whole growing area needs a similar reduction. If one bed or row receives more light than the others, targeted coverage may make more sense. Check the pattern at different times of day, and keep doors, windows and vents unobstructed.
When should I adjust or remove greenhouse shade cloth?
Reassess when the season, crop or canopy changes, rather than relying on fixed calendar dates. Compare current readings with the light target for the plants you are growing. If you plan to move or remove the cloth, follow the greenhouse and cloth suppliers’ instructions for the arrangement you have.
A reliable shade-cloth choice comes from matching measured light to the needs of the crops you plan to grow. Use the percentage on the label as a comparison point, map exposure at canopy height and place coverage only where it is needed. Then repeat the measurements as the season, crop and growing layout change. That turns “What percentage should I buy?” into a site-specific decision, rather than a number borrowed from someone else’s greenhouse.
