
How to Add Greenhouse Shelves and Baskets Without Overloading the Frame
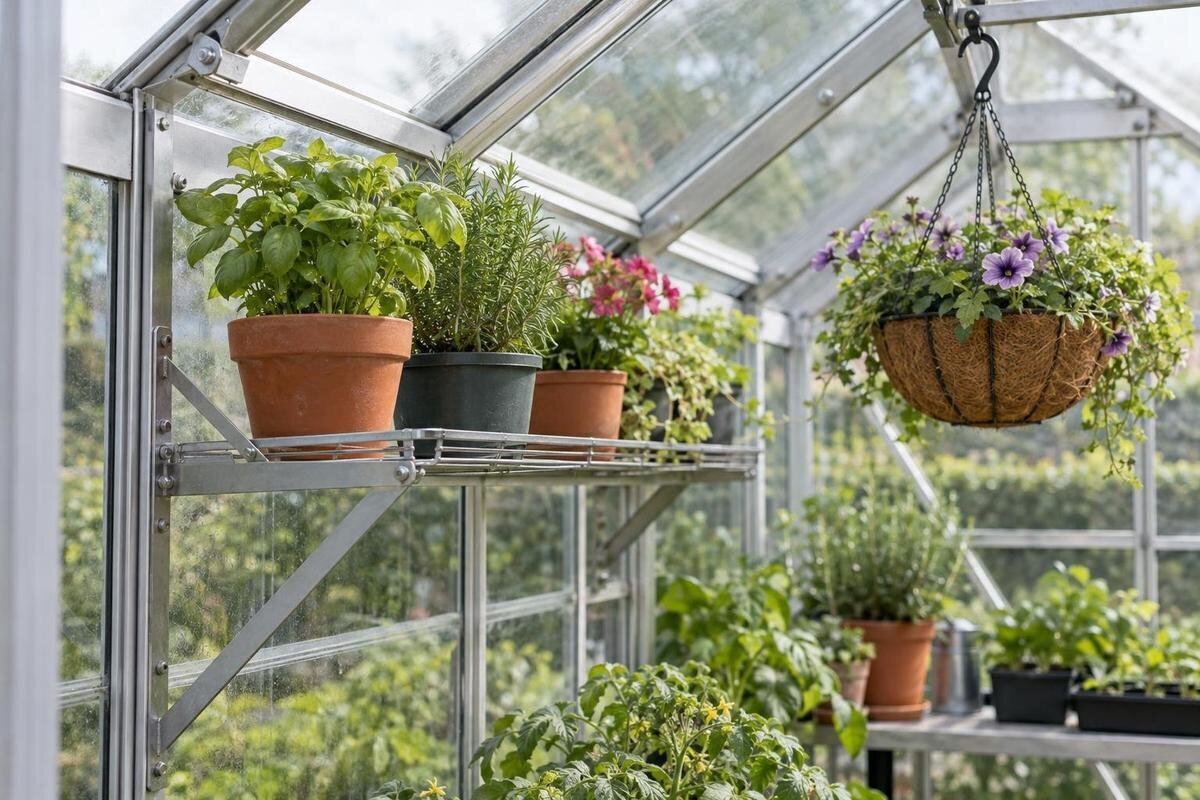
Greenhouse accessories
Adding shelves or hanging baskets can free up growing space, but each accessory transfers weight to a particular part of the greenhouse. A roof member that looks strong is not automatically designed for a hanging load. Check the manual for your exact model for approved fixing points and documented accessory limits, including the full load in normal use. If the instructions are missing, unclear or no longer match the structure, do not guess or drill a new point. Ask the manufacturer or a qualified greenhouse installer before fitting anything.

Before fitting an accessory 1
How shelves and baskets transfer weight
Adding a shelf or basket changes the way weight reaches the greenhouse frame. The load travels from stored items through a shelf, bracket or hook, into the fixing, then into a frame member and its connections. It is not automatically spread across the whole structure. A bar that supports glazing, or looks thick enough to take weight, is not necessarily an approved attachment point. The greenhouse may have dedicated accessory rails, or it may not allow that accessory at all. Follow the instructions for the exact model to identify how the accessory must be supported. Appearance, material and another owner’s arrangement cannot establish capacity. The fixing, connector and supporting member must all be covered by the documented arrangement.
Shelves and baskets also load a frame differently. A shelf may transfer weight through several supports, but that does not mean the frame load is shared evenly across them. A basket often hangs from one small point and can move. Several accessories may bear on the same rail or connected parts, so checking each item alone can miss the combined arrangement. The number and placement of fixings matter as well as the accessory’s own weight. Do not test an unknown frame by adding items gradually; an attachment that holds at first may still be outside its documented use. Confirm the permitted fixing and load before putting plants, trays or tools on it.
Find the manual for the exact greenhouse
Find the assembly or installation manual for the exact greenhouse model and version before choosing shelves or baskets. A product family name can cover different sizes or configurations, and a similar-looking structure may use different members or connections. Check the product label, order paperwork, invoice or earlier correspondence for a model name or code; note any changes made since installation. Then look for drawings or accessory instructions that mark approved rails, holes, brackets and permitted positions, as well as any load or quantity limits. A parts list can identify components without saying that they accept extra weight. Keep the manual with the greenhouse records so later additions can be checked against the same version.
The Lean-to Greenhouse listing identifies a family described as an aluminium wall greenhouse, with an area range from 3.69 to 14.34 m². Neither the name nor the floor area shows which fixings a particular version permits. Use a catalogue page to help match a family, then find the corresponding manual or ask the supplier for it. If the manual only shows greenhouse assembly and says nothing about shelving or hanging baskets, do not interpret an empty hole, glazing bar or convenient cross-member as permission. Ask whether the proposed point is approved for that accessory and load, and whether the instructions require a specific fitting rather than generic hardware. Keep any clarification with the model records.
Before fitting an accessory 2
Read load limits in context
Read a load figure in context: a number without its scope can mislead. It may apply to one shelf, one bracket, one fixing point or the complete accessory, and the permitted position may be specific. Check whether the stated amount is a maximum, whether it includes the shelf itself, and whether more than one shelf can be installed on the same member. Do not add separate ratings together unless the instructions explicitly permit that arrangement. A limit for one location cannot automatically be transferred to another. If the wording or units are unclear, ask the supplier to explain them rather than converting one type of rating into another.
Distinguish a load limit for a supplied accessory from one for the greenhouse structure. A shelf can meet its own product rating while its brackets or the supporting frame remain unsuitable. Check which instructions cover the accessory, connector and greenhouse, and read them together. For the Classic family in the Aluminium Greenhouses range, listed in sizes from 3.77 to 28.08 m², match those instructions to the exact size and version you own. The catalogue dimensions do not replace a model-specific shelf-load limit. Ask whether that limit also covers your proposed combination of accessories. If the manual and accessory sheet seem to conflict, pause and get the manufacturer to clarify before installing.
Count the complete load at its heaviest
Count the whole accessory at its heaviest normal use, not just the empty container or pot. For a shelf, include the shelf unit, its brackets and everything stored on it. For a basket, the basket, pot, plant, potting mix and retained water all contribute; watering can change the total substantially. Trays that hold runoff and stored supplies also add to shelf contents. When you ask the manufacturer about a rating, describe the intended arrangement, including its weight after watering and any water it may retain, and ask what the figure includes. Follow the load requirements in the manual rather than substituting a guess or your own safety margin. Do not rely on an empty-basket estimate made before the plants have grown.
Where more than one item will use a rail or support, ask about the complete arrangement, not each item in isolation. Several shelves may rely on one accessory rail, and their individual ratings do not necessarily add up to an approved combined load. For a greenhouse from the Limited Edition Aluminium Greenhouses range, which lists sizes from 3.77 to 28.08 m², specify the model size, number of shelves and intended positions when making that enquiry. A larger floor area does not establish a higher accessory capacity. If you change from small pots to larger containers, or add another accessory later, check that the documented arrangement still covers what you plan to store.

Before fitting an accessory 3
Plan shelves around access, plants and built-in storage
Once the support is confirmed, plan around how the greenhouse is used each day. Mark the door swing, main walking route, vents, window handles and the mature size of plants before choosing shelf depth or basket position. Shelves can make watering, pruning and moving trays awkward if they narrow an aisle or block a door or vent. Leave the clearance required by the greenhouse instructions around glazing and moving parts, and avoid a position where a swinging basket could strike a pane or opening. Storage should remain reachable without leaning on the frame or reaching across glazing. Allow room to carry a watering can or seed trays without knocking into stored items.
Consider light and airflow too. A deep shelf or row of baskets may shade plants below, while tightly packed pots can make inspection and watering awkward. Plan shelf levels for the plants you expect to grow, not only for seedlings, and leave access to leaves and vents. If the greenhouse includes built-in storage, mark its footprint before adding more shelves: the Limited Edition Aluminium Greenhouses with Storage listing identifies a storage version, not a layout for extra accessories. Treat existing storage as part of the plan, then compare proposed positions with the manual. Check that handles and openings will remain accessible even if you use them only occasionally.
A hanging basket needs an approved point
A hanging basket needs an explicitly approved hanging point, not simply a hook that fits. Do not assume that the roof, ridge, rafters, glazing bars or any cross-member is designed to carry suspended weight. Parts that support the greenhouse and its glazing are not automatically rated for extra planters. When considering baskets for a Pyramid Greenhouse, use the listing to identify the model family, then check the exact manual for a designated hanging point and permitted fixing. The model name does not establish a roof member’s suitability, and a horizontal member is not automatically intended to carry a hanging load. If no suitable point is shown, ask the manufacturer before hanging anything.
Ask about movement as well as weight. A basket can swing when a door opens, air moves through the greenhouse or someone brushes past, so a static-load figure may not cover every condition. Confirm whether baskets are permitted at that point, whether movement is addressed, and what clearance is required from panes, vents and people. Do not attach a hook to glazing hardware, wedge one under a bar or improvise a strap around the frame unless that arrangement is specifically approved. If reaching the basket would mean climbing onto a bench or leaning across glazing, choose another approved position. A hook that holds an empty basket is not proof that it is suitable in use.
Before fitting an accessory 4
What to do when the load rating is missing
If the manual is missing or its rating is unclear, pause before buying or fitting an accessory. Contact the manufacturer or retailer with the exact model, size, product code or serial details available, plus the approximate age or purchase record if known. Send clear photographs of the greenhouse overall, its identification label and the proposed fixing location; do not dismantle glazing to obtain them. Describe whether you want a shelf or basket and its intended full load. Mention visible damage or previous repairs so the answer reflects the current structure. Ask which point and accessory are approved, what limit applies there, whether it is per point or combined, and whether a particular fixing part is required.
Request the matching manual, technical drawing or written clarification rather than relying on an impression that a member looks strong. If the label identifies a Bloomcabin Prestige Greenhouse, include that family name and the exact size or version; the listing is an identifier, not an accessory rating. Where parts are missing, ask for the precise spare-part identifier instead of substituting generic hardware. A qualified greenhouse installer can review an uncertain existing structure or a frame that has been altered. Keep any written clarification with the manual for future reference. If neither the manufacturer nor installer can confirm the point and load, leave that location unused.
Positioning freestanding shelves
A freestanding shelf can be an alternative where no frame attachment is approved, provided it is genuinely independent. Its legs need a stable, level surface, and the unit must not lean on, brace against or be clipped to the greenhouse frame; otherwise it still transfers force to the structure. Check the shelf maker’s instructions and confirm that its base suits the actual floor or foundation. A unit with narrow feet may concentrate weight on a small area, so check the maker’s guidance for the surface. Do not assume a greenhouse floor can carry a concentrated load simply because the frame stands there. If the surface is uneven or uncertain, ask an installer how to assess the proposed arrangement before loading it.
Keep a freestanding unit clear of the doorway, vents and glazing, with enough room to reach plants and move trays. Follow the shelf maker’s instructions for stability on that surface; do not improvise a tie to a greenhouse rail. If your layout no longer fits, comparing greenhouse footprints may be more useful than squeezing in another hanging item. The Spacious Greenhouse listing gives an area range of 47 to 70 m², which can inform a footprint comparison only. Floor area does not establish a suitable shelf position, the capacity of the floor, or a roof fixing limit. Leave room to lift pots out without pulling the unit towards you.

Before fitting an accessory 5
Do not modify the frame to add a fixing
If the only way to make an accessory fit is to drill a new hole, clamp onto an unapproved member, remove glazing or alter the frame, stop and get model-specific advice. Those changes can affect the frame, its connections or glazing, and may create a load arrangement the original documentation does not cover. Do not copy a nearby greenhouse owner’s setup; models, assembly details and previous alterations can differ even when structures look alike. A new screw, cable tie or homemade bracket is not automatically suitable because it holds an empty accessory in place. Use only a fixing method the manufacturer has approved for the specific model and location.
If the current structure has no documented support for your planned storage, choose an independent shelf or consider whether a different greenhouse is a better fit rather than modifying the frame. Any replacement needs its own accessory check before purchase. For a possible replacement from the T-Model Orangery Greenhouse family, the listed area range of 16.52 to 30 m² helps you compare growing space, but does not identify suitable shelf or basket fixing points. Obtain the manual for the version you are considering and check its approved accessories, positions and limits before choosing it. Never transfer a fixing position or load limit from the greenhouse being replaced.
Fit approved accessories and recheck them
Where an accessory is approved, fit it exactly as described and use the specified accessory and fixing parts. Keep the work clear of glazing; do not climb on the roof, lean on panes or remove glass to reach a point. If fitting involves glass or access you cannot manage safely, leave the work to a qualified installer. Before loading, check that the component is seated as instructed and that doors, vents and windows still operate normally. Do not tighten, pack or modify a fixing in a way the manual does not describe. Record the accessory and approved position so a later move is not mistaken for the original setup.
After loading, look from a safe position for visible movement, sagging, twisting, loose fittings or changes around the supporting rail and nearby glazing. If anything shifts, stop using that point. Remove the accessory’s contents only if you can do so without reaching over glass or putting weight on the frame; otherwise ask the manufacturer or installer for guidance. Recheck after changing the layout, replacing a bracket or changing a basket’s contents, and include any new accessories in the load enquiry. Observation cannot certify a load or replace the manufacturer’s rating, but it can help you notice a change before adding more weight.
Frequently asked questions
Can I hang a basket from a roof bar?
Only if the manual for your exact greenhouse identifies that point and permits a hanging basket there. A roof member or glazing bar is not automatically approved for extra weight. If the instructions are silent, ask the manufacturer or a qualified installer rather than testing it with a basket.
What should I include in a basket’s load?
Include the basket, pot, plant, potting mix and any water the container or tray may retain. Ask what the documented limit covers and whether it applies to a complete basket or only its fixing. An empty-basket weight does not describe the load in normal use.
Can I install two shelves if each is within its load limit?
Not unless the instructions also allow that combination on the shared rail or frame. A limit for one shelf does not automatically establish a combined limit for several accessories. Check the permitted number, locations and total arrangement for your exact greenhouse.
Can I use a freestanding shelf instead?
It avoids loading the frame only if it is genuinely independent, stable on the floor and not braced or tied to the greenhouse. Check the shelf instructions and confirm that the floor or foundation suits the proposed load before placing heavy pots on it.
What if my manual does not mention shelves or baskets?
Do not assume a spare hole or convenient rail is suitable. Contact the manufacturer or supplier with the exact model details and a photo of the proposed location, and ask for written guidance. Leave the accessory off until the fixing point and load are confirmed.
Plan accessories around the greenhouse’s approved supports, rather than adding them wherever a hook fits. The key checks are an approved fixing point, a load limit that covers the complete accessory in use, and a layout that leaves doors, vents and glazing clear. If the support or load remains uncertain, leave the accessory off the frame and use storage with confirmed support or a genuinely independent unit instead. Extra growing space should not depend on an unverified roof member or an improvised fixing.
