
How to Position a Greenhouse Thermostat Reliably
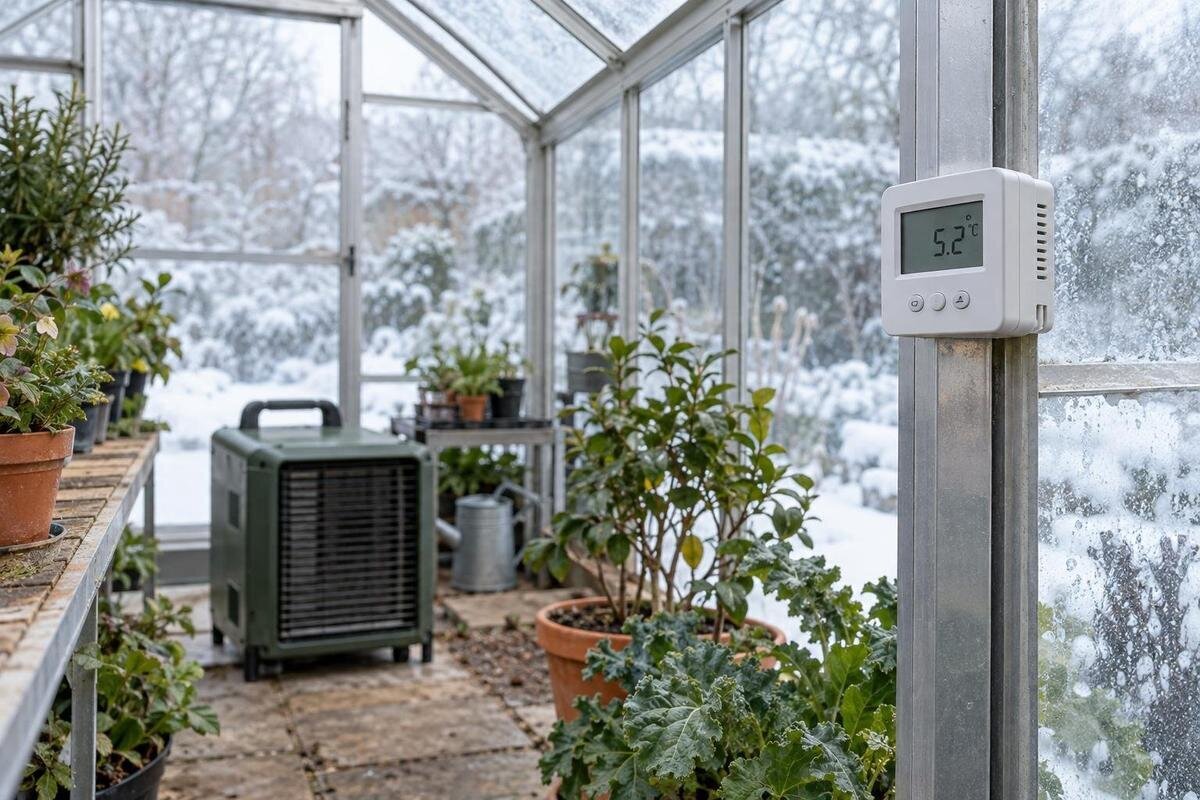
GREENHOUSE HEATING
A greenhouse heater can be set to a particular temperature while the plants experience something different. The thermostat responds to the air around its sensor, so direct sun, a heater’s warm airflow, a draught or a position above the canopy can skew the reading. Reliable control starts with a representative sensor site and an independent check among the plants. This guide explains how to choose that site, compare readings and recognise when one point cannot represent the whole growing area.

What a greenhouse thermostat actually measures
A greenhouse thermostat responds to the air at one sensor, not to an average across every bench. When the reading reaches a switching point, the controller starts or stops the heater according to its own design. A sunlit shelf, a shaded corner and a position beside glazing may each be warmer or cooler than the sensor. Its displayed number is evidence about one location, not a promise that every plant has reached the same temperature. If the sensor is built into the control unit, the unit’s position is the measuring point; if there is a separate probe, consider the probe’s location rather than the screen.
Before mounting the sensor, sketch the greenhouse as it will be used. Mark the heater, door, vents, benches, shelves, storage and main plant groups, then identify which plants the heater is meant to protect. Avoid picking a spot simply because it is easy to reach or sits at the geometric centre. When considering the Pyramid Greenhouse, use this sketch to compare possible sensor positions within your planned interior. Mark more than one candidate so you can check them before choosing a permanent mounting point. Include the height of each candidate, not just its position on the floor plan: a point beside a bench and one above it may sample different air. Check the controller’s placement instructions too, especially if they specify where its unit or a remote probe must go.
Choose a representative position among the plants
A representative sensor site is usually in the growing area occupied by the priority crop, exposed to ordinary greenhouse air rather than a special pocket of warmth or cold. It need not be halfway between the walls: a centred position can still sit above the canopy, in a sunbeam or in the heater’s plume. If several benches hold the same crop, choose a typical part of that group rather than an unusually sheltered end. Where plants occupy separate zones or have different needs, decide which group the heater control is intended to serve and check the others independently.
Keep storage and growing areas distinct in your plan. If you are considering the Limited Edition greenhouse with built-in storage, mark the intended crop area separately from the space for tools and supplies. A sensor in a storage corner will not report the air around crops simply because both areas share a structure. Decide which occupied growing area should guide heater operation, particularly if plants will be moved between benches during the season. This gives you a clear reference for judging whether a candidate sensor position is useful. For the other plant groups, note separate thermometer locations on the plan so that their readings are not mistaken for measurements taken at the main control point.
Keep direct sunlight off the sensor
A sensor in direct sunlight can warm faster than the surrounding air. It may then register a higher temperature than the shaded plant zone, prompting the controller to reduce heat before that area has warmed. This is a measurement bias, not proof that every plant is warm. Sun exposure changes through the day and year: a point that is shaded during one visit may receive a beam later, or become shaded by nearby objects. Check the proposed position when natural light reaches the greenhouse, including the hours when heating is likely to operate.
Choose a spot that stays out of direct sun while leaving air free to move around the sensor. A cupboard, closed box or thick improvised cover can isolate it from the air you want to measure; wrapping it in insulation will not correct a high reading. Use a shield only if the controller’s manufacturer supplies or approves one, and follow its instructions. If you are assessing a site for the Bloomcabin Prestige Greenhouse, check the real shade pattern there: nearby trees, buildings and orientation determine when sunlight reaches the sensor.
Keep the sensor out of the heater’s airflow
The heater itself can distort the control reading. If the sensor sits in the stream of heated air, it may register a quick rise and switch the heater off while the wider plant area is still cooler. That can also contribute to repeated on-off cycles. A position directly above a heat source may sit in a warmer pocket than the plants. On the other hand, placing the sensor in a particularly cold incoming-air path can keep the heater running longer than the representative growing area needs. Follow the heater and thermostat instructions about sensor separation and airflow; there is no universal distance for every unit and layout.
Map the heater outlet and likely air path before settling on the control point, then compare the sensor with a shaded thermometer at plant height while the heater starts and stops. A sharp change at the sensor that is not matched among the plants suggests a local influence, although it is not proof of one cause. When planning the interior of an Aluminium Classic Greenhouse, consider the heater, sensor and occupied benches together rather than selecting each position separately. Note whether the sensor responds first whenever heating begins, and whether the readings become closer after the heater stops. That sequence is more useful for assessing the position than a single temperature taken without noting what the heater was doing.

Account for doors, vents and draughts
Doors, vents and gaps can create short-lived changes beside them. A sensor right by a frequently opened door may react to a burst of outdoor air that does not represent the rest of the growing area. A sensor under a vent can likewise respond to a local stream of air. Avoid these direct draughts, but do not hide the sensor in an isolated corner that never experiences normal ventilation. The useful test is whether its reading follows conditions in the crop zone through ordinary greenhouse operation, rather than whether it is protected from every brief fluctuation.
Separate a brief disturbance from a genuinely cooler spot that affects plants. If crops beside a doorway regularly experience lower readings, keep the main sensor in a representative growing zone and check that edge separately; moving the control point to one outlier may make the rest of the space too warm. For a Lean-to Greenhouse, mark the actual doorway and ventilation openings on your plan, along with the plants nearest them. In your temperature notes, record when an opening was used and whether the lower reading continued after it closed. This helps distinguish a momentary draught from a recurring difference in an occupied growing area, without assuming that every low reading requires a change to the thermostat.
Mount the sensor at the height of the crop
Temperature around a sensor can differ between floor level, the crop canopy and the roof. If the sensor is high above short plants, it may sample warmer air than the foliage; at floor level, it may read a cooler layer that the leaves do not experience. Set it near the height of the plants the controller is intended to protect. There is no single height in centimetres that suits seedlings, low crops and tall plants alike. Keep the sensing element clear of leaves, soil, pots, damp trays and the greenhouse frame, which can influence its local reading.
Make mounting height part of the crop plan, not a one-time choice. Adjust a suitable mount as the canopy changes, or recheck the position when benches and shelves are rearranged; foliage should not touch or block the sensor. When planning benches for the Limited Edition Aluminium Greenhouse, note both the bench height and the expected height of the plants above it. This makes the intended measuring level clear before you choose a mounting point. Where plants grow at several levels, check those levels separately to see whether the main sensor remains representative. Record sensor height from a consistent reference, such as the floor or bench surface, so that a later comparison uses the same position rather than an approximate height remembered from an earlier check.
Check for warm and cool pockets across the greenhouse
Once you have chosen a likely control point, look for temperature differences around the greenhouse rather than assuming its reading applies everywhere. Check the main plant canopy, the area farthest from the heater, and any spot suspected of getting extra sun, shade or draughts. Make comparisons under similar conditions: comparing a sunlit sensor with a shaded thermometer may tell you more about exposure than about the greenhouse as a whole. A repeated difference between growing areas may point to uneven heat distribution, local airflow or different exposure. The checks help show whether the control point represents the plants that matter.
The Spacious Greenhouse is listed with floor areas from 47 to 70 m², but that range does not show how temperature is distributed in any particular setup. In any greenhouse, the position of benches, crops, partitions and the heater determines which points are worth checking. Treat floor area as a prompt to map occupied growing areas, not as proof that readings will be uniform or that several thermostats are needed. Measure the spaces in use before deciding whether one control point is adequate for your plants.
Cross-check the thermostat with a separate thermometer
Use a separate thermometer or temperature logger to check the thermostat rather than relying on its display alone. For a direct comparison, place the independent instrument near the sensor, at the same height and away from direct sun or contact with a surface. Leave both in the same air long enough for the readings to settle; the instruments may respond at different speeds, so an immediate glance can mislead. If either device gives accuracy information, take it into account instead of expecting identical digits. A side-by-side check tests agreement at that point, not temperature uniformity across the greenhouse.
Next, move the independent thermometer to the crop zone and repeat the check at other relevant positions, noting where each reading came from. If you use one thermometer for several locations, record the time as well as the place: readings taken in sequence are not simultaneous measurements. Keep the thermostat reading alongside each entry so you can see whether conditions at the control point changed during the comparison. A minimum/maximum function or logger can reveal changes that a single visit misses, but follow its instructions and protect it from moisture as directed. Label the location and recording period clearly when reviewing those results. If readings continue to differ unexpectedly, review exposure, height, response time and both devices’ manuals. Use only a calibration or correction method described by the manufacturer; do not invent an offset just to make the numbers match.

Watch readings through a heating cycle
Compare the sensor and independent plant-zone readings during normal heater operation. Record the time, both readings, whether the heater is running, and relevant changes such as direct sun, an opened door or an adjusted vent. Repeat at different times of day and during the cooler period when the greenhouse is normally heated. Use the same observation points for repeat checks so that a change in location does not become confused with a change over time. Keep routine observations separate from deliberate placement trials, and note exactly when you move the sensor. An instant reading can look reassuring even if the temperature falls later; a logger or minimum/maximum record provides more context. You are looking for a pattern that repeats, not a perfect single reading or a guaranteed temperature.
If the thermostat reading rises quickly whenever the heater starts while the crop-level reading lags, revisit the sensor’s position relative to the warm-air path and compare more than one plant location. If the gap persists under different conditions, the control point may not be representative, or the heating and greenhouse setup may need separate attention. Do not assume that moving a sensor can resolve every heat-distribution or heat-loss problem, and do not change heater settings based on one brief observation. Follow the controller’s instructions for adjustments, then compare the readings again.
Recheck the position when the setup changes
Revisit the sensor after changes that could alter the air around it: new benches, taller crops, moved pots, shelving, a relocated heater, different ventilation habits or an object that now casts shade. Sunlight also reaches the greenhouse differently through the year, so a position checked in one season may need another look when the light path changes. Keep the sensing element unobstructed and in representative air. If the sensor has been bumped or moved, treat its readings as unverified until you repeat the comparison at plant level and elsewhere in the growing area.
For the T-Model Orangery Greenhouse, the listed floor-area range is 16.52 to 30 m². Use your chosen size and completed interior layout to identify the measuring point, then keep a brief note of its height, nearby equipment, shade and independent readings. Date the note and update it when the arrangement changes, rather than leaving several different positions recorded as though they were the same one. After a crop rotation or rearrangement, compare the new observations with the relevant earlier setup. This makes later checks easier and helps distinguish a change in growing conditions from a changed measuring point. A useful record explains where and when a reading was taken, rather than preserving a temperature number without the context needed to interpret it.
Frequently asked questions
Where should I put a greenhouse thermostat sensor?
Place it in freely moving air in the main growing area, at the height of the plants the heater is intended to protect. Keep it away from direct sun, the heater’s outlet, glazing, doorways and vents. Then compare that spot with temperatures at the crop canopy elsewhere. The best position depends on your layout, not on a universal centre point.
Should a greenhouse thermostat sensor be in direct sunlight?
No. Sunlight can warm the sensor faster than the surrounding air, making the reading higher than the temperature around shaded plants. The controller may then reduce heat too soon. Choose a shaded position that still has free air around it, and check that it stays shaded at different times of day.
How high should I mount the sensor?
Use the height of the plants whose conditions the controller is meant to manage. A position near their canopy is often more representative than the roof or floor, but there is no single height for every crop. Keep the sensor clear of foliage and surfaces, and recheck its position as plants grow.
How can I check whether the thermostat reading is reliable?
Place a separate thermometer beside the sensor, at the same height and in the same shade, and allow both readings to settle before comparing them. Then check the thermometer at plant level and in other relevant areas. If the readings differ unexpectedly, check placement and each device’s instructions before changing any settings.
Can one thermostat sensor represent the whole greenhouse?
It represents the air around its own sensing point, which may not match every growing area. Compare temperatures at the main crop zone and any areas affected by different light, airflow or shelter. If readings vary consistently, choose the control point for the priority plants and keep checking other zones separately.
Reliable thermostat placement is a practical measurement exercise. Keep the sensor in shaded, freely moving air at a height and position that reflect the priority plants, away from direct sun, heater airflow, openings and surfaces. Compare its reading with an independent thermometer at crop level and in the parts of the greenhouse that matter. If readings differ, use the pattern to review the location and layout rather than treating one display as a promise for every plant. Recheck after the greenhouse, crops or heater arrangement changes.
