
Planning Independent Watering for Greenhouse Pots and Beds
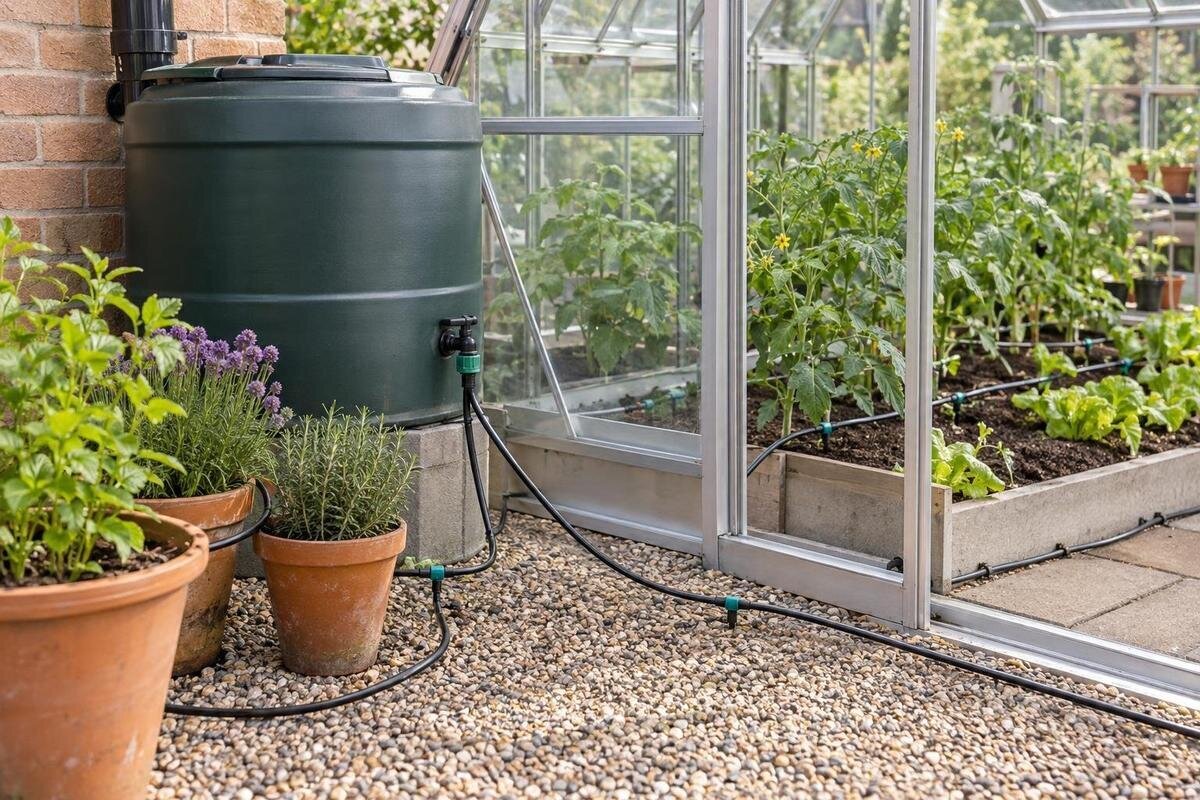
GREENHOUSE WATERING
Inside a greenhouse, pots and planted beds may sit only a few steps apart, yet their roots draw on very different amounts of growing medium. A single timer setting can leave containers dry while a bed remains wet, or supply more water than some plants need. Independent watering zones let each area follow a suitable schedule without creating a separate programme for every plant. The useful design work is grouping crops, matching delivery to each root zone and checking what the system actually supplies.

Why pots and beds often need different schedules
Containers have a finite volume of growing medium, so roots can draw only on moisture held inside that pot. A small pot or shallow tray has less reserve than a deep container; pot material, colour, position and exposure can also alter how quickly moisture is lost. Drainage holes and the structure of the potting mix affect how water moves through it. Two pots on the same bench may therefore dry at different rates, even with the same crop and outlet. A fixed pulse that suits one can leave another short of water or unnecessarily wet. The delivered volume needs to suit the actual container, not just the number of plants.
Beds behave differently because roots can use a wider soil profile, but they are not automatically slower to dry. Depth, texture, compaction, organic matter, drainage and root spread all affect moisture. A bed may be wet near the surface and dry lower down, or water may linger in one patch. Treat containers and beds as separate starting groups, then combine or divide them after checking actual moisture. Compare different beds too: depth and position can change how a shared circuit performs. The aim is not to give every plant its own timer; it is to stop one area's requirements dictating a compromise for another. Use root-zone condition, rather than the surface alone, to decide.
Map the greenhouse before choosing zones
Start with a floor plan of the greenhouse rather than the timer menu. Mark beds, benches, access paths, the water source and the positions of pots; include room to reach plants for pruning, picking and routine checks. If you are comparing options such as the Pyramid Greenhouse, look beyond the stated floor area when planning your growing space. Use the selected model's plan, if available, or measure an existing space to establish where benches and paths will sit. Then sketch where each line and control could run, leaving a clear route to the tap or reservoir.
Add a crop register beside the sketch: crop, pot or bed, approximate container depth, growing medium, planting stage and any consistent difference in sun or airflow. Check representative potting mix and bed soil at root depth, not just at the surface. For a pot, note how quickly its root ball dries between checks; for a bed, inspect more than one point along the row. A greenhouse roof may keep direct rain off the planting area, so outdoor rainfall alone is not evidence that a zone received useful water. Make the notes easy to update when plants move, and check at a consistent point in the watering cycle so comparisons are meaningful.
Group plants by similar root-zone needs
Group plants by root-zone behaviour rather than crop name alone. A shallow seedling tray, a mature plant in a large pot and a crop in a bed can have different moisture reserves even if they prefer similar conditions. Conversely, two crop types in comparable containers and media may share a zone when their observed drying patterns align. Take account of planting stage: young plants use less root space now, then may need a different arrangement as they establish. Check them over several cycles before deciding that a grouping is permanent. Water demand can change as foliage and roots expand.
A useful zone contains plants that can receive similar amounts on similar days without leaving one root area persistently soggy or dry. Keep groups manageable: separating every pot creates more controls and more opportunities for missed adjustments. When comparing the Limited Edition Aluminium Greenhouses with Storage, include storage and access space in your planting sketch rather than treating the entire floor area as growing space. The selected plan will help you work out where beds and container groups can sit and how you will reach them. Revisit groupings when crops are replaced or pots are moved, rather than keeping an old circuit assignment by habit.
Place water where each root system can use it
For pots, make sure the outlet wets the root ball rather than bare potting mix at the rim. An emitter sitting against the side may send water down the pot wall or out through drainage before the centre is evenly moist. Larger containers or broad root systems may need a different distribution pattern from a small pot; follow the emitter maker's guidance and check moisture in several parts of the root area. Secure tubing so it stays in place when you lift or rotate a pot, and allow for containers likely to be moved. Test in the actual mix, not by counting outlets alone.
In beds, position outlets to serve crop rows and the active root area, not simply to make a line look evenly spaced. Soil texture and planting distance affect how far water spreads sideways, so inspect the bed after a cycle at several points. A wet strip beside a pipe does not prove the whole bed is supplied. If you are considering the Bloomcabin Prestige Greenhouse, draw your proposed rows on the selected model's plan, if available, before deciding where outlets should go. Match their positions to the planting layout and leave joins and filters accessible for inspection.

Check delivery before setting run times
A timer's run time has meaning only when outlet delivery is known. Check the irrigation manufacturer's stated pressure and flow requirements against the water source, including any filter, regulator or valve in the circuit. Actual output can differ from a nominal emitter rating when pressure, line length or outlet count changes. This matters when two zones share a source or run sequentially. If the supplier's diagram or compatibility details are unclear, ask the irrigation supplier or a qualified installer to confirm them rather than guessing from the greenhouse's area. Record the system specifications before changing emitters or extending lines.
Measure each zone under its intended operating conditions. A simple collection test at representative outlets can show whether the first and last points deliver alike; record the collected amount over the same measured period and compare it with the system's published specification. Take pressure readings only with suitable equipment and according to manufacturer guidance. If you are planning a layout for a Spacious Greenhouse, assess the proposed pipe runs alongside the flow available from your tap or tank. Do not lengthen a programme to mask a blocked or under-supplying outlet; diagnose distribution first, because other outlets on that circuit may then receive too much.
Adjust each programme from moisture checks
Give each zone its own start time, interval and duration only to the extent the controller allows, and base those settings on what happens in the root area after watering. The practical target is an even wetting of active roots without persistent saturation or water running away before it can soak in. Check the same representative pots and bed points after a cycle, then again before the next one. If pots are dry but the bed remains adequately moist, adjust the pot zone rather than increasing all irrigation. Avoid importing a calendar schedule from another greenhouse: pot size, medium, crop stage and weather vary.
Change one setting at a time, then observe the result through more than one normal watering cycle. Bright, hot weather, a ventilation change, fresh planting or a larger canopy can alter demand; the schedule should respond rather than remain fixed by default. When planning pots and beds for a Classic aluminium greenhouse, note which groups will need separate programmes before choosing the timer. Check that it supports the required number of independent outputs and allows the settings each group needs. Keep a short note of each setting change and its result so you can reverse an adjustment that did not help.
Make sure each zone can be controlled separately
Independent pipes alone do not create independent programmes. If two lines are fed by the same timer output, they will usually run together; separate tubing does not let them follow different automatic schedules. The control arrangement has to switch each zone independently, through a controller with suitable stations, a compatible valve arrangement or separate controls. Check the controller specification for the number of outputs and how its programmes operate, and confirm that valves and the water source meet the system maker's requirements. Do not assume that a timer with several buttons has several independent stations. Check the manual's channel description before you buy.
Manual control can suit a small set-up if someone is present to operate each area, but it is not the same as having separate automatic schedules. Write down which control serves pots and which serves beds, label accessible lines, and make sure you can see whether a branch is open. If you are considering a Lean-to Greenhouse, mark control positions on the same plan as your pipe routes and growing areas. Keep every control reachable without shifting containers. Labels should identify the zone clearly enough for another person to operate it without having to trace each line back through the planting.
Route lines around access and drainage
Route each line so the zones remain clear as you work. Keep main paths free of loose tubing, leave access to doors and work areas, and avoid putting a fixed line where moving a pot will pull it out of position. If pots may change size or location, use a layout that can be adjusted and mark the intended outlets. In beds, plan how a line reaches each row without crossing areas where water is not wanted. A clear route makes it easier to find a blockage, isolate one zone or change planting later; it also reduces accidental knocks during daily work.
Think about where excess water goes as well as where the outlet sits. Check that container drainage does not spill onto a path or into a neighbouring pot with different needs, and observe whether the bed's lower edge stays wet after its zone runs. Run-off is not proof that roots received an even dose; it can mean water is bypassing the root area. If the Limited Edition Aluminium Greenhouses are on your shortlist, use measurements from the selected layout to plan line routes, access points and the positions of containers above or beside beds. Apply the same drainage check when rearranging an existing greenhouse.

Test the zones with the planted layout in place
Commission one zone at a time with the pots and crops in place. Check that each outlet is present, correctly positioned and delivering, then compare representative points along the line. Look for dry sections, unexpected pooling, leaks or outlets that deliver noticeably less than others. Check moisture below the surface after a run and confirm water reaches the intended root area, not only the top layer. Where observed output conflicts with system specifications, pause schedule changes and check the equipment, pressure and line layout. Follow manufacturer instructions when inspecting filters, emitters and connections.
Record the date, zone, settings, crop group and what you found at root depth. A brief log helps distinguish a schedule issue from a line problem when a plant later looks dry. For a new planting layout in a T-Model Orangery Greenhouse, keep the selected model's plan, if available, alongside your irrigation diagram and record the results of the in-place test. Recheck after moving pots, replacing plants or changing an emitter, because each can alter how that zone behaves. Mark those changes on the diagram so the log still refers to the outlets and crop groups currently in use.
Revisit the plan as crops and conditions change
Uneven results point to a diagnosis, not automatically a longer programme. If pots dry while the bed is fine, check whether pot outlets are blocked, shifted or poorly matched to container size, and inspect moisture inside several containers. If the entire pot zone is dry, examine the supply and control; if only a few pots are affected, inspect those outlets and their positions. If a bed stays wet in one strip but dry elsewhere, review outlet placement and soil wetting rather than extending the whole bed cycle. Test a representative pot and bed, not only the worst-looking plant, before changing a setting.
Reassess groupings as roots grow and planting turns over. A seedling tray, a newly planted crop and a mature container may not belong on the same circuit throughout the season. Periodically check filters and outlets using the equipment maker's maintenance guidance; sediment or a shifted line can alter delivered water without any change to the timer. Revisit settings when light, ventilation or plant cover changes, and keep pots and beds on separate schedules for as long as their observed moisture needs differ. The system should follow the current planting layout, not preserve an outdated plan. An adjustment to one zone need not force a change to the other.
Frequently asked questions
Can pots and beds share one timer?
They can share a timer only if its control arrangement can run their zones independently, or if you are willing to operate them manually. Two lines on the same single output will normally start and stop together, so they cannot follow separate automatic schedules. Check the controller's station and programme specifications, as well as the irrigation maker's compatibility requirements, before choosing an arrangement.
How many watering zones should a greenhouse have?
Create a zone for each group that needs a materially different schedule or delivery pattern; do not automatically assign one per crop or container. Begin with pots and planted beds when checks show distinct drying behaviour, then split a group only if some root areas remain too dry or wet under a shared programme. Keep a diagram of each zone.
Should I water greenhouse pots every day?
There is no universal daily interval. Container size, potting mix, crop stage, temperature, ventilation and outlet delivery all affect how quickly moisture changes. Check the root area and adjust the pot-zone programme to actual conditions. Avoid copying a fixed timetable or extending it just because the surface looks dry.
Why are a few pots dry even though their line is running?
Check that those emitters are not blocked, shifted or watering the pot wall, and compare their delivery with other outlets on the same line. Check inside several pots at root depth, since surface wetness can mislead. If the whole zone is dry, inspect the supply and controls; if only certain pots are affected, investigate their outlets and potting mix before changing every zone.
Can different crops share a watering zone?
Yes, if their root volumes, growing media and observed moisture needs are close enough to suit the same schedule and delivery. Crop name alone is not a reliable grouping rule: a seedling tray and a mature container may differ, while different plants in similar pots may behave alike. Review groupings as crops grow or move.
Independent zones work best when they reflect real differences in root volume and moisture behaviour, not when every plant has a separate line by default. Keep pots and beds distinct while checks show different drying patterns, set each control to operate them separately, and confirm delivery at the root area. A clear map and brief record of changes make it easier to adjust as crops grow or move. The result is a system that responds to the planting layout instead of forcing pots and beds onto one compromise schedule.
