
Lean-To or Freestanding Greenhouse: Fit It to Your Section
Greenhouse planning
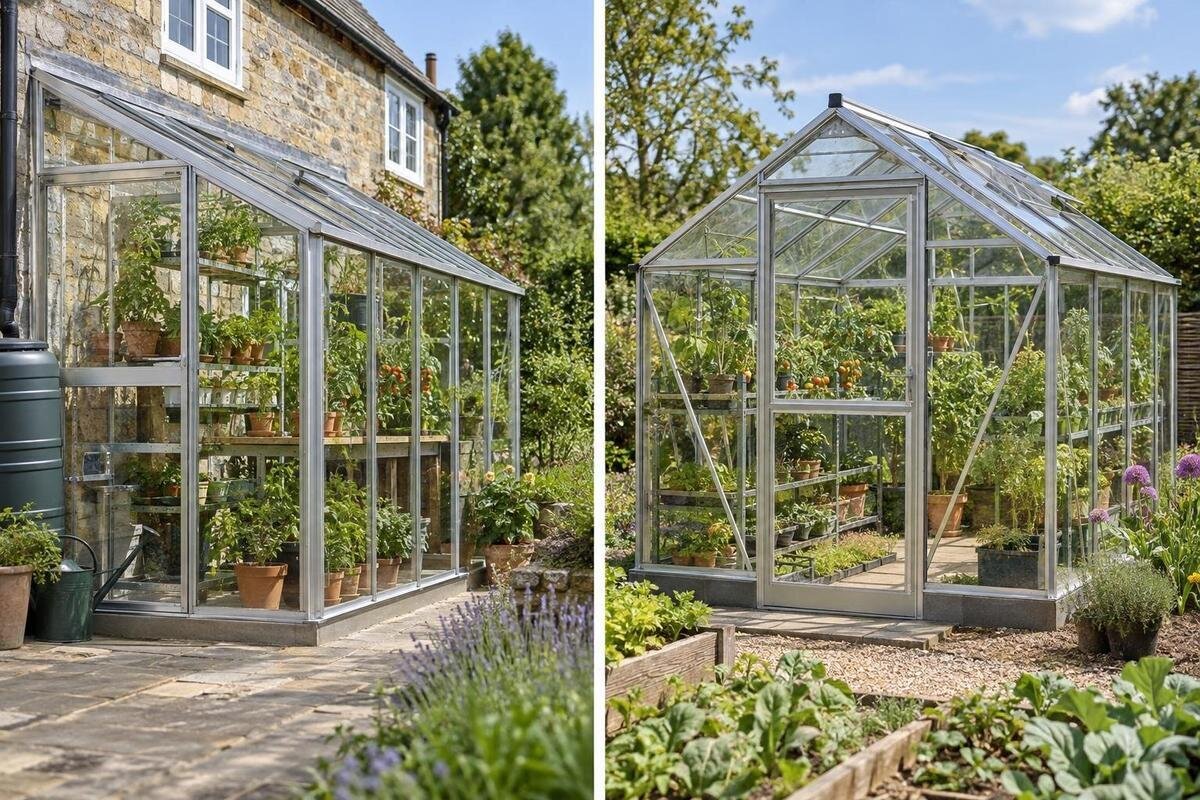
A lean-to greenhouse can look like the obvious choice when a section has limited open ground, while a freestanding model can seem easier to place. Neither label tells you how much garden will remain usable. Wall suitability, the entry route, sunlight, maintenance access and the shape of the internal growing area all matter. The fairest comparison is to put both options on one plan of the same site, then test how each would affect the rest of the garden as well as its own footprint.

Put both greenhouses on the same site plan
Begin with one plan of the part of your section that could realistically hold a greenhouse. Mark the house, boundaries, gates, existing paths, sheds, fences, trees, slopes and any known service locations. For a simple comparison, imagine a backyard with the house along one edge, an apparently clear stretch of wall, an open patch farther out and a gate at one end. These are features in an example, not assumptions about your property. Keep them fixed while testing both forms; otherwise, the comparison can quietly give one option extra land or a more convenient route. Include existing paving or a narrow side passage, and note whether measurements come from a site check or an older plan. If you use an old drawing, verify its scale before trusting a close clearance.
Draw two outlines on the same plan: one alongside the wall and one in the open patch. Use the outside dimensions for the exact configuration under consideration, then draw the remaining lawn, beds and access routes. The Spacious Greenhouse range is listed from 47 to 70 m²; that is a range, not one footprint or a recommendation for this example. Compare a chosen layout with the measured site, rather than comparing broad product labels. If the two options cannot be matched in size, record the difference so you know whether you are comparing form or capacity. Keep fixed needs, such as a route to the rear gate, in both versions.
Measure the full footprint and surrounding space
A site’s total area can conceal a poor fit. Measure the width and depth at each candidate spot, taking more than one reading where the space narrows or changes direction. Note slopes, fences, eaves, overhanging branches and nearby structures that affect the outline. A long, narrow strip can be awkward even if its area matches a compact patch. Mark boundaries and existing access ways; do not count the whole lawn as free if people need it to reach a shed or back gate. At an irregular spot, measure near both ends rather than relying on a single width. Recheck any tight dimensions before settling on a model.
Lay out the greenhouse’s external outline with string, chalk or temporary markers. Add the door opening and any clearance called for in the selected model’s information, as well as room to reach glazing or fittings for ordinary upkeep. Mark where someone would stand to open the door or work around the structure, not just the line of its walls. This test can reveal a clash with a path or fence, but it does not confirm that the ground or fixing method is suitable. The Aluminium Classic Greenhouse is listed from 3.77 to 28.08 m². Use the external dimensions of your selected configuration for this on-site check.
Check the wall before choosing a lean-to
With a lean-to, examine the wall as part of the proposed location, not as spare space that is automatically usable. Measure the clear run and note doors, windows, vents, meter boxes, downpipes, taps, eaves and changes in cladding. Check that opening household windows and reaching their handles would remain practical, and consider whether a path or doorway would be narrowed. Note which fittings need to stay accessible for maintenance. A wall that looks blank from the garden may still have openings or services that affect the layout. A photo and a note of the clear width can also help a professional assess the actual spot.
Ask a qualified installer or building professional to confirm that the wall and proposed attachment detail suit the selected greenhouse. Wall condition, construction and fixing points matter; do not assume that a particular wall material is adequate or that a greenhouse will attach safely just because its footprint fits. Ask how the junction with the house is intended to work, including any relevant water run-off and access for maintenance. The Lean-to Greenhouse range is listed from 3.69 to 14.34 m², but its stated area cannot confirm whether your wall is suitable or whether the route beside it remains clear. Get that advice before treating a visually clear stretch as a usable attachment point.
Find a separate position for a freestanding greenhouse
A freestanding greenhouse needs its own position without relying on attachment to the house wall. That can give you more choice about where it sits, but it uses a separate patch of the garden. On the same plan, test whether the proposed location leaves the access required for installation, cleaning and maintenance. Trees, boundary fences, sheds and other structures may restrict room around it. A freestanding label does not mean every side will be easy to reach; use the selected model’s guidance to identify any clearance needs. Consider how the greenhouse components would be brought to the spot too, including turns through a side gate or passage.
Look beyond the structure’s outline: would it cut across the route between house and gate, take the only place for a future bed, or make the rest of the garden awkward to use? Positioning it in the open avoids relying on a house wall, but you may need to reroute a path around it or divide a useful open area. If a fence or planting makes one side inaccessible, mark that limitation rather than counting the space as available for maintenance access. The comparison is about how the greenhouse fits the plot, not just whether its base can be drawn inside it.

Compare sunlight and shade on the growing area
Make a simple light map before deciding that one location is sunnier. Observe the candidate areas at different times of day, and repeat the check as conditions change through the year if you can. Mark shadows from the house, fences, trees and neighbouring structures, including places where tree cover changes seasonally. A single visit around midday can miss the morning or afternoon pattern. You do not need a formal light measurement for this first comparison; record what you observe and where you are uncertain. The aim is to compare the same spots over time, not to turn a casual check into a precise reading.
Place each greenhouse outline over that record, then sketch the actual beds or benches inside it. A lean-to may sit beside a wall that casts shade; a freestanding unit may be in a more open patch, or in a shaded one if that is where space is available. Neither type guarantees a better growing environment. Check the planned crops’ light needs against the conditions you observe, and note whether one layout puts the most-used growing zones in a less suitable part of the structure. If the two locations receive broadly similar light, use access and interior layout to distinguish them rather than assuming one greenhouse type is better.
Plan the entry and the route to it
Trace the route people will use from the gate or house door to the greenhouse entrance. Mark where someone carrying trays, a watering can or potting mix needs to turn or pause, and test the route with the tools you actually use. Note whether the path stays clear when the greenhouse door is open and whether the approach crosses a bed, lawn or another entrance. If you expect to wheel a barrow through, its real width and turning space are more useful than guessing from the plan. A direct route can matter when you are carrying fragile seedlings or visiting the greenhouse in wet weather.
Check the exact doorway position and opening arrangement for each shortlisted configuration; a product name or floor-area figure does not tell you where the entry sits. For a lean-to, make sure the route along the wall is not pinched by household doors, taps or stored items. For a freestanding option, consider which side can face the path without putting the door into a fence or bed. The Pyramid Greenhouse listing is a model reference, not a door-position specification, so use configuration details before judging its approach. Also mark where someone can stand near the entrance without blocking the path.
Compare usable growing space
Separate total floor area from the space you can comfortably use for growing. On an interior sketch, reserve room for an aisle from the entrance, standing space to tend plants, benches or shelves, potting work and any equipment you plan to keep inside. Leave enough space for door access and to reach the back of beds; a packed plan can look productive on paper but become frustrating to use. The proportions matter as much as the number of square metres, especially if you need a continuous route through the greenhouse. For taller crops, consider the headroom they need and check any relevant limits in the selected model information.
Repeat the same planting plan inside each candidate outline: mark beds, bench space, a clear aisle and the tasks you need to do there. Compare how many workable growing zones remain, not how many rectangles fit on the page. The T-Model Orangery Greenhouse is listed from 16.52 to 30 m². Use the internal dimensions of the configuration you are considering to see how your planting plan fits. A smaller total footprint with a workable aisle may suit your routine better than a larger plan that leaves awkward corners or blocks access. If your crop mix changes through the year, sketch another layout rather than assuming today’s arrangement will stay fixed.
Fit storage, water and power into the plan
Include storage and services before the layout is fixed. List what you expect to store inside, such as hand tools, pots and trays, and decide whether it belongs in the growing space or a separate shed. Show where water is available and how a hose would reach without crossing the main route or lying across beds. If powered equipment is part of the plan, note where a suitable connection would be needed and have electrical work assessed and completed by a qualified professional. Do not assume a greenhouse near the house is already connected to anything. Items used only occasionally still occupy floor space when they are stored.
Storage built into a greenhouse still needs to be checked against your preferred internal arrangement: confirm what the selected configuration includes and where it sits before counting the remaining planting area. The Limited Edition Greenhouse with Built-in Storage is identified as a model with built-in storage and listed from 5.52 to 28.08 m²; the product name does not show how your beds, aisle and stored items will work together. If you choose separate storage, draw its footprint on the site plan too, so it does not quietly take up the same path. Compare the distance to taps, tools and any equipment you need to service.

Confirm the base and attachment requirements
Compare the ground conditions under both outlines as well as their surface positions. A patch that looks level from the lawn may still need professional assessment for the proposed base, drainage, fixings or attachment; requirements depend on the greenhouse and site. Note places where water collects, where the ground falls away and any known underground services, but do not use a sketch as an engineering assessment. If water movement is unclear, record what you observe after rain and share it with the installer. Ask the supplier or installer what site information they need and have a qualified professional review anything uncertain.
A lean-to needs a suitable base as well as a connection to the building; a freestanding greenhouse has its own base and site-specific fixing requirements. Confirm the details for the exact model before comparing installation plans. The Prestige Greenhouse with metal foundation is identified as a model with a metal foundation, but that name does not establish that it suits your ground or explain what preparation is required. Keep the product information for the selected configuration with your site notes. If boundaries, services or building approvals raise questions, check with your local council or an appropriately qualified local professional rather than guessing.
Choose the layout that works with the rest of the garden
Return to the two overlays and treat hard constraints as pass-or-fail: the exact footprint must fit, the approach must stay usable, the wall must be confirmed suitable for a lean-to, and the chosen location must allow required access. If an option depends on blocking a door, squeezing through a bed or assuming an unverified wall connection, it is not a sound fit on the current plan. Then compare the other trade-offs: how each layout affects light, movement, growing zones and the rest of the garden. Give these essentials more weight than a small difference in listed area.
A lean-to may suit a site where a suitable wall runs alongside an otherwise awkward edge and the approach remains clear. A freestanding greenhouse may make more sense where a separate open position gives better routes or puts the growing area where you want it. Those are outcomes to test, not rules; either form can fail if access, light or the ground does not work. The Limited Edition Aluminium Greenhouse range is listed from 3.77 to 28.08 m². When considering a configuration from that range, compare the garden space it would leave with the other layouts on your plan. If neither outline fits without sacrificing an important path or growing zone, revisit the size or position rather than forcing the first choice.
Frequently asked questions
Is a lean-to always the better choice for a small section?
No. It may use an edge of the site, but still needs a suitable wall, a clear approach and room for the door and maintenance access. A narrow footprint can be awkward if it blocks a path or leaves the growing area shaded. Measure the actual layout before deciding.
Does a freestanding greenhouse need access on every side?
Not necessarily in the same amount. Follow the clearance and maintenance guidance for the selected model, and allow for its door and the access you will need. If a fence or boundary makes one side hard to reach, ask the installer how that affects the proposed position.
Can I compare the options by floor area alone?
No. A listed area does not show how much room remains for an aisle, benches, storage or door access. Compare the exact configuration drawings and sketch the same beds, equipment and route inside each option.
How can I check whether a wall is suitable for a lean-to?
Note the wall’s condition, construction, clear space, openings and services, then have a qualified installer or building professional check the proposed attachment against the selected greenhouse’s requirements. A wall that looks clear from the garden is not necessarily suitable for fixing.
Which type will get more sun?
Neither type is automatically sunnier. Observe shade at different times and as conditions change through the year, then compare the light over the actual growing zones in both plans. The wall, trees, fences and nearby buildings all affect the result.
The better choice is the one that leaves a workable greenhouse and a garden you can still use. A lean-to needs a suitable wall and a practical approach; a freestanding greenhouse needs a separate position that works for light, access and growing. Draw both on the same site plan and choose the layout that passes those checks without sacrificing an important route or growing zone.
