
Greenhouse Frost Pockets: Assessing Low-Lying Ground
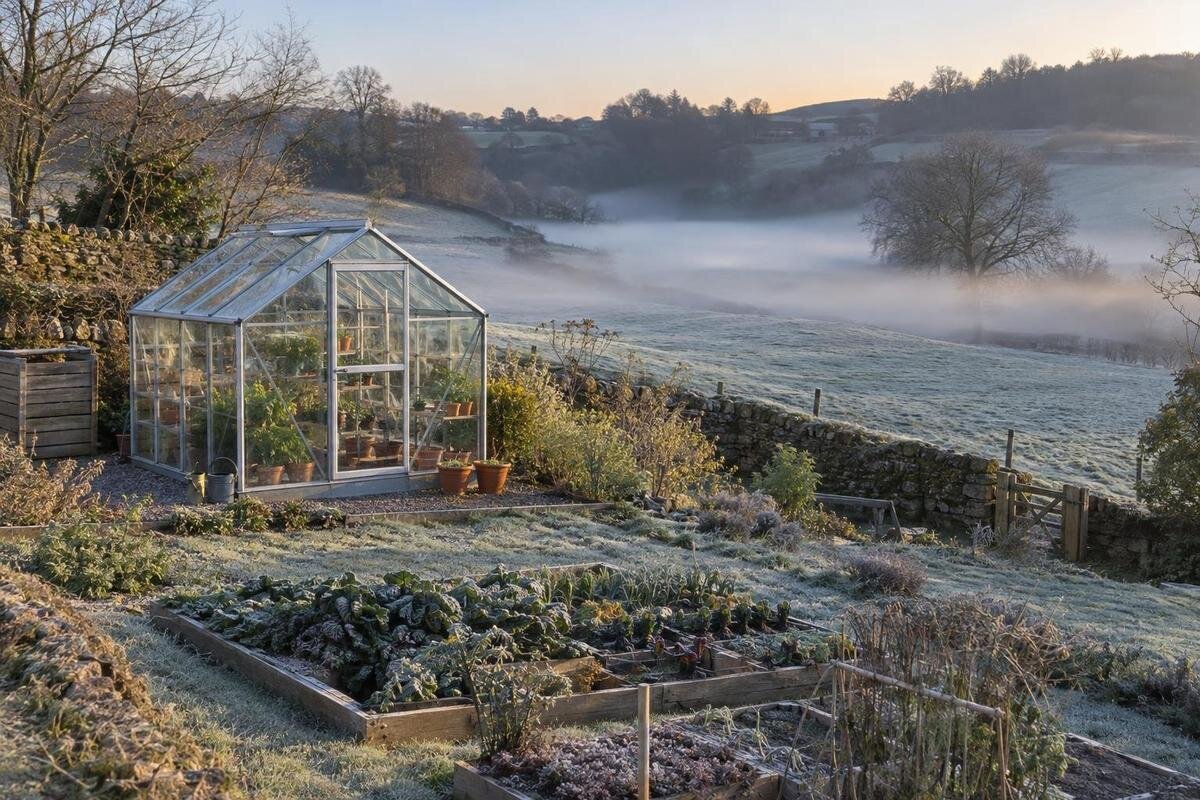
Greenhouse site planning
Low ground can be colder than nearby parts of a garden, but a dip on a site plan is only a warning sign, not a verdict. Before choosing a greenhouse position or allowing for heating, compare minimum temperatures at candidate spots over representative winter nights and observe where cold air settles or drains. A consistent record can show whether the proposed footprint shares similar conditions or crosses a warmer shoulder and a frost pocket. This is more useful than assuming every low spot behaves the same.

Why frost pockets form on low-lying ground
On a clear night, the ground can lose heat to the sky, cooling the air close to the surface. In calm conditions, that denser air can move downhill and collect in a hollow, behind a bank or in a dip with no easy outlet. A frost pocket is therefore a local pattern, not simply a place at a low altitude. One garden may have a cold bottom, a milder slope and a relatively open shoulder within a short distance. The shape of the land and the surrounding features matter, so a regional forecast or broad topographic map cannot identify the best greenhouse spot by itself.
Cloud, wind, surface cover and the way a site is enclosed can change the pattern from night to night. Clear, still conditions often make small differences easier to notice; cloud and air movement can reduce or rearrange them. Frost that lingers in one corner or low mist in a dip can point to a recurring cold area, but these are clues rather than air-temperature measurements. The lowest point is not automatically the coldest, and frost may be patchy. Note the weather alongside what you see, so a pattern observed on a still morning is not treated as typical of every cold night.
Map the site before choosing a position
Start with a scaled sketch rather than a mental impression. Mark the high and low points, slope direction, shallow channels, banks, retaining edges, fences, hedges, walls, buildings and gaps between them. Add gates and fixed landmarks so you can return to the same places in photographs. If you do not have a survey plan, sketch the visible changes in level and identify where the ground flattens or drops. The purpose is not to calculate a universal setback or predict exact airflow; it is to identify candidate positions and nearby features whose effects you can test on cold nights. Use a consistent scale so you can add proposed outlines and measurement points later.
Draw the proposed greenhouse outline on the sketch, not just a dot at its centre. If a wall-mounted option such as the Lean-to Greenhouse is on your shortlist, mark the wall as well as the outline; its listed options span 3.69–14.34 m², but area alone does not show the exact shape or orientation. Put separate candidate points at each end of a sloping or uneven area. Photograph the same view after frosts where possible, and keep seasonal shade notes separate from frost observations so one issue does not stand in for the other.
Place minimum thermometers consistently
Use a minimum thermometer that retains the overnight low, or a data logger that records temperatures over time. Before relying on two instruments, leave them side by side for a few nights and compare them; if they differ consistently, swap their locations or account for the difference. Follow the maker’s directions for reading and resetting a minimum–maximum thermometer, and note each reset time. A logger can show when a low occurred, while a daily minimum cannot. Whichever type you use, keep the units and routine consistent, and check that the instrument is working before a cold spell.
Measure the low point, a higher or more open reference spot, and each distinctly different part of the proposed footprint. Keep sensors at the same chosen height and place them in ventilated radiation shields, away from direct sun and surfaces that could distort a reading, such as walls, paving or greenhouse glazing. When comparing options in the Limited Edition Aluminium Greenhouses range, listed from 3.77 to 28.08 m², label the measurement points on your sketch and use those labels in your log. Keep the positions consistent throughout the comparison; a reading in the middle may miss a colder edge, especially where the ground changes level.
Keep a useful winter record
Build a record that separates each reading from the conditions that produced it. Each morning, write down the overnight minimum at every point, the date, the units and the time you reset or downloaded the instrument. Note whether the sky was clear or cloudy, whether it was calm or breezy at the garden, whether rain fell, and whether frost or mist was visible. Record unusual changes too, such as a gate being left open or a nearby source of heat being used. With a logger, save the overnight trace rather than keeping only the single lowest number.
Monitor through a representative part of winter and extend the record into the coldest period for your site if that has not yet occurred. There is no magic number of days that guarantees a useful result: several mild nights tell you little about a clear, still frost event, while one exceptionally cold night does not show how often the pocket forms. Compare candidate and reference readings from the same nights. If you have only one sensor, move it between points in a repeatable sequence and note the dates, but treat the results cautiously because they were not measured simultaneously.

Compare site readings with your growing plans
Organise results by site point, not just by date. For each night, compare the candidate reading with the reference, note which spot was colder and by how much, and count how often that difference recurred. Keep the coldest value visible instead of hiding it in a seasonal average, but also record whether it happened once or repeatedly. If a greenhouse would cover ground with different readings, compare its ends as well as the centre. For an option from the T-Model Orangery Greenhouse range, listed from 16.52 to 30 m², keep the results for all points within its proposed outline together. This makes it easier to see whether the temperature pattern is consistent across the intended growing area.
Compare the pattern with the plants and season you have in mind. Look up requirements for the specific crops or varieties from a reliable horticultural source, and consider whether you want to start them early, grow them through winter or simply extend the season. A sensor measures air at its own position; leaves near the ground, root zones and an eventual greenhouse interior may differ. Do not equate a sheltered reading with a plant’s exact temperature, or assume an unheated greenhouse will meet a crop’s frost threshold. If you install a greenhouse at the chosen spot, monitoring inside can help you understand its actual conditions.
Watch how cold air moves through the site
Walk the proposed area after a clear, calm night, preferably near dawn, and look for patterns that repeat rather than one patch of white frost. Note where frost appears first or lingers, where low mist forms or clears, and whether it follows a shallow channel, a slope or an opening between obstructions. Mark each observation on your sketch with the date and weather. Low mist can be a clue to where air is pooling or moving, but it is not a reliable wind vane and may not be present every time. Pair these visual clues with readings from the same night.
Check the route around the full planned outline: cold air may move downslope, then stall behind an embankment, hedge or solid boundary, while a gap may let it continue through. These effects are local; do not assume every hedge blocks airflow or every gap drains it. If considering a Pyramid Greenhouse, use your sketch to record where the proposed structure would sit in relation to those boundaries and openings. Distinguish routes you have repeatedly observed from ones you merely suspect, and note any readings that support the pattern. Repeat observations on more than one suitable night rather than relying on a single frost pattern.
Check the whole greenhouse footprint against the readings
Compare each site’s records with the proposed greenhouse’s entire footprint. A position can have a relatively mild entrance end and a colder far end, or sit partly in a hollow even if its centre reads well. Overlay the outline, doors and planned paths on your sketch; where temperatures change across the ground, add readings along the relevant edges before choosing. This also prevents a warmer reference point from making a cold corner seem harmless. If no single position avoids the pocket, compare a higher spot with a smaller or differently shaped option, while allowing for access and other site constraints.
Think about how each part of the structure will be used as well as its outside dimensions. The Limited Edition Aluminium Greenhouses with Storage listing covers 5.52–28.08 m². Confirm the chosen layout, then mark the growing area and storage section separately within the full outline on your sketch. Note which measurement points correspond to the places where you intend to keep plants, rather than treating every part of the structure as growing space. If the colder readings fall within a planned crop area, include that difference in your assessment. This connects the site record to the intended layout without assuming that a storage section changes frost protection.
Assess drainage and foundation needs separately
Temperature is only one part of a low site’s suitability. A minimum thermometer cannot tell you whether soil is firm, drains adequately or stays wet after rain; record puddling, persistent softness, runoff and erosion separately. Do not infer that the coldest point is necessarily the wettest, or that frost readings justify raising, cutting or filling the ground. A change to levels can alter water movement and the cold-air route, and may affect the base the greenhouse needs. If you notice drainage or ground concerns, ask an appropriately qualified professional to assess them before committing to earthworks.
Treat a foundation option as a product detail, not proof that a low, sloping or wet site is suitable. The product information for the Bloomcabin Prestige Greenhouse identifies a metal foundation, but that fact alone does not establish compatibility with your soil, drainage, levels or frost exposure. Check the requirements for the exact model and discuss site-specific questions with the supplier and a qualified builder or site professional. Avoid assuming that a raised base will solve cold-air pooling: it does not remove a frost pocket from the wider garden.

Plan heating around measured conditions
Let the measurements inform whether heating merits investigation, rather than deciding from one low reading. If your intended crops need protection below the site’s recurring minima, distinguish between avoiding the coldest position, choosing crops for an unheated season and maintaining a target temperature with heat. Those are different plans. Consider how often a crop’s threshold is crossed and how long cold periods last, as well as whether energy supply and ongoing running costs are acceptable. A greenhouse by itself is not a promise of frost protection, so make its expected use clear before deciding what heating provision to explore.
Heating requirements depend on the exact greenhouse, its dimensions and construction, air leakage, site exposure and the temperature you aim to maintain. Floor area alone is not enough to calculate capacity. The Aluminium Greenhouses range is listed from 3.77 to 28.08 m²; that span cannot determine the heater size or energy use for an individual version. Give a heating professional or supplier the exact model information, site log and crop target, and ask what equipment is compatible and what running costs might look like. Have installation and any electrical work assessed by a qualified professional rather than improvising.
Shortlist a position using the full site evidence
Use a comparison table to shortlist positions: recurring minima, nights below the relevant crop threshold, contrast with the higher reference, cold-air route, full footprint, access, seasonal sunlight and any ground work needed. Keep frost evidence distinct from shade, wind, drainage and installation questions; a site can be good on one measure and poor on another. If readings are mixed, add monitoring rather than smoothing the uncertainty into a single score. A practical choice is the position whose measured conditions and constraints match the greenhouse’s intended use, not simply the highest or sunniest-looking corner.
Once you have a shortlist, record the exact size and configuration beside each candidate position. The Spacious Greenhouse listing spans 47–70 m²; use the dimensions and layout of the selected version to complete the comparison. Keep unresolved questions visible in the table, identifying whether each concerns temperature, ground conditions or heating, so you can discuss it with the relevant professional. Where two positions look equally promising, compare how complete their records are before choosing between them. If a persistent pocket does not suit your intended plants, moving to a better-assessed position or changing the growing plan may be more practical than assuming extra heat will make the site straightforward.
Frequently asked questions
Does every low-lying garden have a frost pocket?
No. A dip can collect cold air, but its effect depends on the surrounding slope, barriers, openings and weather. A low site may have warmer and colder areas close together. Compare temperatures at several spots rather than judging by elevation alone.
How long should I record minimum temperatures?
There is no fixed number of nights that suits every site. Aim to capture several clear, calm cold nights and some contrasting conditions, including the coldest part of winter for your garden. If the period you have recorded stays mild, treat the results as incomplete.
Where should I put a minimum thermometer?
Place it in a ventilated radiation shield, away from direct sun and nearby surfaces that could affect the reading. Keep it at the same height at every comparison point, chosen to reflect the crops you intend to grow. A second, lower sensor can help reveal differences near the ground.
Can a nearby weather station replace garden measurements?
Use station data for wider weather context, not as a substitute for measurements in your garden. Its elevation, exposure and surroundings may differ from a hollow or sheltered corner on your site. Local readings show how candidate positions compare during the same nights.
Will a greenhouse keep plants frost-free?
Not necessarily. The temperature inside depends on the structure, conditions and how it is used; an outside minimum does not predict the exact temperature around plants inside. If frost-sensitive crops are part of your plan, check their requirements and monitor the greenhouse interior once it is in use.
A representative winter record, paired measurements and a map of the entire proposed footprint give you a clearer basis for assessing low-lying ground. Choose a position and growing plan that fit the conditions you observed, while recognising any gaps in the record. Resolve remaining temperature, drainage or ground concerns before committing to a structure; heating is then a separate, model-specific decision.
