
Planning a Greenhouse Beside a Garage
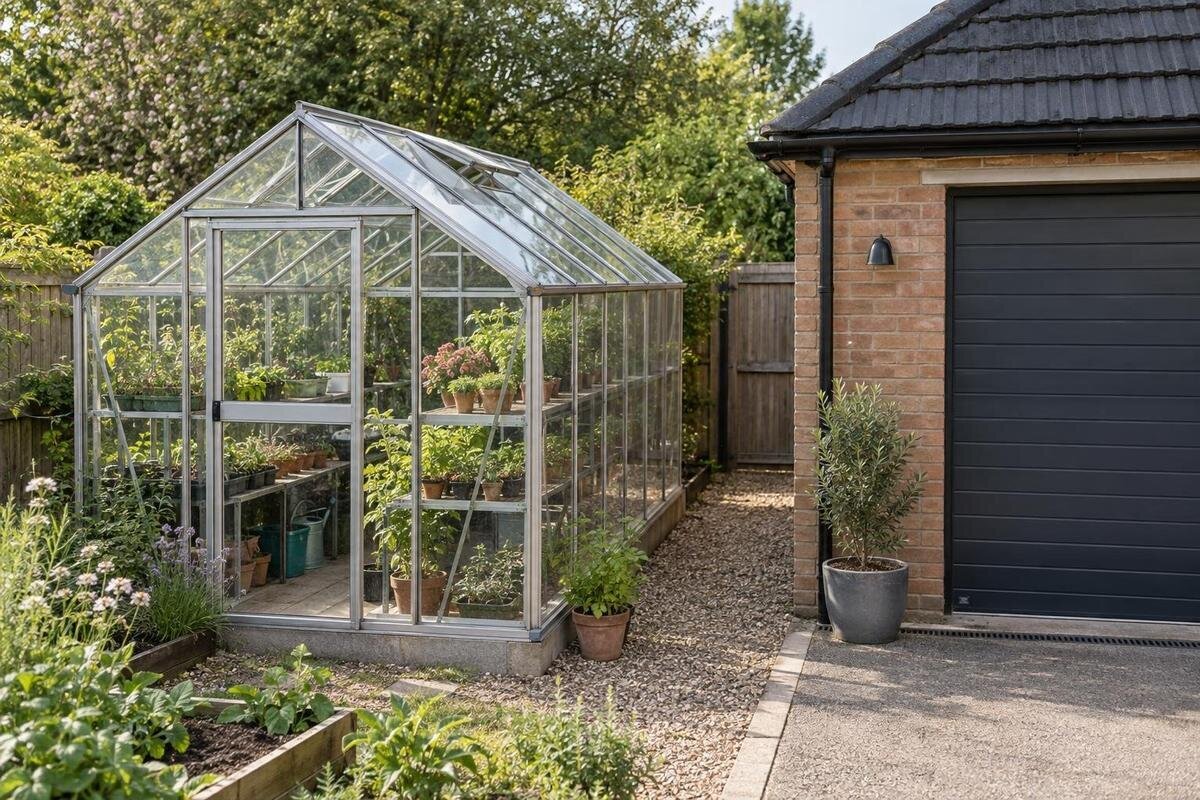
Greenhouse location guide
A garage can make an otherwise convenient greenhouse site harder to judge: it casts changing shade, sheds roof water and needs to stay usable. Before choosing a freestanding position or a wall-attached layout, map the two buildings together. A scaled sketch, seasonal shadow record and photographs of rainwater paths reveal problems that a quick look can miss.

Choose a freestanding or wall-attached design
First decide whether the greenhouse will stand separately beside the garage or be fixed to one of its walls. A freestanding layout leaves a physical gap and keeps the garage wall outside the greenhouse design, but still needs a usable route for access and upkeep. An attached layout makes the garage part of the project: its cladding, eaves, windows, doors and the condition of the intended fixing area all need consideration. Draw these arrangements separately, showing the wall junction as well as the ground footprint. Otherwise, a plan can miss a blocked opening, a difficult connection or a route that is too narrow for everyday use.
Use an attached design only when the selected greenhouse is intended for that configuration and the connection has been assessed for your particular garage. The catalogue identifies a Lean-to Greenhouse as an aluminium wall greenhouse, with listed area options from 3.69 to 14.34 m²; this makes it a type to investigate, not proof that a specific garage wall is suitable. The wall’s visible condition alone cannot confirm what is behind its surface or whether it is appropriate for the intended fixing. Ask for the chosen model’s installation requirements, and have the wall interface and any site approvals confirmed by an appropriate professional. If those points remain unresolved, keep a freestanding alternative on the plan.
Draw the garage and greenhouse to scale
Draw the garage, driveway and proposed greenhouse on a scaled sketch, using measured positions rather than judging the gap by eye. Include the garage’s outside walls, eaves and gutters, downpipes, roller or side doors, windows, paths, fences and any known service access points. Mark where vehicles park and where people normally walk. Choose one scale and use it for every alternative, then add a note beside measurements that still need checking. Photograph the same view from several angles so you can compare the drawing with the actual site. The sketch is not a survey or construction plan; it is a way to expose clashes and awkward routes before choosing a model.
Plot two or more candidate outlines using the exact overall dimensions for each chosen version, not just its stated growing area. The Bloomcabin Prestige Greenhouse listing covers area options from 3.77 to 28.08 m²; floor area alone does not reveal length, width or clearance around a particular version. Add the base footprint, roof projections, door position and any access needed for assembly. Draw doors open and show the route you need for a wheelbarrow, pots or maintenance. Repeat the sketch for a freestanding position and any proposed attachment, because the same ground footprint can work very differently against a wall.
Check seasonal shade from the garage
Make a seasonal shadow diagram rather than judging the site from one sunny visit. At different times of day, note where the garage roof and wall shade the intended greenhouse footprint; repeat the observations, or estimate them, for seasons when the sun sits differently. The garage’s height, roofline, orientation and distance from the greenhouse all affect its shadow, so a small gap does not tell you by itself how much light the plants will receive. Photograph the proposed position from fixed viewpoints and mark the time and season. That record helps you compare possible spots and see whether shade reaches the whole greenhouse or only part of it.
Consider the plants you expect to grow and where their growing area will sit inside the structure; do not reduce the decision to a simple sunny-or-shaded label. If the Pyramid Greenhouse is on your shortlist, its listed area options span 5.53 to 18.9 m², but area alone will not show the selected version’s height or the shade it may cast on nearby space. Obtain the exact external dimensions and add that outline to the shadow plan. Also note whether you mainly want to propagate plants, overwinter them or grow crops, since those uses can make different parts of the site more important. Revisit your notes in another season where possible.
Trace rainwater from both roofs
Follow rainwater from both buildings across the ground. On the sketch, mark each roof edge, gutter, downpipe, outlet and any visible overflow, then note where water lands or travels. If practical, take photographs during rain from a safe place; a dry-weather inspection may not show splashback, ponding or a route across the proposed base. Check the garage eaves as well as the intended greenhouse position, because water can fall from a roof edge even where there is no downpipe. Include the greenhouse’s own roof runoff in the same plan rather than treating it as a separate afterthought, and note if a water path crosses an entrance or regularly used route.
Consider the greenhouse’s roof shape and drainage arrangement alongside the garage’s. When comparing the Aluminium Classic Greenhouse, which is listed in area options from 3.77 to 28.08 m², ask how roof water is collected and discharged for the size you are considering. Add its outlets to the sketch so you can see where runoff from the two buildings meets or crosses an access route. Get professional advice before changing a downpipe, adding an outlet or redirecting discharge. Do not assume the greenhouse gutters can accept water from the garage, or that the garden surface will carry excess water away harmlessly.

Keep garage doors and everyday access clear
Protect the garage’s everyday use, not just the outline of the closed building. Trace how roller or hinged doors move, where a vehicle turns, and the room needed to park, open car doors and unload. Add side doors, windows that open, bins, bikes and the route to the house if they use the same area. Draw a typical parked vehicle rather than an empty driveway, especially if more than one vehicle or regular deliveries affect the space. A greenhouse that fits on paper can still make it awkward to reverse, reach an entrance or carry bulky items. Check that its doorway does not sit across the busiest path.
Keep a separate walking route to the greenhouse and garage, with enough room for the tasks you expect, such as carrying trays, compost or a watering can. The Limited Edition Aluminium Greenhouse with Built-in Storage listing includes area options from 5.52 to 28.08 m²; built-in storage may affect which model you compare, but it does not replace clear access to the garage or room to open either entrance. Show where stored items, bins and garden tools will actually go. If moving something is part of the plan, test that new route on the sketch before treating the layout as workable. Leave room for everyday use, not just for the greenhouse itself.
Allow room to maintain both structures
Leave practical access for maintaining both buildings. A close gap can make it harder to inspect the greenhouse sides, clean or service glazing, reach fixings, clear leaves, or work on garage cladding and guttering. List the maintenance jobs you expect, then mark where a person, tools and any necessary access equipment would need to stand. Consider which sides need regular attention and whether those tasks can be done without moving a vehicle or stored items. The right working space depends on the chosen greenhouse and the garage details, so do not take a generic clearance number as a guarantee. If the space is too tight for routine work, plan a wider gap or another position.
Test maintenance access using the outline of the particular model and size you are considering. The Limited Edition Aluminium Greenhouses range is listed from 3.77 to 28.08 m², so the space left beside the garage will depend on the version selected. Use its installation and maintenance information to identify where access is needed, then compare those positions with the garage wall, eaves, downpipe and windows. Check whether each job can be done from the available space without leaning on a greenhouse panel. Where work requires access from both sides, show both routes and the working space on the plan rather than counting a narrow passage as sufficient.
Assess wind exposure and greenhouse openings
A garage does not automatically make a greenhouse position sheltered. Depending on the gap and the surrounding site, the wall may block weather from one direction while the space between buildings channels wind from another. Observe the proposed location in different conditions, and note how wind reaches it and whether rain is blown into the gap. Photos taken on calm days alone will not describe a site that is exposed in stronger winds. If conditions are uncertain, ask the greenhouse supplier or a suitable building professional what to check for the chosen model. Do not infer that a greenhouse is suitable for the site simply because the garage wall is nearby.
Check the openings on the selected greenhouse as well. If doors or vents face the garage, confirm that they can open fully without hitting the wall, eaves or a parked vehicle; if they face away, make sure the route to them stays accessible. A closed door or vent may fit within the available space while its movement is obstructed, so mark the full opening movement rather than just the closed position. Include nearby corners and roof edges that could restrict that movement or make the openings difficult to reach. This check helps you understand how the two structures affect the layout without assuming that close proximity is either a benefit or a problem.
Check ground levels and the required base
Look closely at the surface between the garage and the greenhouse site. Note changes in level, existing paving, the garage apron, soft ground, places where water collects and any visible drains. Mark which way water appears to travel across paved areas, especially near the proposed base or a frequently used path. Do not assume that a driveway slab, a narrow strip of paving or the garage foundation is a suitable greenhouse base; check the selected model’s base requirements against the actual site. If ground preparation or levelling is needed, establish what will be changed and where rainwater will go. Locate known service routes before planning any digging, and seek site-specific advice for work beyond straightforward preparation.
Compare the proposed footprint with the ground conditions marked on your sketch. The T-Model Orangery Greenhouse is listed with area options from 16.52 to 30 m²; use the selected version’s footprint and preparation requirements to identify which parts of the site it would occupy. A larger option may extend beyond the garage apron onto a different surface or cross a route taken by rainwater. Keep those changes visible on the plan rather than treating the whole area as uniform. Where the ground, drainage or support needs more than simple preparation, ask a qualified professional to assess the site rather than working from a general online rule.

Match the greenhouse size to its intended use
Choose the greenhouse size from the way you will use it, then check that choice against the garage-side constraints. Sketch benches, growing beds, shelving and the main route through the interior so you can see whether the space is practical, not merely large enough to contain plants. Include room to bring trays and supplies through the doorway and handle larger pots or equipment. Think about whether your plans are likely to change, but avoid adding space you cannot reach or maintain. Storage or a roomy interior may be useful, but neither solves an obstructed outside path or a roof that drains into the access route. Decide what needs to go inside before comparing variants.
A larger greenhouse needs to be considered in relation to the whole section, not just the strip beside the garage. The Spacious Greenhouse listing covers options from 47 to 70 m². Plot the exact option alongside vehicle movements, service routes, maintenance access and the garden space you want to retain. Compare that layout with your interior sketch: does the additional space serve a clear purpose, and can you reach it comfortably? If the preferred size removes a necessary entrance, path or workable runoff route, reassess the size or position. A tighter drawing does not resolve a conflict between the greenhouse and the garage’s everyday use.
Confirm site requirements before ordering
Before ordering, confirm any requirements that apply to the exact greenhouse, its location and the work involved. Do not rely on a universal setback number or an example from another property: requirements can depend on the site and on whether the structure is freestanding, attached or accompanied by ground or drainage changes. Ask your local council what approvals or checks are relevant, and involve a qualified building professional where the wall connection, ground or water management needs assessment. Also check any property-specific restrictions that apply to your situation. Keep notes of the advice and model information so you can compare them with the final site plan before committing.
Use the evidence you have gathered to make a clear comparison. A freestanding option needs its own footprint, access, useful light, a workable water route and room for upkeep; an attached option needs a model intended for that arrangement and a confirmed garage interface. If either outline blocks a door, sends roof water through a growing area or leaves no practical way to maintain the buildings, it is not ready to order. Keep the scaled sketch, seasonal shadow diagram and site photographs together, because they show different parts of the decision. Update the plan once the exact model dimensions are available rather than filling gaps with assumptions.
Frequently asked questions
Is it better to put a greenhouse beside the garage or attach it?
Neither option is automatically better. A freestanding greenhouse does not use the garage wall as part of its design, but needs its own footprint and access. An attached option should be intended for that arrangement, with the particular wall connection and site conditions confirmed. Compare both layouts on the same measured plan.
Will the garage make the greenhouse site too shady?
Not necessarily. The amount and timing of shade depend on the garage’s position, height and roofline, as well as the season. Record shadows at different times of day and compare them with where you plan to grow. A single sunny-day visit will not show how the light changes through the year.
Can garage roof water drain into the greenhouse gutter?
Do not assume it can. Map runoff from both roofs, including downpipes and overflow, and note where water travels across the ground. Get professional advice before changing an outlet or redirecting water. The greenhouse’s chosen model and size also need to be considered when planning its own roof drainage.
How much space should there be between the garage and greenhouse?
There is no universal gap that works for every site. Allow for the selected greenhouse’s dimensions and door movement, plus the space you need to inspect and maintain both buildings. Check nearby garage doors, windows, gutters and paths as well. A narrow gap that cannot be reached for routine upkeep is not a practical one.
Do I need approval to attach a greenhouse to a garage?
Requirements depend on the site and the work involved, so do not rely on a general rule or an example from another property. Check with your local council, and ask a qualified building professional to assess the wall connection where needed. Make these enquiries before ordering or altering the site.
A useful garage-side greenhouse plan has to work as part of the whole site. It should account for changing shade, runoff from both roofs, the garage’s everyday use and the access needed to look after each building. Compare freestanding and attached layouts on a measured sketch, then revisit the choice with the exact model dimensions and any site-specific advice. The best position is the one that continues to work for gardening without making normal access, drainage or upkeep harder.
