
Planning Greenhouse Bench Space for Spring Seed Trays
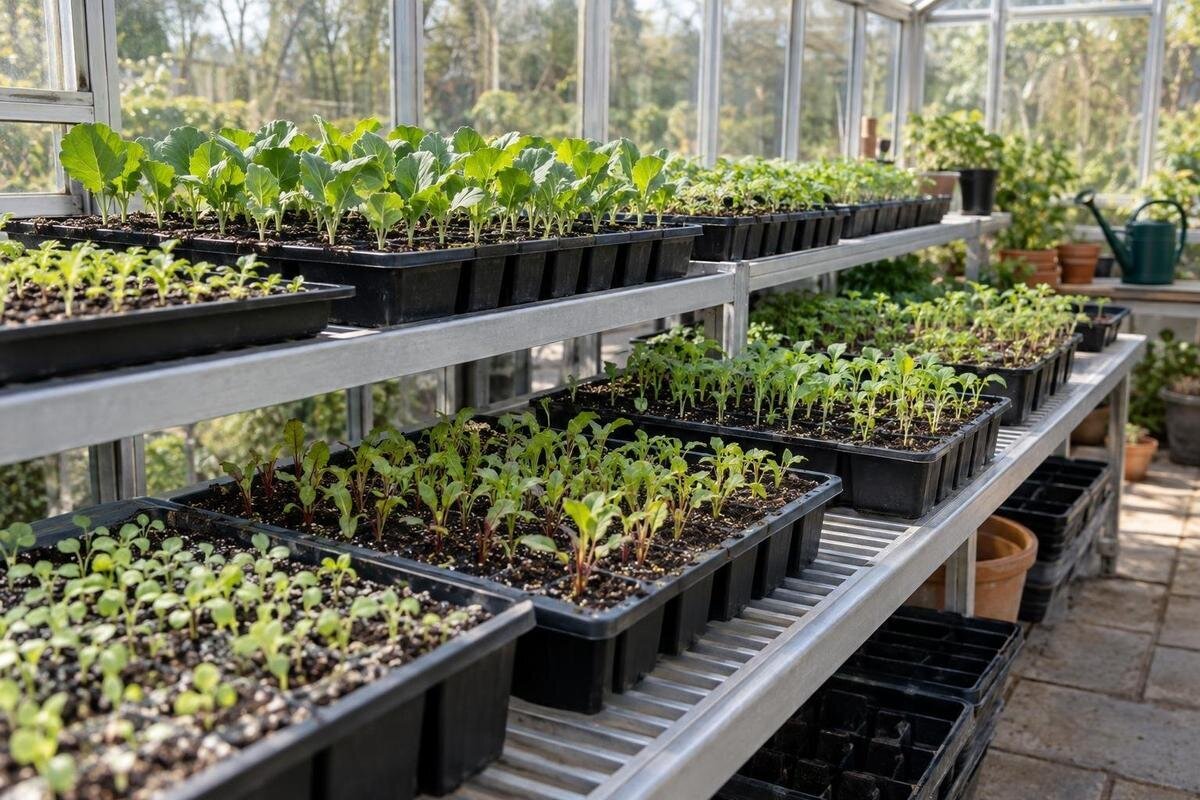
Spring propagation planning
Plan spring bench space before the busiest sowing weeks arrive. Several batches can occupy a greenhouse bench at the same time while earlier seedlings wait to move on. A count of seed packets or total square metres will not show whether the trays physically fit. This guide turns a sowing calendar into a peak tray count, maps tray footprints onto usable bench surfaces and keeps access and other work in the plan.

Find the spring peak before measuring benches
The first sowing gives only a snapshot of demand. If trays from one batch stay on the bench while the next batch begins, both occupy space; later sowings may overlap with several earlier ones. The peak is the greatest number of trays present at one time, not the total number used throughout spring and not the count on the first day. Count each tray for as long as it is planned to sit on the bench. If it starts elsewhere, begin its occupancy period when it is due to arrive on the bench you are measuring.
Record the peak as a date or week, and keep the batch names behind the total. Where tray formats differ, record demand by footprint as well as by number: 12 small trays are not interchangeable with 12 wide ones. Include plants or equipment already using the bench during the same period. Note the busiest week and the weeks close to it, too; a near-peak can keep space tight for longer than one isolated busy date. That gives you a real demand to compare with measured capacity.
Put each sowing batch on a calendar
Set up a calendar with one line for each batch. Record its planned sowing date, tray count and format, the date trays are expected to arrive on the greenhouse bench, and the likely date they will leave it. The bench-arrival date may differ from the sowing date if trays begin elsewhere. Note the planned next stage or destination to explain the expected departure date; this is a space plan, not a forecast of every plant’s progress. A week-by-week grid suits a regular sowing plan, while actual dates are clearer when batches are unevenly spaced. Be consistent about changeover days. If one batch leaves and another arrives during the same week, note whether they will share the bench at any point. A weekly total should not assume that departing trays have already gone when the new batch arrives. Add a dated changeover note wherever that distinction affects the space required.
Base occupancy periods on crop-specific guidance, your own growing records and the conditions in which you will raise the plants. Avoid applying one assumed number of weeks to every batch. If a departure date is uncertain, mark a likely range or retain the trays in the calendar for a conservative test. Do not count a tray as moved merely because another surface might become available; include the move only if that surface is genuinely part of the plan. Check the whole calendar at the same interval so that a busy week is not hidden by a monthly total.
Count physical trays, not seeds or cells
Start with the containers you intend to use. A seed packet count or number of cells does not directly show how much bench space is needed: one tray holds a whole footprint whether it contains many cells or only some of them. For each batch, write down how many complete trays you expect to set out and which formats they use. If a half-filled tray still occupies its full base, count that full footprint. If you genuinely plan to combine part-trays in one shared container, count the arrangement you will use rather than estimating space from the number of seeds.
Group matching sizes and record each tray’s outer length and width; multiplying them gives a rough footprint. Adding those footprints is a useful lower bound, but it leaves out gaps, access and awkward bench shapes. Keep it separate from your fit calculation. When turning demand into a greenhouse brief, compare the tray footprint with the overall size options, not as if they were the same measurement. The Classic aluminium greenhouse range is listed from 3.77 m² to 28.08 m² in floor area. That can help filter size options, but it does not state the available bench dimensions.
Measure the bench space you can actually use
Measure each surface you plan to use rather than estimating from the greenhouse’s overall footprint. For every bench or shelf, note the clear length and depth between its usable edges. Mark any section occupied by fixed equipment or reserved for another task. If a bench narrows or has a notch, split the usable area into simpler shapes instead of treating the whole surface as one large rectangle. Measure each level separately only if it will genuinely be available to trays during the busiest period. Give each surface a simple label, such as bench A or shelf B, and use those labels on both the sketch and the calendar. This lets you allocate batches to specific places rather than relying on a combined area total. If two surfaces have different dimensions, record their tray capacities separately so that spare space on one is not mistaken for a usable position on the other.
Draw a simple plan and label each measured surface. A square-metre total can disguise proportions that matter: a long, shallow bench and a shorter, deeper one may have the same area but fit different tray formats. The Lean-to greenhouse options are listed from 3.69 m² to 14.34 m² in floor area; that range does not specify bench width or tray capacity. For a wall greenhouse, compare the dimensions of the option you are considering with your bench plan instead of estimating worktop space from floor area alone.

Record tray footprints and orientation
Measure trays at their widest and longest points across the outer base, not just across the cells. Include projecting rims or a base that must remain underneath. If a cover, label or other accessory stays on the bench, check whether it changes the footprint or makes the tray harder to reach. Use the actual containers you intend to sow into; familiar-looking formats can differ. Keep trays with different widths in separate groups, since a row that fits one format may not fit another.
Check whether each tray can be turned through 90 degrees without making its label or contents difficult to reach. Record both orientations if either is practical. Allow for the gaps and edge margin you need for lifting and routine tasks; trays that touch may fit on paper but leave no room to handle them. A scale sketch or paper rectangles can reveal unused strips caused by a poor orientation. The Limited Edition aluminium greenhouse range is listed from 3.77 m² to 28.08 m² in floor area, but the chosen dimensions and your tray layout—not the area figure—determine the fit.
Calculate how many trays fit on each bench
For a rectangular bench, treat the usable part as a grid. First reduce its clear length and depth by any edge space you have decided to keep. For one tray format, test both orientations. If a tray side is a and the planned gap is g, a row of n trays uses n × a + (n − 1) × g. Find the largest whole number that fits along each bench dimension, then multiply the two counts for a first estimate. This works for an aligned grid; to mix tray sizes, draw each footprint into the remaining clear space and check the whole arrangement. Keep all measurements in the same unit and round tray counts down, not up. Calculate each separate bench surface before adding its capacity to the total. Two leftover strips on different benches cannot be combined into one tray position. For mixed formats, record the actual combination that fits—for example, the number of each format—rather than describing the result as a single interchangeable tray count.
For arithmetic only, suppose a bench measures 120 × 60 cm and each tray base is 28 × 18 cm. Leave 1 cm clear at each edge, giving a tray area of 118 × 58 cm, and allow 2 cm between neighbours. Four 28 cm sides fit along the length (4 × 28 + 3 × 2 = 118), while three 18 cm sides fit across it (3 × 18 + 2 × 2 = 58): 12 trays. Rotating them also gives six by two, or 12. These are made-up dimensions and gaps, not a standard tray size or recommended clearance. The T-Model Orangery range is listed from 16.52 m² to 30 m² in floor area; compare the selected option’s dimensions with your own grid.
Calculate peak demand from overlapping batches
Now total the batches at each point on the calendar. In a simple example, batch A occupies eight identical trays in weeks 1–2, batch B occupies six in weeks 2–3, batch C occupies seven in weeks 3–4, and batch D occupies five in weeks 4–5. The weekly totals are 8, 14, 13, 12 and 5. The peak is 14 tray positions in week 2, although 26 trays are used across all four batches over the full period. This distinction prevents the seasonal total from being mistaken for the space needed at once. Compare each weekly total with the capacity of the benches allocated to those batches. If the measured layout holds 12 of these identical trays, week 2 is short by two positions and week 3 by one. Week 4 fills all 12 positions. Recording each shortfall shows both how much extra space is needed and how long the pressure lasts.
Repeat the calculation if formats differ, using the layout rather than assuming every tray takes the same space. Then test a realistic delay: for example, keep one batch on the bench for an extra interval and recalculate the affected weeks. If the result changes sharply, note which move or sowing date causes the pressure. The Pyramid greenhouse range is listed from 5.53 m² to 18.9 m² in floor area; those figures can help compare overall size options, but they do not establish how many trays your peak layout will hold.
Reserve space for access and other bench work
A bench that is completely covered in the tray sketch may not work well in practice if it also serves as a potting or sorting surface. Mark the area you need to reach, handle or inspect trays, as well as any route that must remain clear. Do not assume that every gap between trays is usable working space; a narrow space that cannot be reached may not help with the task you have in mind. Decide which surfaces are dedicated to propagation and which are shared, then use that distinction in the capacity count.
Show persistent equipment, pots, tools or storage on the plan so their footprints are not counted twice as tray space. Count an overflow shelf only if it will be available at the peak, has a usable surface and suits the setup for those trays. The Limited Edition greenhouse with built-in storage is listed from 5.52 m² to 28.08 m² in floor area. Its name identifies a storage feature, but the area range does not show where that storage sits or how much bench space remains; include the exact option in your own layout check.

Match the bench map to the greenhouse footprint
Greenhouse floor area and propagation-bench area answer different questions. Floor area is a useful overall size measure, while the bench plan depends on the usable length and depth of each surface after access and other uses are accounted for. A larger floor area does not automatically give you one long, unobstructed bench; shape, openings, selected options and interior fittings can affect where surfaces can go. Equally, a smaller footprint may still be worth comparing if its actual dimensions suit the layout you need.
Use the tray map to identify the bench runs you require, then place those runs on a plan of the greenhouse option you are considering. Mark openings and the access space already allowed for in your layout so that the comparison reflects how you will use the interior. The Prestige greenhouse range is listed from 3.77 m² to 28.08 m² in floor area. For the selected size, compare the relevant dimensions with each planned bench run. Record any run that needs to be shortened or divided, then check how that change affects the tray arrangement.
Compare greenhouse options against a written brief
Before choosing, put the useful measurements together in a short brief: peak tray count by format, the clear length and depth needed for the planned layout, the number of bench surfaces, and the area reserved for access and other tasks. Add the date or week of peak demand and note which batch creates it. This makes it easier to see whether a problem is caused by too few bench positions, a tray format that fits poorly, or batches that overlap more than expected. It also gives you a consistent basis for comparing greenhouse options. Separate the space you definitely need from changes you are willing to make. For example, note whether a batch could be rescheduled or whether a different tray arrangement would be practical. Keep the original peak layout alongside any revised version, so a proposed solution does not quietly depend on a timing change you have not agreed to.
For each greenhouse option, record whether the planned bench runs fit, how many trays the resulting layout holds and any shortfall during the peak or delayed-batch test. Use the same tray formats and access allowances throughout the comparison. The Spacious Greenhouse range is listed from 47 to 70 m² in floor area; that figure is not bench capacity or proof that a particular layout is needed. Include it only if your measured brief calls for that overall footprint. A useful comparison shows which option accommodates the plan as drawn and which would require a change to bench arrangement or sowing dates.
Frequently asked questions
How do I calculate the peak number of seed trays?
List each batch, how many trays it uses and the dates it is expected to occupy the bench. Add the trays from all overlapping batches for each week or date range. The highest total is your peak demand. If tray sizes differ, also map their footprints; a count alone does not show whether they will fit.
Should I use the greenhouse’s floor area as its bench capacity?
No. Floor area is a useful way to compare overall greenhouse sizes, but it does not tell you the length or depth of a bench, the space available after access routes, or how many trays fit. Measure the actual surfaces you plan to use and draw the tray layout against them.
Which dimensions should I measure?
Measure the clear length and depth of each bench or shelf, and the outer length and width of each tray base. Include anything that stays on the bench, such as a base or cover, if it changes the space needed. Note any area reserved for other tasks or equipment.
How much spare bench space should I allow?
There is no universal spare-space percentage. First map the actual tray footprints, access and other bench uses. Then test what happens if one batch occupies the bench longer than planned or an extra tray is needed. Use the result to identify a specific buffer, rather than adding an arbitrary number.
Can I count greenhouse floor space as overflow for trays?
Only count another surface if it is actually available when the busy period arrives, has a stable, usable layout and suits the conditions your trays need. Open floor space may be needed for access and other work, so it is not automatically spare bench capacity.
Spring bench capacity is a calendar-and-layout problem: the busiest overlap sets demand, while measured tray and bench dimensions show whether that demand can be accommodated. A clear peak-week count and a simple bench map give you a practical basis for adjusting batch timing, tray formats or the greenhouse size you compare before sowing begins.
