
Greenhouse Clearance: Planning the Outside Work Zone
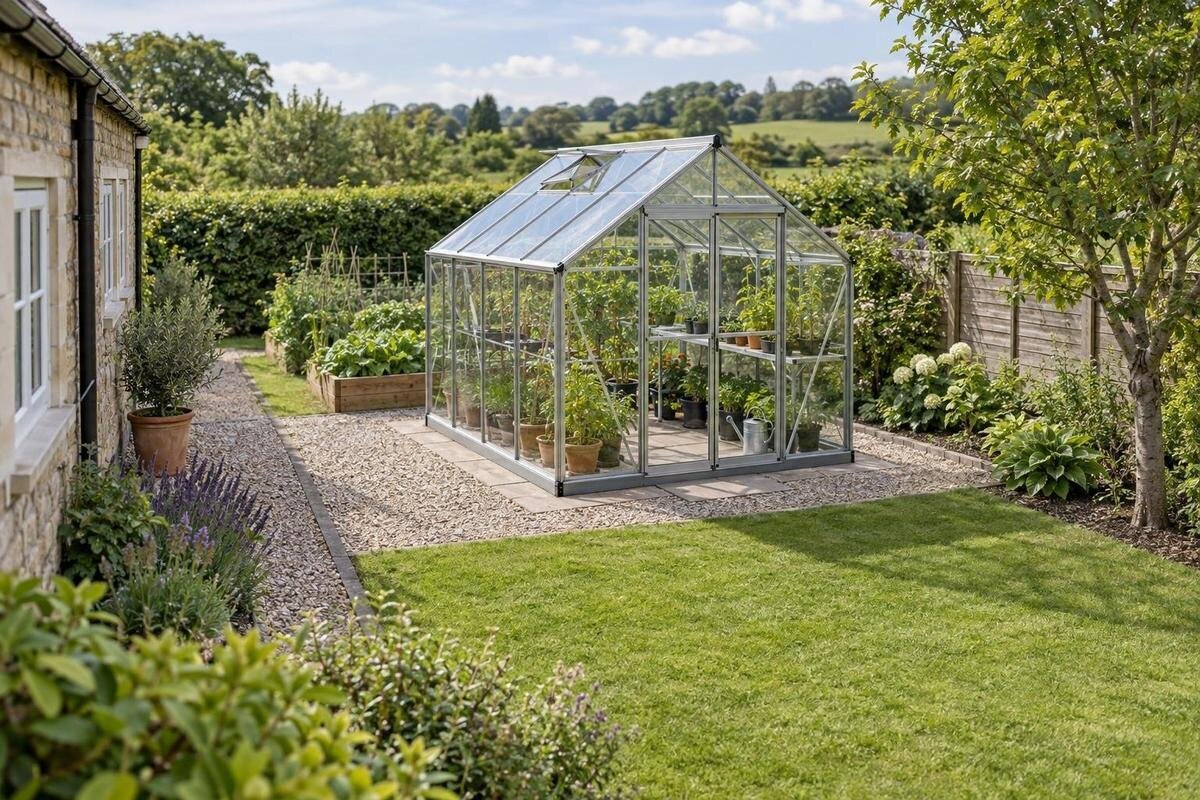
Greenhouse location planning
Choosing a greenhouse is only half the site plan. The space beyond its walls determines whether it can be assembled, reached for cleaning, repaired and worked around without blocking a garden route or damaging nearby planting. There is no single clearance figure that fits every model and site: the practical zone depends on the selected greenhouse, the tasks to be done, the assembly route and nearby obstacles. A scaled perimeter sketch makes those demands visible before you settle on a position.

Before choosing a model 1
What greenhouse clearance needs to cover
Clearance is the usable space outside the greenhouse’s full external outline. It is not automatically a uniform strip, and it is not interchangeable with the maker’s installation allowance or any site-specific boundary requirement. A side may need room to reach glazing, fixings, an opening or a gutter; another may need access only during assembly. The suitable amount follows the tasks and routes on your property, not a universal number. Keep practical working space separate from other conditions, and confirm model-specific installation requirements with the supplier or installer. Where the site has restrictions, check them with an appropriate local professional rather than assuming the access sketch settles them.
Think of three overlapping but distinct zones: temporary space for putting the structure together, ongoing access for inspection or maintenance, and routes for normal garden work. The first may be needed only while the greenhouse is installed; the other two must remain usable afterwards. Write beside each side what someone must reach and how they can get there. A generous gap on paper is not useful if a fence, hedge, stored equipment or change in level prevents entry. The aim is a practical outdoor plan that reflects real tasks, not a symmetrical border added without a purpose.
Draw the footprint and access space to scale
Begin with a measured site plan, not a sketch from memory. Mark the house, boundaries, fences, sheds, paths, garden beds, trees, drains, downpipes and any overhanging eaves. Trace the greenhouse using the external dimensions for the exact version you are considering, including any projections shown on its drawing; floor area alone does not show the length of each side. Add the door position and opening direction, and label nearby obstacles with their distances from the greenhouse outline. Product ranges illustrate why the chosen version matters: the Classic Greenhouse range, listed from 3.77 m² to 28.08 m² gives a floor-area range, not a working-clearance measurement.
Keep one scale across the whole plan, then draw an outer line around each working area and dimension the gap from the greenhouse to the nearest obstacle. This plan-view sketch is only a key; replace its outline and access bands with your own measured shape: OUTER LIMIT OF WORK AREA ┌──────────────────────────────────────────┐ │ OUTSIDE WORK ZONE │ │ ┌──────────────────────────────┐ │ │ │ GREENHOUSE FOOTPRINT │ │ │ └──────────────────────────────┘ │ │ OUTSIDE WORK ZONE │ └──────────────────────────────────────────┘ Mark the entrance route, nearby fence or garden bed, and any side that cannot be reached. The outer line represents the extent of the working area, not a property boundary or recommended gap. Add the real dimensions and obstacles so the drawing can show whether the tasks fit.
Before choosing a model 2
Plan the assembly route to the site
Plot the installation route from the point where components can be unloaded to the greenhouse position. Measure and mark gates, turns, narrow paths, steps, changes of level and overhead obstructions along the way. A site may have enough area for the footprint but still be difficult to reach with long or bulky parts; do not infer handling needs from a product photograph. If you are considering the Spacious Greenhouse range, ask the supplier or installer how components for your selected version will be brought through this route. Identify any points where handling space is restricted, rather than checking only whether the route reaches the site.
Separate temporary assembly space from the permanent work zone. An installer may need a place to sort parts or work around several sides, while everyday maintenance may require only particular points to stay reachable. Confirm the sequence and any space needed for components before positioning the greenhouse, especially where garden beds, a narrow side passage or another structure limit the route. Mark the temporary area with a different line or colour and note when it can be cleared. Do not reserve an arbitrary band on every side as a substitute for asking how this particular installation will be completed.
Leave room for door access and repairs
Show the door and its full opening path on the plan, using the drawing for the chosen version rather than guessing from a small image. Note whether it opens towards an outside path, fence, bed or wall, and confirm its actual direction in the product details. Keep a clear approach to the threshold and enough room to move past the door while it is open. If there is more than one entrance, draw each one. For a wall-mounted style such as the Lean-to Greenhouse, treat the wall side as a separate access question: the nearby building surface and any windows, vents, guttering or services may also need to remain reachable.
Glazing repairs need access as well as routine cleaning. Check the manufacturer’s instructions to see which face of a panel, its retaining points and adjacent components are reached from outside, and how replacement parts are handled. Leave room for the person doing the work and for tools or a panel to be set down without blocking the only garden route. Do not assume a narrow gap is serviceable just because a hand fits through it, or that all repairs can be done from inside. If work cannot be reached safely from the ground, use a suitably qualified person; never treat glazing or a roof as a working platform.

Before choosing a model 3
Plan access for glazing and gutter care
Build routine cleaning into the position. A path along a glazed side lets you reach the outside surface, inspect it and follow the maker’s care instructions; the zone should allow a person to stand and move, not merely squeeze past. Check how the corners and ends can be approached too, particularly where an edge sits beside planting or a fence. Cleaning from outside can be awkward if the route ends in a dead end or runs through a garden bed. Use the maintenance guidance for the chosen product rather than assuming all glazing or frame details are cleaned in the same way.
Where gutters or downpipes are part of the chosen installation, mark their position and route on the plan. Leave access to inspect outlets and clear debris where the maintenance instructions call for it; note any water collection or discharge point so it does not end up hidden behind a planter or path. Do not assume a gutter is included, or that its projection is captured by a quoted floor area. When comparing models such as the Limited Edition Aluminium Greenhouse, check the selected option’s drawings and care information before deciding what the outside work zone needs to accommodate.
Keep garden routes usable
Clearance has to work alongside the rest of the garden. Draw the route you use between the gate, greenhouse, beds, compost area or tool storage, and note whether a barrow, mower or other equipment needs to pass. A greenhouse that leaves a generous service lane but narrows the only route to a bed can make everyday jobs awkward. Check turns as well as straight runs: a path may look adequate on a plan yet leave little room to manoeuvre at a corner. Leave access for pruning and routine care of nearby planting, and avoid allocating working space that can be reached only by stepping over a bed.
If an option includes storage, map its complete outline and the way you reach it, rather than drawing only the growing area. The Limited Edition Aluminium Greenhouse with Storage is a named listing to compare, but its title does not replace the selected version’s dimensioned plan; confirm how the storage is arranged and where it opens. Think about where an item would be brought out and whether that movement crosses the access path. This is an outside-space check: the aim is to keep a clear route to and around the greenhouse, not to design shelves or benches inside it.
Before choosing a model 4
Check growth, shade and ground conditions
Look beyond the day you draw the plan. Shrubs and tree branches grow, climbing plants spread, and seasonal pruning can change how easily the sides are reached. Photograph the site from each corner and along every narrow passage, with fences, tree canopy and existing paths visible. Make a simple shadow sketch at different times and seasons, noting when trees or buildings cast shade across the proposed position; this can also reveal when an access route is damp or less visible. A single photograph or sunny-day visit cannot show all seasonal conditions. Keep the photos with the sketch so you can compare what the plan assumes with what is on site.
Observe the ground after rain as well as in dry weather. Note puddling, runoff paths, soft or uneven areas, and the position of drains or outlets that must remain visible and reachable. These conditions affect whether a narrow strip is comfortable to walk along or suitable for carrying parts. When assessing a position for a model in the T-Model Orangery Greenhouse range, mark these observations beside the proposed footprint and access routes. Show where a working area overlaps wet or uneven ground, rather than treating every unoccupied patch as usable space. Do not redirect water or make assumptions about ground conditions from an access drawing alone. If the site raises drainage, retaining or foundation questions, get advice from the relevant qualified professional.
Measure irregular boundaries and restricted sides
Do not force the work zone into a neat rectangle when the site is irregular. Mark angled fences, corners, low eaves, projecting downpipes, steps, established trees and neighbouring structures as they actually sit. Measure to the closest obstruction at several points along a side; a single distance can conceal a pinch point at a corner. Trace overhanging branches or features that may restrict a person, tools or a replacement panel, and label what is fixed and what can be moved or pruned. If you are considering the Oasis Pyramid Greenhouse, use the exact option’s drawing to position its outline among these obstacles. The product photograph illustrates its appearance, but cannot show how much working space your site will leave.
Where one side has to sit near a fence or wall, ask what work can genuinely be done from the other side and whether an installer or service person would need access later. If the side cannot be reached, show that on the sketch instead of drawing a thin strip that no one can use. A wall may also have its own maintenance needs, doors, windows or services, so consider the greenhouse and building together. Avoid treating the narrowest possible gap as a target: the right arrangement depends on the model’s instructions, site access and whoever will maintain it. Confirm constraints with the appropriate professional before finalising the position.

Before choosing a model 5
Test the proposed access on the ground
Use the drawing in the garden before committing to the location. Mark the proposed footprint and outer work-zone edges with temporary markers or string, then walk the planned route from the gate and approach each side as if you were cleaning or checking it. Mark the door’s full opening path on the ground using the direction shown in the model drawing. Test turns with the tools or barrow you normally use, and check whether access continues around corners rather than ending behind an obstacle. A mock-up will not prove that the base or structure is suitable; it simply reveals clashes that a small plan can hide.
Take fresh photographs from the planned entrance and from each working side, then compare them with your scaled sketch. Look for places where a person would need to step into a bed, move a planter, lean over another object or cross an obstructed route. Note which maintenance tasks remain possible, which depend on moving something, and which would require specialist access. If you cannot reach a surface safely or get a replacement part through the route, revise the position or ask the installer about the service method before purchase. Do not rely on moving established beds or fixed garden features repeatedly unless that is a genuine, workable part of the plan.
Compare the exact model against the plan
Compare each model against the same site drawing. Use the selected option’s external dimensions and any shown roof edge, gutter, storage extension or other projection; add door position and opening direction, then test the access zones and route against those lines. For the Prestige Greenhouse range, as for the other options, compare the exact version rather than treating the range as a single size. Note where each outline changes the space available beside a fence, at a corner or along the entrance route. Keep product dimensions and your site measurements clearly labelled so you can see whether a difference comes from the greenhouse itself or from the working area you have allowed.
Use the completed plan to resolve any remaining access questions with the supplier or installer before choosing a position. Ask specifically about sides marked as inaccessible, routes with tight turns and places where maintenance would depend on moving an obstacle. Establish which side is used to reach glazing, fixings, gutters or other fitted parts, and record the agreed access method beside that part of the drawing. If a task cannot be accommodated, adjust the location or compare another model before finalising. The useful result is a plan showing how installation and maintenance can be carried out, with any temporary arrangements clearly distinguished from space that must remain available.
Frequently asked questions
How much clearance should I leave around a greenhouse?
There is no single distance that suits every greenhouse and garden. The working space depends on the exact model, how it is assembled, which surfaces need cleaning or repair, and what is beside each side. Draw those tasks and routes on a measured plan, then confirm any model-specific requirements with the supplier or installer.
Can I place a greenhouse close to a fence?
It may be possible, but first decide whether anyone will need to reach that side for assembly, cleaning or maintenance. Mark the fence and its distance from the greenhouse on your plan, and check whether the side can be serviced another way. Check any separate site or boundary restrictions with the appropriate local professional.
Do I need working space on every side?
Not necessarily. Some sites have a wall or other obstruction along one side, while other sides need to remain accessible. Do not assume an inaccessible side will be easy to maintain from inside or from the opposite side: check the installation and care instructions, and ask how future repairs would be handled.
How much room do installers need?
The requirements depend on the selected greenhouse, the installation method and the route to its position. Ask the supplier or installer which sides need to be reached, how components will be brought in, and whether temporary space is needed to sort or assemble them. Include gates, turns and obstacles on the route, not just the greenhouse footprint.
Is the greenhouse’s floor area enough to plan clearance?
No. Floor area does not give you the exact external length and width, the position of doors, or the extent of any projections shown on the model drawing. Use the dimensions for the exact version you are considering, then add the separate space needed for access, maintenance and garden routes.
A useful perimeter plan ties every marked space to a real task: bringing components in, reaching an opening, cleaning a surface, making a repair or moving through the garden. Measure the exact greenhouse outline, draw the routes and obstacles around it, then check the plan on the ground. The result may have different amounts of open space on different sides, or a side that is deliberately inaccessible. What matters is that the installation and ongoing care can be handled as planned.
