
Plant Scorch on One Side of the Greenhouse: Causes
Greenhouse troubleshooting
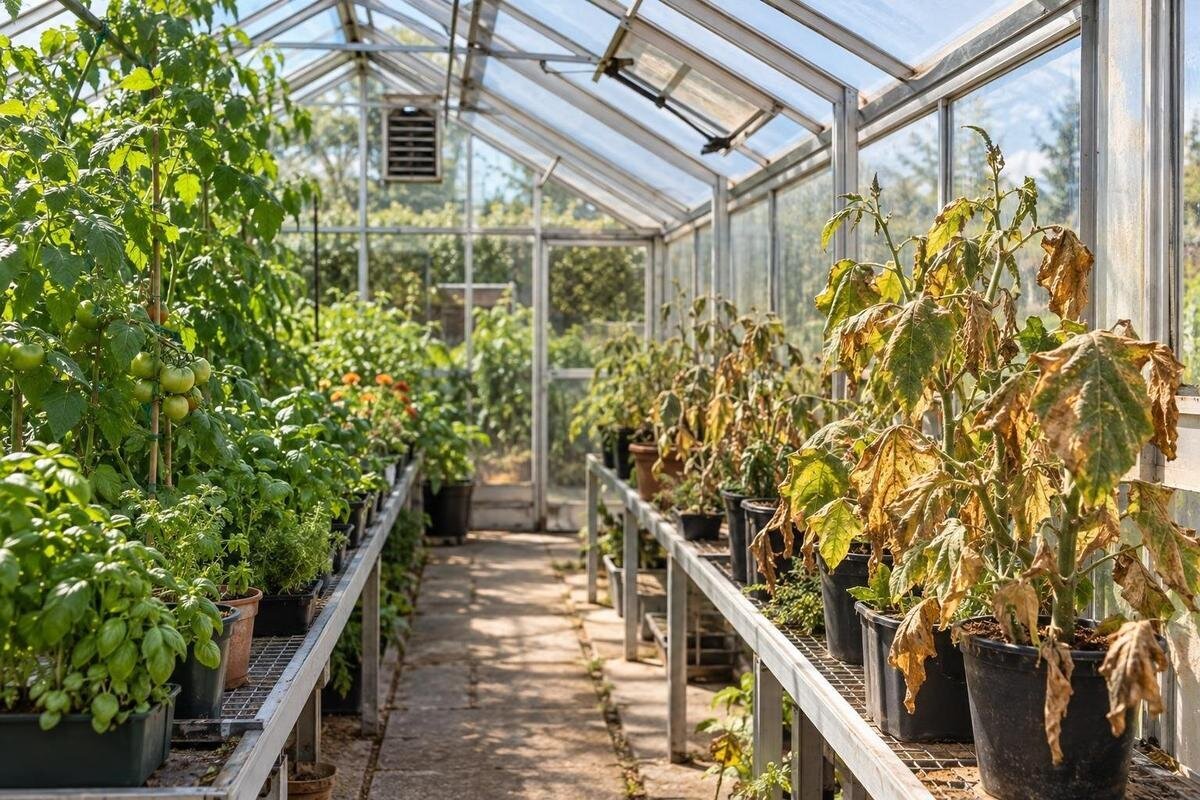
Scorch confined to one side of a greenhouse is a useful clue, not a diagnosis. It can point to a local difference in direct sun, reflected heat, air movement or water supply. Before covering the whole structure or changing care for every plant, compare the affected row with a healthy one and note what differs when new marks appear.

What the pattern says about the cause
Start by mapping exactly where the damage sits rather than describing the whole crop as burnt. Note whether marks appear on leaves facing a pane, at the upper edge of a bench, nearest a wall, or only on one plant. If several plants in a row show similar marks, a shared exposure, airflow or watering pattern becomes more plausible. If one plant is affected while nearby plants of the same type look healthy, examine that plant’s roots, pot and recent handling before blaming the greenhouse. Record which side of each plant is affected, not just its position on the bench. On a simple sketch, mark healthy plants too: the boundary between damaged and undamaged plants is useful when comparing a strip beside the glazing with the rest of the growing area.
Describe the appearance and age of the damaged leaves as well. Heat- or sun-related injury can look bleached, tan, dry or crisp, but those signs are not unique to scorch. Water stress, salt build-up, pests, disease, or contact with a spray or fertiliser can look similar. Take a close photo of the affected leaves and a wider one showing their position; label the plants if needed. Existing dead tissue will not turn green again, so the useful sign is whether fresh leaves develop new marks after you make a change.
Follow the sun through the greenhouse
Trace actual sunlight at plant height in the morning, around midday and later in the afternoon. The brightness of the roof alone does not show which leaves are in direct sun. In New Zealand, the midday sun is generally on the northern side of the sky, but its height and seasonal path vary with location and time of year. Trees, fences, neighbouring buildings, greenhouse frames and roof projections can create narrow bands of sun and shade. Note which plants are lit and at what time, and take photos from the same spot so you can compare the pattern.
Repeat the observations on more than one clear day, and include a cloudy day as a reference. A brief check can miss a patch of sun that passes through a gap in branches or between buildings. If the affected plants are at one end, record the time as well as the compass direction; that end may receive a short period of direct light even if it is shaded for much of the day. Separate what you observed from what you assumed: write down when direct sun reached the leaves and when they returned to shade. When considering a Limited Edition greenhouse with built-in storage, mark the proposed growing and storage areas on the same site sketch. Compare their positions with the sun pattern you recorded, so your layout decision accounts for the space where plants will actually stand.
Look for reflected light and heat near the affected side
At the time the affected plants receive sun, inspect the corresponding exterior side. A pale wall, glazed surface, light paving or metal cladding may change the light reaching one bench. A nearby hard surface can also influence local warmth, but the effect depends on the surface and its position. Look for a bright patch moving across the floor or leaves as the sun moves, rather than assuming that the colour of a wall explains the damage. If a spot stays noticeably warmer after direct sunlight has shifted, the surrounding materials or limited air movement may also be relevant.
Compare the affected bench with a healthy area while the bright patch is visible. Note which exterior surface faces each area and whether the light reaches the leaves, the pots or only the floor. A photograph from the same position at different times can help you track the patch without relying on memory. Keep direct sunlight and possible reflections as separate entries in your notes; both may be present, and brightness alone does not tell you which is responsible for the damage. With a wall-adjacent option such as a Lean-to Greenhouse, include the supporting wall in the inspection. Record its orientation and finish, together with neighbouring paving or glazed surfaces. This gives you a clearer basis for comparing plant positions than covering the whole wall before you have identified where the extra light appears.
Measure conditions where the leaves are damaged
A single reading from the middle of the greenhouse can miss a local hot spot. If you have two thermometers or temperature-and-humidity meters, place them at crop-canopy height: one near the affected plants and one beside a healthy comparison group. Keep both out of direct sunlight and away from contact with glazing or a warm wall, using the same type of ventilated shade for each. Take readings at the same time during the period when the damage is most likely to develop, rather than comparing measurements made hours apart.
Record the time, readings, weather, direct sun on the plants, and which doors or vents are open. Keep the affected and healthy areas in separate columns so you can compare readings taken together. Swap the two sensors during a later observation; if the higher reading follows the instrument, the device may be part of the difference. Humidity readings can help describe conditions but cannot diagnose scorch on their own. Note whether a difference appears repeatedly during the same sunny period or only once. When comparing a replacement such as an Aluminium Classic Greenhouse, use the plan for the configuration you are considering to mark possible sensor and bench positions. Compare those positions with your existing problem area rather than treating a central reading as representative of every plant.

Check watering, roots and other look-alikes
Compare moisture around the roots of affected and unaffected plants at similar times. Check whether irrigation reaches both ends of a bed, and look for blocked emitters, leaks, dry rootballs, poor drainage or pots whose growing mix dries faster than others. Record when each group was last watered and whether it received the same treatment; comparing a freshly watered pot with one due for watering can obscure the pattern. For an affected row, check individual pots or points along the bed rather than relying on one convenient spot. A plant beside a warm wall may dry at a different rate, but that does not establish the cause of its leaf damage. Avoid increasing water for every plant just because one row has crisp leaves; persistently wet roots can create a separate problem.
Review recent fertiliser, potting-mix and plant-care changes too. Salt build-up in containers or uneven application of a feed or foliar spray can injure leaves. Note what was applied, where and when, and follow the product label rather than repeating an application. Check leaf undersides, stems and growing tips for signs of pests or disease, then compare affected plants with the same type elsewhere. If only one plant is affected, its roots or recent treatment may be the better lead. If a whole strip changes together, return to shared conditions such as irrigation, light or airflow.
Compare plant positions, pots and bench layout
Compare plants that are as alike as possible: the same crop, age, pot size and growing mix, with similar watering. Their position may still expose them to different conditions. Plants near the roof or glazing can receive more direct light; a crowded section may have less air movement; a lower bench may sit in another plant’s shade. Note the height and spacing of affected plants as well as their distance from the greenhouse wall. These small differences can explain why one row suffers while plants elsewhere appear fine.
For a practical check, move one comparable potted plant out of the affected position while leaving another in place, and keep both on their usual care routine. Label them and record their original positions, including bench height and distance from the glazing. Avoid moving every plant at once, as that removes the comparison. The product listing for a Spacious Greenhouse covers models from 47 to 70 m², but floor area alone says nothing about exposure at an individual bench. When planning growing zones, draw the benches and taller plants into the layout, then compare their positions with the sun, walls and openings. Include a suitable comparison position in your plan rather than assuming a larger footprint will eliminate local hot spots.
Test shade locally before covering the whole greenhouse
If your observations link new damage to direct sun, try a small, reversible shade change over the affected zone or move only the most sensitive potted plants. Keep a comparable unshaded plant as a reference. A purpose-made greenhouse shade product is preferable to improvised opaque material; follow the maker’s guidance and avoid obstructing vents or openings. External and internal shade act at different points: an external screen intercepts sunlight before it passes through the glazing, while an internal screen reduces exposure after light has entered. The choice depends on the crop and the greenhouse layout.
Check for new damage during similar sunny conditions, not just immediately after the change. Record which plants the shade covers and whether neighbouring plants remain unshaded, so you can interpret the result. Before buying a screen for a Limited Edition Aluminium Greenhouse, compare its proposed coverage and fixing arrangement with the exact build. Check clearance where vents open and whether the screen would shade only the affected bench or a much wider growing area. Product fit and useful coverage are separate considerations: a screen needs to suit both the structure and the area you intend to protect. Shade only the area supported by your observations; covering the whole roof can reduce useful light for plants that are not affected.
Check whether air can reach the affected row
Uneven air movement can contribute to a local hot spot, but opening a window on one side does not guarantee even airflow. Wind direction, the position of openings, shelves and plant density can all affect how air moves through the greenhouse. Check which vents or doors are open during the hot period, whether crops or stored items are blocking them, and whether the affected plants sit in a pocket between openings. You can compare gentle movement at plant height with a lightweight paper strip. Do not use a flame or smoke, and do not force a ventilation mechanism that is not operating as intended.
Air movement is only one part of the diagnosis: strong direct or reflected light can still harm leaves even when vents are open. For a candidate such as a Bloomcabin Prestige Greenhouse, compare the opening positions shown in the information for the exact configuration with your intended bench layout. Identify where plants and stored items would sit along the route between openings, rather than considering the openings in isolation. In your existing greenhouse, record which openings were in use when you noticed the uneven conditions. Check that they operate as intended and consider the route air takes before deciding that more shade or another opening is needed.

Change one factor and watch the new growth
Make one change at a time so you can tell whether it helped. Choose the adjustment that addresses the clearest difference in your notes, and write down what you expect to improve. Keep other care consistent and leave a comparable plant or area unchanged where practical. Avoid changing shade, watering and ventilation all at once; you would not know which change mattered. Keep a dated note of the weather, affected plants, readings and the single adjustment you made. If an unrelated change becomes necessary during the trial, record it too, so you do not mistakenly attribute the result to the original adjustment.
Judge the result under conditions similar to those that produced the problem, rather than comparing a sunny day with a cloudy one. Use dated photos to distinguish old marks from fresh damage, and compare the treated plants with your unchanged reference group. Record an inconclusive result as well as an improvement; a trial without comparable weather may not answer your question. If the problem continues after a position or shade trial, revisit watering, pests and spray history. If your notes instead point to the greenhouse layout, compare the plan for a T-Model Orangery Greenhouse with the specific weakness you identified. Look at the proposed plant positions and openings rather than treating a different structure as a solution in itself.
Plan for even growing conditions when choosing a greenhouse
Before rearranging a greenhouse or choosing another one, observe the site at times that matter to the crops you want to grow. Record seasonal sun and shade, nearby walls and fences, trees, hard surfaces and the direction of prevailing wind. Think about where benches, taller plants and watering lines will sit, not just where the greenhouse will stand. A site map marked with the affected row, bright patches and existing openings gives you a practical way to compare possible layouts and reduces the chance of repeating the same local problem.
For any candidate, check the proposed orientation, glazed faces, opening positions and compatibility of shade products against the site map. When considering a Pyramid Greenhouse, place the plan for the exact configuration alongside your observations and mark where the affected crop would go. Compare options using the same intended bench positions and growing needs, so a change in layout does not obscure the comparison. Separate features shown in the product information from conditions that depend on your site, such as nearby shade and reflected light. If you are keeping your current greenhouse, use the same map to identify which bench, obstruction or exposed area needs attention. This keeps the decision focused on the local problem instead of changing conditions for every plant.
Frequently asked questions
Does scorch on the north-facing side prove that sunlight is the cause?
No. In New Zealand the midday sun is generally to the north, so that side may receive stronger direct light, but the pattern is only a clue. Compare several plants, check for reflected light and uneven watering, and record conditions at the affected leaves before deciding that sunlight is responsible.
Should I shade only the affected side?
Only if your observations point to excessive direct light. Try a small, reversible shade change or move one comparable potted plant, keeping another as a reference. Use a shade product suited to the greenhouse and make sure it does not obstruct vents. Shading the whole roof may reduce useful light elsewhere.
Why does the thermometer show a normal reading when the leaves are scorching?
A single sensor in the centre may miss a hot spot beside a wall or bench. It can also read differently if direct sunlight falls on it. Compare readings at plant height in the affected and healthy areas, shield both sensors from direct sun in the same way, and record them at the same time.
Could poor ventilation cause scorch on one row?
Uneven air movement can contribute to a local hot spot, particularly if vents, doors or the route between them are obstructed. However, direct or reflected sunlight may still be the main cause. Check openings and compare air movement across the greenhouse before deciding that additional ventilation is needed.
How long should I wait to see whether a change has helped?
Judge the change by new leaves or fresh growth, not by the damaged patches, which will not turn green again. Compare plants through similar sunny conditions and keep notes on the changes you made. There is no single useful timeframe for every crop or weather pattern.
A one-sided scorch pattern gives you a map of where to investigate. Compare light, nearby surfaces, airflow, watering and plant position in that area before making a broad change. Once you have a likely cause, a small, reversible adjustment and a healthy comparison plant make it easier to see whether the diagnosis is right.
