
Greenhouse Beside a Pond: Assessing the Site
PONDSIDE GREENHOUSE PLANNING
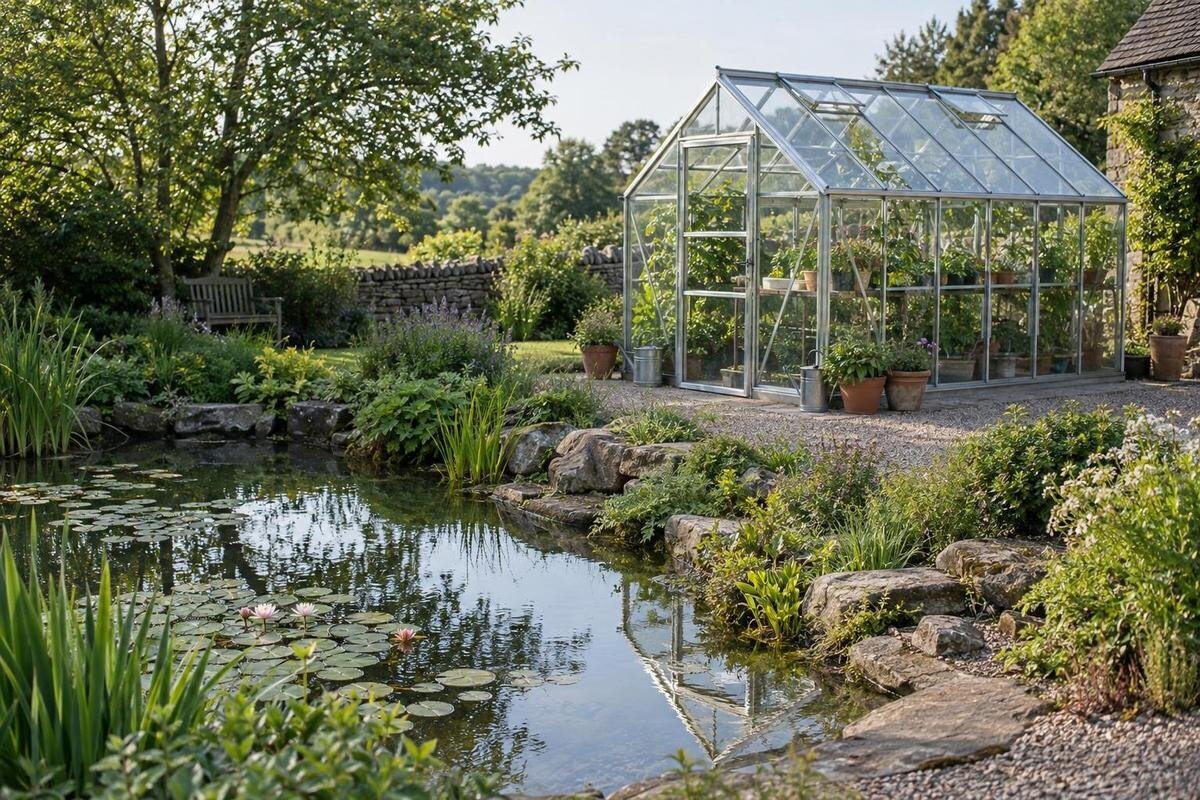
A greenhouse can be installed near a pond, but proximity to water does not make the site suitable—or unsuitable—by itself. Check whether the proposed footprint is on ground appropriate for the chosen base, how water moves through the area, and whether you can reach and maintain both the greenhouse and pond. A scaled sketch, observations in different weather and a seasonal shade record help you assess the position before choosing a model. There is no single distance that works for every pond: bank condition, drainage and garden layout all matter.

01
Can a greenhouse go near a pond?
Often it can, but being near water does not by itself make a position suitable. A greenhouse close to a pond might sit on firm, well-drained ground, while a site farther away could still be low-lying or crossed by runoff. Assess the proposed base and the area around it, not just the distance to the waterline. Check the pond in more than one condition, including after sustained rain and during any known high-water period. The visible edge can change, and one dry-day observation will not show every route that water may take.
A pond is not a growing advantage you can count on. Its presence does not guarantee useful light, even temperatures or the right moisture for plants, and it is not a substitute for planned watering and ventilation. Choose a position for the growing space and garden routine you actually want, then check that it does not conflict with the bank, overflow routes or pond access. There is no universal distance that settles the question for every site. If the ground appears to be moving or water behaviour is unclear, pause before choosing a structure.
Draw the pond, bank and greenhouse footprint to scale
Make a site sketch that shows more than a rectangle labelled “pond”. Mark the current waterline, the top and lower edge of the bank where visible, any retaining walls or edging, slopes, low spots, paths, trees, fences, buildings, taps and known drains. Note any areas you know have been reshaped or filled. Add a scale, north direction, measurements and the date. Take photos from the same safe viewpoints so you can compare them later. If pond levels vary, mark the usual line and the highest line you have personally seen or can reliably document.
Draw possible greenhouse positions as full external footprints, not just the growing area inside. Include the entrance approach, space for routine work and any projections shown on the manufacturer's drawing. The Classic aluminium greenhouse range lists sizes from 3.77 m² to 28.08 m², but an area figure alone cannot show how one selected model will fit between the bank, a path and the rest of the garden. Use the exact dimensions for the configuration you are considering, then test that outline against your sketch. Measure from fixed features so you can relocate the footprint accurately if you compare another position.
02
Assess the pond bank and ground conditions
From firm ground, note visible changes rather than trying to diagnose the bank. Cracks, fresh slumping, exposed or undercut roots, seepage, recurring soft patches, or retaining walls that lean or separate are reasons to investigate further. None of these signs proves a particular problem, and a tidy surface does not establish what lies beneath it. Earlier landscaping may have left placed material, buried debris or services that are not apparent from the surface. Ask the pond owner or a previous owner about changes if possible, and do not dig trial holes close to a bank or water edge without appropriate advice.
If the proposed base is on a slope, near a retaining structure, on suspected fill or in ground that has moved or stayed saturated, have a suitably qualified site professional assess the location before committing. The right adviser depends on the issue; a qualified builder or geotechnical professional can help identify whether further assessment is needed. Do not read a model name as proof of ground suitability: the Bloomcabin Prestige Greenhouse with Metal Foundation listing identifies a product configuration, not a solution for a particular pond bank. Check the selected greenhouse's base requirements as well as the actual site conditions.
Map overflow and water movement after rain
Trace where water goes during and after heavy rain. On your sketch, mark the pond's overflow or outlet if known, places where water gathers, wet tracks across lawn or paths, seepage points and any route that drains towards the pond. If it is safe, take a photo while water is moving and another after the ground has had time to drain. Ask whether the pond level or outlet has changed over time, and whether water has previously crossed the proposed greenhouse position. A dry garden in fine weather can conceal a flow path, so combine what you observe with the site's history.
Include runoff from the greenhouse and nearby surfaces in the same assessment. Do not assume the pond is an appropriate place for water to drain: concentrated flow could soften ground, erode soil or create a wet route through the garden. Avoid creating a channel or altering the pond outlet to make a greenhouse fit; drainage changes need suitable advice and local checks. When comparing a wall-mounted design from the lean-to greenhouse range, map the wall's existing roof runoff alongside the proposed greenhouse position. The listed sizes range from 3.69 m² to 14.34 m². Plot the selected configuration so you can assess water routes around both structures together.

03
Track seasonal shade across the proposed footprint
Record shade across the whole proposed footprint at different times of day, then repeat at different points in the year as the sun's path and nearby foliage change. Mark shadows from fences, buildings, trees and pond-side planting, noting the date and time. Dated photographs from consistent viewpoints are more useful than remembering that a position felt bright in summer. If deciduous trees are nearby, note whether they are in leaf; evergreens, new growth and planned pruning can also change the picture. Keep observations of direct shade separate from assumptions about light reflected by the water.
Compare your shade record with the crops and use you have in mind, using reliable growing guidance for their light needs. Do not treat the pond as a reflector that guarantees suitable sun. When considering the Limited Edition aluminium greenhouse range, plot the selected model's outline on your shade diagrams. Compare how much of that footprint is shaded at each recorded time, rather than judging the position by its brightest corner. Keep the dates and times visible so observations from different seasons remain useful. If no position provides the light your intended use needs, consider another location or crop plan rather than assuming nearby water will compensate.
Keep pond maintenance and greenhouse routines compatible
Plan the greenhouse and pond as two working areas. List the tasks you do at each: opening the greenhouse, watering and carrying trays; reaching pond equipment if there is any, clearing its edge, or accessing a filter; and moving tools, soil or produce. Where routes would otherwise cross on narrow or wet ground, see if they can be kept separate. Make sure the people who maintain both areas can approach them safely, and include household members and visitors who use the garden. The aim is not an arbitrary clear strip but enough practical room for the jobs you actually do, without using the pond bank as a shortcut or storage area.
Allow for storage as well as growing space. If you are considering the Limited Edition greenhouse with built-in storage, use the dimensions of the complete selected configuration when planning the layout. Decide where tools, potting materials and hoses will go, and how you will reach them during greenhouse and pond maintenance. Mark storage and access space on your sketch, then check whether retrieving supplies would block the greenhouse entrance or interrupt work at the pond. Keep those routes distinct from places where materials will be left temporarily. If the pond has a barrier, gate or designated access route, include it in the plan rather than treating it as spare space.
04
Plan access from delivery through to maintenance
Test access from the point a delivery vehicle can reach, not only from the greenhouse position. Trace the route through gates and along paths, noting level changes, tight turns, steps, soft ground, overhead branches and places where long or fragile parts would need to be carried. Identify a temporary staging area that will not block the pond path, garden entrance or overflow route. Ask the supplier or installer what access and handling space the selected greenhouse requires, and confirm how far components will be moved from the delivery point. A route drawn on the plan can reveal a pinch point before an order is placed.
Check ongoing access too: can you reach the outside for cleaning and upkeep, move the items you use through the entrance, and remove garden waste without crossing a fragile bank? Use the manufacturer's guidance and the tasks you expect to do rather than applying a made-up clearance measurement. For a larger option, staging and route access can be important parts of the site test. The Bloomcabin Orangerie listing covers area options from 47 to 70 m²; compare the chosen model's published dimensions and delivery requirements rather than relying on the category name. If the only route crosses questionable ground or blocks pond servicing, reconsider the position.
Compare models by their actual footprint
Growing area, external footprint and working space are different measures. Check the selected model's outside length and width, door position, any roof or eaves projections shown, and the base outline specified by the manufacturer. A freestanding greenhouse needs its own plotted position; a lean-to needs a suitable wall and a workable approach, not merely a narrow gap beside a building. Do not infer dimensions from a photograph or a stated area. If the pond constrains one side, draw access on the other side as well and test whether entrances and everyday garden routes can still be used without conflict.
Compare different greenhouse forms after you have checked the ground, water movement and light. The T-Model Orangery Greenhouse listing gives area options from 16.52 to 30 m². Draw the chosen model's full outline on the plan, including its entrance and the approach you would use from the garden. Check that this approach leaves the route to the pond usable; a modest growing area can still occupy an important part of the layout. Conversely, a position may work closer to the pond than you first expected if the ground and access are suitable. Compare the complete layouts rather than ranking models by their listed area alone.

05
Compare possible positions using the same evidence
If the garden allows, compare at least two possible locations before committing. For each one, review the same evidence: bank condition and history, exposure to overflow, pond maintenance access, observed shade, delivery route and effect on other garden uses. Mark each item as known, uncertain or unsuitable rather than forcing everything into one score. Take photos from both the pond and garden sides, and include a rain observation and seasonal shade record. Keep notes with dates so you know which conclusions come from direct observation and which still depend on assumptions.
Use product options only after you have identified a workable area. The Oasis Pyramid Greenhouse page lists sizes from 5.53 to 18.9 m². Plot the same selected model on each candidate sketch, using the manufacturer's dimensions and entrance position, so you can compare locations without also changing the structure. Rule out a position if the full outline blocks a route, crosses a possible overflow path or occupies ground that needs professional review. If you then compare another size or form, record which constraint that change addresses. This keeps the choice focused on the garden's actual limits rather than an assumption that a different named shape will fit.
Know when to proceed and when to pause
You are ready to compare models when you have a measured outline, a credible account of bank condition, observations of water movement, a seasonal shade record, and workable delivery, maintenance and pond-service access. You will still need the selected model's current drawings and base requirements. Where the ground or water behaviour raises concerns, get advice from someone suitably qualified to assess them. A favourable result on one point, such as convenient watering or good sun, does not make up for an unresolved problem elsewhere. The proposed position has to work as a complete garden layout.
Pause if the bank appears to be moving, a retaining edge is in question, the site may be filled or persistently saturated, overflow history is unknown, or delivery depends on crossing questionable ground. Consider another position if it meets your growing needs while keeping pond access clear. If drainage or earthworks may need to change, check the proposal with an appropriately qualified person and the relevant local authority before work begins. No generic setback can settle these questions; the answer depends on the conditions at the particular pond and the requirements of the greenhouse you select.
Frequently asked questions
How close can a greenhouse be to a pond?
There is no single distance that suits every pond and garden. The right position depends on the bank, ground conditions, overflow routes and access around both the greenhouse and pond. Map the exact footprint and check the site rather than choosing a setback by guesswork. If the ground or water behaviour is uncertain, get suitable professional advice before settling on a position.
Will a pond improve growing conditions in a greenhouse?
Not automatically. Nearby water does not guarantee useful sunlight, steady temperatures or suitable moisture for plants. Assess shade at the proposed position and plan watering and ventilation for the greenhouse itself. If you intend to use pond water for plants, check its source and suitability rather than assuming proximity means it is appropriate.
What signs of bank movement should I look for?
From safe, firm ground, note cracks, fresh slumping, exposed roots, seepage, soft patches or changes to retaining walls and edging. These are observations, not a diagnosis; a neat surface does not confirm what lies beneath it. If you find signs of movement or suspect fill, pause and ask a suitably qualified professional to assess the site.
How can I check where pond overflow will go?
Mark known outlets and overflow routes on a site plan, then observe water movement during and after rain from a safe place. Record wet tracks, pooling and any flow across the proposed footprint. Ask about past high-water events if you can. Do not redirect water or alter an outlet just to make a greenhouse fit.
Could I put a lean-to greenhouse near a pond?
Possibly, if the particular wall, ground and surrounding access work for the chosen model. Include the wall and its existing roof runoff in your site plan, and check the greenhouse's exact external dimensions and base requirements. A lean-to product listing identifies a model type; it does not establish that a specific pondside position is suitable.
Treat the pond as a site feature to assess, not a guarantee of better growing conditions. The strongest basis for a decision is a measured plan backed by observations of the bank, water routes, shade and everyday access. Once a position works on those grounds, check the exact greenhouse dimensions and requirements. If key facts about the bank or overflow remain uncertain, resolving them—or choosing another part of the garden—is more useful than trying to make a model fit around an unknown.
