
Planning a Greenhouse Move to a New Garden Position
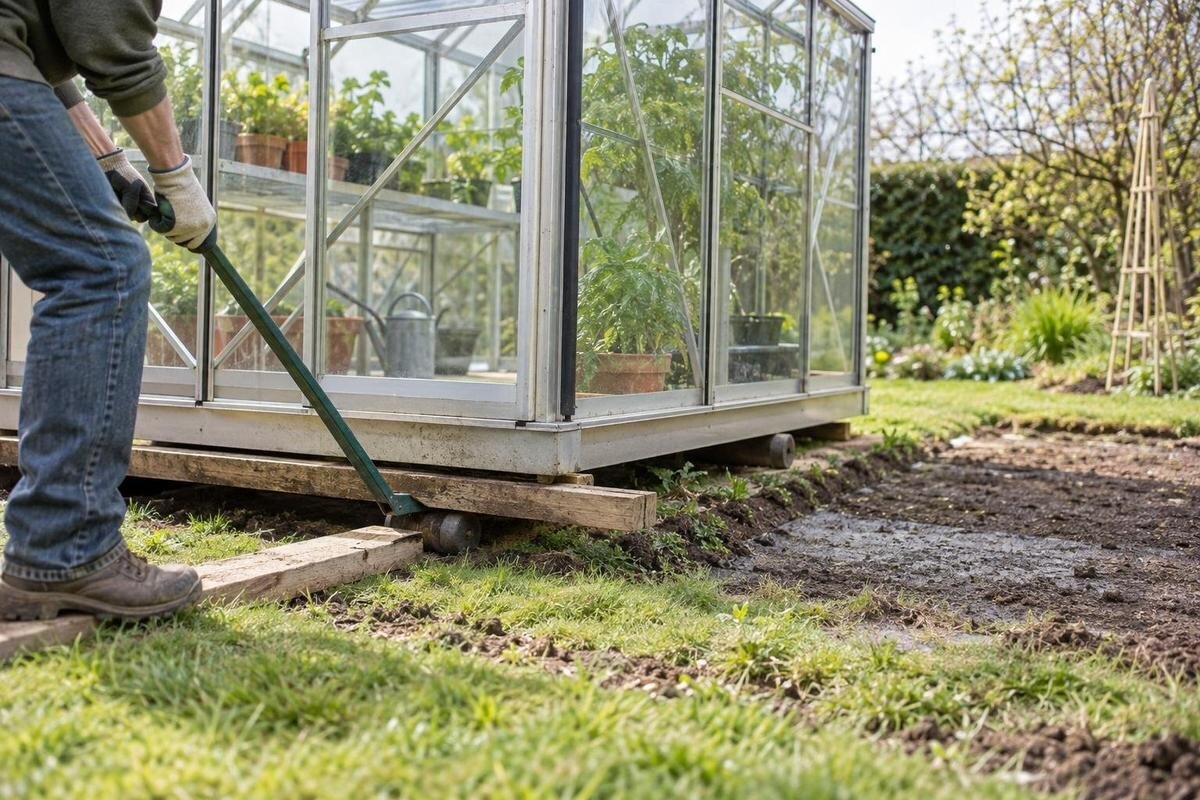
Greenhouse relocation
Moving a greenhouse to another part of the garden can improve access, light or the way the space works, but it is not a matter of simply lifting the structure and setting it down again. A sound plan is built around the exact model, the condition of the frame and glazing, a suitable new base, and an installer who can manage dismantling and reassembly. Work through those points before clearing the old site or booking the move.

Decide whether relocation is worthwhile
Begin by defining what the move needs to solve. Is the current position too shaded, difficult to reach, affected by runoff, or no longer suited to the way you use the garden? Note the improvement you want and any changes in day-to-day access, such as a clearer approach to the door or more room to work around the frame. Record which plants or equipment currently rely on the greenhouse and whether they can be moved temporarily. If light is the issue, note seasonal as well as current shade; if access is the issue, consider who will use the door and when. This gives the installer a practical brief. Distance between the old and new sites is only one part of the job.
Compare the whole scope before choosing relocation: dismantling, transport, temporary storage, preparation of a new base, parts, glazing handling and reassembly can each affect the decision. Ask the installer to describe what is included and what could trigger extra work, then compare that scope with keeping the current position or replacing the structure. Include disruption to plants and the time before the greenhouse is usable again, rather than comparing only travel distance. If replacement is part of that comparison, the Classic Aluminium Greenhouse is listed in sizes ranging from 3.77–28.08 m². Use the dimensions of the specific model you are considering, rather than this area range, when comparing it with your existing greenhouse.
Record the existing greenhouse in detail
Before anything is taken apart, create a record that lets another person understand how the greenhouse is arranged. Photograph each side, the interior, the doors, vents, roof, connection points and the way it sits on the existing base. Note the manufacturer’s name, model, version or serial number from labels or paperwork; add the purchase date if known. Make a simple plan showing the door position and direction, openings, any storage or accessories, and which glazing panels are already missing or damaged. Record any changes made since installation, as well as what has always been part of the structure. Include the frame material and finish if known. Keep the record with the manual, not mixed in with loose components.
Measurements should describe the assembled structure and the base separately, including outside length and width, the door opening and the clear space needed to open it. The installer can confirm which dimensions matter for the new base and transport route. Similar product names can conceal different editions: the current Limited Edition Aluminium Greenhouse listing does not establish the measurements or compatible parts of an older version. Record identifiers exactly rather than relying on an approximate description. If labels are missing, say so and supply photographs of any remaining markings. Keep measured dimensions separate from catalogue information so the installer can see which details describe the greenhouse you own.
Find the manual and confirm parts availability
Search out the manufacturer’s assembly manual, technical drawings, parts list, order confirmation and any notes from the original installation. Ask the manufacturer or retailer for the correct documents using the exact model and version; an online manual for a similar-looking greenhouse may not apply. Before booking, ask whether the instructions cover dismantling and reassembly, whether required parts are available, and whether the current structure can be moved without changing its design. Confirm that the manual covers your glazing and accessory configuration, and note which version the installer intends to use. If coverage or warranty terms apply, check how they relate to relocation before work begins rather than assuming the move has no effect.
When a component looks worn, loose or missing, identify it through the manual’s part name or number and send clear photographs to the supplier or installer. State where it belongs and how many are needed, if known. Ask for compatibility confirmation before ordering; a photograph alone may not resolve which version you need. Include all variant details in the request. For example, Limited Edition Greenhouse with Built-in Storage identifies a product family, but the supplier still needs the relevant component identifier to confirm a replacement. Keep a written parts list showing any unresolved identifiers, who will supply each item and whether it will arrive before dismantling.
Assess the frame, glazing and fittings
Have the installer assess the frame before deciding it is worth moving. Record visible distortion, cracked or bent members, loose connections, corrosion on any metal parts, deterioration around doors and vents, and signs that the existing base has moved. Note whether problems are isolated or occur in several areas, and share earlier repair records if available; this helps the installer focus their inspection. These are observations, not a home structural assessment: issues may not be obvious in photographs. A dated list can help separate old damage from anything found during the move. Do not straighten, drill, cut or reinforce members to make the frame suit the new site. Ask whether its condition and available documentation make dismantling and reassembly a sensible option.
Glazing and fittings need the same attention. Note broken or missing panels, seal damage, jammed openings, loose fasteners and repairs already made, but leave handling of cracked or heavy panels to a qualified person. Photograph from a safe position; do not lean on panes or test a fitting that appears caught against damaged glazing. Record any previous panel replacements and ask the installer which parts can be reused and which need replacement. If the assessment favours a new structure, you could include the T-Model Orangery Greenhouse, listed in sizes ranging from 16.52–30 m², in your comparison. Obtain its exact layout and dimensions before deciding whether it fits the garden and meets the needs currently served by your greenhouse.

Choose the new position before dismantling
Visit the destination at different times and note where sunlight and shade fall, how nearby trees or buildings affect light, and whether rainwater runs towards or pools around the proposed position. Check the ground, slope and working room without assuming that a fence or wall will shelter the greenhouse. Consider seasonal shade and future tree growth, and allow space for the door, vents, maintenance access and the paths you use. A site that fits the outline on paper can still be awkward if the approach or surrounding clearance is poor. Put these observations on a site sketch with photographs so the installer can review the proposed position alongside the greenhouse measurements.
Photograph the approach from the driveway or other unloading point to the new position, including gates, turns, steps and narrow areas, so the installer can judge access before dismantling. If a wall-side location leads you to consider changing the type of greenhouse, the Lean-to Greenhouse is a separate product category; its name does not mean a freestanding frame can be attached to a wall or made to fit that site. Confirm the exact design and siting requirements from the relevant manual and installer instead of adapting the old structure. Note known pipes, cables, drains or other services in the planned base area and arrange a professional review; do not guess their location.
Check the new base with the installer
Do not assume the base at the new position can be copied from the old one or that the existing base can simply be reused. Give the installer the current base’s outline, dimensions, condition and visible fixing details, alongside the proposed site’s measurements and surface. The manufacturer’s drawing should guide the required footprint and relationship between the greenhouse and its base; an installer must confirm what is suitable at the new location. A matching floor area alone does not guarantee that the frame, fixing points or door position will line up. A simple sketch and dated photographs can make the review clearer than a single rough figure. Have missing information checked before arranging work on the base.
Ask who is responsible for preparing or checking the new base, what information is needed before work starts, and how the installer will confirm readiness before the greenhouse arrives. If the former base is also to be moved, have its condition and handling reviewed separately. Do not improvise new anchor points, make holes in the frame or alter members to bridge a mismatch; refer the issue to the installer. When comparing replacement options, the Prestige Greenhouse with Metal Foundation is one catalogue model to consider. Its foundation still needs to be assessed for that model and your proposed site; the product name does not establish compatibility with the greenhouse you already own. Use the relevant base drawing rather than ordering by approximate dimensions.
Plan access, transport and temporary storage
Plan how the greenhouse and its components will get from the old position to the new one. Share route photographs, gate and passage measurements, turning space, steps, soft ground and overhead obstructions with the installer. Include the route from the unloading point to the greenhouse, not just the distance between the two garden positions. The route may be more restrictive than either site, particularly if panels or long frame pieces must pass through it. Do not judge whether an item will clear a gap by looking at the assembled greenhouse alone; ask the installer to check the route against the dismantling plan and component sizes. Agree which access areas should be kept clear, and avoid moving components without the installer’s direction.
Agree where components can be kept if the base or replacement parts are not ready on the same day. The installer should specify how parts and glazing are to be labelled, protected and stored, including any requirements for stacking or supporting panels. Build the schedule around base preparation, parts availability, weather, transport and reassembly, and allow for a delay if a damaged or incompatible item is found. If plants need to come out, arrange suitable temporary space before work begins so the greenhouse is not left partly dismantled while alternatives are improvised. Write down who will keep each group of components, where it will be stored and how labelled hardware will stay with the corresponding parts.
Agree the dismantling and glazing work
Choose a qualified installer with greenhouse relocation experience and arrange an on-site or detailed remote review before accepting a quote. Ask for a written scope covering dismantling, handling of glazing and frame parts, transport, storage, work at the connection between the frame and base, reassembly, and treatment of damaged or unavailable components. Clarify what you need to clear and who is responsible for any separate trades. If electrical services or powered equipment are connected, have a suitably qualified tradesperson assess and disconnect them; do not include electrical work in an improvised dismantling plan. Ask how unplanned damage will be recorded, who approves additional parts, and whether the quote includes a return visit if replacement components are needed.
Ask the installer to explain the model-specific dismantling method and who will handle fragile panels. Make these responsibilities clear before work starts, including whether there is any preparation you can safely do yourself. Do not assume that lifting the assembled greenhouse, removing glazing yourself or altering the frame is an acceptable shortcut. If you want a different shape or layout, treat that as a separate replacement decision. For example, the Oasis Pyramid Greenhouse is a distinct model, not a source of parts for converting the existing frame. Discuss the proposed replacement with its own instructions and site requirements, rather than adding a design change to the agreed relocation work.

Reassembly and final checks
Before reassembly, confirm that the new base has been reviewed and is ready, all model-specific parts are available, and the stored components can be matched to the record. Give the installer the manual, drawings, photographs, parts enquiries and notes about earlier repairs. Check the inventory against the parts list, including items ordered since dismantling, so any gaps can be resolved before work starts. If a connector, panel or frame member does not match, the installer should check it against the manufacturer’s documentation rather than substitute a visually similar part or force it into place. Keep unresolved items on the work record so they can be addressed before handover.
At handover, ask the installer to review the completed greenhouse against its instructions and explain any remaining limitations or work that could not be completed. Ask them to confirm that doors, vents and other moving fittings operate as intended, and that glazing, seals and the connection to the base have been checked in the documented way. Collect a list of parts replaced or still needed, photographs and any revised instructions. Ask when the greenhouse is ready to use and whether any work remains outstanding. Keep this record with the original model information so future maintenance or a parts enquiry starts from an accurate history.
Compare relocation with replacement
Relocation is less attractive when the frame is significantly damaged, key documents or parts cannot be confirmed, the new base is unsuitable, or dismantling and rebuilding would involve extensive replacement work. Those issues do not automatically mean the greenhouse must be discarded, but they are reasons to pause and get an installer’s view before spending on a move. Compare the scope of necessary repairs and replacement parts with a new structure, and weigh that against the greenhouse’s present condition and how well its current layout meets your needs. A second installer’s review may help if the options remain unclear.
If you compare new models, look beyond area: confirm the actual outside dimensions, shape, door location, base drawings, glazing and intended site before choosing. As a broad catalogue example, the Spacious Greenhouse is listed across an area range of 47–70 m², but that figure alone does not establish its footprint or whether it suits your garden. A replacement enquiry is more useful when it includes your measured available space, access constraints, details of the existing greenhouse and any parts or features you want to retain. Check the delivery and assembly route separately from the floor area, and ask for model-specific information before treating two listings as alternatives.
Frequently asked questions
Can I move a greenhouse without dismantling it?
Do not assume it can be moved intact. A qualified installer needs to assess the exact frame, joints, glazing and manufacturer’s instructions before deciding how it can be handled. Plan around the method they approve, and do not attempt to lift or shift a glazed greenhouse as one unit yourself.
Can the existing base be reused?
Possibly, but its dimensions, condition, level and fixing details need to be checked against the greenhouse’s documentation and the new site. A matching footprint does not prove that the frame will line up or attach correctly. Have the installer review the base before dismantling begins.
Should I remove the glazing before the installer arrives?
Do not remove or handle glazing unless the installer has specifically agreed that you should and you are suitably equipped to do so. Ask who will handle the panels and how they will be protected and stored. Leave cracked or heavy panels to a qualified person.
How long does a greenhouse relocation take?
There is no reliable time estimate without knowing the model, access, condition, base preparation and parts needed. Ask the installer for a schedule that covers dismantling, transport, any delay for parts or site work, and reassembly. Agree how changes to the timing will be handled.
What should I send when asking about spare parts?
Provide the exact model and version if known, any serial or part numbers, the manual or drawing, and clear photographs showing the component in place. Say where it belongs and how many are needed, if you know. If an identifier is missing, explain that rather than guessing or ordering by appearance.
A successful greenhouse move depends on the structure, its documentation, the new position and the base being considered together. Record the model and condition first, then have a qualified installer review the site and agree how dismantling, glazing and reassembly will be managed. If the assessment reveals unavailable parts, significant damage or a base that cannot be matched, pause and compare replacement options. Planning around the exact greenhouse is more useful than judging the move by distance alone.
