
Self-Watering Pots in a Greenhouse: Key Checks
Greenhouse watering guide
Self-watering pots can make greenhouse watering less frequent, but they do not remove the need to check the growing mix. The important details are how the reservoir feeds the root zone, where excess water goes, and how a spill will spread across a paved floor. Compare the design before buying, then test one pot with the intended plant and potting mix in its actual position.

Before you choose 1
How a self-watering pot supplies moisture
Self-watering describes how water reaches the potting mix, not one standard construction. Many pots hold a reservoir below a raised growing chamber; a wick, capillary column or extension of the mix draws water upwards. Other arrangements stand pots over a shared tray or capillary mat. They differ in where water sits, how roots gain access and how excess escapes. Ask for a cutaway or setup diagram showing the reservoir, growing chamber, wick or platform, fill opening and overflow. A product label alone cannot tell you whether moisture will reach the full root ball or whether you must still water from above.
Treat the reservoir as a water store, not an automatic schedule. Capillary movement relies on a continuous route between the water and the mix; a gap, unsuitable substrate or mix that has not been moistened as directed can interrupt it. Check whether the pot needs initial watering from above, whether a wick must be positioned by hand, and how the maker defines the maximum fill level. Do not assume the fill tube is also an overflow, or that a tank indicator measures moisture in the potting mix. For a shared mat, find out how the tray is replenished and drained. Knowing what each part does makes it easier to compare designs and investigate uneven wetting.
Reservoir capacity and refill access
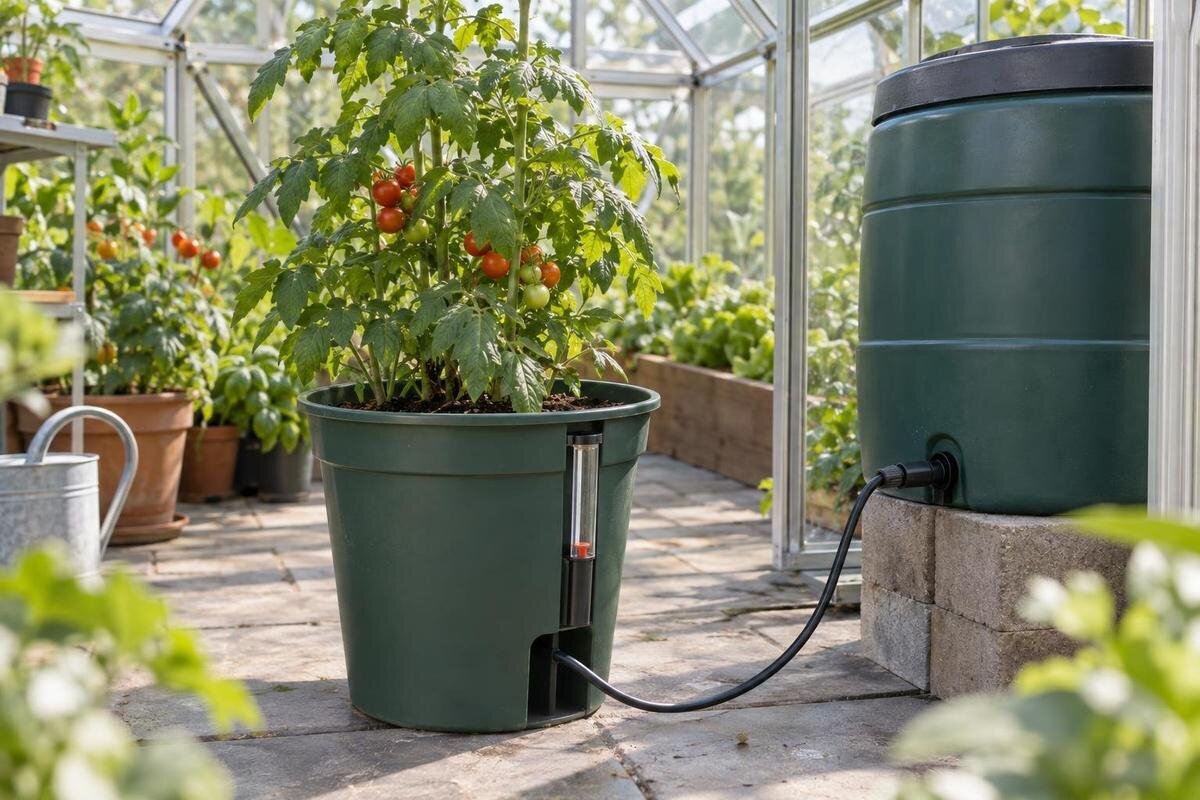
Capacity alone cannot tell you how many days a pot will last. Ask for the usable reservoir volume, the maximum fill line and how you can check the water level; the overall size of the pot is not the same as tank capacity. A float or window may show water remaining in the reservoir, but it does not confirm that the mix around the roots is moist. If the level is hidden, check that you can inspect it without dismantling the planting. A clear indication reduces guesswork, but you still need to learn how quickly a planted pot uses its supply in your greenhouse.
Put the fill opening where you can reach it along a clear path. A pipe tucked behind foliage, a bench edge or a wall can make routine top-ups awkward once the plant is established. Draw the pot footprints and access points before buying several, and include room to refill without lifting or shifting heavy containers. Check whether the opening suits the jug or watering can you plan to use, including the space needed to tilt it. Consider how you will read the level indicator while pouring: having to move between opposite sides of a pot makes the task less convenient. If you are still comparing greenhouse sizes, the Spacious Greenhouse listing covers options from 47 to 70 m². Use the plan for your chosen size to mark refill access alongside the growing space, rather than allocating the whole area to pots and leaving access as an afterthought.
Before you choose 2
Overflow control on a paved greenhouse floor
Look for a stated overflow outlet and note its position relative to the intended water level. If the reservoir is filled above its limit, an outlet, where provided, directs the excess away from the tank. Not every pot has one, and a fill port may simply open into the reservoir. Check the diagram and instructions for what happens when the tank is full, whether an outlet could be blocked by a tray or wall, and how it should be cleared. Do not rely on a guessed overflow path. If the design has no specified outlet, follow its fill limit and watch the pot while topping it up.
Paving is not automatically watertight: joints, edges and the greenhouse threshold can let water travel out of sight. A spill may follow the fall of the floor, reach a doorway or collect under a bench instead of soaking into soil. After refilling, watch where excess water goes and check the surrounding floor. Distinguish the place where water leaves the pot from the place where it ends up; catching a drip immediately below an outlet may not contain water that runs along the base. Mark any low spots, joints and thresholds on your layout so you can consider them when placing containers. The Aluminium Classic Greenhouse listing shows options from 3.77 to 28.08 m². When comparing those sizes, consider how much of the floor you can keep visible for spill checks. The area figure itself does not show the slope or drainage arrangements at your site.
Drainage and spill containment
Overflow and pot drainage do different jobs. An overflow outlet limits the reservoir level, while drainage from the growing mix gives excess water a way out of the root zone. Check which openings the pot has and what the maker says they are for. Keep drainage routes clear, and do not block an outlet simply because the pot sits above paving. If there are no visible drainage holes, ask how the design handles excess water and what conditions it is intended to operate in.
A tray can catch drips, but it should not hide a persistent leak or hold the pot in standing water unless the design specifically calls for that arrangement. Check that a tray does not obstruct an overflow, drainage hole or air gap in the base. Think through how you will empty it with the planted pot in place. A tray that can only be removed by lifting a full container may be inconvenient for routine care. Allow space to inspect its edges and see whether water has escaped beyond them, rather than fitting it tightly between neighbouring pots. The Lean-to Greenhouse is listed with area options from 3.69 to 14.34 m². On the plan for your chosen option, mark both the tray footprint and the space needed to remove or empty it. Keep that working space separate from the walking route and access to any floor drain.

Before you choose 3
Check moisture at root depth
Water supplied from below can leave the lower part of the mix wetter than the surface. A dry-looking top layer is not proof that the whole pot needs more water, just as a full reservoir does not prove that moisture has reached the roots. Check the mix at more than one depth, using a method suitable for the pot, and compare what you find with the plant’s needs. Roots need air as well as water; if the root zone stays saturated, the plant may struggle even though the reservoir is working as intended.
Plants do not all suit a steady supply from below. Group pots with similar watering needs, and be cautious about putting plants with very different preferences on one shared capillary mat. With individual reservoirs, keep each plant’s moisture checks separate even if you inspect the whole group at once. Note which pots stay wet lower down and which show uneven wetting, rather than topping them all up simply because one needs water. This also helps you decide whether a shared arrangement is practical or whether separate pots would make management easier. The Limited Edition Aluminium Greenhouse range is listed from 3.77 to 28.08 m². As you compare footprints, allow room to reach pots within each group, not just those around its edges. Arrange the groups by watering needs and inspection access, rather than assuming that every container in the greenhouse can follow the same routine.
Choose a potting mix that can wick
The mix affects how water travels from a reservoir to the roots. Texture, compaction and the depth of the growing chamber can all affect capillary movement, so a mix that behaves well with overhead watering may not wick evenly from below. Follow the pot maker’s guidance on suitable growing media and depth. Do not assume ordinary garden soil will behave like a container mix; it can settle or compact differently. If the instructions specify a mix or wicking arrangement, treat that as part of the system rather than an optional detail.
Set up the wick or capillary column as directed, with the required contact between it and the mix. Avoid packing the medium down more tightly than the instructions recommend, as that may change how water moves. Before planting hides the arrangement, check the position of the wick and note how the growing chamber has been filled. If moisture later fails to reach the roots, that record gives you something specific to compare with the setup instructions. Keep any comparison between mixes manageable: use the same pot design and note which mix is in each container, rather than changing the pot, medium and position together. If you are planning space for these checks, the T-Model Orangery Greenhouse listing gives area options from 16.52 to 30 m². Set aside an accessible place for the trial containers where you can inspect the mix without having to rearrange established plants.
Before you choose 4
Plan pot positions and access
Plan around the planted pot, not just its empty base. Allow for foliage, access to the fill opening, room to remove a tray for inspection, and a clear walking route. Keep overflow outlets visible, and avoid placing a pot where another container hides a leak or makes the reservoir difficult to check. If plants grow into the path or block access to a fill point, a layout that worked on planting day may become inconvenient later. Sketching the arrangement before filling the greenhouse can reveal pinch points early.
A full pot can be heavier and less easy to move than an empty one. Use a stable position and check the greenhouse and pot instructions before putting filled containers on shelves or supports; do not assume a bench is suitable for any load. Decide where the pot will stay before filling it, and consider whether you can still remove its cover, reach its base and carry out routine maintenance there. If a container will eventually need moving, leave a clear route rather than enclosing it behind a permanent row of other pots. The Pyramid Greenhouse listing covers area options from 5.53 to 18.9 m². Compare the plan for your chosen option with the complete pot-and-path arrangement, including doors, benches and other fittings. Check the shape of the remaining usable spaces as well as their total area; a narrow gap may not provide practical access.
Expect refill needs to change
A reservoir does not empty at a fixed rate. Water use changes with the plant’s size and stage of growth, as well as light, temperature, ventilation and humidity in the greenhouse. Two pots with the same reservoir can need refilling at different times if their plants or positions differ. A spot in stronger sun may behave differently from one in shade. Use reservoir capacity as a comparison between designs, not as a promise that a pot will last a particular number of days.
Check more often when conditions change, such as during a warmer spell, after pruning or as plants grow. Note how the tank level and root-zone moisture respond, then adjust your routine. A brief record can include the date, the reservoir level before refilling and whether the mix was damp at the depth you checked. Keep observations for each pot rather than recording only the total water used across the greenhouse. That makes it easier to recognise a change in one container without assuming every plant needs the same adjustment. The Limited Edition Aluminium Greenhouse with Storage listing shows options from 5.52 to 28.08 m². When laying out your chosen size, identify pots in different positions so their records remain easy to distinguish. If your greenhouse can get cold enough for water to freeze, follow the pot maker’s guidance for protecting or emptying its reservoir.

Before you choose 5
Test one pot before scaling up
Before buying several pots, try one with the plant and mix you intend to grow. Set it in the position where it will stay, fill it according to the instructions and check both the reservoir and the mix at root depth. Note when you top it up and what the plant’s surroundings are like. Observe it through changes in conditions rather than relying on one mild spell. The trial helps show whether the wick makes contact, the mix responds as expected and the refill opening is practical in daily use.
Watch the floor during and after refilling, and confirm that any overflow or drainage remains visible and contained. Use the trial to assess everyday handling as well as moisture supply: can you read the level, pour comfortably, inspect the outlet and empty the tray with the plant in place? Record any difficulty so you can distinguish a problem with the pot’s design from one caused by its position. Do not rely on a new setup while you are away until you have learnt how it behaves. If you are also choosing a greenhouse, the Prestige Greenhouse listing includes area options from 3.77 to 28.08 m². Keep the trial position marked on the plan while considering additional containers. Repeat the arrangement only where the same access and inspection space can be retained, rather than using every remaining gap for another pot.
Keep the reservoir and outlets clear
Leaves, loose mix and roots can collect around openings, so check the fill port, wick route, overflow and drainage points during routine care. Keep any supplied cap or cover in place as directed, and clean the reservoir using the method recommended for that pot. Avoid adding a cleaning product or altering an outlet unless the manufacturer’s instructions allow it. A clear opening makes it easier to inspect the water level and can prevent debris from obscuring where excess water should go.
If the reservoir stays full while the mix remains dry, check the wick’s contact with the medium and whether the specified mix and setup are being used. If the tank empties unexpectedly, look for a leak or an overflow path as well as increased plant water use. If the paved floor is wet, trace the source before simply topping up again. These checks help distinguish a setup issue from a change in growing conditions, and let you correct the cause rather than treating every problem as a need for more water.
Frequently asked questions
How often should I refill a self-watering pot in a greenhouse?
There is no reliable schedule based on reservoir size alone. Plant size, potting mix, light, temperature and ventilation all affect water use. Check the tank and the mix at root depth, then note how often that particular pot needs topping up in its actual position.
Can I put a self-watering pot directly on paving?
Usually, provided the pot is stable, its drainage and overflow outlets remain clear, and you can see where any excess water goes. Paving may have joints or a slope, so do not assume a spill will soak in or stay beneath the pot.
Can the reservoir leave the potting mix too wet?
Yes. A plant that prefers the mix to dry between waterings may not suit a steady supply from below, and a poorly matched wick or mix can keep the lower root zone too wet. Check moisture at root depth rather than judging by the reservoir level.
Do I need to water from above as well?
Some systems need an initial top-watering to settle or moisten the mix; others have different setup instructions. Follow the guidance for the pot you choose, especially when planting or starting with dry mix. Do not assume that filling the reservoir will wet the whole root ball immediately.
What should an overflow outlet do?
If the design has one, an overflow outlet lets excess water escape once it reaches the specified level. Keep it clear and make sure you can see and contain the discharge. It is different from a drainage hole that lets excess water leave the growing mix.
Consider the reservoir, potting mix and paved floor together when choosing a self-watering pot. The mix needs to carry water to the root zone, excess water needs a clear escape route, and the fill opening must remain accessible as the plant grows. Choose on those details rather than tank size alone. A small trial in the final position will show whether the pot behaves as expected before you repeat the arrangement across the greenhouse.
