
How to Plan a Greenhouse on a Sloping Garden
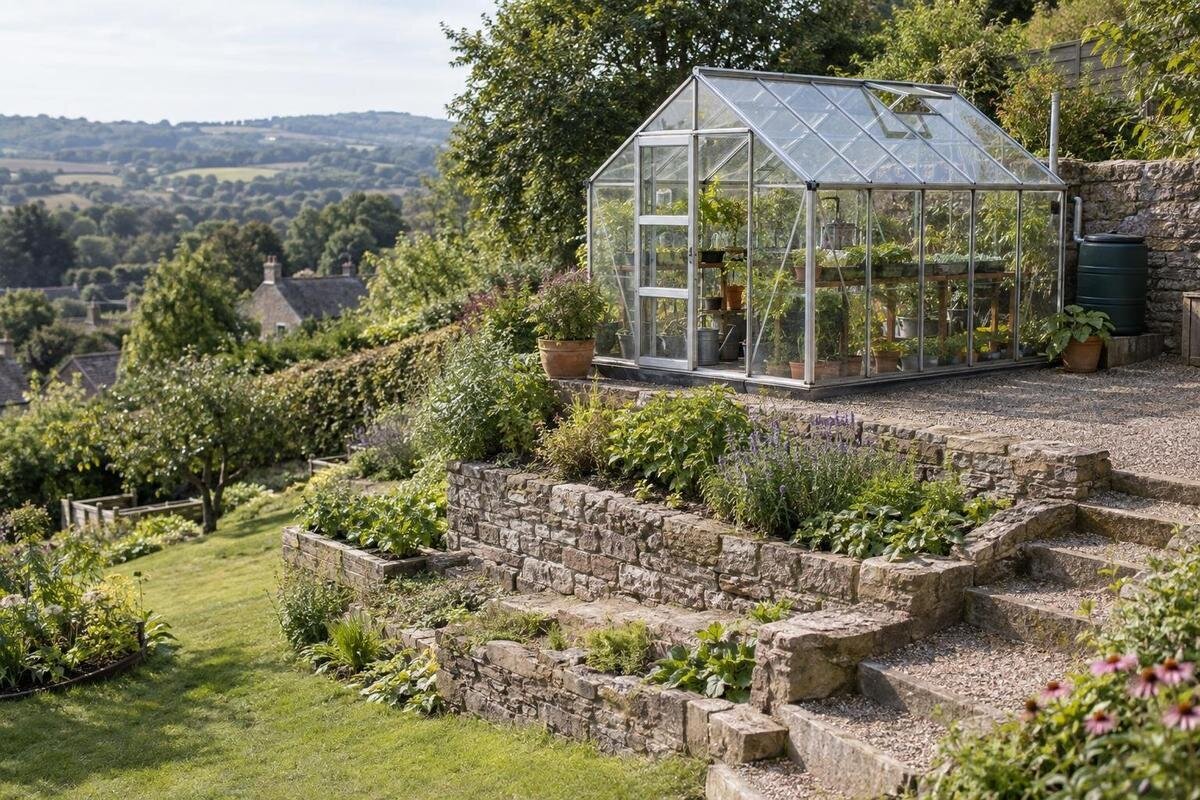
GREENHOUSE SITE PLANNING
A sloping garden can accommodate a greenhouse, but planning starts with the ground rather than a catalogue image. First find out how much the land falls across the proposed footprint, where rainwater travels, which areas receive sun, and how people and materials will reach the site. Then compare ways to form a level platform. Its support and drainage depend on the soil, slope, greenhouse design and local conditions, so a scaled survey is a planning tool—not a structural design.

Site-planning checklist 1
Survey the whole garden before choosing a position
Draw the garden as a whole before narrowing down to a spot. Include the house and outbuildings, fences, gates, steps, paths, retaining walls, drains, downpipes and established trees, as well as the boundaries you know. Mark the high and low sides of the slope and sketch one or more possible greenhouse footprints. Add room for the door to open, a person carrying a tray, cleaning and routine access; a rectangle that only just fits may be awkward once it is in use. Show a route for a wheelbarrow and for bringing materials in. This is a constraints plan, not a finished building drawing.
Take photographs from fixed viewpoints and label them with the date and time. A picture taken on a dry afternoon will not show where water sits after rain, and one day's shadows are not a seasonal record. Note low patches, damp ground, signs of erosion and any cracks in existing retaining structures, without trying to diagnose their cause. Keep the measurements, observations and photos together so the site can be discussed with a supplier, builder or surveyor. If boundaries, buried services or a steep section are uncertain, establish that information before settling on a position. Repeat observations at different times of year if nearby trees or buildings change the site's shade.
Measure the fall across the proposed footprint
Record ground levels at the corners and through the middle of each possible greenhouse footprint, then continue the readings beyond it on the uphill and downhill sides. Use a consistent reference point so readings can be compared. Note whether the ground falls evenly, changes direction or becomes steeper in one part; an average can hide a local high or low spot. Measure across both the length and width of the proposed position, because the fall may differ in each direction. A suitable level can help with an initial site check, but a surveyor can provide more reliable contours where the slope is irregular or earthworks may be substantial.
An area figure helps you compare options, but it is not a footprint drawing. For example, the Limited Edition Aluminium Greenhouses listing gives an area range of 3.77 to 28.08 m². Once you have shortlisted a particular size, get its exact plan dimensions and mark the outline to scale; do not guess the length and width from the area alone. Compare that outline with your level readings and the space available for access. Check the selected model's information for any additional clearance requirements, such as room for an opening door or maintenance.
Site-planning checklist 2
Compare ways to create a level platform
A platform can be formed in different ways, and each changes the site around it. Cutting into the slope creates an excavated area and may leave ground that needs support. Raising the lower side with fill or a built platform can create a level surface, but the fill, support and edge conditions need to suit the ground. A terraced arrangement is another possibility where the site and layout allow it. Compare how much ground each option disturbs, what happens to the uphill and downhill edges, and whether the finished platform leaves a workable approach to the greenhouse.
Do not treat a level-looking surface, loose fill or a product foundation as a complete solution to a sloping site. The Bloomcabin Prestige Greenhouse listing identifies a metal foundation, but that detail alone does not show whether it suits a particular slope or replaces the work needed to form a stable platform. Keep the greenhouse package and the platform design as separate questions. Ask a suitably qualified builder or structural professional to assess the ground, support and any retaining work for the actual site and chosen model. Avoid deciding on a platform method from a photograph or a general rule of thumb.
Trace rainwater through the site
Look beyond the patch of ground where the greenhouse might sit. Rainwater can arrive from higher garden areas, a nearby driveway, roofs, downpipes or irrigation, then collect at a low point or continue downhill. Observe the site during and after rain when it is safe to do so, and mark flowing water, puddles, damp areas and any signs of erosion on your sketch. A spot that seems dry in fine weather may be part of a route used by water during a downpour. Avoid choosing a position without first understanding that route, especially where the ground is already prone to ponding.
Include the roof edges and likely water paths in the plan, not just the greenhouse's centre point. For scale, the Spacious Greenhouse listing covers models from 47 to 70 m²; for any large shortlisted footprint, draw the chosen outline and consider where roof water could travel. The listed area does not tell you how much water a roof will discharge or where it can safely go. Do not assume water will disappear at the edge of a platform or that a drain can be placed anywhere. If the source or route is unclear, or the ground repeatedly becomes waterlogged, get a drainage professional to assess the site and possible outlets.

Site-planning checklist 3
Check sun, shade and exposure on the slope
A slope can change what the greenhouse receives over the day, while trees, fences and buildings create additional shade. Make a simple shadow record from the proposed position at several times, and repeat it in different seasons if possible. Note whether the upper part of the garden, a neighbouring structure or tree canopy blocks light, and whether the usable sunny area shifts. A site sketch with dates and times is more useful than deciding from one visit. Consider the greenhouse's position in relation to both the land and its surroundings; slope direction alone cannot tell you how much direct sun the particular site receives.
Use a shortlisted model's actual footprint when placing it on the shadow plan. The Pyramid Greenhouse range is listed at 5.53 to 18.9 m², but that area range cannot show exactly where a particular version will sit or how nearby shade will fall around it. Get the dimensions of the specific option before comparing positions. Also note where the site feels exposed to wind, such as an open crest, and where buildings or planting shelter it. A calm-day impression is not a structural assessment; ask a qualified professional to consider exposure as part of the site-specific design.
Plan the approach and the space inside
A suitable position needs a practical route from the garden entrance or house, not just enough room for the greenhouse. Check gates, steps, narrow turns and changes in level along the way. Consider how you will carry compost, plants and tools in, and take waste or harvested produce out, including when the ground is wet. Mark the access path on the plan and consider whether it can meet the greenhouse entrance without crossing a low, muddy or frequently wet patch. Set aside space for opening the entrance and working around the outside, rather than allowing the platform edge to become the only route.
Sketch the intended growing layout as well as the external footprint. Beds, benches, shelving and storage can all affect the space left for moving around and working. The Limited Edition Aluminium Greenhouses with Storage listing gives an area range of 5.52 to 28.08 m²; if a storage option is on your shortlist, check the selected model's plan and whether the listed area represents the whole greenhouse or the growing space. Do not count a storage area as extra room for plants without checking its position and dimensions. Planning the interior now can reveal that a slightly different footprint or entrance position would work better on the platform.
Site-planning checklist 4
Compare freestanding and wall-backed layouts
A freestanding greenhouse and a wall-backed design place different demands on the site. With a freestanding option, consider the space around all sides for access, upkeep and water flow. With a wall-backed option, include the wall's position, the ground along it, available light and the route to the entrance in the survey. Record how ground levels change along the wall and where the proposed level base would sit in relation to it. A slope can leave one end of the base much higher above the existing ground than the other. A wall does not remove the need to resolve the base or plan how water travels nearby.
The Lean-to Greenhouse listing spans 3.69 to 14.34 m², which can help you compare listed area options. Its name and size range do not establish that a particular garden wall or sloping position is suitable. Before choosing a wall-backed model, check the exact installation requirements and get qualified advice on the proposed attachment and supporting surface. Compare it with a freestanding alternative using the same site plan, including access, shade and drainage. That makes the choice about how each layout fits the garden, rather than assuming one form automatically solves the slope.
Match the greenhouse footprint to usable ground
Do not choose by floor area alone. Two options with similar listed areas may occupy the garden differently, and the amount of internal working space depends on the selected plan and how you intend to grow. Mark the exact external dimensions, entrance, approach path and space for maintenance on your scaled drawing. Then sketch the beds or benches you expect to use and check that the layout leaves room to move. If the platform has to expand substantially to provide access or accommodate an edge, include that area in the comparison; the nominal greenhouse footprint is not the whole site requirement.
For example, the T-Model Orangery Greenhouse is listed in area options from 16.52 to 30 m². Use the exact variant's dimensions to test how it sits within the usable part of your garden, rather than treating the range as a single footprint. Compare the resulting plan with the surveyed fall, shade, access and water routes. A model that looks the right size in a catalogue may still require more level ground or surrounding work than is available. Keep a second footprint on the drawing if it helps you see whether a smaller or differently positioned option would make better use of the site.

Site-planning checklist 5
Get the platform and structure reviewed for the site
A scaled survey helps a qualified professional assess the actual conditions, but it does not replace their design work. Share the ground levels, photographs, water observations, intended platform and exact greenhouse model with the builder or relevant structural professional. Ask them to consider the soil, the amount of excavation or fill, any retaining work, the platform support and how the greenhouse is to be supported. These elements depend on the site and the selected product, so a solution used on another garden may not be appropriate here. Keep any manufacturer instructions for the specific model with the site information.
The Aluminium Greenhouses listing covers area options from 3.77 to 28.08 m²; when seeking advice, identify the exact model and size rather than relying on a broad category or area range. Ask which parts of the work are included in a proposal, such as excavation, platform construction, retaining, drainage and reinstatement of paths. Check with your local council or a qualified local professional whether any approvals or site constraints apply before earthworks begin. The aim is not to ask a greenhouse listing to settle structural questions, but to make sure the chosen model and its site support are considered together.
Put the plan on paper and check it on the ground
Bring the survey together in a scaled drawing with levels, candidate footprints, paths, access points, trees, nearby structures and observed water routes. Show the proposed platform separately from the greenhouse so it is clear where excavation, fill or support may be needed. Add notes about when photos were taken and what you observed during rain or in shade. If you are comparing two positions, use the same information for both rather than relying on memory. A clear drawing gives a builder, surveyor or greenhouse supplier a common reference and makes gaps in your information easier to spot.
Before committing to a position, mark a shortlisted footprint on the ground with string or other temporary markers. Walk the approach, check the entrance area and see whether the outline sits where your sketch suggests. This simple check does not establish that the ground is level or structurally suitable, but it can catch access or space problems early. Use the completed plan to compare the scope of different proposals: clarify who is responsible for earthworks, the platform, retaining and water management, and what remains to be decided. That way, you can choose a greenhouse that fits the planned site rather than trying to adapt the ground to a model chosen too early.
Frequently asked questions
Do I need to level the whole garden for a greenhouse?
No. The relevant area is the greenhouse base and the space needed for access and work around it. The surrounding slope still matters, though: plan how rainwater will move past the platform and where paths meet it.
Which type of level platform is best on a slope?
There is no single best option for every site. Cutting into the slope, using engineered fill or creating a raised platform each has different effects on soil, retaining needs, drainage and access. Have the options assessed for your ground and chosen greenhouse.
Can I put a greenhouse directly on sloping ground?
Do not assume that a greenhouse frame can follow the slope. Check the installation requirements for the exact model and arrange a suitable, level supporting base if required. A site professional can advise on how to form it safely.
How can I work out where water will flow?
Observe the site during and after rain, then mark puddles, flowing water, damp patches, downpipes and low points on your sketch. If water repeatedly ponds, erodes the ground or comes from an unclear source, ask a drainage professional to assess it.
Is a lean-to greenhouse a simpler option for a sloping garden?
Not automatically. A wall-backed design still needs a suitable base, and the wall, slope, access and water flow all need consideration. Check the selected model's requirements and get qualified advice before planning an attachment.
The useful order is straightforward: measure the site, map water and seasonal conditions, test access, then compare level-platform options against the exact greenhouse footprint. A sloping plot may offer several workable positions, but each needs to be judged on its own ground and surroundings. Getting that information onto a clear plan makes it easier to choose a greenhouse and have its supporting structure designed for the site.
