
Siting a Greenhouse and Pergola in One Garden
Garden planning
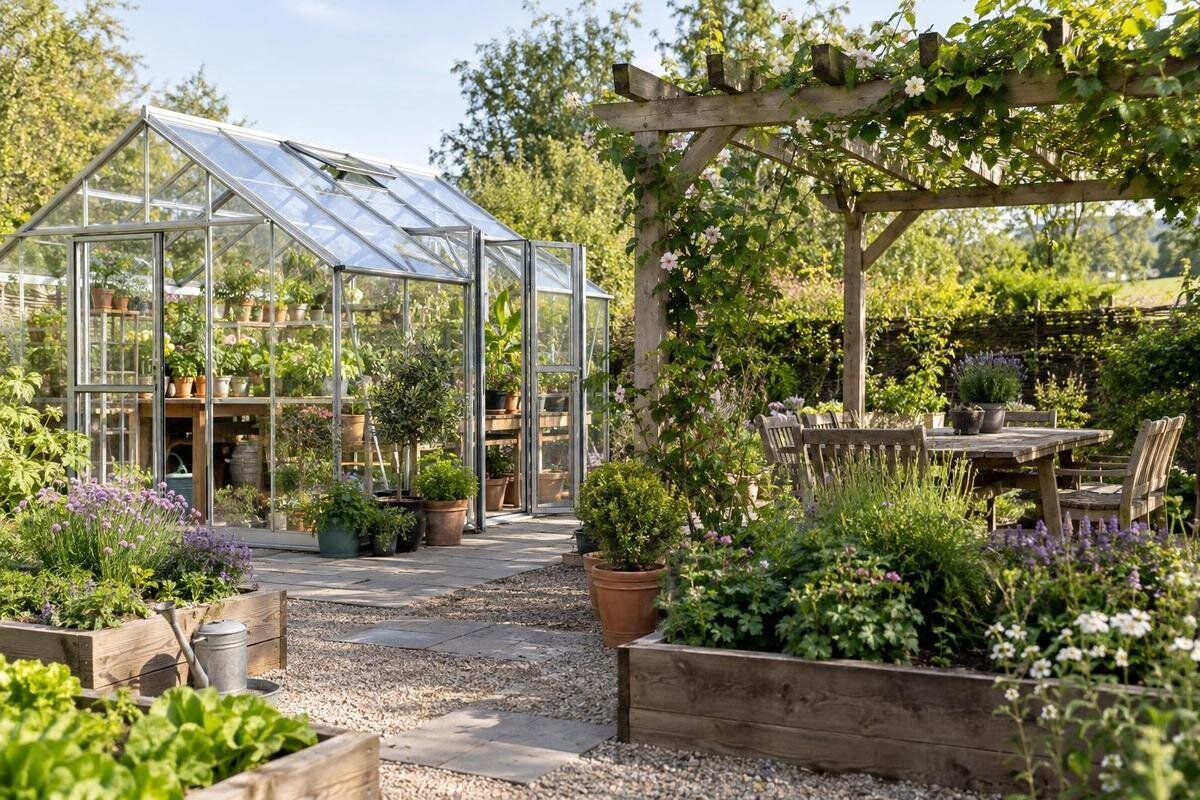
Fitting a greenhouse and pergola into one garden is a layout problem as much as a style choice. The greenhouse needs a position that works for light, growing tasks and routine access; the pergola needs to suit the people and activities using it. Their placement also affects seasonal shade, routes, water, power and drainage. Decide what each structure is for, map the whole site, then test likely footprints and openings before settling on positions.

Give the greenhouse and pergola different jobs
Write down what each structure must do in an ordinary week, rather than beginning with a preferred corner of the garden. The greenhouse might be used for propagation, potting, growing or protecting plants; the pergola might provide an outdoor place to eat, sit or meet. Rank those jobs if there is more than one. A greenhouse intended for light-sensitive growing has different siting needs from a pergola whose main purpose is to create shade for people. Also note whether the spaces will be used together or at different times: a path through the dining area can frustrate both uses even when the footprints fit. Giving each structure a clear role makes compromises visible before you fix either position.
List the items and activities that belong in each space. For the greenhouse, include benches, trays, tools and any storage you expect to use; for the pergola, sketch the table or seating and room to move around it. The Limited Edition Aluminium Greenhouses with Storage range is listed with area options from 5.52 m² to 28.08 m². Its product name identifies a storage option, but the area figure alone cannot show how much usable room remains in a particular arrangement. Separate storage from working space on your sketch and note which items you need to reach during potting. Then use the selected greenhouse's documented dimensions to see whether its assigned role fits.
Map shade across the seasons
Put a north arrow on the garden plan and note when each part of the site receives sun. At midday in New Zealand, the sun is generally to the north; its height and the length of the day change through the year. Check the site in the morning, around midday and later in the day, and repeat in different seasons if possible. Record the time and date rather than labelling an area simply sunny or shaded. A tree or neighbouring building can cast a different shadow when the sun is lower, so an observation on one clear afternoon is only a snapshot.
Mark shade from the house, fences, trees and other fixed features as well as from both proposed structures. Include the pergola as it is actually planned: an open framework and a design with a cover will not necessarily shade the same area. Note whether nearby trees keep their leaves or lose them, since that can change the pattern through the year. Use a site sketch, dated photographs or simple shadow outlines to distinguish recurring shade from temporary cloud. Comparing these records with the greenhouse's intended use can reveal whether a pergola shadow falls on a growing area, a path or both.
Protect the greenhouse's usable light
Once you have mapped the shadows, identify the parts of the greenhouse that need the clearest light. Think about where benches or growing areas are likely to sit, not just whether the roof appears bright from the path. A boundary hedge, tall wall or pergola on the sunward side can reduce light at particular times. If the greenhouse will contain a mix of plants, identify its main use rather than assuming every crop has identical light needs. Compare the shadow map with that use, and note whether an internal layout adjustment could help if the position cannot change. A small shift in either structure may preserve a brighter working area while keeping the pergola convenient.
A greenhouse set against a wall needs the wall and roofline included in the shadow check; being beside a wall does not guarantee a brighter or more suitable position. The Lean-to Greenhouse listing identifies a wall greenhouse, with area options from 3.69 m² to 14.34 m². Treat that range as an initial comparison, then use the chosen configuration's actual dimensions to test its position against wall shade, access and the pergola. Check where shadows fall across the greenhouse itself, not only along its outer edge. If the light map shows a conflict, shift one structure or reconsider the pergola before paving or planting makes the layout harder to change.
Plan clear routes between the structures
Draw routes from the house, gate and garden work areas to both structures. A useful path should connect them without cutting through a bed, forcing people around furniture or turning the greenhouse entrance into a dead end. Show where someone carrying a tray, watering can or harvested produce would go; a line on a plan can look clear even when a wheelbarrow or two people cannot pass comfortably. Keep routine garden access distinct from the route for sitting and eating where the layout allows. If several people will use the garden, mark a place to pass and avoid making one narrow pinch point do every job.
Mark each entrance and its approach on the drawing. The Aluminium Greenhouses listing shows area options from 3.77 m² to 28.08 m², but its area figure does not measure the outdoor space needed in front of a door or along a path. Use the selected model's plan, then add the actual route to the pergola, turning room and planting edges. Check that the approach stays clear with the door open and the pergola occupied. If the only direct path runs behind chairs or through the main growing work area, move the route or a structure rather than relying on people to shift things each time.

Allow room for doors, furniture and equipment
Test the openings and the space just outside them. A greenhouse door needs an approach that remains clear, while a pergola seating plan needs room for people to pull out chairs, get up and pass one another. Draw furniture at the size you intend to use and put it in its normal position; an empty pergola outline is not a realistic circulation plan. Also consider where trays, a hose, a bag of potting mix or tools will be set down during work. These short-term items can occupy the same ground as a path or doorway, so mark where they can be put aside without blocking either structure.
The Limited Edition Aluminium Greenhouses listing covers area options from 3.77 m² to 28.08 m². When comparing options, consider how the entrance and working space would function while the pergola is occupied. Show greenhouse doors open and chairs pulled out, then trace the route someone would take while carrying garden equipment. Identify any overlap between that route and places used for setting down trays or potting mix. Give frequently used items a convenient storage position so they do not end up in the doorway. Confirm any clearances specified in the product information or installation advice rather than treating an empty gap on the drawing as sufficient.
Coordinate water access and drainage
Plan the water source and route before choosing final paving or planting. Note whether the greenhouse and pergola need access to a tap, hose or another water point, and where that point is easiest to reach. A shared source may make sense, but it is only practical if the route serves both without crossing the main walkway or leaving a hose where it becomes an obstacle. Mark the route separately from the walking line and show where the hose can be kept when not in use. Think about how often each space needs water as well: a point used for regular greenhouse work should not be hidden behind pergola furniture.
Treat roof water and drainage as related but separate decisions. If you want to use collected rainwater, identify the intended catchment, storage position and overflow route; do not assume either structure's roof arrangement suits a collection system. For a pergola, the plan also depends on whether it has a cover and how runoff is managed. Show where water may fall and whether it could pool on a path or at an entrance, including runoff from existing paving or higher parts of the site. A qualified plumbing or drainage professional can assess a proposed connection and site conditions. Keep the water route, overflow and everyday walking line visible together so one decision does not undermine another.
Review power and ground conditions early
Decide whether either space needs outdoor power before you finalise its position. Possible uses might include task lighting or equipment you have specifically chosen; they should be part of the brief, not a reason to add a connection by guesswork later. Mark the intended points and the route a professional would need to assess, while keeping it clear of the normal walking line and future planting areas. Do not treat one convenient source as proof that it can serve both structures. Ask a qualified electrician to advise on feasibility, equipment needs, location and any requirements for the particular site.
Ground levels and drainage belong on the same early plan because they affect where each footprint can sensibly go. Compare the proposed positions with the site's slope, existing paving and likely water flow; a level-looking sketch is not a site assessment. The Bloomcabin Prestige Greenhouse with Metal Foundation listing gives area options from 3.77 m² to 28.08 m². That product information does not establish whether its foundation or preparation requirements suit your particular ground. Use the chosen model's documentation, and ask a relevant installer or site professional to check the base, levels and relationship to nearby paths and services.
Put exact footprints on the garden plan
Do not treat a listed area as a complete siting measurement. Product information may state an area, but your plan still needs the exact outside dimensions of the selected version, its doorway position and any clearances specified in the installation information. Add the pergola dimensions, paths, existing trees, garden beds and service points to the same scaled sketch. Include any access needed to maintain either structure. If you are considering both together, check the closest points as well as the outer edges: the gap has to work for access and movement, not merely fit between two shapes.
The Pyramid Greenhouse listing shows area options from 5.53 m² to 18.9 m², a useful comparison range but not an exact footprint for every option. Select the size you are considering and check its product information before placing it on the plan; do the same for the pergola. Draw the proposed locations full size on the ground using removable markers or string if that helps, then walk the route and check access from the house and garden. This simple test can reveal a doorway that faces a crowded area or a narrow gap that a scale drawing did not make obvious.

Choose a greenhouse size that leaves room for the garden
Choose a size based on the activities planned for the greenhouse and the outdoor area you want to retain. A larger listed area can mean more enclosed space, but it can also use room needed for a pergola, paths, beds or garden access. A smaller option may be inconvenient if routine tasks spill into the approach. Compare at least two realistic sizes with the pergola in its intended position. Consider how much space each activity needs when it is under way, rather than counting only the items stored there. If space is limited, decide which activities take priority and which can comfortably take place elsewhere in the garden.
The T-Model Orangery Greenhouse listing gives area options from 16.52 m² to 30 m². Use that range to shortlist sizes, then consider what you would actually do with the additional space. Would it accommodate growing tasks that otherwise compete for room, or would much of it remain unused? Compare that benefit with the outdoor space you would lose, including any beds or lawn you want to keep. Also consider whether you expect to use the greenhouse and pergola at the same time. The most useful size is one that supports the intended growing work without unnecessarily reducing the space available for relaxing, moving around or tending the rest of the garden.
Review large projects across the whole site
For a particularly large greenhouse brief, check whether the extra enclosed space changes the pergola's position or purpose. Do not scale the rest of the plan by eye: a substantial footprint can change where people enter, where paths join, how much open garden remains and which areas become shaded. Decide whether the pergola must still be the main outdoor gathering place, and preserve its route from the house as well as the route to the greenhouse. In a shared or commercial project, include the expected pattern of use and practical management of both spaces; project-specific requirements need a proper review rather than assumptions based on a private garden sketch.
The Spacious Greenhouse page identifies a Bloomcabin Orangerie with area options from 47 m² to 70 m². Those figures describe the product range, not a recommendation that a particular garden can accommodate it. For a project at that scale, compare the chosen configuration's exact footprint with boundaries, existing features, pergola position, movement and service routes, then have site and project requirements reviewed by appropriate professionals. Record any resulting changes on the combined plan. If the greenhouse position changes, reassess its effect on the pergola and surrounding garden rather than treating the revised footprint as an isolated decision.
Frequently asked questions
How much space should there be between a greenhouse and pergola?
There is no single spacing that suits every garden. Use the exact footprints and door positions, then allow for the route between the structures and any access or clearance specified in product information. Check how shade and water flow affect the gap as well. If ground levels or access are complicated, ask an appropriate site professional to review the plan.
Should the pergola sit north of the greenhouse?
Not automatically. At midday in New Zealand, the sun is generally to the north, so a pergola on the north side can cast shade towards a greenhouse to its south. The effect depends on the time of day, season and pergola design. Map the actual shadows before choosing positions by compass direction alone.
Can the greenhouse and pergola share water and power?
You can plan their service routes together, but do not assume one connection is suitable for both. Check where water is needed and how a hose can be kept out of the main path. For proposed plumbing or outdoor power, have a qualified professional assess the requirements and the particular site.
What does a greenhouse's listed area tell me?
It helps compare the area options shown for a product, but it does not tell you the exact outside dimensions, door position or access space for the version you are considering. Get the relevant product information, then plot that footprint alongside the pergola, paths and garden features.
Is the largest greenhouse option best for a large garden?
Not necessarily. Choose a size that supports the intended growing work while leaving room for the pergola, paths, planting and other garden uses. For a larger project, compare the selected configuration with site conditions and service routes, and have any project-specific requirements reviewed before committing.
A good combined plan gives the greenhouse suitable light and room for growing tasks, while placing the pergola where its shade and access suit the people using it. Neither structure should obstruct the other's entrance or working space. Check seasonal shade, draw the actual footprints and openings, and trace movement and services before hard landscaping. The aim is a garden where growing and relaxing can happen alongside each other, with enough space for both.
