
Planning a Greenhouse for a Small Plant Nursery
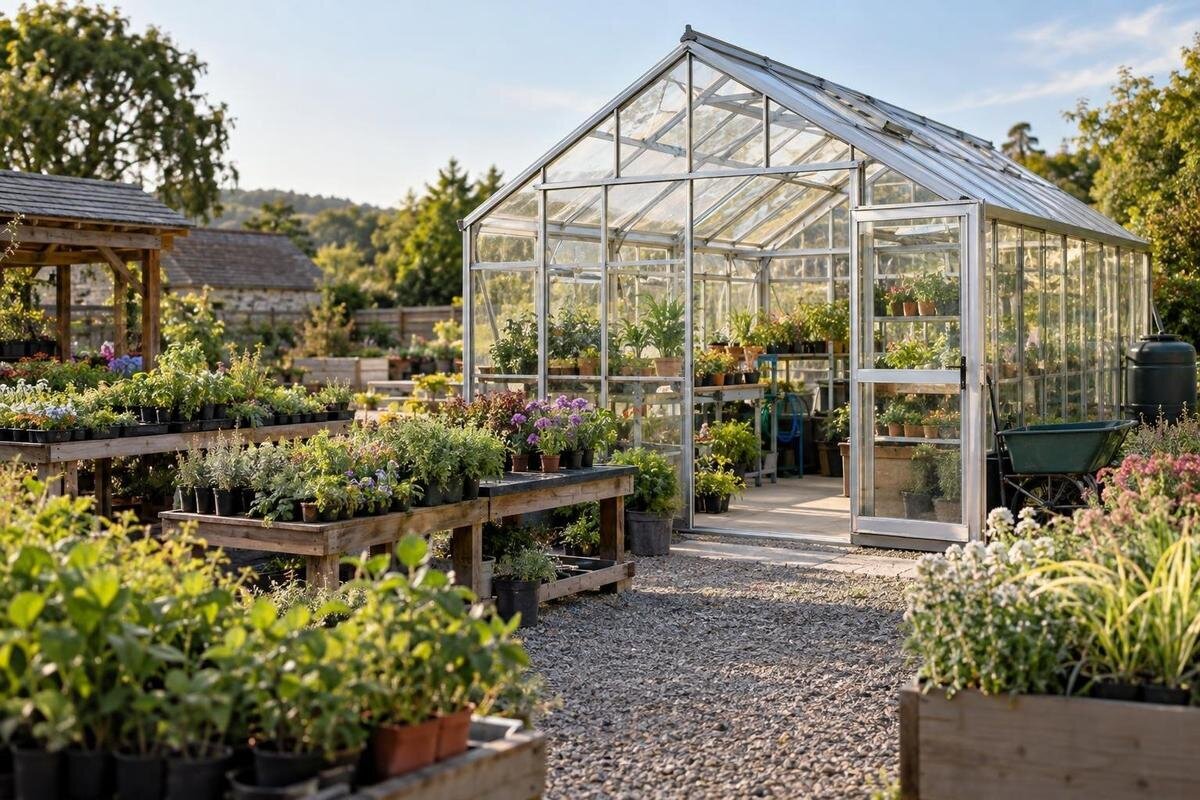
Greenhouse planning for nurseries
A small plant nursery needs space for more than germinating seeds. A working greenhouse may need to receive young stock, propagate plants, pot them on, grow them to saleable size, grade batches and prepare orders. Planning from those tasks gives a more reliable capacity estimate than choosing a structure by floor area alone. Start with crops and sales patterns, calculate how many plants occupy each stage at once, then test that workload against benches, paths and work areas. This guide shows how to build that plan and identify what to confirm before purchase.

What to confirm before buying 1
Define what the nursery will produce
List what the business intends to produce and sell: seed-raised plants, cuttings, plugs, potted stock, seasonal lines or a mix. Record each crop’s sale period, batch size, expected time on site and whether customers collect or orders are packed for delivery. Note whether young plants are raised in-house or bought in, and what unit is sold: a pot, tray, bundle or larger batch. These differences affect bench spacing and handling time as much as head count. A nursery turning over dense trays of young plants will organise its work differently from one holding fewer, larger potted plants.
Separate regular demand from one-off projects, and mark when orders need to be ready. Base the forecast on past sales, confirmed orders and a reasoned estimate of likely demand; do not treat every possible sale as certain. For a new business, make low, expected and peak cases, then identify the crops and weeks that drive each. List on-site tasks too, including sowing, taking cuttings, potting-on, labelling, holding stock and handing over orders. This scope becomes the brief for calculating capacity and drawing the layout, so a display greenhouse or hobby growing plan is not mistaken for a production workspace.
Turn demand into plant numbers
Choose a planning period that reflects how orders arrive, such as a week or batch date. For each crop, convert forecast sales into saleable units, then into trays, pots or bench positions needed at each stage. Record the assumptions beside the numbers: batch size, sowing frequency, time in each stage, planned spare stock and likely loss. Where the business has reliable records, use them to estimate losses and unsold plants; for a new operation, show the estimate clearly rather than hiding it inside a large buffer. If records support an expected loss rate, work back from the saleable target to the number to start. Avoid adopting a generic percentage from another nursery.
Keep sales capacity distinct from greenhouse capacity. The Aluminium Greenhouses listing gives a stated area range of 3.77 m² to 28.08 m², but catalogue area is not a plant count or bench surface. Use a listed range only to screen possible footprints. On the exact drawing, count usable bench surfaces, then work out how many actual trays fit with their required spacing; for individual pots, allow for the full growing footprint, not just pot diameter. Compare that result with peak demand without filling routes or work areas. If the figures do not fit, revisit the target or the layout.
What to confirm before buying 2
Account for plants at every growing stage
Plants occupy space for different lengths of time, so a week’s sowing target is not the number of plants in the greenhouse. For steady weekly production, multiply the number entering a stage each week by the number of weeks they remain there. If 60 trays enter a stage each week and stay for three weeks, allow for about 180 trays at that stage at steady throughput, before allowing for spacing, access and uneven batch dates. Use your own crop schedule, not a generic cycle length. Model seasonal crops separately when sowing and selling are concentrated into a short period.
Split the schedule into propagation, potting-on, growing-on, hardening off or holding, and ready-to-sell stock where those stages apply. The same plant count may need more surface after potting-on because plants are larger or spaced differently. When considering the Pyramid Greenhouse, listed with area options from 5.53 m² to 18.9 m², map the space needed for each stage onto the proposed layout. Use the tray sizes and spacing from your crop schedule. Add each stage’s peak occupancy, plus batches being moved or graded, and identify where demand overlaps most. Include any overlap when one batch is waiting for space while the next must start. That bottleneck is what the layout needs to accommodate.
Lay out benches and routes before choosing a footprint
Draw the greenhouse outline to scale and mark doors, bench runs, fixed equipment and any posts or obstructions shown on the proposed plan. Use actual tray, pot and trolley footprints; do not estimate from a photograph or external dimensions alone. Place stock where it can be reached for watering, inspection and movement without shifting another batch first. Set paths around the way people carry trays or use trolleys, and check turns, door operation and where loads are set down. Include the most cumbersome item that must pass through. Ask the person doing the work to test the sketch, not just the person measuring the building.
Count bench area as usable cultivation surface, not total floor area. Set aside room for access, potting, storage and dispatch, and count shelves or levels only if the chosen product and operation support them. The T-Model Orangery Greenhouse is listed from 16.52 m² to 30 m². Use the plan for the selected size to test how these spaces fit together. Sketch two versions if useful: one prioritising growing benches and another allowing more handling space. Comparing them makes the trade-off visible and helps avoid adding benches that make routine care or batch movement awkward.

What to confirm before buying 3
Keep receiving, propagation and dispatch in workable order
Map the route from incoming seed, cuttings or purchased young plants through propagation and growing-on to finished orders. New or potentially affected stock may need separate handling under the nursery’s plant-health procedures; avoid sending it straight through every production bench merely because that is the shortest route. Mark places to unload, label, inspect and hold incoming material, and decide where used trays, waste and returnable containers go. Keep batch records with the crop as it moves so labels and orders do not become detached from stock. A layout can support careful practice, but cannot guarantee that pests or disease will be avoided.
Test the route in both directions: staff bringing trays into the growing area, and graded plants leaving for collection or packing. Separate clean propagation tasks from messy potting and waste handling as far as the plan allows. When assessing a configuration from the Bloomcabin Prestige Greenhouse range, listed with area options from 3.77 m² to 28.08 m², draw the receiving and dispatch zones onto its plan. Trace the route between them with the trays or trolleys you intend to use, including where a delivery waits if benches are full. If customers will enter, map their route separately and assess supervision, access and separation from production work.
Allow space for potting, storage and order preparation
Growing benches are only part of a nursery’s floor plan. Potting needs a work surface and room for trays, pots, growing media, labels, tools and temporary batches; dispatch needs room to group completed orders without blocking a route. Note which supplies need dry, secure or readily accessible storage and how much stock is normally held between deliveries. Include space for cleaning equipment and waste handling if those tasks happen on site. Keep frequently used items near the task that needs them, but do not count a storage shelf as cultivation area. An equipment list with quantities is more useful than a vague allowance for miscellaneous items.
The Limited Edition Aluminium Greenhouses with Storage range is listed with built-in storage and area options from 5.52 m² to 28.08 m². Compare the storage provision with your equipment and supply list: confirm what is included, its dimensions, how you access it and whether it takes room from a route or growing area. Identify which items would go there and which would still need space elsewhere. If mixing, packing or cleaning needs a separate work area, decide whether it belongs inside the greenhouse or in another suitable space. Show that choice on the drawing before using total floor area to compare models.
What to confirm before buying 4
Check the site, access and services
Choose a location with the whole operation in mind, not only the available patch of ground. Consider how deliveries reach the structure, where trays can be unloaded, how staff move between the greenhouse and other work areas, and whether paths remain usable in busy periods. Observe where shade falls during the day and across seasons, how exposed the site is, and whether surface water or uneven ground could affect the proposed position. Note access for any people or equipment needed to prepare the site. These observations identify questions to resolve; they do not replace a site assessment.
List environmental and service needs for the crops and work plan: ventilation, temperature management, water access, any planned power, monitoring and cleaning. Write down the conditions each crop needs before comparing options; a larger area will not solve an environmental mismatch. Match each need to the candidate’s documented provision, and ask the supplier or an appropriate tradesperson about anything dependent on equipment, connections or site conditions. The Lean-to Greenhouse listing gives an area range of 3.69 m² to 14.34 m²; that does not establish whether a particular wall location, route or service arrangement is suitable. Check the exact site and model together rather than assuming a catalogue footprint settles installation questions.
Compare a specific model with the working plan
Once you have a target footprint, use the exact product configuration rather than a broad family name or its largest listed area. Ask for the dimensions and plan for the version under consideration, including doors, internal obstructions, bench arrangements if offered, and any foundation or site details relevant to the project. Draw actual working equipment into that outline, then check the entry and the largest item that must pass through it. A greenhouse can look roomy on a sales image yet be awkward for the trays, trolleys or large pots used every day. Compare like with like: stated outside size is not usable growing surface.
The Limited Edition Aluminium Greenhouses listing covers area options from 3.77 m² to 28.08 m². Treat the range as a shortlist reference, not evidence of identical layouts or nursery suitability across all sizes. Compare the selected version’s plan with your bench count, storage, routes and peak stock. Ask which details change between size options and whether the proposed use has been considered. Record answers against the drawing, including any assumptions that remain open, so an informal assurance is not confused with a verified dimension or operating requirement.

What to confirm before buying 5
Plan for seasonal peaks and a realistic growth path
Small nurseries often face uneven workloads: propagation may cluster before a selling season, while potting and dispatch peak later. Model the busiest overlapping weeks, not just an average month. Include time and surface for incoming deliveries, unsold stock and delayed orders where those occur in your business. A plan that works only when every tray leaves on its intended date may become congested after a slow sales week. Keep a simple capacity table by crop stage and week, and note what can be postponed, reduced or moved elsewhere without undermining the production plan.
Decide whether growth means more batches, a wider crop range, larger plants or more customer access; each changes the use of space. The Spacious Greenhouse listing shows areas from 47 m² to 70 m², but a larger listed area is not, by itself, a reason to choose it or evidence that it suits a commercial operation. Compare expansion with expected sales, staffing and ongoing costs for labour, climate management, water and upkeep. If future growth may be staged, ask what needs to be provided for now and what can genuinely wait; do not treat later expansion as guaranteed.
Confirm commercial use and requirements before committing
Before choosing, describe the intended operation to the greenhouse supplier: crops and stages, peak stock, staff tasks, customer access if any, storage and required services. Ask the supplier to confirm which model and configuration are being discussed and which of your requirements have not been assessed. Product identity or a listed area range does not establish suitability for commercial propagation, public access or a particular working environment. Where the answer depends on site conditions, structure, services or safe access, involve an appropriately qualified professional instead of relying on a general product description.
Check applicable local planning, building, workplace, access, fire and utility requirements with the relevant authority or qualified advisers before work begins; what applies depends on the project and its location. Agree who is responsible for site preparation, foundation, connections, fit-out and supporting facilities, and record what is included. Finally, walk through a busy day using the drawing: receive a delivery, find supplies, water and inspect plants, pot on, label, grade and prepare an order. If any task blocks a route or displaces stock, revise the plan while changes are still straightforward.
Frequently asked questions
How do I estimate plant capacity in a greenhouse?
Start with expected saleable units for each crop, then calculate how many plants occupy each growing stage at the same time. Use actual batch timing and spacing, and count usable bench surface rather than treating the whole floor area as growing space.
Is greenhouse floor area the same as bench capacity?
No. Floor area also needs to accommodate paths, doors, work areas, storage and order preparation. Use the plan for the exact configuration to count usable bench space and check whether the plants, trays and equipment fit.
Can propagation and growing-on share one greenhouse?
That depends on the crops’ growing conditions, handling procedures and the layout. Map the tasks and plant movements first; if the stages need different conditions or separation, check whether the proposed plan can provide it.
How much room should I allow for paths?
There is no single useful allowance for every nursery. Draw the routes around the people, trays, trolleys and largest items used in your work, including turns and door operation. Check any access requirements with an appropriate adviser.
What information should I send with a greenhouse enquiry?
Share your crop list, production schedule, peak stock estimate, bench and storage needs, staff tasks, customer access plans and required services. A scaled layout helps the supplier respond to the specific configuration and use you are considering.
A well-planned nursery greenhouse has a capacity you can explain: forecasts lead to batches, batches lead to peak stock, and the drawing shows where each stage, task and route fits. Use that chain to compare candidates, then verify the selected configuration, site, services and requirements for the intended operation. The result is a production plan based on how the nursery will work, not on a floor-area figure alone.
