
Starting Dahlia Tubers Under Cover for Garden Planting
Dahlia growing guide
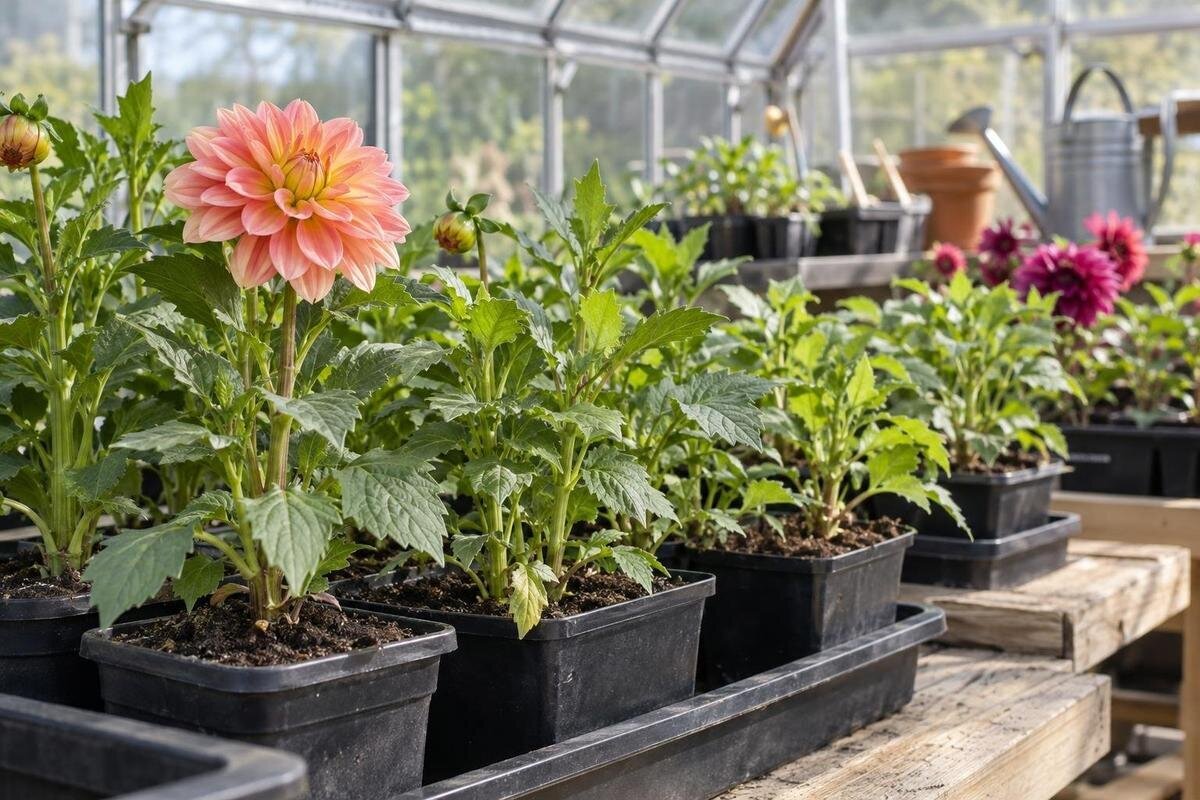
Starting dahlia tubers under cover can give them a useful head start while spring nights remain uncertain, but a greenhouse does not make new shoots frost-proof. In New Zealand, timing depends on your local frost pattern, the shelter and aspect of the garden, and how quickly the soil warms. Pot sound tubers in free-draining mix, keep them lightly moist, and leave enough room to inspect and move each container. This guide follows the short greenhouse stage from dormant tuber to planting out, without treating one calendar date as safe everywhere.

01
What a greenhouse offers during early growth
Use a greenhouse to start tubers into growth while the garden is still too cold or exposed for planting. Pots under cover are easier to inspect and move when conditions change, but an unheated greenhouse may still become cold enough overnight to slow or damage young shoots. It can also heat rapidly in direct sun, especially when doors and vents stay shut. A minimum/maximum thermometer at pot height is more useful than judging the air by feel at the doorway. Record several nights before starting a whole batch if the overnight pattern is unfamiliar; if temperatures swing widely, begin with a few tubers and keep the rest dormant as the supplier directs.
The benefit is a short staging period: you can see which tubers have sprouted and keep a small batch together until the garden bed is ready. It is not a way to bypass frost risk outdoors, nor a reason to start months early. The shoots still need light and room, and they must acclimatise before living outside. If dahlias are only one seasonal use, consider whether you also need space for larger growing projects. The Spacious Greenhouse is listed in area options from 47 to 70 m², so it represents a substantially larger space than a few pots require. Choose a scale that reflects the growing work you actually plan to do.
Work back from your local frost window
Choose a likely planting-out period first, then work backwards. As a rough guide, pot tubers about four to six weeks before that window, adjusting for the light, overnight temperature and space you can provide. This gives shoots time to develop without holding a vigorous plant in a small container for months. Frost risk varies with region, elevation, exposure and garden shelter, so a national month or a neighbour’s planting date cannot guarantee conditions in your bed. Check local frost history and the forecast, and leave a margin for a late cold snap. If conditions remain cold or waterlogged, wait; you do not need to start every tuber at once.
If you are planning a new greenhouse, complete site preparation before tubers begin to sprout, so pots of young plants are not in the way during construction. The Prestige Greenhouse with metal foundation listing identifies a metal foundation, but that alone does not establish what ground preparation your site needs. Check the details for the exact model and schedule the work before filling pots. Starting later in a prepared, bright space is usually easier than potting early and trying to keep weak, stretched shoots going while the structure is unfinished.
02
Choose a bright, accessible greenhouse site
Check the light at the intended greenhouse position throughout the day. Dahlias grow best in a sunny garden spot, and strong light after sprouting helps keep young stems from stretching. Note shade from fences, trees, walls or eaves in the morning and afternoon, rather than judging from a single midday visit. A wall-mounted format can suit a restricted footprint, but the wall and nearby buildings may block sunlight; the Lean-to Greenhouse is listed from 3.69 to 14.34 m², while its product name and area cannot tell you how much sun reaches your wall. Assess the site before comparing configurations.
Access is part of the site decision. You will check pots, water them, open vents if fitted and carry trays outdoors during hardening off. Leave a clear path from the entrance to the work area, with room to stand while holding a tray. Think about how far water and potting supplies need to be carried, and where containers can wait temporarily when you are moving a batch. Keep benches and stored items clear of doors and vents. A layout that supports these small daily tasks makes it easier to inspect plants and respond to changing weather.
Check each tuber for a viable eye
Inspect each dormant tuber before potting. Sound tubers are usually firm; discard material that is badly soft, wet or rotting, and ask the supplier about questionable stock rather than trying to rescue a damaged crown. The growing point, or eye, is on the crown where the tubers join. A detached tuber with no eye may not sprout, so do not divide a clump unless every division retains a sound tuber and a visible eye. Surface dryness alone does not tell you whether a crown is viable, so check the growing point and firmness. Keep cultivars separate from the start.
Until you are ready to pot, store dormant tubers as the supplier directs and inspect them occasionally. A greenhouse is not automatically a good storage place: daytime heat and overnight cooling can fluctuate, and damp conditions can encourage decay. If dedicated equipment storage is useful, the Limited Edition Aluminium Greenhouses with Storage range is listed with built-in storage; check its actual arrangement before relying on it for labels or tools, and do not assume it is suitable for plant material. Mark each pot with the cultivar name, and keep a separate note if labels may be moved.

03
Match the pot and mix to a short growing stage
Use a clean individual pot with drainage holes and enough room for the tuber to lie comfortably and develop roots for several weeks. A container far larger than needed can leave excess mix wet around a small dormant tuber; a cramped pot is harder to water evenly and may need shifting before planting-out time. Choose fresh, free-draining potting mix that holds some moisture without becoming heavy and airless. Avoid ordinary garden soil in short-term containers, where compaction can make moisture harder to judge. If reusing pots, remove old roots and wash away stuck mix before filling.
Measure the pots you intend to use, including their rims, and check how they sit in trays. A tray that holds several small pots may not accommodate the wider containers needed for a large tuber clump. The Aluminium Greenhouses range is listed with area options from 3.77 to 28.08 m²; use the plan for your chosen size to work out where those containers could sit. Allow enough room to lift a pot by its rim and return it without catching neighbouring shoots. This makes pot size, rather than the number of dormant tubers alone, a useful starting point for estimating staging space.
Pot tubers at a shallow depth and manage water
Fill the container part-way, place the tuber on its side or at a slight angle with the crown and eye facing towards the surface, then cover it with a shallow layer of mix, just enough to hide it. Keep any shoot that has already appeared above the medium. Follow the supplier’s instructions if they specify a different depth, as tuber shapes vary. Do not cut or force a tuber to fit a pot; choose a container that lets it sit naturally. Water once to settle the mix, then let excess drain fully.
Before shoots appear, judge moisture in the pot instead of following a fixed timetable. Let the surface begin to dry between waterings while the mix around the tuber stays lightly moist; if it is damp below the surface, wait. Once leafy growth is active, the plant uses water faster, so inspect more often and water thoroughly enough for excess to drain. Empty trays that collect water, and keep the label with its pot. A sunny day can dry containers quickly, while a cool, overcast spell may leave the mix damp much longer.
04
Give shoots light, mild warmth and ventilation
Dahlias are warm-season plants: their tubers need mild warmth to start, but they do not need tropical conditions. A useful working benchmark for planting outdoors is soil at about 10°C or warmer; check at planting depth instead of treating a warm greenhouse afternoon as proof the garden bed is ready. Cool mix can delay sprouting, while cold, wet mix increases the risk of rot. Check overnight minimums at pot height too, because an unheated greenhouse can cool sharply on a clear night. There is little value in waking tubers early if emerging shoots cannot receive enough light.
After emergence, provide bright light and avoid permanent shade; in the garden, dahlias generally flower best with at least six hours of direct sun. Glass can trap heat and humid air on a bright day, so use fitted vents or doors when needed and monitor conditions rather than leaving plants in a closed, hot greenhouse. The Limited Edition Aluminium Greenhouses range is listed from 3.77 to 28.08 m², but floor area alone does not establish the selected configuration’s height or ventilation options. Check those details if they affect access to shoots, air movement or your staging surfaces.
Make room for pots, paths and watering
Arrange containers in a single layer, with labels visible and enough room to inspect foliage and water each pot. If you use a bench, make sure it is stable and that trays can drain; if pots sit on the floor, keep the doorway and route to vents clear. Place shorter plants where they will not be shaded by taller shoots as they grow. Group cultivars for easy identification, but leave a gap wide enough to lift one pot without knocking over the next. Keep spare trays within reach rather than piling them where they obstruct access. A simple floor sketch can expose crowding before the first tuber is potted.
Test the layout with the actual containers and trays, including the tray you will carry outside for hardening off. Check that you can turn towards the doorway without brushing leaves against nearby pots, and that there is somewhere to set the tray down while opening the door. The Pyramid Greenhouse is listed in area options from 5.53 to 18.9 m². When comparing sizes, look at the individual floor plan and entrance position rather than assuming a familiar bench arrangement will fit. Leave the working route clear when adding staging: a usable doorway and walkway are part of the growing space, not spare corners to fill.

05
Choose greenhouse space for the whole season
Think beyond the few weeks of dahlia staging when comparing greenhouse size. After planting out, that bench may be used for seedlings, potted plants, propagation or storage, but only if those jobs fit your seasonal routine. Write down which uses overlap in early spring rather than adding every possible future purpose. Note when each batch is expected to leave and which plants will take its place. If outdoor planting is delayed, the dahlias may still occupy space intended for another crop. The greenhouse is a temporary nursery for these dahlias; plan headroom for the shoots during staging, not for keeping mature garden plants under cover.
Use that seasonal plan when comparing models. The T-Model Orangery Greenhouse is listed in options from 16.52 to 30 m²; consider that range alongside your site limits and the growing tasks that genuinely overlap. A few dahlia pots alone do not require a large footprint. In a shared greenhouse, decide which staging remains available for dahlias and which areas are committed to other plants. Include a little flexibility in that allocation so a delayed move outdoors does not force you to displace another batch. This gives you a clearer basis for choosing space than a list of possible future uses.
Harden plants off before planting in the garden
Do not take a greenhouse-grown shoot straight into a full day of outdoor sun and wind. Hardening off gives leaves and stems time to adjust to brighter light, moving air and wider temperature changes. In settled weather, start with a few hours in a sheltered, bright spot, then increase the time outside and the amount of direct sun gradually over about a week to ten days. Bring pots back under cover or to another protected place if nights are cold or conditions turn rough; extend the process when weather is unsettled. Keep the mix from drying out while pots are exposed, as sun and wind can dry it faster than conditions inside the greenhouse.
Plant into a sunny, free-draining bed only after local frost risk has passed and the soil is warming and workable, not cold and saturated. Follow the cultivar’s guidance for spacing because mature plant size varies. Slide the rootball from the pot without pulling on the stem, set it at roughly the same level it grew in the container, firm the soil gently and water it in. Tall varieties may need support; put it in during planting rather than forcing it beside established roots later. If a late cold spell delays planting, keep pots bright and spaced under cover instead of leaving them crowded or rushing them into the garden.
Frequently asked questions
When should I start dahlia tubers in New Zealand?
Work back from the time you expect to plant them outside. Starting tubers under cover about four to six weeks beforehand is a useful guide, but local frost risk, overnight greenhouse temperatures and available light matter more than a fixed calendar date. Start later if you cannot keep shoots bright and manageable.
Will an unheated greenhouse protect dahlias from frost?
Not reliably. An unheated greenhouse can cool sharply overnight, so check the minimum temperature where the pots are rather than assuming they are safe because they are under cover. Delay sprouting or move pots to a more protected place when cold conditions are expected.
How much sun do dahlias need?
Dahlias generally grow and flower best in a sunny position, with around six or more hours of direct sun a useful guide for the garden. Give emerging shoots bright light under cover too; a warm but shaded greenhouse can produce weak, stretched growth.
Do I need to soak dahlia tubers before potting them?
Sound, dormant tubers can usually be potted directly into lightly moist, free-draining mix. Soaking is not a substitute for good moisture control, and leaving tubers in water can encourage problems. If a tuber is unusually dry or shrivelled, follow the supplier’s advice.
How long should I harden off dahlias?
Allow roughly a week to ten days in settled weather, increasing outdoor time and sun exposure gradually. Take longer if conditions are cold, windy or changeable, and protect pots on cold nights. Wait to plant until local frost risk has passed and the soil is warming.
The greenhouse stage is temporary: tubers need suitable conditions to sprout, young shoots need light and air, and the garden must be ready before planting out. A frost-aware schedule and a staging layout that leaves room to lift, inspect and harden off pots will usually do more for reliable establishment than potting as early as possible. Let the plants and local conditions set the pace.
