
Work Out How Many Tomato Plants Your Greenhouse Holds
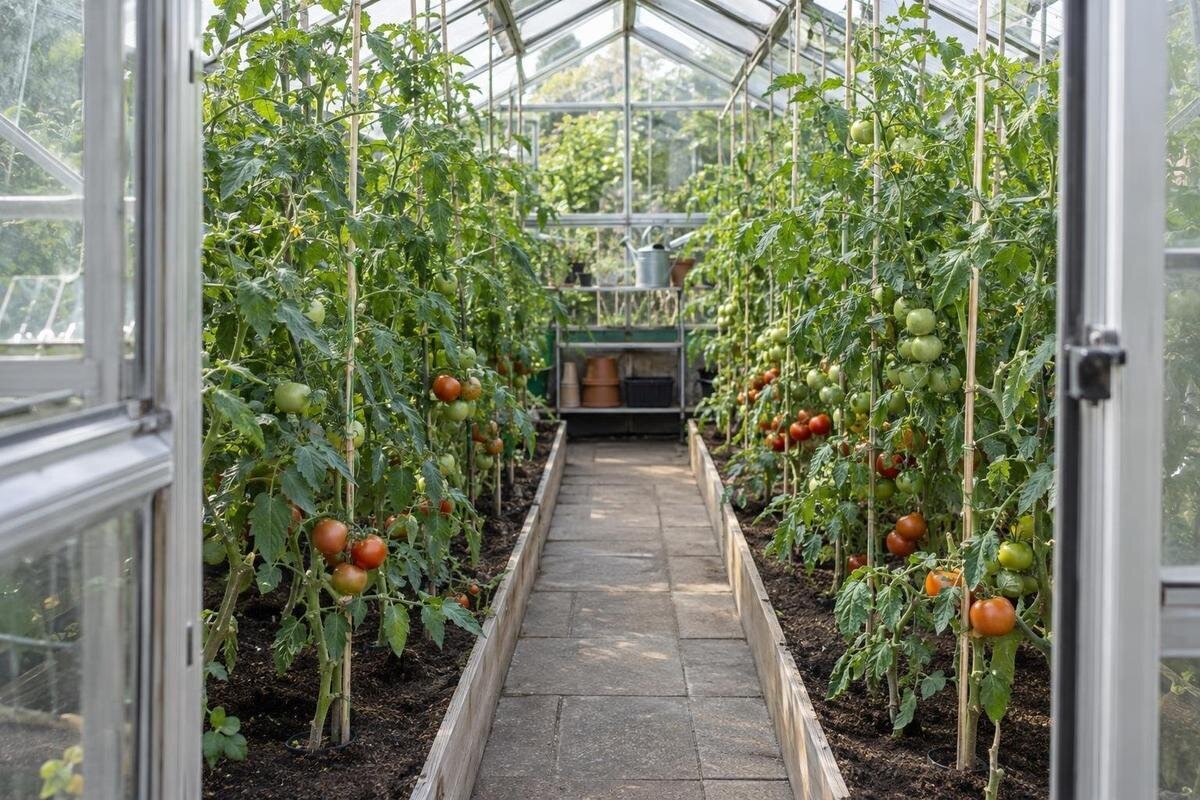
Tomato growing space
To work out how many tomato plants your greenhouse can hold, use its clear internal dimensions, choose a bed-and-aisle layout, then count planting positions along each row. Catalogue floor area is only a starting point: it does not tell you the width of a usable bed, where a doorway interrupts a row, or how much room remains to water, tie in and pick mature vines. Your answer also changes with the tomato variety and whether you train it as a narrow cordon or allow a bushier habit. A small plan with explicit assumptions is more useful than a universal plants-per-square-metre figure.

01
Why floor area is not tomato capacity
Floor area combines length and width, but tomatoes are planted in rows or defined bed areas. Two greenhouses with the same stated area can produce different layouts: one may allow a long bed and a clear route, while another loses useful floor space to a doorway, an end space or a fixed fitting. The Spacious Greenhouse range is listed from 47 to 70 m², for example; that area range alone does not tell you the clear row length or how much room you will reserve for access. Use square metres to compare broad scale, not as a plants-per-square-metre conversion.
Count rooted plants, not stems or fruit trusses. A plant trained to two leaders still counts as one plant, but its canopy may take more room than a single-stem cordon. A row filled from wall to wall may look efficient on planting day and become awkward to tend as leaves and fruit spread. Estimate capacity for the mature layout: include access for watering, tying in, checking foliage and picking, and leave a way to reach the far end of each bed. The useful capacity is the number you can work with, not the largest number of seedlings you can squeeze in.
The internal dimensions of the chosen size
Use the exact greenhouse size you are considering, not the outside footprint of a product family. Find the clear internal width and length at bed level; the frame, base and fixed parts can reduce the floor available for rows. If a drawing gives outside measurements only, do not subtract a guessed frame width and treat the result as exact. Check whether measurements are taken at the base or higher up, and ask for the clear internal dimensions if that is not clear. Measure length along the growing beds and width across them.
Draw the doorway and mark any permanent bench, shelf, storage area or other obstruction before placing plants. Show how the door opens and the route from it to each bed, rather than measuring a rectangle and leaving these details until later. The Limited Edition Aluminium Greenhouses with Storage range lists floor areas from 5.52 to 28.08 m²; that family-wide area range does not specify the inside dimensions of the particular size you will buy. Map any fixed feature using the chosen configuration’s measurements, then count only the remaining growing space.
02
Bed layout and aisle width
Once you know the clear inside width, divide it into beds, a route and any edge clearance. A pair of side beds with a central aisle is one option; a narrower greenhouse may be easier to use with one bed and a path beside it. Write each width into a cross-section so the total fits inside the measured width, rather than assuming the whole floor can be planted. As a first sketch, test a path around 60–80 cm wide, then mark it with tape or a board to see whether you can pass while carrying a watering can or picking basket. This is a planning allowance, not a required width.
The path needs to connect the entrance with the places you will tend, not stop at a row end or disappear behind stored items. Allow for the door opening and enough room to stand at a bed; a walkway that is technically present but blocked by foliage is not useful. The Lean-to Greenhouse is listed in floor-area options from 3.69 to 14.34 m², but those areas do not show whether a particular layout can hold a second row and an accessible route. Check the chosen plan and how you will reach the wall-side growing edge before adding plants.
Plant spacing by variety and training method
Choose spacing after identifying the tomato type and training method. Cordon, or indeterminate, tomatoes are usually trained up a main stem and need regular tying; a single-stem plant can be kept in a narrower line than one allowed to develop several leaders. Bush or determinate varieties tend to occupy more width across the bed, while dwarf types have their own growth habits. The label, seed packet or supplier’s cultivar notes should guide your final allowance. A count based only on the number of roots misses the canopy differences that determine whether leaves and hands can fit between rows.
If you have not chosen a variety, draw two provisional plans rather than committing to one maximum. A first sketch might test 45–60 cm centre-to-centre for single-stem cordons and 60–75 cm for bushier plants, measured along the row. These are planning assumptions, not universal planting instructions; follow the advice for the particular cultivar and growing system. Include room across the bed as well as along it. If you intend to keep multiple leaders, use the wider option and leave a margin at each end for the first and last plant.

03
The plant count along each row
For a row measured from end to end, use this formula: number of plants = floor((L − 2e) ÷ s) + 1. Here, L is the clear row length, e is the distance from each end to the first or last plant centre, and s is the centre-to-centre spacing along the row. Floor means round down to the nearest whole number. If the row is shorter than the two end clearances combined, there is no planting position under those assumptions. Otherwise, reduce the count rather than narrowing the gaps to fit extra plants. If you have already measured between the first and last plant centres, use that span instead of deducting end clearances again.
Repeat the calculation for each row and add the results; do not estimate by dividing floor area into equal squares. If two rows are different lengths, count them separately. For rows side by side, also confirm that the bed depth allows both lines and that plants remain reachable from the path. The Bloomcabin Prestige Greenhouse range is listed from 3.77 to 28.08 m², so choose a particular size before calculating its row lengths. A range-wide floor area cannot substitute for the measurements of that configuration.
Worked example: two side beds
Here is an illustrative plan, not the dimensions of a listed greenhouse. Assume clear internal measurements of 2.2 m wide by 3.6 m long. Across the width, set aside 0.15 m at each side, then allow 0.55 m for each side bed and 0.8 m for the central aisle: 0.15 + 0.55 + 0.8 + 0.55 + 0.15 = 2.2 m. Put one planting row down the centre of each bed. Allow plant-centre clearances of 0.3 m at both ends of each row, leaving a 3.0 m span between the first and last possible plant centres.
At 0.5 m spacing, the 3.0 m span holds six intervals, or seven plants in each row: 14 plants across the two beds. At 0.65 m spacing, it holds four intervals, or five plants per row: 10 altogether. The example therefore gives a planning range of 10–14 plants under those assumptions. It presumes each bed can hold one row and the aisle stays clear; a different door position, fixed bench, end clearance, bed depth or cultivar can change the count. These dimensions are illustrative only, not a product size or a yield estimate.
04
Mature height and support points
A floor plan counts planting positions, but trained vines also need vertical room. Measure from the bed or container surface to the intended tie-in point and compare it with the growth habit of your chosen variety. If the roof slopes, rows near the sides may have less headroom than a row nearer the centre. Raising the bed or using tall containers also reduces the clear distance above the plants. Check the greenhouse drawing for the chosen size and consider where you will stand to tie in a vine without leaning across another row.
The Limited Edition Aluminium Greenhouses can be compared by their selected size, but a floor-area figure does not state internal headroom or what support points are suitable. Before attaching strings or wires, check with the greenhouse supplier which fixing arrangements are permitted; the appearance of a frame does not establish its load capacity. If there is no confirmed overhead support, choose a growing arrangement that does not rely on an unverified fixing. Mark windows and other openings on the plan too, so mature foliage does not make routine access difficult.
Access and equipment space
Tomato rows may share the greenhouse with seedling trays, a potting bench, buckets, watering gear or stored tools. These items take up floor space and can narrow the route even when they sit beside rather than inside a bed. Draw the footprint of each item in its usual place, then allow for the space where you stand while filling a container, tying a vine or picking fruit. If a bench is seasonal, make a separate summer plan so you can see whether it will still be convenient once the plants have grown.
The T-Model Orangery Greenhouse range lists sizes from 16.52 to 30 m². In your selected layout, mark the places needed for regular tasks as well as the growing beds: where you will put down a picking basket, keep watering equipment and stand at a workbench. Distinguish these working spaces from the continuous route through the greenhouse, even if some serve both purposes at different times. Add only rows that you can reach without stepping into a bed or stretching across the aisle. Keeping these spaces visible on the drawing prevents equipment from gradually taking over the access space you reserved.

05
The comfortable count and the maximum count
It is useful to work out a lower, comfortable count and an upper count that still respects the cultivar’s guidance. For the lower figure, use wider spacing, keep the planned aisle and allow generous end clearances. For the upper figure, test the narrower spacing only if it suits the variety and leaves the access you need. Compare the two totals alongside the time you want to spend tying, checking and picking; a tightly packed plan is not automatically the best use of a greenhouse.
The Pyramid Greenhouse is listed in floor-area options from 5.53 to 18.9 m². When working out a tomato count for your selected configuration, separate permanent tomato positions from space used temporarily for seedlings in pots. If a bench will stay through summer, or other crops will share a bed, mark their allocated space before comparing your lower and upper totals. Apply the row calculation only to the lengths left for tomatoes, including any shorter or interrupted rows. Keep both totals on the plan so you can see exactly which spacing and end-clearance assumptions produce each figure, rather than treating the upper number as a target.
Comparing specific greenhouse configurations
For each size you are considering, write down the clear inside width and length, the bed widths, the aisle, end clearances, plant spacing and number of rows. Note what is fixed and what can be removed seasonally. This makes comparisons useful: a larger area may add length, width or both, and each change affects the layout differently. Check that the chosen bed arrangement leaves a continuous route from the entrance and that every row can be reached from that route.
Include the Aluminium Greenhouses range in the comparison using the same layout assumptions as the other options. Record the tomato count beside the selected size, with a note of the variety or training method used to calculate it. If one configuration holds more plants, identify where those extra positions come from: a longer row, an additional reachable row or less space allocated to equipment. This makes the comparison easier to interpret than a total on its own. Keep a separate version if you change the spacing or remove a seasonal bench, so you can compare the alternatives without confusing their assumptions.
Frequently asked questions
How many tomato plants fit in a 2 m × 3 m greenhouse?
Those measurements give a useful count only if they are the clear internal dimensions and you have decided where the beds and path go. A single bed and aisle create different row lengths from two side beds. Measure each usable row and apply the spacing formula. This guide’s worked example uses a larger, illustrative 2.2 m × 3.6 m layout and gives 10–14 plants under its stated assumptions. That is not a count for a 2 m × 3 m greenhouse and should not be scaled by floor area alone.
How far apart should greenhouse tomatoes be?
Spacing depends on the cultivar and how you train it. For an initial plan, test 45–60 cm between single-stem cordons and 60–75 cm for bushier plants, measured from stem centre to stem centre. These are planning assumptions, not universal instructions. Follow the guidance for your variety and leave room for its mature foliage.
Can I fit more plants by training tomatoes vertically?
Training a tomato as a single-stem cordon can keep its growth in a narrower line, but it does not remove the need for room around the foliage or access for tying and picking. Check the available height and confirm that the intended support arrangement is suitable for the greenhouse. Vertical training is not a reason to ignore plant spacing.
Should I use the greenhouse’s outside or inside dimensions?
Use clear internal dimensions for the chosen size. External measurements do not tell you how much floor is available for beds once the frame, base and fixed features are accounted for. If a drawing does not distinguish inside and outside measurements, ask for the clear internal width and length.
Do pots change the plant count?
They can. Draw the actual pot or container footprints in the bed plan, then leave the route and working space you need around them. Base the number of plants in each container on the cultivar’s growing guidance. Avoid counting a walkway as spare growing space just because containers could physically be placed there.
A defensible estimate is a count of measured planting positions after fitting the beds, aisle and service space inside the actual greenhouse. Set spacing according to the tomato’s growth habit, leave end clearances and check the vertical room needed for trained vines. In the illustrative 2.2 m × 3.6 m layout, the result is 10–14 plants under the stated assumptions; a real count should come from the chosen greenhouse’s internal dimensions and your growing method. A slightly lower total can be the more useful capacity if it leaves room to tend mature plants.
