
Greenhouse Leaks: Is Water Coming From Above or Below?
Greenhouse troubleshooting
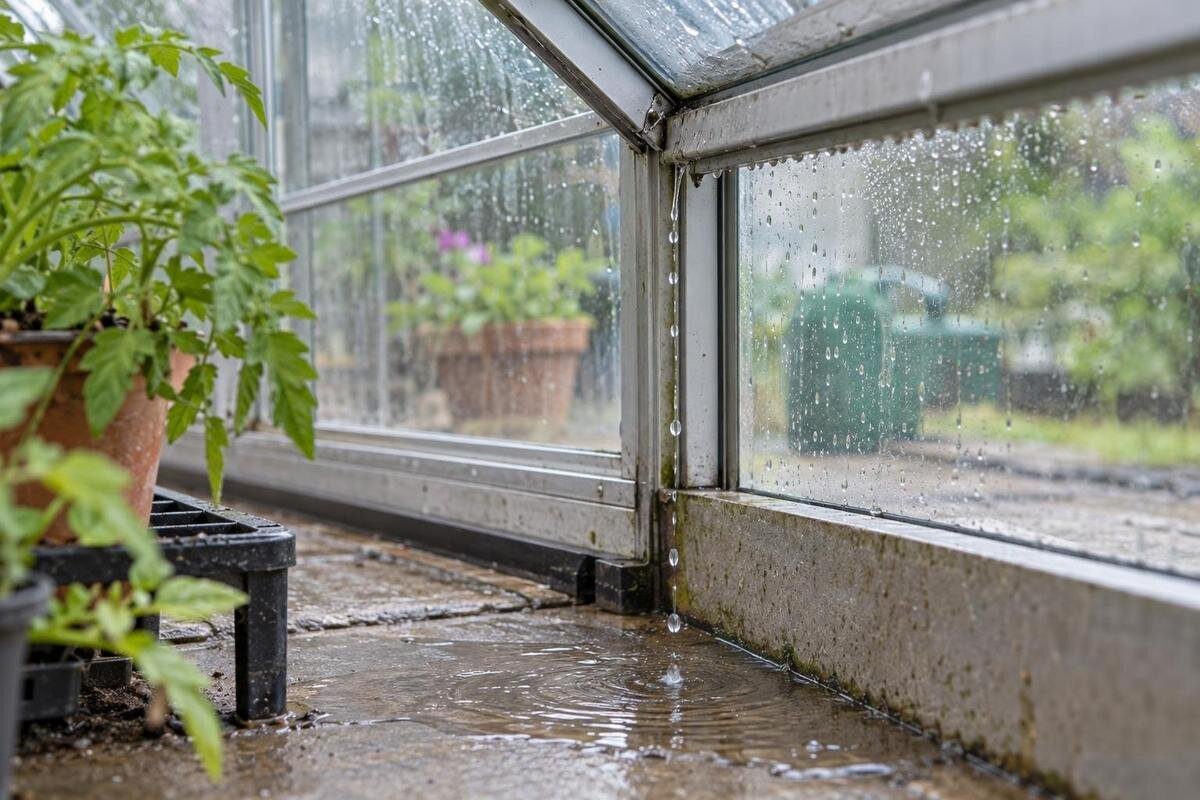
Water on a greenhouse floor is a symptom, not a diagnosis. Rain may enter through the roof or a junction; surface runoff or saturated soil may wet the base; and condensation inside can collect on glazing before dripping down. By the time it forms a puddle, water may have travelled from its starting point. Record where moisture first appears and what was happening, then compare observations during natural rainfall, on a dry day and after the interior cools. This sequence helps narrow the cause without climbing on the structure or removing glazing.

Details to record 1
Record when and where the moisture first appears
At the first sign of moisture, note the date and time, recent rainfall, wind, watering or misting, and whether doors and vents were open. Record if plants had just been watered, wet pots or tools were brought in, or condensation had formed on the glazing. Take a wide photo and a close one before wiping, if you can do so safely; include a fixed reference such as a corner or doorway so you can compare the same patch later. If water needs clearing to prevent a slip, document it first and note what you moved.
Draw a rough plan of the greenhouse and mark the door, vents, roof faces, glazing joints, base and any wall it meets. Give each wet patch a simple label so your photographs and notes refer to the same location. Keep overhead drips, dampness at the perimeter and droplets on glazing as separate observations, and indicate which appeared first. Distinguish a point you actually saw becoming wet from an area that was already wet when you arrived; the latter cannot establish the starting point. Record the maker, exact model name and any code from paperwork or a product label. The Aluminium Classic Greenhouse product page can help you recognise a catalogue name, but identification for a parts enquiry needs to be tied to your installed unit.
Compare the wetness with rainfall
Use natural rainfall for your first comparison rather than creating a test with a hose. If practical, note which surfaces are dry beforehand, then check from inside during and after rain. Record when moisture first appears, how long it takes to show, and whether it continues after the rain has stopped. Wind direction can matter because rain may reach a different side in windy conditions. Timing is a clue, not proof: water can travel across the ground as well as enter above.
Mark the first new drip or damp area on your plan, not just the place where water eventually pools. Note the roof face, nearby joint or frame member and whether the wet area changes as rainfall continues. For a greenhouse identified as an Oasis Pyramid Greenhouse, label the actual roof faces on your sketch so there is no doubt about which side you mean. Use a doorway or another fixed feature as your reference rather than descriptions such as ‘the left side’, which depend on where you are standing. Record the order of events: rain starts, a joint becomes wet, a drip forms, then a puddle spreads. If you miss part of that sequence, leave it unknown rather than filling in an assumed route.
Details to record 2
Trace a possible entry point in the roof
From a safe position inside, watch for the first visible trace rather than assuming the drip on the floor marks the entry point. Water may run along a frame before it falls. Note whether moisture appears at a glazing edge, ridge, eaves, vent, door header or another joint, and photograph any new run mark without pressing the glazing or its seals. An old stain may record an earlier event, so distinguish it from fresh moisture that forms during the current rainfall.
If the greenhouse meets a building wall, record the wall-to-frame junction separately. Note whether dampness appears on the wall, on the greenhouse side or below the join; nearby building runoff may also reach that area. For an Aluminium Wall Greenhouse, make the adjoining wall a separate part of your sketch rather than treating every wet mark there as roof entry. Photograph the wider junction as well as the wet point so someone reviewing the image can see its position. If you cannot see where a trail begins, record only the visible portion and where it disappears from view. Avoid applying sealant or pushing glazing back into place; use model-specific instructions and get installer advice where needed.
Inspect the exterior without disturbing the glazing
Once the weather has passed, look at the roof from the ground if you have a clear, safe view. Note visible damage, a gap, debris or water marks, but do not climb onto the greenhouse, lean a ladder against it, remove glazing or force a vent. If glass appears cracked or loose, keep clear and arrange an appropriate assessment rather than trying to handle it. A mark can help locate an area for further inspection, but it does not confirm the cause.
At ground level, note whether water may be reaching the greenhouse from a nearby roof, gutter, spouting or downpipe. An overflowing channel or a wet trail can point towards runoff rather than a roof leak. Include the surrounding area in a photograph so the possible source and the greenhouse are visible together. Separate what you observed during rain from what you found afterwards: a damp trail records a location, but not necessarily the direction water travelled. Do not make changes above shoulder height or alter a drainage route as a test. If a seal or panel appears damaged, describe its position and visible condition for a parts enquiry. For a Limited Edition Aluminium Greenhouse, include the unit’s identifying details as well as the catalogue name, so the enquiry concerns the correct component.

Details to record 3
Look for water entering around the base
A wet edge, damp patch at a low corner or water appearing at floor level after rain may point to moisture around the base. Note whether the perimeter becomes wet before the middle of the floor, and whether the damp area follows one side or several. Water can spread across a floor or along its edge before it collects, so the lowest or largest puddle may not show where it began. Compare the indoor pattern with conditions outside.
From the ground, observe the soil, paving and surface flow around the perimeter, including nearby irrigation and downpipes. Record whether water runs towards the greenhouse or whether the ground stays damp after rainfall has stopped. Compare the outside and inside of the same corner, using your plan to match the locations. If the outside was already wet before your inspection, say so; that is different from watching water arrive there. Keep a note of any perimeter sections that remain dry, as these help define the extent of the problem. Do not dig, lift the base or try to regrade the site as a diagnostic test. If discussing a Prestige Greenhouse with Metal Foundation, describe the installed base and surrounding ground separately from the product name; the enquiry needs to address the conditions at your site.
Check for watering, splashes and spills
On a dry day, check for other sources before concluding that the enclosure is leaking. Watering cans, hoses, irrigation connections, overflowing plant trays, floor cleaning and wet equipment can all leave moisture inside or beside a greenhouse. Note whether the wet patch appears after one of these activities, and whether it starts near the equipment or plants. If practical, compare a day when watering has occurred with a dry period when it has not.
Check containers, trays and visible hose connections without dismantling anything. Follow your normal watering activity in the notes: where water was carried, which plants were watered and whether any trays overflowed. This makes a comparison more useful than simply recording ‘watering day’. If containers or equipment have been moved, mark their earlier positions so the wet patch can still be understood. For a Limited Edition greenhouse with built-in storage, include the storage area in the plan if wet equipment was placed there, without assuming that the structure caused the moisture. Keep observed spills separate from unexplained dampness. A known spill may account for one patch while another still needs comparison with rainfall or condensation.
Details to record 4
Recognise condensation on the inside
Condensation often appears as droplets or a fine film across several parts of the inside glazing, rather than as a single new mark at one joint during rain. It can form when moist air inside meets a cooler surface, then gather and drip onto plants, benches or the floor. Check whether droplets are on the interior face, and note whether they appear after a cool night or in dry weather. Do not assume that a damp floor must have come through the roof.
Choose a small, safe-to-reach area of interior glazing to observe alongside the surrounding surface. Record whether moisture is spread across the pane or whether fresh water appears at one specific point, and whether neighbouring panes show a similar pattern. You do not need to wipe every surface to make this comparison; a clear note about where droplets are present is more useful than disturbing the whole pattern. Do not touch a cracked pane or reach above a safe height. Keep rain-linked drips in a separate entry, since condensation and a leak can occur together. If you are also comparing replacement options, such as the Bloomcabin Orangerie, use these observations to explain the problem you want addressed. A change of model should not be treated as a remedy for condensation without considering the indoor conditions already recorded.
Record indoor conditions and ventilation
Alongside the weather, note what was happening inside when the moisture formed: recent watering, damp soil or equipment, and whether doors or vents were open. These details help explain why droplets may form on a dry day, or why condensation may be more noticeable at one time than another. Change only one controllable factor at a time when comparing observations; otherwise, it becomes difficult to tell which change affected the pattern.
Use the instructions for your exact model when checking how its vents are meant to operate. For a T-Model Orangery Greenhouse, match the catalogue name with the code on your manual or paperwork before asking about a vent component. In your observation log, record the actual position of each door or vent rather than simply writing ‘ventilated’. If you compare different opening arrangements, note what changed and keep the other recorded conditions as consistent as practical. An observation made after several changes cannot tell you which one mattered. Do not close vents permanently or alter fittings simply to hide visible droplets. Keep this comparison focused on indoor moisture, with rainfall observations recorded separately.

Details to record 5
Repeat the observation before choosing a repair
A single wet day may not show the full pattern. When practical, compare more than one natural rainfall event and a dry period, using the same plan each time. Before each observation, note the weather and the condition of the same indoor surfaces. Give each event its own dated entry so an old stain is not mistaken for a new trail. Compare equivalent locations, but do not expect different weather to produce identical results. If a previously wet area stays dry, record that too; the absence of moisture is part of the comparison. Keep watering-related wetness separate, rather than changing the watering routine, ventilation and other conditions all at once. The aim is to narrow the possibilities, not to recreate a leak with a hose.
Use the evidence to make a provisional distinction: a new trail during rain may point to entry above; dampness that begins at the perimeter may involve runoff or ground moisture; widespread interior droplets in dry weather may indicate condensation. These are clues for further checking, not final diagnoses, and more than one source can be present. If the pattern is still unclear, or moisture returns after a repair, keep the photos and notes for an installer rather than replacing parts at random.
When to seek parts or installer advice
Stop investigating yourself if glazing is cracked or loose, the frame appears to have shifted, or reaching the suspected area would require climbing or disturbing a panel. Do not pry, drill or apply an unapproved sealant as a trial fix; it may hide the original water path and make later assessment harder. If water reaches powered equipment, do not handle it; seek advice from a qualified professional. A wall junction, persistent base ingress or repeated leak may also need an on-site assessment.
For a parts enquiry, gather the exact model name and code, the relevant manual or parts identifier, a clear photo taken from a safe position, and your sketch showing where moisture first appears. Summarise the observations in order, including rainfall, watering and any separate condensation pattern. State which source you suspect and which details remain uncertain; a concise account of what you saw is more useful than presenting an unconfirmed cause as settled. Mention any previous repair and whether the same wet point returned afterwards. Ask which model-specific component or instructions apply rather than assuming that a similarly named part will fit. If an installer finds that repair is not appropriate, a model upgrade or replacement enquiry can then be considered on the basis of the actual site and condition.
Frequently asked questions
How can I tell whether water is coming through the roof?
Look for the first new moisture during or soon after natural rainfall, then trace any visible run mark back towards a roof edge, glazing joint, vent or frame. A drip on the floor may be some distance from where water entered, so one observation is a clue rather than proof.
Can condensation make a greenhouse floor wet?
Yes. Moisture can form on the inside of cool glazing and drip onto the floor, even when it has not rained. It is more likely to be condensation if droplets cover several interior surfaces or reappear in dry weather, rather than starting at one point during rain.
Why is water collecting around the base?
Rainwater may be running towards the greenhouse, ground beside it may be saturated, or water may be coming from irrigation or another nearby source. Note which side becomes damp first and check the surrounding ground and water flow without digging or changing the base.
Should I hose the roof to find the leak?
Use natural rainfall as your first test. Spraying the roof can send water into places it would not normally reach and may not be safe around glazing. If the source remains unclear, follow the manufacturer’s instructions or ask an installer to assess it.
What should I include in a parts enquiry?
Provide the exact model name and code from your paperwork or label, any part identifier shown in the manual, and a photo or sketch of where the water first appears. Add the timing, recent weather and whether the moisture began at the roof, base or inside surface.
The most useful clue is often the small patch that appeared first, not the largest puddle. Keep roof entry, ground moisture, other water sources and condensation as separate observations, then compare them with weather and indoor conditions. If more than one pattern appears, record both rather than forcing a single explanation. That gives a parts team or installer a clearer starting point and helps avoid replacing the wrong component.
