
Why a Greenhouse Base Must Be Square as Well as Level
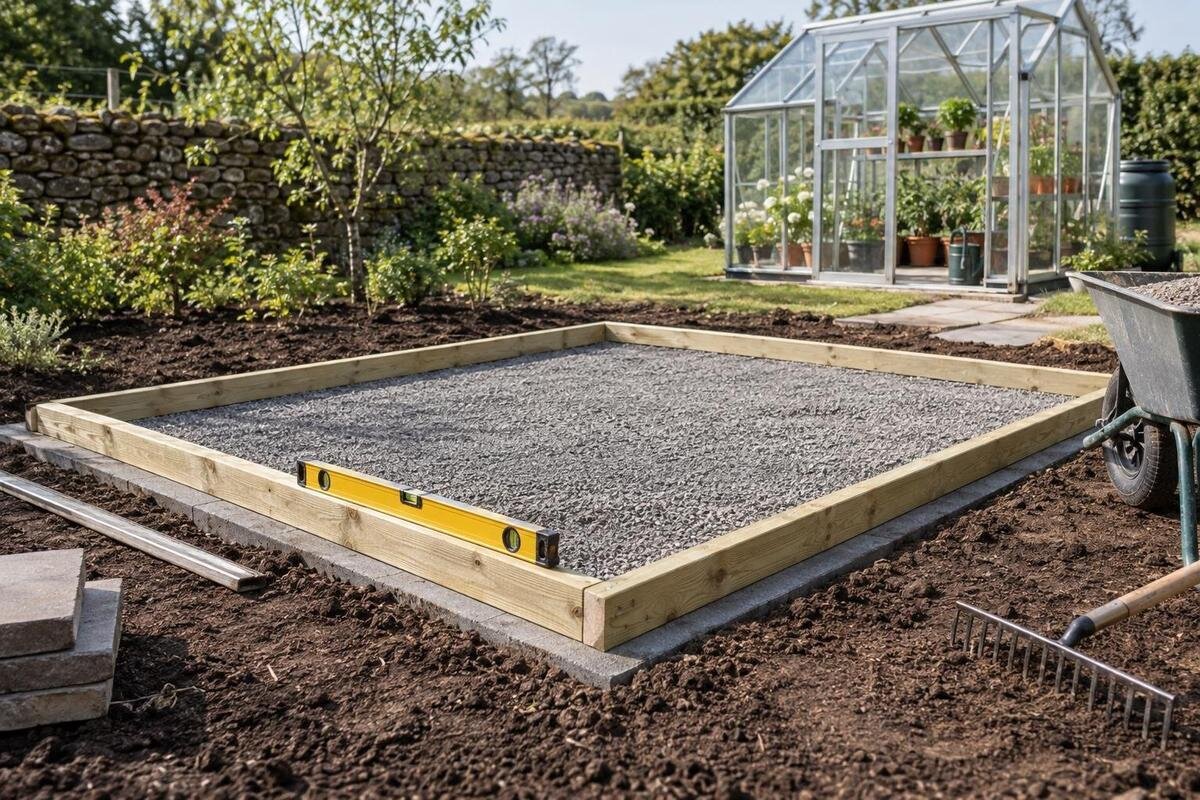
Greenhouse groundwork
A greenhouse base can be level and still be skewed in plan. If the outline is out of square, the frame may not meet its intended corner geometry; if the base is uneven, a correct footprint can still leave supports at different heights. Check both conditions against the manufacturer’s drawing for the exact model before assembly. Diagonal measurements are a useful set-out check for a rectangular footprint, but they are not a universal acceptance test or a substitute for the drawing and an installer’s review.

Level and square are different checks
Level and square describe different things. Level concerns height: the base lines or support surfaces need to sit at the elevation and plane specified for the greenhouse. Square concerns the outline when viewed from above: a rectangular footprint needs the intended side lengths and corners at right angles. Four corners can be at a similar height while the outline has been pushed into a parallelogram. Conversely, the outline can be rectangular while one support point sits too high or low. Looking across the surface, or checking one corner with a level, cannot establish both conditions.
The distinction matters because the greenhouse frame is assembled to its intended geometry and set-out. If the base is not square, its corner positions and fixing lines may be displaced even though they appear level. If it is not level, heights can differ even when the plan measurements are right. Either issue can make the initial assembly harder and complicate the alignment of later parts. Here, square means true to the model’s plan: a rectangular design needs a rectangular footprint, while a non-rectangular design needs to follow its own drawing. It is not a rule that every greenhouse has a four-corner rectangle.
Start with the exact model drawing
Before measuring, get the manufacturer’s base or foundation drawing for the exact greenhouse and configuration you intend to install. A product illustration, overall outside dimensions or a drawing for a similar model may not show the reference lines needed to prepare the base. For a selected product such as a Limited Edition greenhouse with storage, match the model and configuration to its own technical drawing; the product name alone does not define the site set-out. When comparing options, keep the product details and the groundwork measurements separate in your notes. Record which configuration you have chosen beside the drawing reference, rather than leaving the person preparing the base to infer it from a catalogue image. If the order or configuration changes, check whether the drawing you are using still applies before relying on the measurements already marked out.
Look for the points or lines the drawing uses to define the footprint, support edges and fixing positions, along with any stated dimensions or tolerances. A drawing may show overall measurements as well as separate reference points for the base, so do not assume those are interchangeable. If you cannot tell which dimensions matter to the groundwork, ask the supplier or installer before construction starts. Keep the relevant drawing available on site, and note its model or version information on your sketch so measurements are checked against the right plan.
Mark the drawing’s reference points on site
Make a simple plan sketch before setting out the base. Mark each corner or other reference point identified in the drawing, labelling them in order, such as A, B, C and D for a rectangle. Include any extra corners, returns or lines the plan shows; reducing an irregular outline to four points can conceal a mismatch. Record which way the plan faces on site and identify the entry end if it is shown, so the layout is not accidentally rotated or reversed. Use the same labels on the sketch and at the measurement points. A note such as ‘front left’ can become ambiguous when someone approaches from the other end, whereas a clearly marked point A remains identifiable. If you add labels to the site sketch, distinguish them from the drawing’s original labels so the two records remain easy to compare.
Use the same reference points for every measurement. The drawing may define a point at a centreline, a fixing position or a particular edge; measuring one diagonal to an outside face and the other to an inside face gives an inconsistent comparison. This applies when setting out a Bloomcabin Prestige Greenhouse too: follow the reference points in the drawing for the selected model rather than choosing whichever edges are easiest to reach. Ask the installer to clarify any point that is not clear before marking or changing the base.
How to measure the two diagonals
For a rectangular plan labelled A, B, C and D in order around the perimeter, one diagonal runs from A to C and the other from B to D. Measure between the drawing-defined points, not along the perimeter. Keep the tape measure straight and use the same method to locate the endpoints for both readings. If one person cannot hold the tape securely at both ends, ask someone to help rather than estimating a corner position. Write each reading next to its diagonal on the sketch, so the figures cannot be confused. Record the units as well as the number, and identify the readings as A–C and B–D rather than simply ‘first’ and ‘second’. If you repeat a reading, retain both values until you have resolved any difference. That makes it easier to distinguish an inconsistent measurement from a consistent difference between the two diagonals.
Repeat the measurements to check that the endpoints and reading method are consistent. If the base is uneven or an obstruction prevents a direct, comparable measurement, ask the installer to choose a suitable way to check it rather than interpreting unlike readings. For a chosen Spacious Greenhouse, use the plan for that exact model when identifying which points to compare. On a rectangular footprint, matching diagonals are a useful cross-check; they are not a universal pass test, and the drawing’s dimensions and corner geometry still matter.

Check side lengths as well as diagonals
Diagonal readings do not tell you whether the base has the correct overall size. Compare each specified side or set-out distance with the drawing, using the same reference points as the diagonal check. A smaller or larger rectangle can still have matching diagonals, so equality does not show that the greenhouse footprint has the dimensions required for the selected model. Also check that the corners sit in the intended positions, not merely that the two diagonal numbers look alike. On your sketch, place the required dimension and the measured dimension beside the relevant side, keeping them clearly labelled. Do not reduce the record to a single overall length and width if the drawing specifies separate distances. Recording each requested measurement gives the installer a clearer basis for reviewing the outline than a general note that the base is the right size.
The plan shape matters as much as the measurements. Equal diagonals by themselves do not prove that an arbitrary four-sided outline has right-angle corners. Check any right-angle marks, offsets or other relationships given in the drawing, and follow all of its reference points. If you are checking an Aluminium Classic Greenhouse, use the technical drawing for the chosen model rather than assuming a product-family name specifies one footprint. Ask the installer how to assess any part of the plan that is not dimensioned clearly.
Check level at the support points
Once the plan geometry has been checked, assess height separately at the support points and lines identified in the drawing. Use a suitable level-measuring method and check the locations the installer or manufacturer specifies; checking only the four corners may miss a high or low point between them. Record individual readings or observations rather than averaging them into one figure, because an average can hide a local difference that matters to the set-out. Identify each checked location on the sketch so a comment such as ‘high point’ refers to a particular place, not the whole base. Keep numerical height readings separate from visual observations, and note the method used. If part of a support line could not be checked, record that gap rather than treating the completed checks elsewhere as confirmation of the entire surface.
Use the drawing to establish the intended plane and any permitted variation; this article cannot supply a universal level tolerance. Keep the plan measurements and height check distinct in your notes. If levelling work changes a corner or support line, recheck the footprint as well as the level. For a Lean-to Greenhouse, use the exact model’s instructions and drawing to establish the relevant base references; do not assume another greenhouse’s simple rectangular set-out applies.
How a distorted base can affect assembly
A frame designed for a particular footprint may be difficult to assemble if its base is skewed. Corner parts or fixing positions may not line up as intended, and the frame can be pulled out of shape when someone tries to bring the sides together. Depending on the model and the amount of distortion, later parts such as glazing, doors or vents may also be harder to align or operate. These are possible signs of a fit problem, not a way to diagnose its cause: an incorrectly identified component or an assembly issue can also affect alignment. Describe the actual mismatch when raising it with the installer. Note which parts do not meet and at what stage the problem appeared, rather than labelling every difficulty as an out-of-square base. This keeps the assembly observations distinct from the base measurements and avoids assuming a cause before both have been reviewed.
If holes or parts do not meet as the instructions show, pause and compare the assembly with the drawing and the recorded base measurements. Do not force fixings, shift parts or alter the frame to make it compensate for a suspected set-out error unless the manufacturer or installer approves that approach. Use the instructions for the selected greenhouse, whether you choose a Limited Edition Aluminium Greenhouse or another model. Resolving a base discrepancy before assembly avoids adding the frame as another variable.
An inspection process to agree with your installer
Agree the inspection method with the installer before the greenhouse is assembled. For a rectangular outline, an example is to review the exact model drawing together, mark its four reference points A to D, then check the specified side dimensions, corner positions and level at the points shown. Measure A to C and B to D between the marked corner references, record both readings, and compare them with the drawing and any stated tolerance. If the drawing does not give a tolerance or the measurements are unclear, ask the installer to obtain guidance rather than inventing an acceptable margin. During that review, separate the measurements you have completed from the conclusions that still need the installer’s judgement. For example, a sketch can show two recorded diagonal values without declaring the base acceptable. Ask the installer to identify any remaining check and record the outcome alongside the measurements, so the handover does not leave an unanswered question disguised as a completed inspection.
Make the record useful to the person reviewing it: note the model and drawing reference, label the measurements on the sketch, and take photos that show the endpoints and tape placement. If different people prepared the base and will assemble the greenhouse, agree who reviews the result and who can authorise any correction. Bring the plan for the exact unit, such as the T-Model Orangery Greenhouse, into that discussion. This is an example process to agree with an installer, not a universal inspection or a claim that any particular base has passed.

What to do when measurements disagree
If the diagonals differ, first check that both were measured from the correct drawing-defined points and in the same way. Confirm that the tape was straight, that the endpoint marks were not confused, and that the side measurements and level observations were recorded separately. Then ask the installer to compare the full set of results with the plan. A repeated difference may indicate that the set-out needs review, but a diagonal reading by itself does not identify the cause or show which point should move.
Do not shift a corner by eye, add packing or change a fixing line based only on the diagonal figures. Let the installer decide whether the issue is a measurement error, a layout difference or something that needs the manufacturer’s input. If any adjustment is made, repeat the relevant side, diagonal and level checks and record the new results before assembly. A name such as Pyramid Greenhouse is not enough to infer its plan shape: use the drawing to establish which dimensions and reference points apply.
Record the check and repeat it after changes
Keep a short handover record with the greenhouse model, drawing reference, labelled sketch, side dimensions, diagonal readings and level observations. Note how the measurements were taken and record any point that the installer asked you to recheck. Date the record and distinguish the initial measurements from readings taken after a correction. Keep earlier values identifiable as superseded rather than leaving several unlabelled sets of figures on the same sketch. Where a question remains open, note what it concerns and who is reviewing it; do not replace it with a broad tick beside ‘base checked’. This information helps the person assembling the greenhouse distinguish a confirmed set-out from a visual estimate and makes it clearer which measurements describe the current base.
Repeat the relevant checks if work changes the base after it has been inspected, or if the installer identifies a reason to review the set-out again. A previous reading describes the base as it was at that time, not necessarily after later work or an adjustment. Before assembly begins, compare the current base with the same model-specific drawing and confirm that outstanding questions have been resolved. The useful handover is a set of traceable measurements and an installer’s review, not simply a note that the base looked level.
Frequently asked questions
Can a greenhouse base be level but out of square?
Yes. Level describes height; square describes the footprint’s shape. The corners of a skewed base can sit at similar heights, while the sides still do not meet at the intended angles. Check height and plan geometry separately.
How do I measure greenhouse base diagonals?
Use the exact corner reference points shown on the model’s drawing. On a rectangular outline labelled A, B, C and D, measure A to C and B to D. Locate the endpoints consistently and use the same measurement method for both diagonals, then compare the readings with the drawing and the other set-out measurements.
Do the two diagonal measurements have to be exactly equal?
An ideal rectangle has equal diagonals, but site acceptance depends on the model’s instructions, stated tolerances and measurement method. Do not apply a universal tolerance. Ask the installer or manufacturer how to assess any difference.
Are matching diagonals enough to prove the base is square?
No. Equal diagonals alone do not establish that every four-sided shape has the right geometry, or that the base has the correct dimensions. Check the specified side lengths and corner positions as well, using the exact plan.
Can I pull the greenhouse frame into alignment if it does not fit?
Do not force the frame or use its fixings to compensate for a questionable base. Pause and compare the base, components and instructions with the installer. They can identify what needs checking or correcting before assembly continues.
A sound pre-assembly check confirms both the footprint and its height against the drawing for the greenhouse being installed. On a rectangular layout, measure the two diagonals between the drawing’s corner reference points, and verify the specified side dimensions and corner positions. For any other plan shape, follow its own reference geometry. If measurements disagree, have the installer review and resolve the issue before the frame is assembled.
