
Does Greenhouse Width or Length Add More Useful Space?
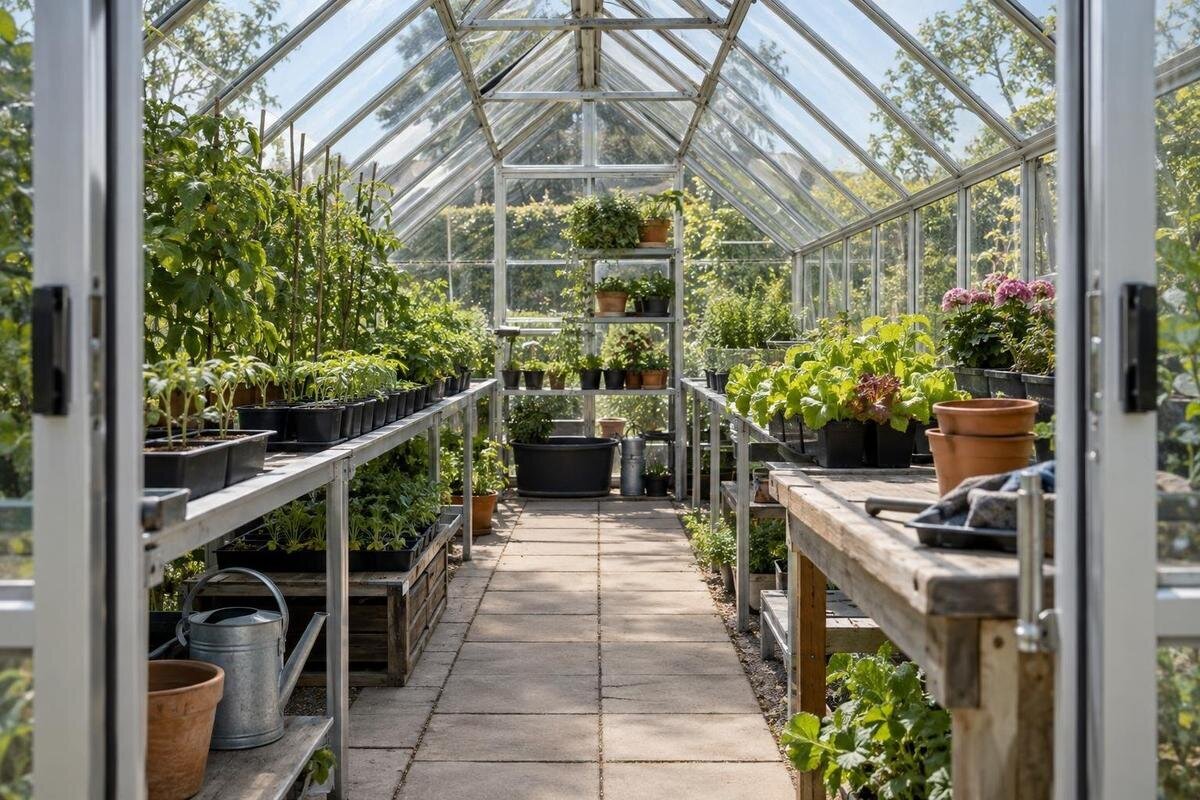
Greenhouse layout guide
Two greenhouses can occupy the same floor area and still feel very different to use. A longer, narrower footprint may suit continuous rows, while a wider, shorter one can make room for parallel growing areas or more convenient access. The better shape is the one that leaves a practical route to every bed and bench, not the one with the larger-looking dimension.

Before comparing models 1
What equal floor area tells you
An equal-area comparison isolates the effect of shape. Floor area is width multiplied by length: illustrative internal rectangles measuring 2 m by 6 m and 3 m by 4 m each make 12 m². These are calculation examples only, not sizes offered in a product range. Use the same kind of measurement for both layouts and hold area constant; otherwise, a change in planting space may come from having more floor as well as a different shape. An external footprint is not interchangeable with clear internal floor dimensions. Frames and the entrance position affect where beds, benches and people can fit. Square metres describe the floor, not how conveniently it can be divided or reached. Keep width and length beside each sketch so the comparison does not collapse back into area alone.
Draw both rectangles at the same scale, then mark the door, routes, beds and fixed work surfaces. Compare what remains after these uses have been allocated. A path is useful working space, but cannot also be counted as a growing bed; a bench can support potting while still occupying a defined footprint. The Oasis Pyramid Greenhouse listing gives an area range from 5.53 m² to 18.9 m². That range alone does not reveal the proportions or clear internal dimensions of the version you are considering. Note any leftover strip that is too narrow to work from, rather than counting it as another bed. Check the dimensioned drawing for the exact option, or request it if it is not shown, instead of inferring the layout from area. Oasis Pyramid Greenhouse range
What extra width can make possible
Width determines how many beds, benches and paths can fit side by side between the walls. It may let you move from one central path with a bed on either side to a layout with another reachable growing strip, a central bed accessed from both sides, or a separate potting space. The benefit is not simply that the room feels more open; it is the extra arrangement the width makes possible. A small increase may change nothing until there is enough clearance for another bed and route, while a larger increase may change the whole layout. If the current problem is reaching a bed, standing at a bench or turning with a tray, extra width can address it.
Extra width creates a reach question as well. A broad bed reached only from its edges can leave the middle awkward to tend; divide it with a path or keep its depth within a comfortable reach for the people who will use it. Decide whether the added band is for cultivation, a work surface or passing space; it cannot do all three at once. The Limited Edition Aluminium Greenhouses with Storage listing gives an area range from 5.52 m² to 28.08 m². If storage is part of your plan, mark it separately rather than counting the same patch as both storage and a bed. The area range does not state the clear width of your chosen model, so check its dimensioned plan. Limited Edition Aluminium Greenhouses with Storage
Before comparing models 2
When extra length is more useful
Length adds space along existing beds and paths. If a long bed or bench already fits the usable width, a longer footprint can extend that run without changing the arrangement across the room. That can suit a continuous planting row, a sequence of sowing, potting and growing zones, or a separate staging area near one end. It is easier to plan repeated work along a straight line when there is a clear aisle alongside it. But additional length does not create room for a parallel bed or a passing space; those need enough width and access. If the existing layout is already too narrow to work in comfortably, making the room longer will repeat the same limitation. Extra length can be useful where the available site width is fixed.
A longer room can also lengthen routine trips. With one entrance at a short end, you may walk the full length to water, inspect or harvest plants at the back; carrying tools or a filled container makes that distance more noticeable. Keep the far end available for turning or a useful workstation, rather than letting a bench close the route. Treat another door or side entry as available only if the selected configuration actually includes it. The Prestige Greenhouse listing spans 3.77 m² to 28.08 m², but area does not tell you whether the selected footprint is long, wide or easy to traverse. Compare the exact dimensions and door positions. Prestige Greenhouse options
Plan doors and paths before beds
Place doors and routes before beds. Entry position determines where a continuous path begins, where you must turn and which bed edges you can reach without stepping over plants. In a narrow, long plan the main route may run along the length; a wider shape may permit a cross-route as well, provided beds do not close it off. Draw the door opening and its swing or track area as shown for the chosen design, not as a blank gap. Check how the route connects to the work surface, and whether a cross-aisle is needed to reach both ends of a bed. A plan that looks clear on an empty rectangle can be blocked by an open door or stored tray.
Test the route by following an ordinary job on paper: carry a seed tray in, set it on the intended work surface, reach each bed, then leave with a harvest container. Mark where a watering can, bucket or rubbish tub will sit; small items can narrow a passage that looked generous in the plan. Think about turning at the far end, and whether you need to move a pot or bench each time you pass. Count a second entrance only if that door is included in the model you are comparing. The Spacious Greenhouse page lists an area range from 47 m² to 70 m²; a large total still needs a route between entrances and work zones. Spacious Greenhouse range

Before comparing models 3
How beds and benches use floor space
Beds and benches show why equal footprints may work differently. A side bed uses one strip; a central bed can create another growing strip but needs access on both sides if you expect to tend it from either edge. Extra width may allow parallel beds with routes, while extra length usually extends a row or bench already in the plan. Pots can be moved, but standing room to water, inspect or lift them still needs to be drawn. Include bed edging and the space occupied by containers; do not measure only the soil surface. If you plan to change the layout seasonally, sketch both the fixed and rearranged versions.
Separate permanent features from movable ones. Mark posts, fixed storage and the usual potting surface first; then show movable benches or pots in the positions they occupy during work, as well as where they are parked. This prevents an apparent advantage from disappearing when the route is blocked: a long layout may give a continuous bench run, whereas a broader one may make two accessible rows possible. A bench that moves still needs a clear place to go during the task. The Aluminium Greenhouses listing states an area range from 3.77 m² to 28.08 m². Use it as a range only; inspect the exact configuration’s dimensions before assigning space to beds or benches. Aluminium Greenhouses
Match the layout to the crops
Plan around mature plant space and the jobs each crop demands, rather than counting pots against bare floor. Compact seedlings and pots can be grouped for one stage of the season; plants that spread, climb or need repeated tying require a different shape of accessible space. A long row can make a continuous planting line easy to follow, but every plant along it must remain reachable from the route. More width can let you separate crop groups or approach a bed from two sides. Neither dimension guarantees a higher plant count: spacing, supports and paths determine how much of the outline is actually available. The best shape depends on the plants you intend to grow, not a generic capacity figure.
On a paper plan, draw each bed as a block and label its crop group, expected spread and work access. Leave a route for watering, tying, inspecting and harvesting; extending a bed does not help if you cannot reach its far edge. Use plant labels or dependable growing guidance for spacing and mature size of the varieties you plan to grow, then test the plan at the busiest stage of the season. A greenhouse used for trays in spring may later contain larger plants or supports. Compare that later arrangement too, so a shape that fits early propagation does not become difficult to work once the beds are full.
Before comparing models 4
Let the site set practical limits
Available ground often limits one dimension before floor area does. Measure the rectangle that is genuinely available, including the space to approach the entrance and carry items in and out. Check outside dimensions for siting, and clear internal dimensions for the layout; do not assume a footprint that fits tightly leaves room to open doors or reach the outside for routine care. If the site is long and narrow, extra width may be impossible. If it is broad but shallow, extra length may cut across a route or another garden use. Sketch nearby paths and work areas as well as the greenhouse outline before comparing equal-area options.
Consider how the chosen shape relates to nearby walls, fences and existing beds without treating them as usable space automatically. A strip beside a building may restrict movement or access, and a greenhouse intended for a particular installation arrangement should be identified as such in its product information; do not infer suitability just from a narrow outline. The Lean-to Greenhouse listing gives an area range from 3.69 m² to 14.34 m², but that does not establish that a particular model fits your site or that its clear interior matches the gap. Check the exact drawing and intended arrangement before planning the surrounding access. Lean-to Greenhouse
Check the dimensions of the exact model
Area is a useful filter, but proportions need dimensioned evidence. For each candidate, record the selected version’s outside width and length for site planning, then clear internal width and length for beds and routes. A drawing may give overall dimensions without the wall-to-wall clearance that matters where a bench or bed must fit; note both if available. If the outline narrows at the sides or fixed features intrude, check usable floor at those points as well as through the centre. A narrow leftover strip may look like planting area on paper but leave no approach from a path. Record door location and any built-in fittings. If exact internal dimensions are missing, ask the seller rather than estimating them from a product photograph or area total.
Compare like with like: do not set one model’s outside footprint beside another’s clear interior, or use a range that combines several configurations as though it described one size. The Limited Edition Aluminium Greenhouses page lists an area range from 3.77 m² to 28.08 m². That figure is not an internal width-and-length pair for every option. Use the selected model drawing to complete your comparison, and mark any dimensions that still need confirmation. If figures use different reference points, ask which dimensions describe the usable interior. A record of width, length, door position and fixed fittings makes it easier to see whether extra width or length improves the layout. Limited Edition Aluminium Greenhouses

Before comparing models 5
Test the layout against real tasks
Once measurements are clear, draw each interior on squared paper at one scale. Give every plan the same bed depth, bench footprint and chosen path width so shape is the main variable. Then note practical outcomes: how many bed edges can be reached, how long the main route is, whether you can stand at the work surface without blocking passage, and where a tray or bucket can be set down. Use a route that suits your body, equipment and way of working; there is no single aisle figure that makes every greenhouse comfortable. An offcut of cardboard can represent a bench, making the effect of moving it easier to see. If the wider shape needs a different route, make another sketch rather than forcing the same arrangement into both.
Run the same tasks through both drawings, rather than judging them by floor area alone. Follow a route from the entrance to the farthest planting spot, imagine carrying a tray around the corner, and mark where pruning waste or a full harvest container goes. If one layout requires moving a bench every time you water or harvest, record that as a cost in time and effort. The T-Model Orangery Greenhouse listing gives an area range from 16.52 m² to 30 m². For a version you are considering, use its plan for this task-based comparison, tracing the route between your proposed beds and work surfaces. T-Model Orangery Greenhouse
Decide which dimension solves your layout problem
Choose more width when you need another parallel growing strip, access to both sides of a bed, a place for a bench or room to turn without narrowing the route. Choose more length when a continuous row or longer work zone is the priority, the existing width already accommodates paths and beds, and the added distance remains manageable from the entrance. These are tendencies, not rules: a wide but poorly accessed bed can be less useful than a long accessible row, while extra length cannot repair a layout that is too narrow to work in. If width creates another aisle rather than another bed, its gain is access rather than planting capacity.
Check the decision with one final question: after fixing the entrance, route, bed depths and work surfaces, what does the extra dimension let you do that the other shape cannot? If the answer is a distinct task or accessible growing area, it is doing useful work. If both shapes hold the same layout and differ only in unused floor, compare site fit and outside access instead. Record clear dimensions, and keep circulation separate from planted space when judging capacity. This makes the equal-area comparison honest and repeatable, and gives you a clear reason for choosing a wider or longer greenhouse before you settle on a model.
Frequently asked questions
Does a wider greenhouse always hold more plants?
No. Extra width can make a second bed or an access route possible, but that space may instead be needed for turning, benches or comfortable reach. A broad bed that cannot be tended from its edges is not automatically useful growing space. Draw the crop spacing and paths first, then count only accessible bed area.
Is a long, narrow greenhouse a poor choice?
Not necessarily. It can suit a continuous row or a sequence of work areas if the width already allows a clear path and workable beds. Check how far you must walk from the entrance, whether you can reach the far end and turn around there, and whether the route stays open when equipment is in place.
How do I compare two greenhouses with the same floor area?
Use the selected versions’ clear internal width and length, draw both at the same scale, and add the same beds, bench and path to each. Note accessible bed edges, route length, turning space and door position. Compare outside measurements separately when checking whether a greenhouse fits your site.
Should I measure internal or external dimensions?
Use outside dimensions to check that the structure fits the site and leaves approach room. Use clear internal measurements for paths, beds and benches. Confirm that both plans use the same measurement points; a listed area or product photograph cannot show the actual clear width and length. If those figures are missing, request a dimensioned drawing.
What if my site only permits one shape?
Start with the available footprint, entrance position and outside access, then see whether a bed, bench and route fit within it. Choose the most workable layout for that shape rather than forcing a preferred proportion. If leftover floor cannot be reached or used, do not count it as growing capacity.
Equal floor area is only a fair starting point: the useful difference appears after the door, path, beds and bench are drawn. Extra width often creates another accessible arrangement; extra length often extends a row or work zone. Test both with the same measurements and a routine task, then choose the shape that suits your intended work without pretending that every square metre is planted space.
