
Winterising Greenhouse Pipes, Pumps and Tanks
GREENHOUSE WATERING
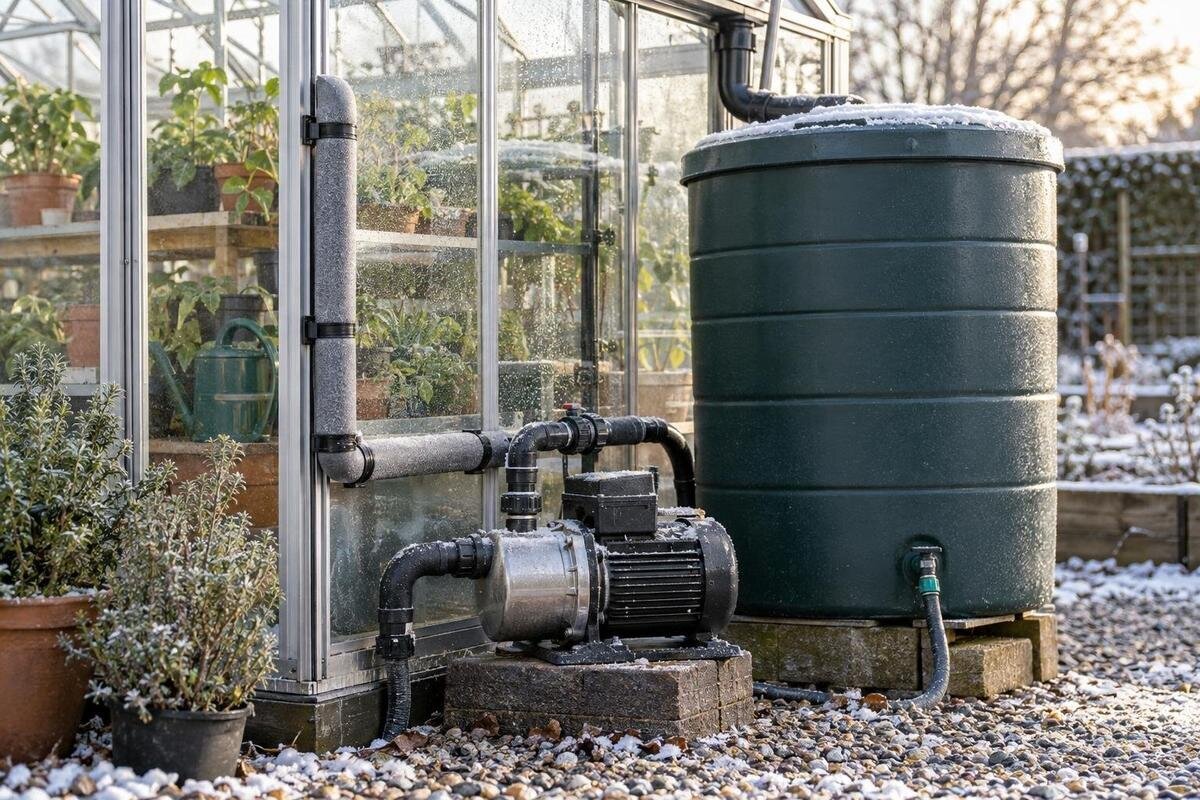
Water trapped in a greenhouse pipe, filter bowl, pump chamber or tank fitting can freeze and damage that component, even when the growing space is enclosed. A reliable winter shutdown is component-specific: decide what can stay in service, what must be drained in place and what should be removed or stored under its maker’s guidance. This guide focuses on pipes, pumps, filters, valves and tanks, rather than general greenhouse winter care, so you can prepare the water system before cold weather reaches your site.

Choose between a shutdown and winter watering
Decide first whether the system will be shut down for the season or must continue supplying plants. A shutdown is practical only if you have another way to meet any remaining watering needs; cold weather does not remove a plant’s need for water. If irrigation continues, use equipment whose instructions allow operation in the conditions at your site. Check the local forecast and the cold spots around the greenhouse, including exposed pipe between the water source and the structure. Shelter can change a component’s exposure, but it does not guarantee that every fitting, pump or water-filled line will remain above freezing. Consider how often crops need water and what alternative is practical before switching off an automatic schedule.
Before cold weather arrives, sort the system into three groups: parts that can stay in service, parts that can be drained in place, and removable parts that need storage. A pump in a sheltered corner may still have exposed inlet or outlet fittings, while a short outside hose can freeze first. If you are planning a Lean-to Greenhouse, include the route from the water source to the growing space in your site plan, rather than treating only the indoor equipment as part of the system. Note which source supplies each branch, so you can isolate the right section without guesswork. Clearly mark any line that must remain in service, so it is not drained by mistake.
Trace the full water route before opening a drain
Trace the full water route on paper, starting at the tap or tank and following the pump, filter, regulator, main line, branch valves and final outlets. Mark shut-offs, unions, end caps, drain points, loops and any low sections. Water can remain in a filter bowl, capped spur, closed valve or sagging tube after the main line appears empty, so a sketch is more useful than relying on memory. Include any timer, automatic valve, bypass or backflow device in the route, without altering its settings. Note which parts are inside, outside, buried or exposed, and photograph connections before removing anything, especially where several similar lines meet.
Use the instructions for each component whose drain method is not obvious, and keep them with the sketch. Mark runs that cannot drain by gravity and identify an accessible service point; do not infer pipe slope just from the ground. When comparing Limited Edition Aluminium Greenhouses, prepare the water-system sketch alongside the proposed layout so you can assess access to drains and connections as well as the route itself. Base the final drawing on the selected site and equipment. Label removable parts and their orientation so you can return each fitting to the correct branch when watering resumes. Record which drain point clears each low section.
Drain pipes and hoses without missing trapped water
When the system is ready to close, shut the water source using its intended control and use designed drains or outlets to empty the main line. Work through each branch, opening only the outlets specified for draining; a single tap at the supply end may leave water behind. Gravity drainage works only where the run can empty and air can enter as the system is designed to allow. A sag, U-shaped loop, uphill section, check valve or closed valve can trap a pocket. Inspect these places rather than assuming an open drain has cleared the circuit. For buried or inaccessible pipe, follow the installer’s guidance instead of cutting into it. Have a suitable container ready for indoor drains so water does not soak stored equipment or leave a slippery floor.
Disconnect accessible garden hoses and removable tubing only at joints intended to come apart. Let each piece drain, keep parts identified, and coil them within the bend limits given for that material; sharp folds or tight coils can deform some tubing. Keep open ends clean while avoiding a cap that traps residual water. For a proposed T-Model Orangery Greenhouse layout, draw the pipe runs and their low points on the site plan, including any removable sections that will need space for draining. Drainage depends on those routes, not simply on the choice of structure. Do not use compressed air as a default clearing method: pressure limits vary, and a forceful blast can damage emitters, filters or fittings.
Prepare the pump according to its design
Pump shutdown is model-specific. Check whether the manual calls for draining a casing, opening a named drain point, removing the pump or leaving it installed in an approved location; do not guess from the pump’s shape. Never run a pump dry to push water out unless its manufacturer explicitly allows that procedure. Stop its operation and follow the stated isolation process before handling it. For hard-wired equipment, or if you cannot confirm safe isolation, use a qualified electrician rather than opening electrical parts yourself. A submersible pump, pressure pump and small inline unit may each have different storage requirements, so one pump’s method is not a reliable template for another.
If the instructions permit removal, drain the pump as specified, protect the inlet and outlet from debris, and store it in the environment the maker recommends. Do not dismantle sealed parts, lubricate components or add antifreeze unless the manual calls for a named procedure. Check the casing, connections and cable for visible damage before storage; a damaged electrical lead needs appropriate professional attention, not tape as a winter fix. Keep drain plugs and screws with the pump, and protect any open port from grit. When planning a Pyramid Greenhouse, allow access to the pump’s service points in the site layout. Check its removal and drainage requirements before settling on a position, so winter maintenance is accounted for from the outset.

Prepare the tank and its outlets for frost
Treat the tank according to its material, design and instructions. An exposed rainwater tank, barrel or smaller supply vessel may have a different freeze tolerance from a tank in a protected service area, so do not assume that emptying, covering or partly filling it is always the right answer. If the maker calls for drainage, empty it through the intended outlet and check the bottom outlet, tap, float valve, inlet and connected pipework for water the main tank drain will not remove. A container that looks empty can still have water in its fittings, where freezing may split a connection. Do not force a seized drain plug; ask the supplier or installer if its removal method is unclear.
If the tank stays in service through winter, confirm that the tank and each exposed outlet are intended for those conditions, and keep the designed overflow clear. Do not alter a rainwater route or block an overflow as a frost measure; water needs its intended path. Where removal is recommended, clean and store the tank only by its maker’s method, and protect openings from dirt. If you are considering Limited Edition Aluminium Greenhouses with Storage, assess the tank’s position separately from storage for smaller removable fittings. The presence of a storage section does not establish that the tank will fit or be protected from frost. Use the actual layout and tank instructions to decide where it belongs.
Winterise filters, valves and controllers individually
Filters and small controls deserve their own drain check. A filter housing can hold water behind its screen or beneath its lid; isolate the system, release any pressure by the maker’s method, then remove and clean the element if permitted. Empty the bowl without forcing it, inspect the seal and housing for cracks, and keep the parts together. Replace a damaged seal only with the specified part. Pressure regulators and check valves can hold water on either side, while a closed valve may isolate a small pocket from the drain. Use designed drain points and do not force a stiff valve with tools; damage can leave it leaking or impossible to operate.
Timed taps, solenoid valves and battery controllers also need model-specific care. Disconnect, remove batteries or store an electronic timer only as its instructions direct; moisture protection and battery handling differ between designs. Do not assume that switching a controller off empties its water passage, or that a shut valve has drained on both sides. On a proposed Bloomcabin Prestige Greenhouse layout, mark where you will access each filter and controller for servicing, not just where the main pipe will run. Keep manuals and small seals in a labelled container, with a note of the component they belong to, so spring assembly does not depend on memory.
Drain drip lines and emitters
Before draining narrow irrigation lines, flush out loose sediment while the system can still supply water, if the crop and equipment instructions permit. Then shut off the source and drain drip tape, laterals, microtubes and short take-offs individually. A main line can look empty while water remains in an emitter body or closed branch, particularly where tubing rises and dips between beds. Remove detachable emitters only if the design allows it; do not pull on a barbed fitting or prise a fixed emitter out simply to speed up winter work. Mark both ends of disconnected tubes so similar branches are not swapped later.
Drain removable hoses and line sections fully, then store them clean and protected from crushing, sharp edges and excessive bends. Do not push wire or a sharp tool into an emitter to clear it; cleaning instructions vary and the opening can be damaged. Avoid using an unapproved liquid to protect a line that will later water crops. When planning irrigation for a Spacious Greenhouse, draw the branches against the intended bench and bed arrangement, then label each line by the area it serves. That layout helps you organise the shutdown, but emitter zones and water pressure still depend on the irrigation equipment. Record both ends of each branch before disconnecting it.
Choose storage for removable components
Storage conditions matter as much as draining. Follow each maker’s requirements for whether a part should be left installed, dried, protected from frost or kept with seals in place; do not assume that every rubber seal or pump component should be dried in the same way. For removable equipment, keep it clean and in a stable, sheltered location where it will not be crushed, contaminated or exposed to direct sun if its materials require protection from UV. Store small connectors, washers and filter elements together, and label containers with the component and its original position. Keep the relevant manuals accessible rather than packing them away with unrelated equipment.
An unheated greenhouse or garden shed may still experience freezing conditions, so judge storage by the maker’s stated limits and the actual space, not by the building’s name. Avoid wrapping wet fittings so tightly that trapped water cannot drain, and do not insulate an installed component in a way that hides leaks or blocks service access. Some systems are designed to remain outdoors, but that needs confirmation for the exact component. While comparing Aluminium Greenhouses, decide where removed watering equipment will be stored and include that location in your plan. Keep storage requirements separate from the growing layout, and leave any installed service point that needs monitoring accessible. Note the valve position specified for winter.

Verify the shutdown before cold weather
Finish with a walk-through from the source to the furthest outlet. Confirm that the supply is shut, every planned drain has stopped flowing, and each low point, filter bowl, pump chamber, valve and tank fitting has been dealt with. Check for unexpected water still escaping from a joint; a leak can signal a valve left open or a part that needs attention. If you cannot identify how a component drains, or the system is tied into fixed plumbing you are not qualified to alter, pause and ask the installer or an irrigation professional. Do not improvise a route through an unknown fitting. Keep the service area visible so a slow leak is easier to notice.
Write down what you drained, removed, stored or left operating, including the position of any valve that the instructions say to leave open or closed. Keep the record with the parts and note the date, local conditions and anything that needs replacement before watering restarts. After a cold snap, look for cracked housings, shifted connections or fresh leaks once conditions allow safe inspection; do not force a frozen fitting or pressurise a component that may have been damaged. A short record is more dependable than trying to reconstruct last season’s shutdown from memory.
Inspect the system before watering resumes
Before switching the system back on, inspect pipes, hoses, pump, filter bowls, valves, tank outlets and removable connectors for cracks, brittle areas, debris or damaged seals. Replace a suspect part with one confirmed as compatible with the exact system instead of forcing a near-fit. Reinstall filters and controls in the orientation shown in the instructions, and prime or prepare the pump using its stated procedure; do not guess at a priming method. Check that drain points and winter caps are in the correct operating position, and reconnect removed components before restoring the supply.
Bring the system back into use in a controlled test rather than leaving it unattended on the first run. Watch joints and tank fittings as water returns, then check each branch and emitter for flow, blockages or uneven delivery. A container placed under a suspect joint can reveal a slow drip while you supervise the test. Confirm that timers and valves respond as intended before relying on an automatic schedule, and correct leaks or unexplained loss of flow before watering beds. Update the sketch with any pipe changes made during winter; that record will make the next shutdown easier.
Frequently asked questions
Will my greenhouse keep irrigation pipes from freezing?
Not reliably. The enclosure may change wind and exposure, but temperatures inside can still fall low enough for water-filled components to freeze. Check conditions at your site, especially around exposed pipe, valves, pump chambers and tank outlets, and follow each component’s winter guidance.
Should I empty a rainwater tank completely?
Only if the tank’s instructions call for it. Design and material matter, and draining the main tank may leave water in outlets, float valves and connected lines. If it stays in use, check that the tank and vulnerable fittings are suitable for the conditions, and keep its intended overflow clear.
Can I use compressed air to clear irrigation pipes?
Not as a default. Compressed air can exceed what a line, filter, valve or emitter can tolerate, and pressure may remain in a closed section. Use it only if the manufacturer provides an approved procedure and limits for your exact system; otherwise, drain through its designed outlets.
Do I need to bring the pump indoors?
That depends on the pump’s instructions and its location. Some pumps need draining or removal; others may remain in place if their design and conditions allow it. Check the pump and connected fittings. For hard-wired equipment or uncertain electrical isolation, use a qualified electrician.
What if I need to keep watering through winter?
Do not shut down a line that plants still rely on without another watering plan. Continue only if the exact system is intended for the conditions at your site, and monitor exposed components. A greenhouse enclosure alone does not make a pump or water-filled line safe from frost.
Winterising works best as a planned system shutdown, not a single drain at the tap. Trace water from source to every branch, prepare each component according to its instructions, and verify the low points, pump, filter and tank fittings individually. Keep a labelled record of what stayed in service and what was removed. When the weather turns cold, that record helps you spot an overlooked pocket; at restart, it guides inspection before the first full watering.
