
Why Does My Automatic Greenhouse Vent Opener Stay Closed?
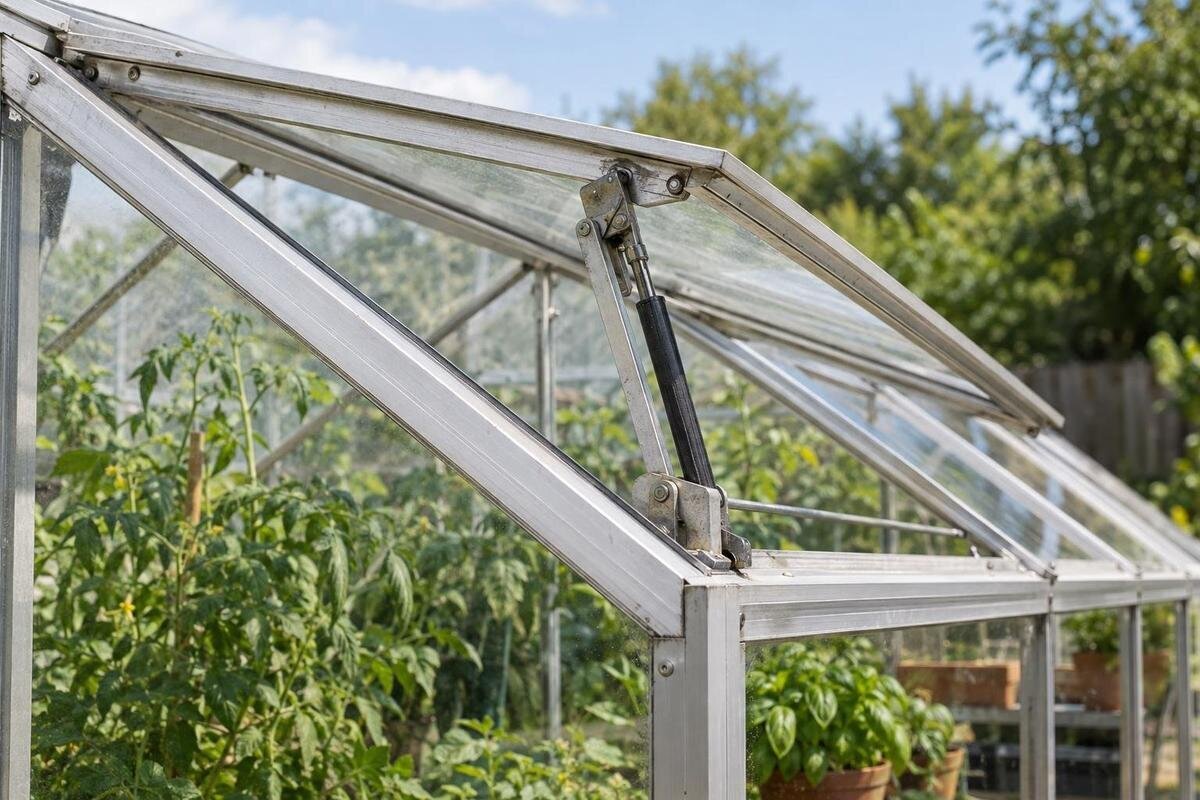
Greenhouse ventilation
A greenhouse vent that stays shut does not, by itself, prove that the automatic opener has failed. A temperature-responsive actuator may not have reached its model-specific opening point; a powered system may have a different control issue. A wrong adjustment, excess drag or load, or a mechanical obstruction can also prevent movement. Start with the exact opener manual and what you can safely observe, not a generic setting or a force test.

First identify the kind of failure
Describe what the opener does before taking anything apart. Does it show no movement, begin moving and stop, move while the vent stays shut, or work only under certain conditions? A vent that remains closed before the manual’s stated opening conditions is not the same problem as a mechanism that fails to travel after those conditions are met. Also identify the operating type: many automatic openers are heat-responsive mechanical devices, while some greenhouse vents use a powered actuator or controller. For a powered system, record the displayed temperature, operating mode, and any error message if those are visible through normal user controls. A controller requesting an opening and a controller making no such request are different symptoms. For a heat-responsive mechanism, the useful starting evidence is the local temperature and visible movement. Do not apply a mechanical opener’s adjustment instructions to a powered system or assume that every automatic vent responds directly to heat.
Keep fingers out of the hinge and linkage path, and do not pry the vent, push down on an actuator, or pull the vent open against resistance. Avoid heating an actuator with a flame, heat gun, hair dryer, or hot water; concentrated heat is not a model-specific test. Do not loosen brackets, disconnect the opener, or open an electrical enclosure unless the manual explicitly gives a safe procedure for owners. If the vent is overhead, unstable, or exposed to wind, limit your checks to observations from a safe position.
Find the exact opener and greenhouse model
Look for the opener’s brand, model number, and any identifying label, then find the manual for that exact version. Check what it says about the opening point, permitted adjustments, mounting position, travel, compatible vent or load, maintenance, and owner-safe tests. Similar-looking openers can have different fittings or adjustment methods. If the label is unreadable or the manual is missing, photograph the unit and ask the supplier, manufacturer, or installer to identify it before trying generic instructions. For a powered model, check indicators or control status only as described in its manual.
Record the greenhouse and vent model separately from the opener. For a Classic aluminum greenhouse, look for the greenhouse’s vent instructions as well as the fitted opener’s manual; the structure’s product name does not identify the actuator. Purchase records may describe the original equipment, while a previous owner or installer may have fitted a replacement. Compare the label on the installed unit with the paperwork rather than assuming they match. Identify which vent stays closed using a repeatable description, such as its position relative to the door. Photograph the complete assembly and then the visible label and brackets from a safe position. This lets a service contact distinguish an equipment-identification problem from a fault and helps prevent ordering a replacement for the wrong installation.
Measure the temperature beside the actuator
For a heat-responsive opener, a reading from the center of the greenhouse may not represent the air around the actuator. Place an independent thermometer in nearby air, at roughly the same height and shade, without touching, covering, or warming the opener. Compare it with a reading from your usual greenhouse location and note the time, sun exposure, and whether a nearby vent or opening is affecting airflow. A sunlit actuator may warm differently from one in shade, and a draft near the opener may make its local reading differ from the rest of the space.
Compare the local reading with the opening point in the exact manual. Note whether the figure refers to the beginning of opening, a closing point, or another stage; some thermostatic units respond gradually or have separate opening and closing behavior. Check the temperature units, too: a value in Celsius cannot be compared directly with a Fahrenheit reading. Do not treat another model’s temperature as a standard or expect instant full travel. Record several observations as conditions change, using any response-time guidance the manufacturer supplies rather than inventing a waiting period. If the documented opening condition has not been reached, a closed vent may be expected. When obtaining operating instructions for a Lean-To Greenhouse, ask which opener manual applies to the actual installation. A greenhouse listing cannot supply the opening threshold, and a temperature measured near a wall or doorway should not replace the reading beside the actuator.
Treat adjustment as model-specific
Some thermostatic openers allow a user to adjust the opening point; others do not. A screw, collar, or fitting may also serve a purpose other than temperature adjustment. Use the exact manual to identify whether adjustment is permitted and which part it applies to. If the instructions allow a change, record the original position and follow the specified increments. Then observe the opener under comparable conditions. Changing a setting repeatedly while the greenhouse is warming makes it harder to tell whether the adjustment helped.
Keep a temperature setting separate from a travel stop or mounting position. Moving a stop or bracket can change how far the vent travels, so do not treat it as a thermostat adjustment unless the manual says to. Before a permitted adjustment, photograph the identified adjustment part and write down its starting position in the terms the manual uses. Keep a record of each change so you can report it or restore the original setting if the instructions allow. For replacement hardware on a Limited Edition greenhouse, request the applicable mounting instructions rather than copying a bracket position from a product photograph. If the installed parts do not match the manual’s diagram, pause and ask for identification. Turning an unfamiliar fitting is not a useful way to discover its function.

Check the vent, latch, and linkage
If the actuator visibly moves but the vent stays shut, inspect the movement path from a safe position. Look for a closed latch or stay, a screen edge or arm catching against the frame, or a vent edge that appears to meet the frame unevenly. These can resist the opener even when its actuator is moving. Notice where the movement seems to stop and whether the contact is on one side or across the vent. Do not reach between the frame and vent or lift against resistance to see whether the linkage will release.
Compare the installed arm and bracket arrangement with the exact manual’s drawing. Look at the attachment locations and the relationship between the arm, vent, and frame, without moving any parts. A close-up may show a contact point but omit the mounting arrangement that helps explain it, so include a wider photograph in a service request. Do not bend an arm, shift a bracket, file a frame, or loosen mounted parts to free the vent. If you need structural drawings for a T-Model Greenhouse Orangery, request those for the specific vent and version you own; a sales image is not an installation diagram. Ask the installer to assess the vent hardware and opener together if the arrangement appears different. A distorted frame, cracked glazing, or loose hinge is a reason to stop.
Check for excess load or a changed setup
An opener is intended for a particular vent and mounting arrangement, and the manual may specify compatible vent sizes or loads. Compare your installed setup with those instructions. Added screens, shade material, clips, security hardware, paint, a plant tie, or a repair can increase drag or weight if attached to moving parts. A hinge that has become stiff or a vent that has shifted can also make movement harder. Do not estimate capacity by pushing on the vent or assume an opener can move any vent that looks similar.
Include any recent change when you ask about a load or fit problem: a new screen, altered mounting, or a different vent can matter even if the opener worked before. Describe where the added item attaches and whether it moves with the vent or remains on the frame. If you have records of a vent replacement, provide its part number rather than estimating its weight. When selecting equipment for a pyramid-type greenhouse, ask the supplier to confirm the actual vent-and-opener pairing; the greenhouse’s name or overall floor area does not establish an actuator rating. Ask whether any proposed accessories change that pairing before buying them. If the manual does not identify a supported arrangement, obtain confirmation for your installed parts. Avoid testing a vent that is weighed down by ice or snow.
Look for visible obstructions without forcing the vent
With the vent closed, look for plant ties, vines, labels, clips, screen edges, shade fabric, twigs, or debris in the accessible movement path. Check for visible contact around the hinge, frame, and linkage, but do not reach over glazing or put a hand beneath a part that could move. A small item near a hinge can restrict travel even when the actuator is responding. If the obstruction is not visible from a safe position, do not try to open the vent just to inspect behind it.
Remove only loose material that is safely accessible and only if the manual allows that kind of routine check. Do not pull off a screen, remove fasteners, or apply lubricant or cleaner unless the opener or greenhouse instructions specify it. If an inspection requires opening the vent or reaching into the mechanism, contact an installer. When planning storage or hanging accessories in a greenhouse with built-in storage, keep their intended locations clear of the vent’s documented movement path. A closed vent alone does not show the space its arm or sash will need when open. Use the appropriate drawings or an installer’s assessment rather than estimating clearance from a product image. A curtain, plant tie, or stored item should not become a new obstruction after the existing fault is resolved.
Use a log to identify a recurring pattern
For an intermittent problem, keep a short record for each occurrence: date and time, temperature beside the actuator, temperature at your usual greenhouse location, vent position, and any movement you could see. Note sun or shade, nearby openings, and recent changes to the vent or hardware. Humidity can be added as context if you already track it, but it is not a substitute for the temperature reading at a heat-responsive opener. Take photographs from the same safe position so you can compare the vent, linkage, and surroundings over time.
Look for patterns rather than diagnosing from one event. If the vent stays closed only when the local reading is below the manual’s opening point, its behavior may be expected. If the same vent repeatedly stalls at one position, a mechanical restriction deserves attention; if the problem began after a change, record what changed. Keep observations from different vents separate, even when their openers look alike. A neighboring vent that opens can be a useful comparison, but it does not prove that both actuators experienced the same temperature or have the same setting. For a Prestige Greenhouse, organize the records by vent location and installed opener, not just by greenhouse model. Include both successful and unsuccessful openings where available. That comparison is more useful than a collection of photographs showing only the closed vent.

Decide whether the opener or vent hardware needs service
Do not replace an opener because it stayed closed once. If the local temperature has not reached the manual’s stated opening point, the observation does not establish a fault. If the actuator moves but the vent binds, focus on the vent, latch, hinge, or linkage rather than assuming the actuator has failed. If the documented conditions are met, the movement path appears clear, and manual-approved checks do not explain the lack of response, contact the manufacturer or a qualified greenhouse installer. For powered systems, limit checks to user-level indicators described in the manual.
Before buying a replacement opener, confirm that it matches the actual vent and mounting arrangement. Use the relevant instructions to check compatibility, permitted load or vent size, travel, and fitting requirements rather than choosing by appearance. Ask whether the proposed replacement includes the necessary brackets and whether existing fittings can be reused; do not assume that a matching-looking cylinder makes the whole assembly interchangeable. If the vent itself needs repair, establish that scope before ordering an actuator. For a wider replacement or expansion project, the large backyard greenhouse listing can help identify the structure being considered, but it does not verify opener compatibility. Request its vent configuration and applicable equipment documentation before selecting controls. Replacing an entire greenhouse is not a diagnostic step for one closed vent; first determine which component actually needs attention.
Know when to stop and ask for hands-on help
Stop inspecting if you find a bent linkage, loose hinge, cracked glazing, a distorted frame, or hardware that shifts when the vent moves. Also stop if access requires climbing, holding up an overhead vent, working in strong wind, or reaching into a pinch point. A damaged or unstable assembly needs assessment, not further temperature adjustment. Contact the greenhouse supplier, opener manufacturer, or a qualified installer and explain any visible damage when arranging the visit. Provide the model labels, photographs, temperature log, and a description of what moves and what remains still.
Do not leave a vent propped open, bypass a latch, or change the opener’s mounting to keep it moving unless the exact manual gives a safe procedure for that action. When arranging service, ask whether the visit will cover the opener, its mounting, and the vent hardware, rather than only replacing the actuator. Explain whether the fault is constant or intermittent and what owner-level checks you have already completed. After any repair, ask which operating observations and maintenance checks are appropriate for the identified equipment. Keep the resulting instructions with your log so a future change in behavior can be compared with the repaired setup.
Frequently asked questions
What temperature should an automatic greenhouse vent opener open at?
There is no single temperature that applies to every opener. Check the opening point and any timing guidance in the manual for your exact model. Compare it with the air temperature beside the actuator, not just a reading from the center of the greenhouse.
Can I turn the adjustment screw to make the vent open sooner?
Only if the manual for your exact opener identifies that part as an adjustment and explains how to change it. Some units are not adjustable, and a screw or bracket may serve another purpose. Record the original position before making a permitted change.
Should I push the vent open by hand to test the opener?
Do not force the vent or actuator against resistance. Follow a manual-approved test procedure if one is provided; otherwise, inspect only what is safely visible and contact the manufacturer or a qualified installer if hands-on testing is needed.
Why does the opener stay closed when the greenhouse feels warm?
The air near the opener can differ from the temperature where you are standing. Shade, direct sun, or a nearby draft may affect the actuator’s local conditions. Measure beside it and compare that reading with the opener’s specified opening point.
What if the actuator moves but the vent does not?
The vent may be caught by a latch, hinge, frame, or linkage, or it may be carrying excess load. Check for visible contact without reaching into the moving parts or forcing them. Stop and seek help if the frame or hardware looks damaged.
A closed vent becomes easier to diagnose when you compare the opener’s exact instructions with the temperature at the actuator, its visible movement, and the vent’s condition. Record those details before changing a permitted setting. If the manual does not match the hardware, the vent binds, or a safe check is not possible, stop and have the opener and vent assessed together.
