
Does Bubble Insulation Help a Glass Greenhouse?
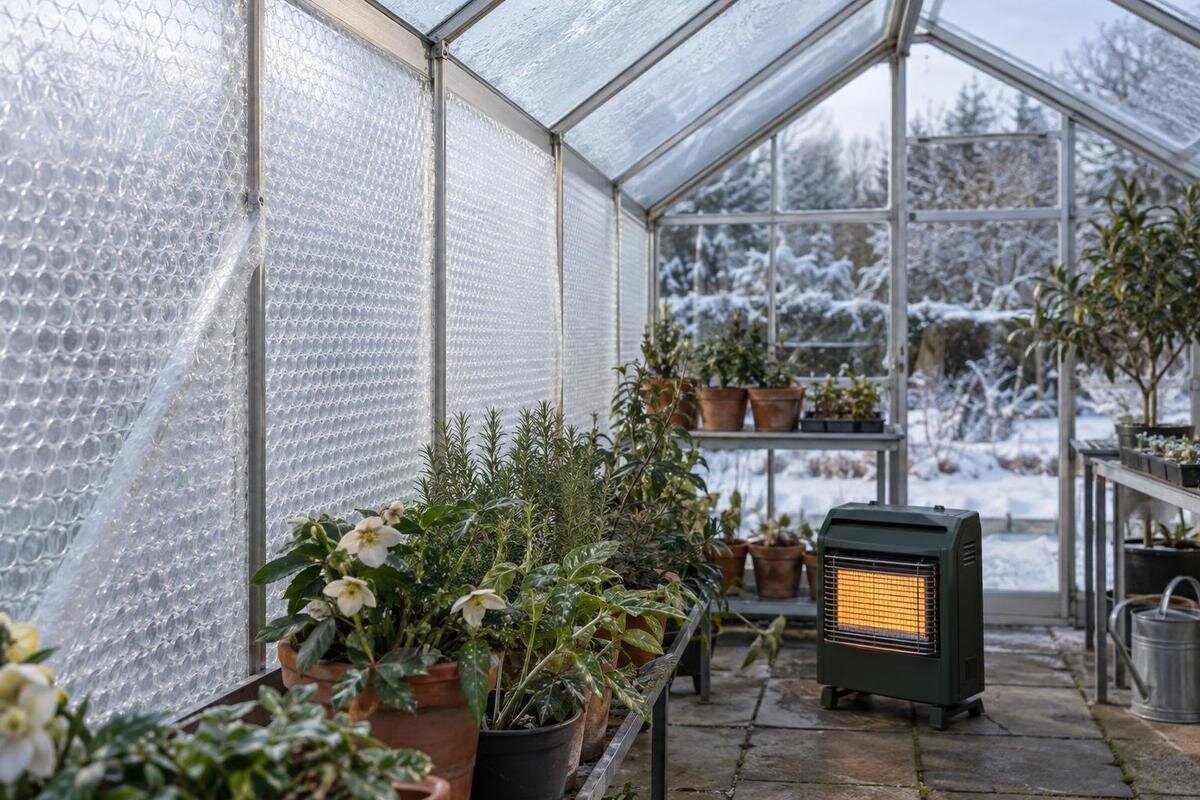
Greenhouse heating and insulation
Bubble insulation can reduce heat escaping through the glass it covers, so it may lower a greenhouse heater’s workload. That does not guarantee a particular temperature or a fixed percentage of energy savings. Results depend on the film, the amount of glazing covered, drafts and framing, local weather, heater controls, and how the comparison is measured. The other side of the decision matters too: extra material in the light path, moisture around the glazing, and a fixing method that must suit the glass and frame.
What bubble insulation can change
Bubble insulation is a film with enclosed air pockets intended to add a layer over greenhouse glazing. On a cold night, heat moves from the warmer interior toward colder outdoors through glass and other parts of the structure. A compatible lining can slow heat transfer across the panes it covers. The effect depends on the film’s construction, how it is held, whether the pockets remain intact, how much glazing is covered, and whether the edges leave gaps. The insulation value applies to the installed arrangement, not just the appearance of the bubbles or the material on a roll. A broad claim about winter protection cannot tell you what your greenhouse will retain.
It does not create heat, fix every leak, or make single glazing behave like a purpose-built insulated wall. Frames, doors, vents, joints, and the base continue to affect heat loss, and uncovered panes remain exposed. A heater may run less only if its controls respond to reduced losses while its settings and use remain comparable. A test result for one film-and-pane assembly will not automatically transfer to another greenhouse or installation. Treat bubble insulation as one possible change to part of the enclosure, not a promise of a chosen overnight temperature or a substitute for a heater with documented specifications.
Estimate glazing area, not just floor area
Heat-loss estimates require more than greenhouse floor area. Note exposed glass on the roof and walls, the frame around it, openable sections, doors, vents, and any opaque wall shared with a building. Identify the glazing from the manufacturer’s documentation rather than judging it by appearance, and mark which panes a liner would cover. If you do not know the assembly’s heat-transfer value, leave it unknown instead of borrowing a number for another glass type. Include your intended indoor temperature and the outdoor conditions relevant to your site when interpreting published figures. This inventory will not produce a certified heat load, but it makes comparison assumptions visible.
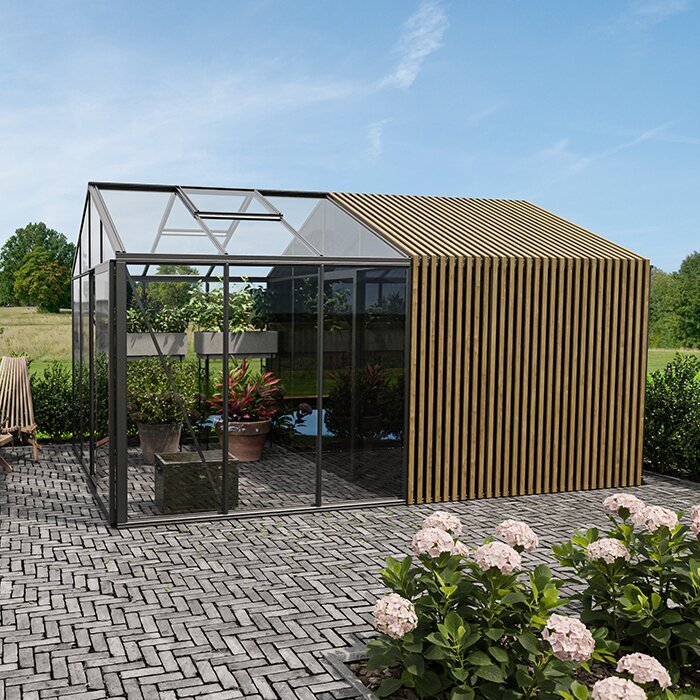
The T-Model Greenhouse Orangery listing covers variants from 178 to 323 sq ft; that footprint range is not a measurement of glazed surface or a heat-loss rating. Use the drawing for the exact version you are assessing. If a supplier gives a thermal value for a film, check whether it describes the film alone or a tested film-and-glazing assembly under stated conditions. Ask for the test report or technical data sheet, including the glazing type, film placement, and any air gap. Also distinguish a reduction in heat transfer through a test panel from a reduction in total greenhouse heating demand. The latter includes losses through other surfaces and air exchange, so the two percentages are not interchangeable. Do not turn a generic figure into a predicted bill reduction when the greenhouse’s glazing, edges, and uncovered surfaces are unknown.
Measure heater use under comparable conditions
Create a baseline before adding film. Keep the thermostat target, vent routine, door use, and plant arrangement as steady as practical; record outdoor and indoor temperatures at the same times, preferably in the area you want to protect, and note when the heater runs. If you can measure actual energy consumption with a suitable meter or the heater’s documented monitoring method, that is more useful than runtime alone. Runtime can mislead when heater input changes, cycling is uneven, or another heat source is active. Note sunlight, wind, and unusual weather too, since they can affect the comparison.
Repeat readings over several comparable cold periods rather than relying on one night or comparing two very different weeks. Match the indoor target and, as closely as practical, outdoor conditions; also record whether vents were opened or sunshine warmed the greenhouse before evening. Use equal-length observation periods and record actual indoor temperatures, not just the thermostat setting. Lower consumption is not evidence of successful insulation if the growing area also became colder. Likewise, when a heater runs continuously and cannot maintain its target, improved heat retention might raise the indoor temperature without reducing energy use. Keep those results separate from tests in which the heater maintained comparable temperatures. The pyramid-type greenhouse range is listed from 60 to 203 sq ft, so a measurement from one size should not be presented as a result for every version or for a different greenhouse. Add one change at a time if possible. If you change the setpoint, heater, and insulation together, you will not know which change affected consumption.
How bubble film affects daylight
Bubble film puts extra material between the sun and plants. Depending on its design, it can reduce transmitted light, scatter it, or do both; haze, dirt, overlap, aging, and multiple layers can change the result. Do not assume that a more diffuse appearance means more total light reaches leaves. The effect may matter most where winter daylight is already limited or where plants occupy the area being covered. A product specification may state light transmission, but compare figures only when the test method and product configuration match. Treat them as product data, not as a measurement of light inside your assembled greenhouse.
For a practical comparison, take readings at the same plant height and location before and after a small trial, at comparable times and under similar sky conditions. A simple lux meter can show relative change at that point, although lux does not directly measure the plant-usable light band as a PAR sensor does. If you already use a PAR meter, record its readings consistently. A single midday reading can miss shading that occurs earlier or later. Sample several positions across the growing area, especially beneath overlaps and near uncovered panes. If your instrument logs readings, comparing daily light totals can reveal changes that a spot reading misses, but changing cloud cover still makes comparisons between days uncertain. The aluminum greenhouse with built-in storage category includes variants from 59.4 to 302 sq ft; plan around the selected layout and crop positions, not the footprint label or a product photo.
Condensation and moisture behind the lining
Bubble insulation does not remove water vapor from greenhouse air. Condensation forms on surfaces that are cool enough relative to the air’s moisture; adding a lining changes the surfaces and air spaces involved, but does not guarantee that condensation will stop. If film is close to the glass, moisture may collect in a narrow gap or remain hidden from view. A wet layer can also be harder to inspect and dry than exposed glazing. The pattern depends on temperature, ventilation, humidity, film spacing, and the glazing arrangement, so check the conditions in your own structure rather than assuming the lining will keep it dry.
After cold, damp weather, look for droplets behind or on the room-facing side of the film, damp edges, blocked drainage paths, or material that has shifted. Follow the film and greenhouse manufacturers’ directions on whether a gap is required and how surfaces should be checked or cleaned. Keep normal ventilation routes usable: wrapping panes is not a reason to leave moisture trapped or to seal a greenhouse indiscriminately. If the lining makes condensation difficult to see, choose a layout that remains inspectable or can be removed for checks.
Choose a fixing method the greenhouse allows
Choose greenhouse insulation whose manufacturer gives instructions for the intended use and exposure; ordinary packing wrap is not automatically a durable glazing product. Check stated compatibility with your glass, frame finish, seals, and cleaning routine, as well as the film’s service conditions. Confirm whether it is meant to sit against glazing or be held with a gap, and how edges should be handled. A claim for the roll by itself does not confirm safe or effective performance once it is attached to a particular greenhouse.
Use only a fixing method allowed by the greenhouse and film instructions. Depending on the design, this may mean approved clips on specified frame members, a manufacturer-supplied channel, or a removable support where permitted. Avoid drilling panes or altering a frame, and do not assume tape or adhesive is harmless to coatings, seals, or finishes; use it only when the manufacturer approves it. The Prestige greenhouse page can identify a candidate model, but its name alone cannot establish a compatible fixing method. Ask the greenhouse supplier or a qualified glazier if the approved attachment is unclear.
Keep vents, doors, and openings clear
Plan the lining around doors, vents, roof vents, louvers, opening arms, and any tracks or handles. Film that slips into a moving part can obstruct operation or tear; a covered vent may be harder to see and use. Keep normal ventilation routes accessible, since insulation does not control humidity or prevent a greenhouse from warming in the sun. Sketch the proposed coverage and mark every opening before cutting film. The finished layout should preserve the operation described in the greenhouse manual, including access needed to inspect panes and frame connections.
Large structures can have many separate openings and long runs of glazing. The large backyard greenhouse listing covers variants from 506 to 753 sq ft, but those footprint figures do not tell you where vents or access points sit in the version you choose. Confirm the exact drawing and leave clear space around moving parts rather than extrapolating from a category image. A design that can be lifted away for access is easier to inspect than a permanent layer that masks a vent, joint, or damaged pane.
Check the rest of the greenhouse envelope
Bubble insulation addresses only the part of the greenhouse it covers. Heat can also escape through frames, doors, panel joints, open vents, and the floor or perimeter; drafts can make gaps noticeable in day-to-day conditions. Inspect seals and closures using the greenhouse maker’s guidance, but do not seal an opening intended for ventilation. If a side wall adjoins a building, the exposed area differs from a freestanding structure. Note what is actually glass, frame, or opaque wall before deciding where a lining might help.
The Classic aluminum greenhouse listing covers variants from 40.6 to 302.3 sq ft, a reminder to work from the selected greenhouse’s drawing rather than a model-family name. Compare the glass area, frame, openings, floor boundary, and positions of the heater and plants for the exact setup. If the most obvious heat loss is a door left ajar or a damaged seal, lining glass will not correct it. Address such issues through the supplier’s approved maintenance guidance before attributing all energy use to glazing.

Compare energy costs with installation costs
Translate measured fuel or electricity use into a cost using the rate that applied during the test period. For electricity, use the variable charge per kWh on your current bill or time-of-use schedule; for another fuel, use the billed unit and price. Keep the period and units consistent before and after insulation. Separate usage-dependent charges from fixed account charges, which generally remain payable even when consumption falls. If rates vary by time of day, a daily energy total alone may not show the cost difference; use interval records where available. State the dates, rate, and measured consumption alongside any reported saving so the result can be interpreted without implying it applies elsewhere. Do not count a lower indoor temperature as a saving if the heater maintained a different target, and distinguish metered consumption from thermostat runtime. A heater’s documented rated input describes its specified power, not how much energy it used across an entire night.
Compare any repeatable reduction with the cost of film, approved clips or supports, labor, inspection, replacement, and seasonal removal or storage. Include the practical value of light lost or growing space made harder to use; those trade-offs are not captured by an energy bill. Avoid assuming a payback period from a cold-week test, because seasonal weather, local tariffs, and heater schedules can differ. Data from a lean-to greenhouse or another attached structure should not be transferred directly to a freestanding one: exposed glass, shared wall, and use conditions may all be different.
Test the fit before covering every pane
Before lining every pane, run a reversible trial to check physical fit, visibility, and moisture behavior. Choose a location where the fixing method is permitted, then inspect the film after damp and cold conditions and confirm that doors and vents still operate. Record light at the intended growing area before and after, using the same position and times. A partial trial can check attachment and local light changes, but it is not a reliable estimate of whole-greenhouse energy savings: unlined panes still contribute to heat loss.
If the trial raises no compatibility or light concerns, expand only as far as the growing plan justifies, then repeat the energy comparison with the same temperature target and monitoring approach. Check the chosen film and structure periodically for loosened edges, visible water, damage, or obscured components, and follow their care instructions. For a candidate such as a Limited Edition aluminum greenhouse, use information for the exact selected version when planning coverage; a category name or image cannot confirm pane layout or attachment approval. Keeping part of the glazing clear may be the better choice when available winter light is the priority.
Frequently asked questions
Will bubble insulation keep a glass greenhouse above freezing?
It may slow heat loss through the glass it covers, but it cannot generate heat or guarantee a temperature. The result depends on the greenhouse, weather, uncovered areas, and heater. Treat insulation as one part of a measured plan, not as frost protection by itself.
How can I tell whether it saves energy?
Compare heater energy use over several similar cold periods, keeping the temperature target and ventilation routine consistent. Record outdoor conditions and, if possible, actual energy consumption. Heater runtime alone is only a rough guide unless you also know how much energy the heater uses while running.
Does bubble insulation reduce greenhouse light?
It adds material between the sun and plants, so it can reduce transmitted light, scatter it, or both. The amount varies by film and installation. Compare product data carefully and, where light matters, check readings at the growing area before and after a trial.
Will bubble insulation prevent condensation?
No. It does not remove moisture from the air, and it can change where condensation forms. Water may collect in a gap or be hidden behind the film. Keep ventilation usable and inspect the glazing and lining after damp, cold weather.
How should I attach bubble insulation to greenhouse glass?
Follow the instructions for the specific film and greenhouse. Use only an approved fixing method, such as compatible clips or a specified channel where permitted. Do not drill glass or assume tape or adhesive is suitable; ask the greenhouse supplier or a qualified glazier if compatibility is unclear.
Bubble insulation can be worthwhile when it reduces heat loss through covered glazing without an unacceptable loss of daylight or added moisture problems. Its value is clearest when repeated measurements show lower energy use at comparable indoor temperatures. A reversible installation lets you adjust coverage as winter light and growing needs change. If the savings are inconsistent—or the light and maintenance trade-offs outweigh them—covering more glass is not automatically better.
