
Choosing a Drip Irrigation System for a Greenhouse
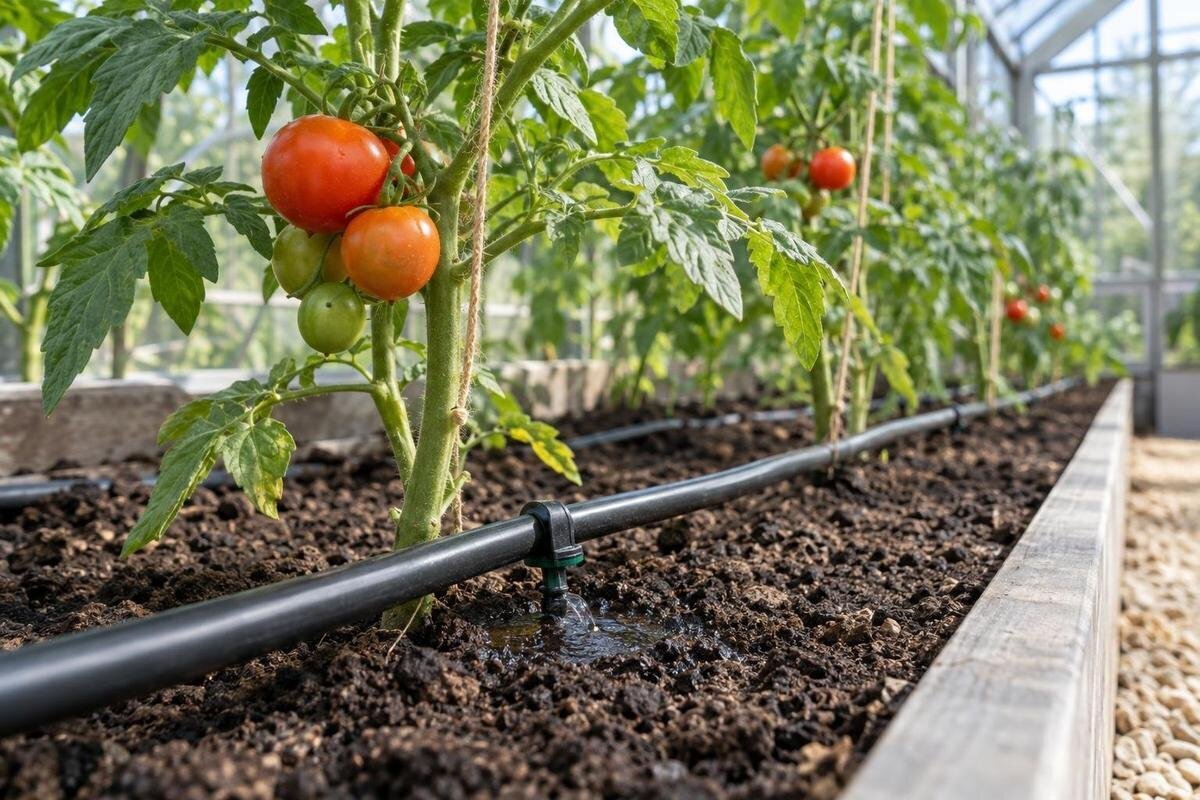
Greenhouse watering
A good greenhouse drip setup delivers water to the root area at a rate the source can support, using components that fit the planting layout and water quality. Choosing one means more than counting emitters: compare pots with beds, select an emitter or dripline, check filtration and pressure requirements, then group plants into zones that can be adjusted independently. This guide focuses on those decisions and on the tests that show whether a layout is working before uneven delivery becomes routine.

Map the planting before you choose a system
Start with a planting map, not a kit’s advertised number of outlets. List what is growing, where it sits, and how it is planted: individual pots, grow bags, benches, or in-ground beds. Note which plants share similar watering needs and which need separate attention. Seedlings in small containers and mature fruiting plants may occupy the same bench but still be poor candidates for one fixed-output branch. Mark the water source, doors, aisles, benches, beds, and spots that must remain accessible for a hose or cart. This drawing gives you a working count of delivery points and a route to plan without treating the greenhouse structure as part of the irrigation system. Also note whether plants are likely to move during the season, since that can change outlet positions and zone membership.
Use the map to decide whether the layout needs individual outlets, continuous rows, or both, and mark which crops belong on independently controlled branches. Measure actual bench and bed runs, not only overall floor area; widths, access paths, and planting density determine how many lines are practical. A product listing can help compare footprints, but it does not describe a watering plan: the Classic aluminum greenhouse range covers versions from 40.6 to 302.3 sq. ft., while the usable growing zones depend on your layout. Leave room on the drawing for a main supply line, valve and filter access, and flushable line ends. A clear plan reduces the chance of ordering the wrong tubing length or routing a line across a walkway.
Match emitter style to the layout
Point-source emitters release water at individual outlets, making them a natural fit for separate pots or widely spaced plants. A small distribution tube can carry water from a mainline to an outlet near a container; check that the tubing, connectors, and emitter are designed to work together. Dripline, by contrast, has emitters built into a lateral at set intervals and may suit planted rows or regularly spaced containers. Its outlet spacing should match the planting pattern closely enough that water reaches the intended root zones. Drip tape is another form of emitter line, but construction and operating requirements vary by product. Do not assume that any tubing with holes is a complete, compatible system.
Compare fixed-flow, adjustable, and pressure-compensating emitters by their stated operating pressure and flow, not by appearance. Adjustable outlets allow individual tuning, but each setting can be disturbed and should be checked. Pressure-compensating models are designed to deliver more consistent output only within the manufacturer’s specified pressure range; they cannot correct a blocked filter, inadequate supply, or a poorly sized mainline. Fixed-output emitters can simplify a uniform planting, but they are less flexible when nearby plants need different amounts. Look for the manufacturer’s guidance on compatible tubing, connectors, filtration, and maximum lateral length, then match those requirements to the map rather than mixing parts by guesswork. If you mix emitter styles, confirm that they share compatible pressure and fitting requirements, or separate them into zones.
Set up drip irrigation for pots and grow bags
Containers concentrate the root zone in a limited volume, so the position and number of outlets matter. One emitter may wet only a narrow patch in a large pot or a medium that spreads water slowly; adding another outlet can improve coverage, but it is not a universal rule. Pot size, growing medium, plant size, emitter flow, and the way water moves through the mix all affect the pattern. Test a representative pot rather than choosing an emitter count from the plant name alone. Run the system, check moisture below the surface and across the root area, and adjust the outlet position or number if the pattern is uneven.
On a long bench, a supply line with short microtubes can give each pot a separate outlet. Dripline can serve a regular row of containers only when its outlet positions line up with the pots. Secure tubing so moving a container does not pull a connector loose, and avoid tight bends that restrict flow. When planning benches for a model in the Lean-To Greenhouse range, allow access to pots at the back as well as those along the aisle. A removable pot should not leave its outlet watering an empty space: use a compatible shutoff or plug as the irrigation manufacturer directs. Place outlets according to the maker’s instructions, and arrange the connections so replacing one container does not disturb its neighbors.
Plan dripline for greenhouse beds
Beds call for a different layout from scattered containers. Map crop rows and root zones, then compare that pattern with the built-in emitter spacing offered for each dripline. A single lateral may wet only part of a broad bed, while extra laterals or another emitter pattern may be needed; the right arrangement depends on soil texture, bed width, plant spacing, and the product’s delivery pattern. Watch where the soil becomes moist after a test run instead of assuming water spreads a fixed distance sideways. Keep lines close enough to the planted row to serve the roots, but out of paths where they are easily stepped on or disturbed during cultivation.
Check the maker’s stated flow, pressure range, emitter spacing, and lateral-length guidance before buying. A short, regular row and a mixed bed are not interchangeable just because they cover a similar area; separate crops with substantially different watering needs so one valve does not force a compromise. For a model in the Limited Edition aluminum greenhouse range, sketch the proposed beds within the selected footprint, including space for reaching their centers. Keep fittings and row ends accessible for flushing and repairs. If crops rotate, decide whether laterals will stay in place or move with the rows. Reusable fittings may make seasonal changes easier, but verify which connections can be disconnected and which require replacement rather than assuming every fitting is reusable.

Choose filtration for the water source
Drip emitters can have small water passages, so suspended particles are a common cause of reduced or uneven delivery. Choose a filter based on the emitter manufacturer’s required filtration rating and the water source, not on a generic promise that one filter suits every greenhouse. Municipal supply, a well, and stored rainwater can present different debris concerns. If the source carries visible sediment or organic matter, account for it before selecting a screen or disc filter; filter types capture particles differently and have their own cleaning needs. An inlet strainer may catch larger debris, but it is not automatically an adequate emitter filter.
Install the filter where the system instructions specify, upstream of the lines it protects, and leave enough access to inspect and clean it. A filter that is hard to reach is likely to be neglected; check how it opens and how often the manufacturer recommends service. Stored water may bring leaves or settled material into the supply, so consider how the intake is kept clear without assuming filtration makes the water safe or removes dissolved substances. If you plan to inject fertilizer through irrigation, confirm that the filter, emitters, and other components are compatible and ask a qualified irrigation professional about suitable backflow protection. Do not add unfamiliar chemicals to a system. A dirty or unsuitable filter can also affect delivery, so follow the specified rating and service guidance.
Check operating pressure and flow
Emitter output depends on operating pressure, so check the product’s pressure range alongside its flow rating. Pressure measured with a valve closed is static; it can differ from pressure while a zone is running. Have the source tested under the conditions the system will actually use, and compare the result with the emitter, filter, regulator, and controller requirements. The zone must receive enough flow while staying within the operating range at its outlets. If you cannot measure this confidently, take the system plan and product specifications to an irrigation supplier rather than buying parts based on a faucet connection or a pump label alone.
Pressure can drop along long or narrow tubing and across fittings, and elevation changes may matter. A regulator controls pressure only when its inlet pressure and flow suit its specification; it cannot create pressure that is not available. If a distant outlet appears weak, possible causes include a clogged filter, a kink, a leak, too many outlets on one zone, or a line run beyond the manufacturer’s guidance. When laying out irrigation for a T-Model Greenhouse Orangery, record the full route from the source to the most distant outlet, including any detours around access areas. Use that route with system sizing charts or professional advice. If readings fall outside a specified range, address the source or layout before relying on the system; extending the timer will not correct a pressure problem.
Divide plants into practical watering zones
Use separate zones when groups of plants need meaningfully different watering or when the source cannot support all outlets together within their operating range. Pots on a bench, thirsty seedlings, and a bed of established plants may call for different control, but the crop labels alone do not decide it. Compare the growing medium, container size, plant stage, and emitter type. A small greenhouse may use one zone if its plants and hardware are compatible; a larger area does not automatically require a fixed number. The purpose of zoning is to let each group receive an appropriate pattern without weakening delivery across the whole system. Where the valve arrangement allows, keep a problem branch isolated without shutting down unrelated plants.
Plan valves and branches around the zones on your map. Each valve should be reachable, labeled by the plants it serves, and compatible with the chosen timer if you intend to automate it. For a model in the Pyramid-type greenhouse range, identify each branch by its location and plant group rather than a valve number alone. Labels such as “left bench—small pots” are easier to interpret when troubleshooting than an unexplained number. Keep a matching zone list with the controls, and update it when plants move. Check each proposed zone against the emitter flow and pressure specifications, including the controller’s ability to run zones separately if the supply cannot support them together.
Choose a controller after setting the zones
Decide between manual valves and a timer after the number of zones is clear. Manual operation keeps the arrangement simple but depends on someone opening the correct valve; a timer can repeat a schedule, yet it does not confirm that water reached the plants. Check the timer’s supported valve type, pressure and flow limits, power source, and location requirements before purchase. If controls need mains power or are installed near water, use equipment and installation methods approved for the setting and ask a qualified professional when needed. Do not assume a timer sold for a garden hose will operate every irrigation valve. For multi-zone controls, confirm that the unit supports the intended number and type of valves, not just the channel count shown in its description.
Set runtimes from observation and the emitter instructions, not from a universal greenhouse schedule. Growing media, plant size, temperature, ventilation, and season all affect how quickly containers and beds dry. Inspect soil moisture and plant response, then adjust the relevant zone while keeping a record of what changed. If you are considering the greenhouse range with built-in storage, plan the controller’s location separately from the storage arrangement: an enclosed space is not automatically suitable for irrigation controls. Follow the controller’s requirements for moisture exposure and access. A timer can maintain an established schedule, but recheck it after changing crops, moving pots, changing the source, or cleaning a filter. Make sure anyone tending the greenhouse can pause the schedule and identify the active zone.

Route lines for access and maintenance
Route mainline and laterals where they are easy to see and service, usually along a bench edge or another protected route rather than across a walking aisle. Keep doorways, vents, and access to beds clear, and avoid points where a line is pinched, rubbed, or regularly moved. Leave filters, valves, connectors, and flush ends reachable instead of hiding them behind fixed benches or crowded pots. Use tubing supports intended for the surface and avoid attaching irrigation parts to glazing or greenhouse framing unless the greenhouse maker allows it. A neat route matters because leaks and blocked outlets are easier to find when the system is visible.
Before finalizing tubing lengths, locate the water-entry point on the plan for your selected Prestige Greenhouse model. Consider how the line will reach the first branch without obstructing a door or passing beneath a movable bench. Keep tubing away from equipment that could damage it, and protect any unavoidable crossing so it does not create a trip hazard. Allow enough clearance around serviceable fittings to disconnect them without moving heavy containers. If routing requires drilling, cutting, or modifying the greenhouse, check the manufacturer’s instructions or ask the installer before altering the structure. Maintain separation from electrical equipment and use a qualified professional for any electrical work.
Test distribution before relying on the system
Commission each zone before relying on it. Follow the system maker’s instructions for flushing new lines and cleaning the filter, then run the zone under normal operating conditions. Check representative outlets near the supply and at the far end. Where outlets are accessible, collect their water in separate containers over the same measured interval. Compare outlets with the same rated flow, or compare each collected amount with its own specified output; different emitter ratings should not produce identical amounts. Check soil moisture too, since consistent outlet delivery does not prove that water is spreading through the root area. Correct leaks, kinks, clogged outlets, and poor placement before extending the same layout to more plants.
Make inspection part of normal greenhouse care, but use a service record to distinguish routine upkeep from recurring faults. Note when the filter was cleaned, which outlets needed attention, and whether delivery changed afterward. For a model in the large backyard greenhouse range, a zone-by-zone record can help you avoid overlooking a branch during inspection. Repeated trouble at the same outlet calls for checking its connection, line condition, and water supply rather than repeatedly increasing runtime. After moving crops or adding a bed, update the map and retest the affected zone. Follow the irrigation manufacturer’s instructions for seasonal shutdown and storage, particularly if components may be exposed to freezing conditions. Keep replacement-part details with the record so repairs use compatible fittings and emitters.
Frequently asked questions
How many emitters should each pot have?
There is no fixed number for every pot. Pot size, growing medium, plant size, emitter flow, and how water spreads all affect coverage. Test representative pots and inspect moisture through the root area before deciding whether to reposition an outlet or add one.
What filter rating does a greenhouse drip system need?
Use the filtration rating specified by the emitter manufacturer; there is no universal rating for every system. Account for the water source and its particles, and make sure the filter is accessible for cleaning. A basic inlet strainer may not provide enough filtration for small emitter passages.
Can pots and planted beds share one watering zone?
They can if their watering needs, emitters, and operating requirements are compatible. If containers and beds need different schedules or have different delivery patterns, separate zones make it easier to adjust one without compromising the other.
Will pressure-compensating emitters fix uneven watering?
They are designed to provide more consistent output within the manufacturer's stated pressure range. They do not clear blockages or correct inadequate supply, a damaged line, or a layout that exceeds product guidance. Check the whole system before replacing emitters.
How can I check delivery at the far end of a line?
Run the zone under normal operating conditions and check outlets near the supply and at the far end. Where possible, collect water from each outlet over the same measured interval. Compare emitters with the same rated flow, or check each against its own specification. Also inspect soil moisture to confirm that water reaches the root area.
The best system is the one that matches the plants and layout you actually have, not simply the greenhouse floor area or the number of outlets in a package. Choose compatible emitters, confirm filtration and operating requirements, and keep lines and controls accessible. A short commissioning test at the far ends of each zone can reveal problems while they are still easy to trace and correct.
