
Greenhouse Drainage: How to Prevent Puddles After Watering
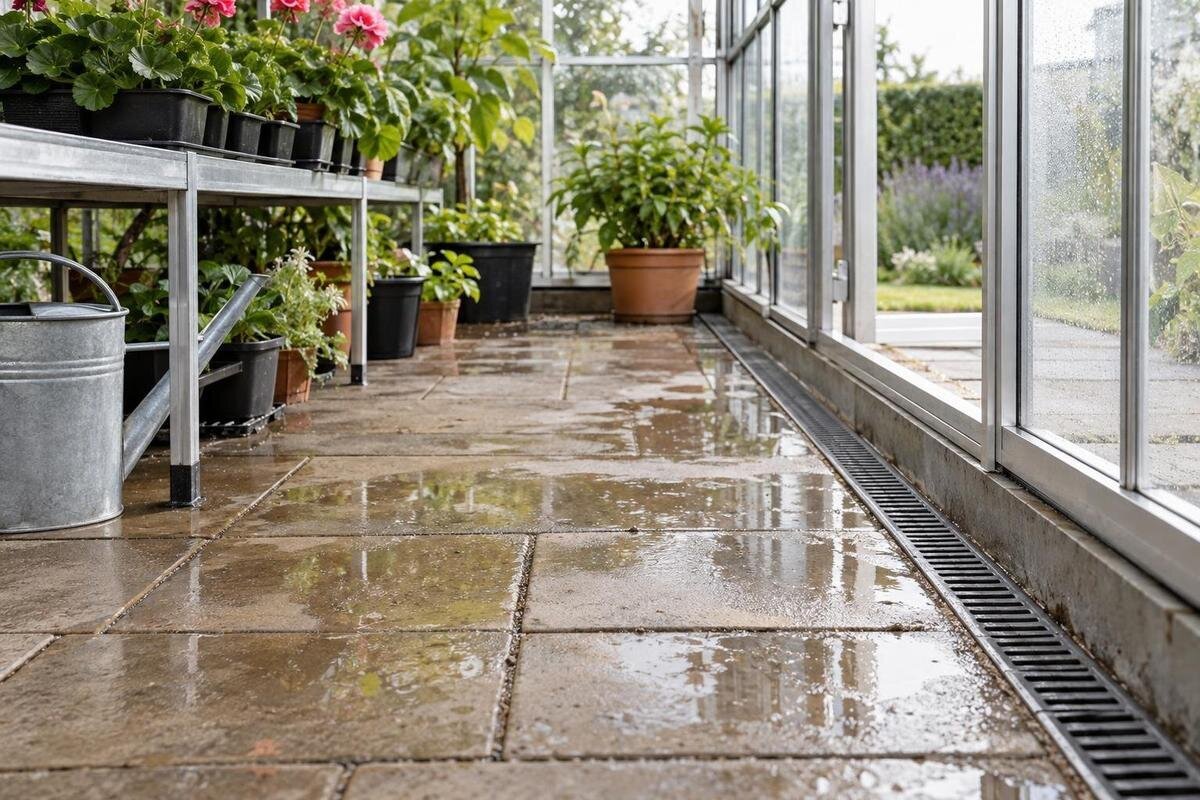
Greenhouse drainage
Water puddles after greenhouse watering can come from overspray, a leaking hose or irrigation line, a low area, an obstructed outlet, or water moving in from outside. The place where water collects is the end of a route, not necessarily its source. A labeled floor diagram and a repeatable test using your normal watering routine can reveal where water starts, how it travels, and where it stops. That evidence helps you distinguish a watering adjustment from a drainage issue that needs the floor, base, or surrounding grade reviewed.

What a puddle can reveal
A puddle after watering shows that water is accumulating faster than it is leaving that spot. It does not identify the cause on its own. Water may spill from a hose, run off pots or benches, escape an irrigation line, or travel over the floor from another point. A local low area or obstructed surface outlet can also collect water. The same puddle may have more than one contributor, so do not assume that every wet patch means a foundation problem or calls for an added drain. First ask whether water started inside, came from outside, or was present before watering began.
Timing narrows the possibilities. Note whether wetness appears before watering, during a particular bed or zone, as soon as watering stops, or only later. A puddle beneath one emitter points toward a different route than a wet line from the doorway, although water may travel before it becomes visible. Record the earliest visible wet spot and the final pooling area separately. Also note whether water spreads, stays in place, or disappears into a joint or soil. Water disappearing from view does not establish where it went, so keep that observation distinct from a confirmed drainage route.
Draw the greenhouse floor and its water routes
Make a simple top-down sketch of the greenhouse rather than an assumed slope diagram. Mark the actual perimeter, door openings, beds, benches, taps or hoses, irrigation zones, and any drain, channel, or outlet you can see. Use the manufacturer base drawing for the exact model and compare it with the installed site; a catalog image is not a reliable scale reference. If a lean-to greenhouse is on your shortlist, record that exact product name and request the matching drawing before plotting its outline. The sketch is a record for tracing water, not a substitute for a construction plan.
Include a narrow strip outside the greenhouse so the map can show the threshold, nearby paving or soil, beds, and roof-water outlets if present. Use arrows only for flow you have observed; mark suspected routes differently so a guess is not mistaken for a fact. Label visible sources and collection points, such as an emitter, floor joint, or open drain. Add notes about where any visible outlet leads, if you can confirm it. Keeping known details separate from assumptions makes the map more useful when you repeat the test or ask a professional to review the site.
Run a repeatable watering test
Set up the test to mirror ordinary use, rather than pouring extra water onto the floor. Begin from a similar starting condition each time; if a section is already damp, mark it on the diagram. Choose one bed or irrigation zone at a time, and keep the hose nozzle, sprinkler setting, watering route, or timer duration consistent. Record how much water you use if you can measure it easily, or note the run time and setting. If you are planning a limited-edition aluminum greenhouse, identify the proposed watering zones on your layout now. Once installed, test those zones separately rather than wetting the entire floor at once.
Water one zone using its normal routine, then stop and observe before moving to the next. Note the first place that becomes wet, the direction of any visible trail, and where water gathers. Choose consistent check times for each run rather than treating one wait time as a universal pass-or-fail standard. Repeat the same sequence after the floor has returned to a comparable starting condition. If you change the watering amount, position, or setting, change just one factor at a time so you can tell which adjustment altered the result.
Record where water appears and how it changes
Use a fixed reference on the diagram, such as a doorway, floor seam, or frame post, to describe each wet area. Record when it first appears, its approximate outline, whether it grows after watering stops, and any visible movement away from it. Distinguish a trail leading to an outlet from water simply disappearing into the surface. Note nearby hoses, emitters, pots, benches, and floor joints. These details can distinguish a spill at the watering point from water that has traveled across the greenhouse before collecting. A short description such as “starts beside the second bed, then reaches the door” is more useful than recording only that the floor was wet.
Take photos from the same position after each run and add the date and watering setup to the image notes. If several puddles appear, mark them separately rather than drawing one large wet area; they may have different sources. Compare the first appearance and direction of travel across repeated tests, not just the final puddle size. If the wet area shifts when you change one watering zone, that is a clue, not proof, about the source. Keep the sketch and photos together so someone reviewing the site can follow the sequence without having to reconstruct it from memory.

Distinguish watering runoff from incoming rainwater
Whenever practical, run the test during dry weather and note any recent rain. Check the floor before switching on irrigation or picking up a hose. If water appears while the watering system is off, investigate that separately rather than assigning it to the last watering session. Rain can bring roof discharge or exterior runoff across a threshold; condensation or washdown should also be recorded as a different event. When planning a T-model greenhouse, include nearby runoff sources on the site sketch as well as the proposed indoor watering areas. That gives you a baseline for distinguishing incoming water from water used inside after installation.
Extend the sketch beyond the greenhouse far enough to show where water might approach the edge: adjacent ground, paving, beds, and any visible roof-water outlet or downspout. Note whether those areas are already wet before the inside test. If puddles occur only after rain, document the route and timing separately from the repeatable watering trial. Do not redirect exterior water or alter nearby grade just to make the greenhouse floor appear dry; first establish where it is coming from and where a proposed outlet would carry it.
Interpret puddles in light of the floor surface
The same amount of water can look different on soil, gravel, paving, or a solid floor. On a more absorbent surface, water may disappear from view without following a visible channel. Joints or gaps can also take water below the surface, which does not confirm that it has been carried away from the base. A less absorbent surface may make a trail easier to see, but it can also leave a larger visible puddle. Record the actual floor material and condition so comparisons are made like for like.
If you are choosing a Pyramid-type greenhouse, treat the floor surface as a separate planning question rather than inferring it from a product photo. For an existing greenhouse, note loose areas, joints, and transitions between materials. A puddle that ends exactly at a surface transition deserves its own mark on the map: the water may be entering a gap rather than reaching an outlet. Avoid using one drying time as a universal standard, since starting wetness, water quantity, airflow, and sunlight affect the result. Compare runs on the same surface under similar conditions, and record where water disappears without labeling an unseen route as confirmed drainage.
Inspect visible outlets, edges, and thresholds
Look for an outlet, channel, or grate only if one is actually present. Check whether its visible opening is covered by leaves, soil, or other loose debris, and follow its ordinary maintenance guidance if it is safe and accessible to do so. Do not push tools into a hidden route or add more water to test an outlet whose destination is unknown. If you are considering a greenhouse with built-in storage, include the planned storage area in the access review. Confirm that the eventual layout will allow you to inspect and maintain any existing outlet; the product name alone does not establish that drainage is provided.
Pay attention to the doorway and perimeter. Water that crosses a threshold from outside has a different route from water that forms around an indoor watering point; a wet line along the edge may need to be traced both ways. Mark where water touches the base, where it passes under or around an edge, and where it finally collects, without lifting or dismantling parts. If the outlet is blocked, inaccessible, or appears to discharge close to the greenhouse, note that condition and seek a site review before changing the base or surrounding ground.
Use the model drawing when reviewing the base
Once the likely route is marked, compare it with the manufacturer's base drawing for the exact greenhouse model. Check that the drawing matches the product being considered or installed, then line up its perimeter and door position with your site sketch. This helps you describe whether pooling occurs inside the footprint, at an edge, or beyond it without guessing at dimensions or drainage details. If a Prestige greenhouse is the selected model, request its matching drawing rather than using an illustration or a generic greenhouse outline.
A qualified site or drainage professional should review recurring water along the perimeter, water that appears to pass beneath the base, or an outlet whose destination cannot be confirmed. Provide the drawing, annotated map, photos, and test notes. Ask the reviewer to identify how the floor, base, surrounding grade, and final discharge point work together. The review should distinguish the greenhouse's required support arrangement from any proposed floor drainage details; do not assume that changing one can leave the other unaffected. Any proposal should explain where the water will go and how the result will be checked, rather than relying on a universal foundation dimension or slope.
Match the correction to the confirmed source
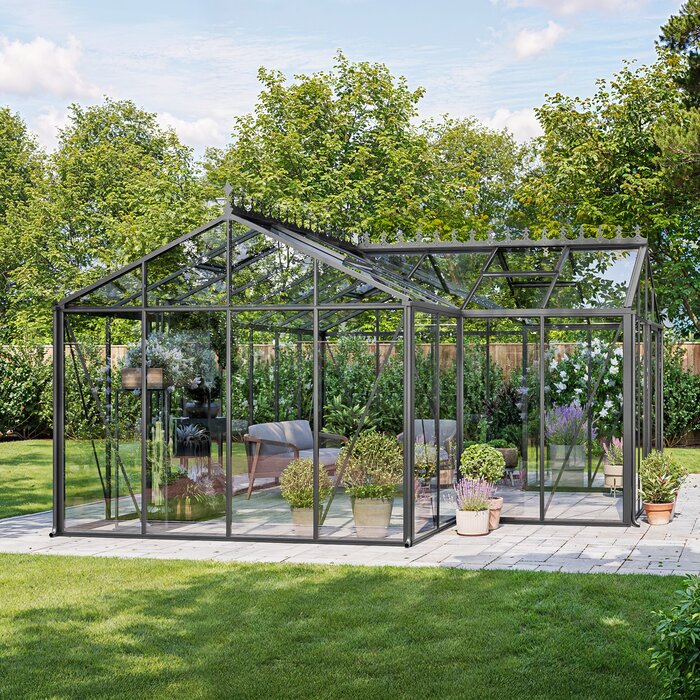
If the test points to overspray or a hose leak, adjust the watering route or address the faulty component using its instructions or qualified service. If water runs off a pot or bench, consider whether the watering method or placement can be changed without sending runoff toward the perimeter. If a visible outlet is obstructed, follow its normal maintenance guidance. When planning a large backyard greenhouse, divide the proposed watering layout into identifiable zones. This lets you trace runoff to a particular activity instead of assuming that every puddle across the footprint needs the same correction.
For a correction involving floor levels, the base, an outlet, or exterior grade, use a site-specific proposal from a qualified professional. Drilled holes, improvised pipes, or material dumped into a depression can hide a puddle while moving water somewhere less visible. After a correction, repeat the original normal-use test without simultaneously changing the watering amount or layout. Compare both the original collection point and the surrounding area: a dry patch alone does not demonstrate success if a new puddle appears nearby. If rainfall was also involved, assess that separately when comparable weather occurs rather than declaring the entire drainage problem solved by one indoor test.
Keep a drainage record as conditions change
Keep the floor diagram, watering settings, weather notes, and photos in one project file. Add the date and any change to hose position, irrigation zone, floor surface, bed layout, or visible outlet. If you choose a Classic aluminum greenhouse, identify that model on the file and keep the original installation layout as a baseline. Save later versions of the diagram instead of overwriting it, so you can see whether a recurring wet area coincides with a moved bench or changed watering zone. Label uncertain routes as unconfirmed and update them only when you have observed or professionally verified the flow.
Repeat the test after changes that could alter the route, such as moving beds, changing irrigation, or modifying the nearby surface. Record rainfall separately from watering so the two sources remain distinguishable. Include a brief maintenance history for visible outlets: when debris was removed, what was found, and whether the next ordinary watering produced a different result. Seasonal changes in sunlight and airflow can affect how long wetness remains visible, so compare the location and movement of water as well as drying time. The record is most useful when it preserves these differences instead of reducing every observation to “wet” or “dry.”
Frequently asked questions
Why does water pool on a greenhouse floor after watering?
Common causes include overspray, a hose or irrigation leak, water running off pots or benches, a low spot, or an obstructed surface outlet. Water can also arrive from outside. Mark where it first appears and repeat your normal watering routine by zone to distinguish the source from the place where it collects.
How can I test greenhouse drainage without flooding the floor?
Use your usual watering pattern and amount, starting from a similar floor condition each time. Test one zone at a time, keep the hose setting or irrigation duration consistent, and record where water appears. The aim is to observe normal use, not to add extra water or force water toward an outlet.
Should a greenhouse floor slope toward a drain?
There is no universal slope or outlet direction that fits every floor, base, and site. Use the manufacturer drawing for the exact greenhouse and have a qualified site or drainage professional review the actual floor and discharge route before changing levels or adding an outlet.
Can I drill holes or add gravel to stop greenhouse puddles?
Do not treat either as a default fix. Holes or added material can change where water goes and may affect the floor or base. First identify the source and route; if the puddle is persistent or near the perimeter, ask a qualified professional to review the drawing and site conditions.
How long should a puddle take to disappear?
There is no single useful time limit. Floor material, the amount of water, airflow, and sunlight all affect how quickly a wet area changes. Compare the same watering test under similar conditions, and note recurring standing water or water that appears near the base for a qualified review.
Preventing recurring puddles begins with identifying the route rather than guessing at a fix. A labeled floor plan, a consistent normal-use watering test, and separate notes for rain and site runoff can show whether the source is a watering habit, a visible obstruction, or a condition around the base. Make simple watering adjustments when the test confirms them. For persistent or unexplained water, share the observations and exact manufacturer drawing with a qualified site professional before changing the floor or grade.
