
Can Greenhouse Drip Irrigation Run from a Rain Barrel?
Greenhouse watering
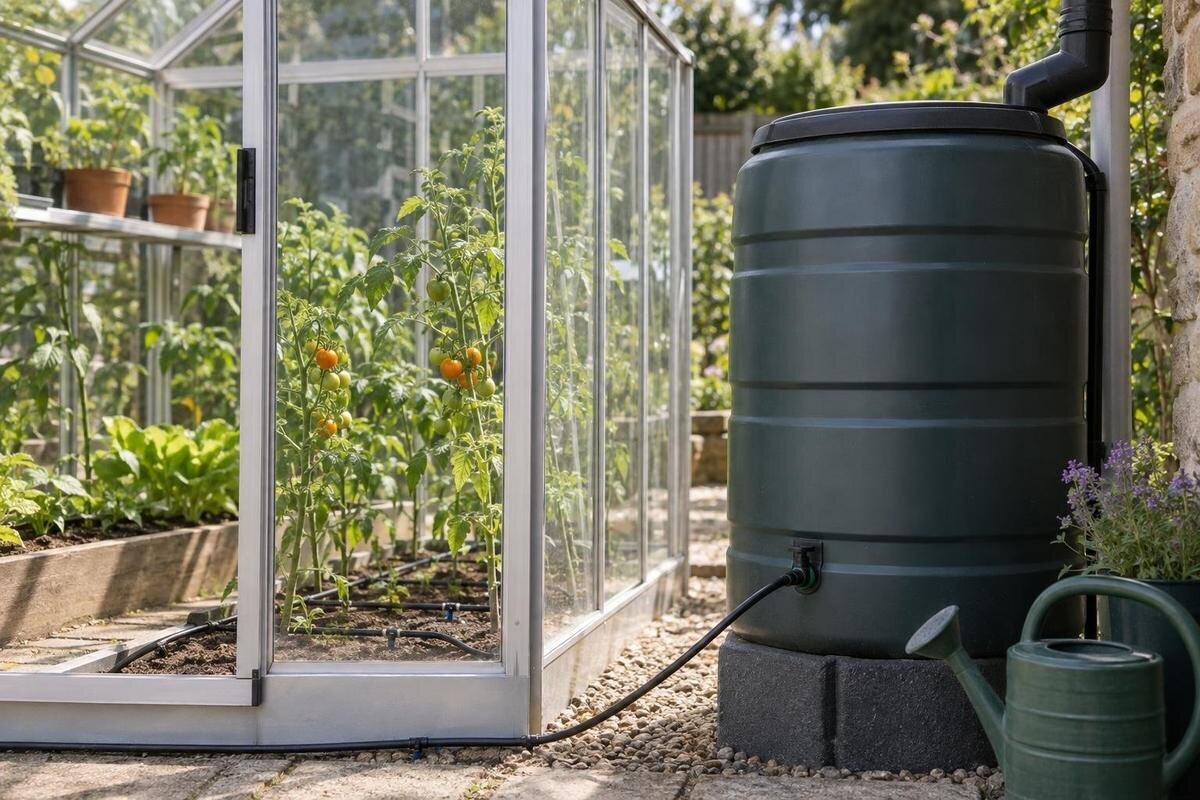
A rain barrel can run greenhouse drip irrigation by gravity, but a full barrel does not guarantee enough pressure at the emitters. The outcome depends on the height of the water surface above the drip line, the low-pressure limits of every component and the flow measured at the far end. These checks help you decide whether your layout can operate passively, needs simpler zones or calls for a pump.

When gravity can run greenhouse drip irrigation
Yes—a rain barrel can run greenhouse drip irrigation without a pump, but only if the available gravity head meets the hardware’s requirements. In an open barrel, pressure comes from the vertical distance between the water surface and the emitter outlet. As a practical conversion, each foot of water column provides about 0.43 psi, so roughly 2.3 feet provides 1 psi of static pressure. This is an estimate for still water, not the pressure delivered while drippers are flowing. A small height difference may be far below the operating range of a standard drip kit.
Separate water volume from pressure. A barrel with more gallons can run longer, but capacity alone does not make water push harder; the water surface’s elevation creates head. Filters, valves, fittings and tubing reduce usable pressure as water moves, and the head falls as the barrel empties. A line that seems to work after rain may deliver less later. A visible drip is not enough evidence: every branch and emitter needs usable flow at the lowest planned water level. Gravity works only when the source height, component ratings and measured delivery line up.
Measure head from the water surface
Measure vertically from the water’s free surface to the emitter outlet—not from the barrel bottom or spigot. If the surface is three feet above an emitter, the ideal static pressure there is about 1.3 psi; pressure while water is moving will be lower because the line has resistance. If an emitter sits above the water surface, an ordinary open gravity layout has no positive head at that point, so do not assume water will be pushed uphill. Hose length and barrel height are not substitutes for this vertical measurement.
Record the waterline when the barrel is full and at the lowest level you plan to use, then note the elevations of the highest and lowest emitters. The smallest water-surface-to-emitter gap gives the least static head, although a distant outlet may receive less pressure once friction losses are included. When comparing Lean-To Greenhouse options, sketch the barrel location alongside the proposed beds and benches. A wall-side route may be convenient, but a shelf above the barrel’s low waterline cannot be treated like a bed at ground level. Include enough room to inspect the outlet and remove the barrel lid. If extra elevation requires a raised stand, have its suitability for the filled barrel assessed rather than improvising a support or attaching the barrel to the greenhouse.
Check the emitter’s minimum operating pressure
Read the irrigation manufacturer’s minimum operating pressure, recommended range and flow rating for each emitter. A kit described as drip irrigation may be designed for a pressurized faucet rather than a rain barrel. Pressure-compensating emitters maintain a more consistent output only within their specified range, and their minimum pressure may exceed the head available from a barrel. Non-compensating emitters can change their output as pressure changes. Drip tape, porous tubing, button drippers and inline emitter tubing also have different specifications; no type is automatically suitable for gravity.
Check which pressure is attached to any published gallons-per-hour rating. An emitter rated at a particular pressure is not guaranteed to deliver that flow at a lower one. Check valves, timers and other inline parts individually, too: a component can be the limiting point even if the emitter itself is suitable. A low-pressure label does not necessarily mean the product works at zero pressure. If the manufacturer does not state a minimum operating pressure or flow at low pressure, treat performance as unverified rather than guessing from the product name.
Calculate the flow your layout needs
Add the rated flow of the emitters that will run at the same time. For example, twelve emitters rated at 0.5 gallons per hour each would call for a nominal 6 GPH at their specified pressure. If the barrel supplies less pressure, the actual total may differ. Calculate each active zone separately if you plan to open one group at a time; adding every emitter in the greenhouse can overstate demand for a zoned system, while counting only one emitter can understate it. Keep a simple record of the emitter count, rated flow and intended watering duration for each zone. This separates two questions: whether the system can supply the instantaneous flow, and whether the barrel contains enough water to finish the planned watering.
Plant count and layout matter more than floor area alone. Pots, beds and crops may need different numbers or positions of outlets, and a longer route can add resistance. The Limited Edition aluminum greenhouse range is listed from 40.6 to 302 sq. ft.; use the selected footprint to draw the growing areas rather than assigning an irrigation demand to the entire model range. Count additional outlets for containers that need more than one watering point, and leave room in the plan for seasonal changes in pot numbers. Keep groups with different watering needs separate where practical, since extending the runtime for thirsty containers also waters everything else on that zone. Use published emitter rates at the pressure you can supply, then compare the planned demand with measured delivery.

Account for pressure loss through fittings and valves
Available pressure is not the same as pressure at the far end of a working line. Water loses pressure as it passes through tubing and components, with long or narrow runs, bends, branches, filters and restrictive connectors all affecting delivery. A pressure reading taken before water starts flowing can therefore look more encouraging than a reading under irrigation. The more complex the route, the more important it is to test the complete setup rather than a short piece of tubing by itself.
Keep the route as simple as the manufacturer’s layout allows, and use compatible tubing and fittings rather than adding unnecessary inline parts. A pressure regulator reduces pressure; it does not create more head, and an unsuitable regulator can leave a gravity system with too little pressure. Do not remove a required filter just to increase flow. When planning irrigation around a T-Model Greenhouse Orangery, mark the main supply route and each branch on the chosen floor plan. Include the hose between the barrel and the greenhouse, not just the tubing inside. That outside connection may contain the narrowest fitting or an overlooked valve. Check components by their actual passage size and operating specifications, not simply by whether their threaded connections fit. A mechanically compatible connection is not proof of adequate flow.
Use simple lines and manageable irrigation zones
Running fewer outlets at once can help keep a gravity-fed layout within its available flow. Dividing beds or container groups into zones reduces simultaneous demand and may reduce friction losses, but it does not increase the static pressure created by the water height. Any valve or manifold used to switch zones also needs to work at the available pressure. Zoning can help a compatible system deliver more reliably; it cannot make an emitter operate below its stated minimum pressure.
Keep branches short where possible, and group emitters with similar elevations so one group is not trying to serve both low beds and high shelves under very different conditions. While browsing Pyramid-type greenhouse options, mark the intended growing areas before deciding how many branches to run. Give each zone an identifiable shutoff and record which outlets it supplies, using valves documented for the available pressure. If zones are operated manually, test the actual switching routine: accidentally leaving two groups open changes demand and may reduce delivery to both. Avoid grouping plants solely by how close their pots are to one another when their watering needs differ substantially. Follow the tubing maker’s guidance on line length and branch arrangement, and leave access to branch ends for the recommended flushing procedure.
Test the farthest emitters under realistic conditions
Test the complete system with the barrel at a representative water level and with the filter, timer, valves and intended tubing installed. Open the zone as you would during normal watering. If you use a pressure gauge, choose one with a scale suited to low readings, and take readings while water is flowing; a no-flow reading shows static pressure, not the pressure available at the emitters. A temporary test point near the beginning and end of a line can help show where pressure is being lost. Confirm that the gauge and test fittings are suitable for the system, and record where each reading was taken. A gauge at the barrel outlet does not establish the pressure at a higher bench or at the end of a long branch.
Collect water from near and far emitters for the same measured interval, and record each volume. Include the highest outlet as well as the most distant one; they may be different test locations. Compare the results with the manufacturer’s flow rating at the pressure you measured. Repeat at the lowest planned barrel level with every intended outlet in that zone open. For a layout planned around the aluminum greenhouse with built-in storage, test the actual watering route rather than assuming a trial beside the barrel represents the finished installation. Note how long outlets take to start flowing after the valve opens, especially if lines drain between runs. Finally, check moisture in the pots or beds after watering. Meeting an emitter rating confirms delivery, but does not by itself establish that the selected watering duration suits the plants.
Filter rainwater for the smallest openings
Rainwater can carry leaves, grit, insects and particles from the collection surface. A coarse screen at the barrel inlet can catch larger debris, but it may not meet the filtration requirement for small emitter openings. Use the mesh or screen size specified by the emitter manufacturer, and check that the filter is suitable for the flow the active zone needs. A filter that catches debris but restricts too much flow can be a particular problem when gravity provides only a small amount of pressure.
Inspect the filter and emitters regularly, especially after rain has washed debris into the collection system. Clogged screens and passages can make output uneven or reduce flow at the far end; cleaning the filter does not remove debris already lodged in an emitter. A covered, screened barrel can limit new debris entering the stored water, but it still needs inspection and cleaning. When planning a Prestige Greenhouse layout, reserve an accessible place for the filter rather than hiding it behind a bed or beneath crowded benches. Leave enough clearance to remove its screen or housing as directed by its manufacturer. Establish a clean-filter flow record during the initial test so later reductions are easier to spot. Use the irrigation manufacturer’s cleaning and flushing instructions, and retest delivery after servicing a clogged system.
Place the barrel and rain collection safely
Put the barrel on a stable support appropriate for its full filled weight, close enough to reach for filling, inspection and cleaning without blocking the main path. If the water surface needs to be higher than the emitters, plan that elevation without treating the greenhouse structure as a stand. Keep the barrel independently supported and off the roof, glazing and frame. Have a qualified professional assess any proposed elevated support where its capacity or stability is uncertain. Plan where overflow will go so it does not create a nuisance on a walkway or around the greenhouse base.
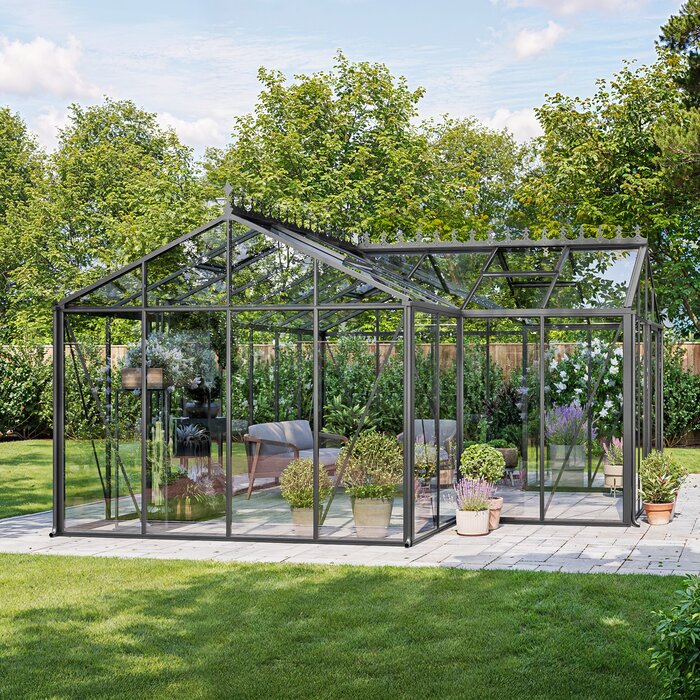
Do not assume a greenhouse includes compatible gutters or that collection hardware can be attached wherever convenient. Check the documentation for the exact model and any collection equipment. If you are comparing large backyard greenhouse options, locate the proposed collection point, barrel inlet and overflow route on the site plan before buying irrigation parts. Keep access to doors and maintenance areas clear, and protect the supply hose from routine foot traffic without creating a trip hazard. Ask the greenhouse supplier about approved gutter connections and mounting arrangements rather than adapting the frame without guidance. If the barrel is farther away to accommodate a suitable collection route, include that extra hose length in the irrigation test. Collection convenience and useful pressure at the emitters need to be evaluated together.
Know when a pump is the better fit
If the farthest emitters fall below their required pressure or flow at the lowest planned water level, revise the system before relying on it. Options include choosing emitters and other components explicitly rated for gravity or low-pressure use, shortening or simplifying the runs, or operating fewer compatible outlets at once. Raising the barrel can add head only if its support is appropriate for the full filled weight. If those changes do not meet the specifications, a pump rated for the required pressure and flow may be a better fit.
For a pump, check its delivered flow at the pressure the irrigation system needs; a maximum-head figure on its own does not show how much water it will supply at that pressure. Confirm that the selected pump and controls are suitable for the intended intermittent irrigation use, including what happens when the barrel runs low. Have any electrical installation in a damp greenhouse handled by a qualified professional. A pump also cannot solve an empty barrel, so consider how rain-dependent supply matches your watering needs. When comparing Classic aluminum greenhouse models, include future growing areas in the watering plan without assuming every area must run simultaneously. Keep a record of the tested zone configurations so changes in emitter count, tubing route or bench height prompt a new test rather than unnoticed overload of the original setup.
Frequently asked questions
Can I use a standard drip-irrigation kit with a rain barrel?
Only if the complete kit is documented to work at the pressure your barrel can provide. Many kits are designed for pressurized water, and their emitters, valves or timers may require more pressure than a gravity supply delivers. Look for minimum operating pressures and flow ratings at those pressures. If low-pressure suitability is not documented, ask the manufacturer or choose a system explicitly rated for gravity use; a brief flow test alone does not establish compatibility.
How high does a rain barrel need to sit?
There is no universal height. Each foot between the water surface and an emitter provides about 0.43 psi of static pressure, before losses through the system. Compare the available head at the barrel’s lowest planned water level with the minimum pressure required by the emitters and other components, then confirm delivery with a flow test.
Will an automatic timer work with gravity-fed irrigation?
Only if the particular timer is designed to operate at the pressure and flow your barrel can provide. Some timers or their internal valves need a minimum pressure, even when the connected tubing and emitters can run at low pressure. Check the timer’s specifications as well as those of the drip system.
How can I tell whether the last emitter gets enough water?
Run the complete system with its filter and other components installed. Collect water from near and far emitters for the same measured interval, with the barrel at a representative low level. Compare the results with the emitter’s stated flow at the pressure you measured; also check that every intended outlet flows when the whole zone is open.
Can I connect a rain barrel to a greenhouse gutter?
Check the documentation for the exact greenhouse and any collection equipment; do not assume a gutter is included or that the frame can support a filled barrel. Keep the barrel on a separate, stable support suitable for its full weight, and verify that the intended collection route is compatible with the greenhouse.
Judge a rain-barrel system by measured delivery at the most demanding point, with the barrel near its lowest planned level and the full intended zone open. If the emitters meet their specifications, keep the layout simple and inspect it as debris or water levels change. If they do not, revise the layout or use equipment with verified pressure and flow requirements. A successful setup depends on the whole system, not on the barrel alone.
