
Designing a Greenhouse for Garden Workshops and Demonstrations
Garden workshop planning
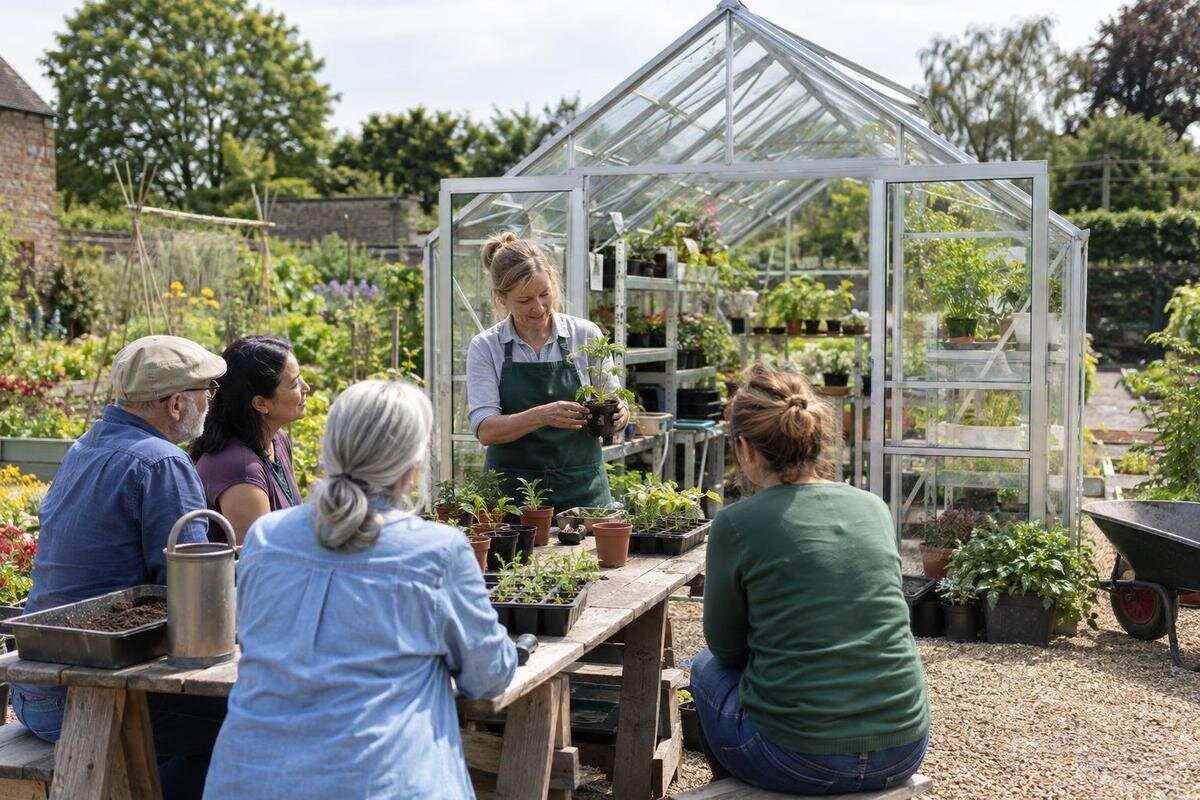
The right greenhouse for garden workshops is designed around a teaching sequence: what the group needs to see, where each person will work, and how participants can move between the demonstration and supplies. Planning those details before choosing a footprint helps distinguish a workable teaching space from a greenhouse that simply looks spacious in a product photo.

01
Define the workshop before sizing the greenhouse
Begin with the teaching task, not a target number of square feet. A seed-starting lesson, a pruning demonstration, and a workshop in which everyone repots a plant use the room differently. Note what the instructor must show, which steps participants will perform, and whether people attend mainly to watch or rotate among stations. A short explanation followed by hands-on practice needs a different arrangement from a demonstration the group watches throughout. Turn the idea into a brief listing the activity, materials, number of people present at once, and how long the greenhouse must function as a classroom. Include whether the class is a one-time event or a recurring program, since that affects setup and storage needs.
Separate typical attendance from peak attendance. Count the instructor, assistants, learners, seated observers, and anyone who needs to move between the entrance and a work surface; don’t count only registered participants. List bulky supplies such as trays, pots, soil, hand tools, labels, sample plants, or demonstration equipment. Decide whether teaching happens alongside regular growing or whether benches can be cleared for class. This inventory helps define work surfaces, storage, and unobstructed floor area before a catalog footprint is treated as usable teaching space. It also reveals where a helper needs to stand while handing out materials or assisting participants.
Plan sightlines around the demonstration
Choose a demonstration focal point that everyone can see without standing in a working aisle. Check it from likely positions: seated, standing, close to a table, and near the back. Consider whether shoulders, tall sample plants, hanging baskets, door frames, or the instructor’s own body could hide the key hand movements. If a lesson has several stages, decide whether one central surface can show each step or a second is needed for finished samples, diagrams, or reference materials. For fine details, plan a closer view or a repeat rather than letting the group crowd the work surface. The presenter should also be able to face the group without blocking the task.
Test sightlines with a full-size floor sketch before committing to furniture. Mark the demonstration table and likely participant positions with tape, then ask someone to mimic the task while another person checks from the back and sides. Include the actual objects used in the lesson: a tray of seedlings may be visible even when the seed placement itself is not. Arrange small samples so they can be passed around after the explanation, or repeat a close-up task for smaller groups. Keep any camera or display out of the instructor’s working space. The catalog lists Pyramid / Oasis greenhouse options from 60 to 203 sq ft, but an area range cannot show where openings, benches, or viewing positions will fall in a particular configuration. Request the plan for the exact size you are considering, then check the demonstration view against that drawing.
02
Separate demonstration, practice, and display surfaces
Give the instructor’s demonstration, participant practice, and plants or finished examples distinct places where possible. That separation keeps specimens from taking over the worktop and lets learners follow one task at a time. Map each surface to its activity: potting needs room for containers and growing media, while seed labeling calls for a dry spot and a clear view of labels. These are planning needs, not assumed greenhouse fittings. If a work surface must serve more than one purpose, decide what can move and where it goes before class. Mark the facilitator’s supplies separately from participant materials to avoid repeated crossings. Test a complete station with the pots, trays, and tools the lesson will use, rather than sizing it around an empty tabletop. Check whether participants can set down a finished piece while starting the next step. For shared stations, identify which materials each person needs individually and which can stay in the center without forcing someone to reach across another person’s work.
A small supply point beside a station can reduce interruptions, but avoid placing pots, soil, or tools where they take over the instructor’s working area. The catalog identifies a Limited Edition greenhouse with built-in storage and lists areas from 59.4 to 302 sq ft. Treat the feature and area as prompts for questions: ask what storage is included in the chosen configuration, where it opens, and how its position fits your plan. The listing does not establish storage capacity or prove that particular tools will fit. Check that people collecting supplies will not interrupt the demonstration or block a route.
Keep circulation clear during hands-on activities
Draw the route from the entrance to the demonstration, then from the demonstration to each practice station and any planned water point. Participants carrying pots, trays, or tools should not have to cross the active demonstration or another group’s work area. Give each station a clear approach and identify where people may pause, set down materials, or wait for instructions. Include staff carrying supplies and participants who may step out and return. A layout can have enough floor area on paper yet feel cramped if routes overlap, so review movement as well as furniture.
Include door operation, the space taken by open doors, and the places where a person might briefly stop to collect materials. Plan for visitors with different mobility needs, but don’t guess at required clearances; confirm the relevant dimensions for your project with qualified professionals or local authorities. The Prestige greenhouse size options are listed from 40.6 to 302 sq ft. That range does not establish the clear route in any particular layout, so check the exact configuration and its openings before placing stations or furniture.

03
Choose a realistic participant count
A greenhouse’s listed area is not the same as its usable teaching area. Growing benches, demonstration surfaces, stored supplies, equipment, and the routes between them all occupy space. Separate people who are actively working from those watching or waiting for a turn, and decide whether everyone must fit inside at the same time. A seated talk followed by small-group practice may need different arrangements for each part. If the room cannot support both comfortably, consider changing the format or using a separate waiting or teaching area rather than squeezing in another station.
The Large orangery size range is listed from 506 to 753 sq ft, which can help frame an early footprint comparison, not a promised number of seats. Furniture, cultivation benches, entrances, and service zones reduce the flexible area, while some activities need more room to work than a talk does. Ask for usable dimensions of the exact configuration and draw the planned stations and routes before deciding attendance. Don’t estimate a safe or comfortable group limit from square footage alone. Shared equipment can also limit a class before floor space does. If everyone needs the same water point or tool during one step, test how that part of the lesson will run. Separate a workable teaching group size from any occupancy limit established for the project: being allowed to accommodate a group does not mean every participant can see, practice, and receive help effectively.
Account for light, ventilation, and seasonal comfort
Conditions in a greenhouse change with sunlight, season, openings, and the number of people inside. Bright light may create glare on a demonstration surface or make printed instructions hard to read; direct sun can also change how comfortable the room feels. Observe the proposed site at likely class times and note nearby shade, the path of sunlight, and reflected light. Consider plant needs and participant comfort as related but separate goals: an arrangement that works for growing does not automatically make a good place for a group to learn. Check whether participants would need to look toward bright glazing to follow the instructor, and try another table orientation if necessary. Include the sound of any planned ventilation equipment in the teaching test. Establish who will monitor conditions during a session and when a lesson would move elsewhere or be rescheduled, rather than relying on the calendar alone.
Ask which opening, ventilation, and shade options are available for the exact configuration rather than assuming they come with a particular model. The Classic greenhouse options list areas from 40.6 to 302.3 sq ft; the range does not establish ventilation or classroom comfort. Match the selected plan to the times and seasons when classes will run. If powered equipment, fans, or task lighting are part of the plan, show their intended locations and have a qualified professional assess the electrical requirements.
04
Plan water, power, drainage, and cleanup
List electrical needs by task: teaching lights, audio or display equipment, device charging, or powered tools used in a demonstration. Decide where instructors and participants would connect or operate equipment, and whether cords could cross a route or work surface. If the design needs outlets, lighting, or equipment circuits, have a qualified electrician assess the proposed locations and requirements. A greenhouse’s footprint does not establish which services are available or how they should be installed, so include the electrical discussion early in project planning.
Separate water for growing from water needed for a lesson and for cleanup. Note whether a class needs water for potting, a nearby hand-washing point, or only fillable containers, and decide how spills and used water will be handled. Follow a practice session through cleanup: where will damp tools go, how will loose growing media be collected, and who will empty containers? Keep the cleanup area from becoming a second supply station that participants must cross during the lesson. Include cleaning materials and waste containers in the layout rather than leaving them to occupy spare floor space. The catalog lists Lean-To greenhouse options from 40 to 154 sq ft; use those figures for footprint comparisons, and request service details separately. If connections are needed, ask a qualified plumbing or drainage professional about water supply, drainage, and the handling of used water before fixing the layout.
Include storage and a reset area
Give supplies and personal items a home without turning every ledge into a catchall. Keep materials for the next lesson together, separate clean demonstration items from used tools, and decide where bags, coats, spare pots, and waste will go. A designated holding place helps keep supplies off the demonstration surface and routes clear between sessions. If equipment must remain in the growing area, include it in the floor plan; otherwise, identify a reset point outside the main teaching route. Don’t assume that a greenhouse provides protected storage for items left there.
Plan for the time between sessions as well as the class itself: someone may need to put tools away, restock materials, and return growing surfaces to their normal arrangement. Prepare a labeled kit for each recurring lesson so missing items are noticed before participants arrive. If furniture will move between growing and teaching layouts, identify its storage position and test the changeover with the people responsible for it. Count that preparation time when scheduling back-to-back classes. The Classic Accoya / Limited Edition greenhouse listing gives areas from 40.6 to 302 sq ft. Compare those footprints using a plan that includes your proposed storage furniture; the supplied listing does not establish built-in storage for this model. Record which supplies can remain in the greenhouse and which need a separate location. For items that require particular handling, follow their labels and storage instructions.

05
Plan for communication, arrivals, and weather changes
Teaching is easier when participants can hear the explanation and see any visual aid from their assigned positions. Test instructions from the back and from each work area; if background sounds, equipment, or distance make it difficult to follow a normal speaking voice, consider a smaller group, repeated demonstrations, or suitable audio equipment. Put handouts and samples where people can reach them without forming a queue across an active station. If a screen or camera will be used, mark its position and power needs in advance, then check sightlines and glare.
Decide where check-in, coats, bags, late arrivals, and people waiting for the next session will go. Keeping those activities separate from the main teaching area can prevent the entrance from becoming a waiting space during a class. Give late arrivals a clear place to pause until the instructor or assistant can direct them to a station without interrupting a demonstration. Also consider what happens if outdoor overflow is unusable because of weather. Any backup arrangement should account for both the people and the activity: a place to wait may not have the work surfaces or utilities needed to continue a potting lesson. The T-Model greenhouse size options are listed from 178 to 323 sq ft. When comparing an exact configuration, locate its entrance on your plan and trace the arrival route to the teaching area, including where a helper could greet visitors without obstructing access.
Check the layout and operating requirements before ordering
Turn the plan into a drawing for the exact size and configuration you are considering. Mark tables, chairs, growing benches, demonstration equipment, doors, routes, and any planned services. Check what remains clear when the group is present, not just when the room is empty. If possible, mark the layout on the site or test it at full scale with movable furniture. This can reveal blocked views, overlapping routes, and stations that are hard to reach before fixed services or construction details are decided.
Document how often the greenhouse will host classes, the maximum expected attendance, setup and cleanup tasks, and who will oversee sessions. If workshops are open to the public or run by an organization, don’t assume that a greenhouse intended for garden use is approved for public teaching. Ask relevant local authorities and qualified professionals which building, fire, accessibility, egress, and occupancy requirements apply to your site and use. Confirm the structure, services, and access plan against those requirements before purchase.
Frequently asked questions
How many people can a greenhouse workshop accommodate?
There is no dependable attendee count from square footage alone. Work out how many people need to watch, work at stations, or wait their turn, then include furniture, growing benches, equipment, and movement routes in the layout. Test the busiest planned session and verify any applicable occupancy requirements with local professionals.
What makes a demonstration easy to see?
Place the demonstration surface where participants can see the instructor’s hands from their intended positions, not just from the doorway. Check both seated and standing views, and account for tall plants, furniture, and people moving through the room.
Can growing benches stay in place during workshops?
They can if the class layout still leaves clear work surfaces and routes. Decide which benches remain in use, what can move before class, and where growing supplies go. Test both the normal growing arrangement and the workshop setup on the plan.
Which utilities should a teaching greenhouse have?
Choose utilities based on the actual lessons. A class might need water for potting, power for teaching equipment, both, or neither. Plan locations and connections with qualified professionals, and include cleanup and drainage needs in the discussion.
Can any garden greenhouse be used for public classes?
Do not assume that a greenhouse intended for garden use is suitable for public teaching. Ask the relevant local authorities and qualified professionals which requirements apply to your site, structure, services, and planned use before committing to a design.
A useful workshop greenhouse is more than a growing space with extra chairs. It is a teaching layout where participants can follow a demonstration, try the task without blocking one another, and reach the materials and utilities the session needs. Decide what happens during a typical class and the busiest one, draw it at scale, and use that plan to compare footprints and verify details that require professional review.
